
Removing the 8x2.5-inch drive backplane with controller expander

Use this information to remove the 8x2.5-inch drive backplane with controller expander.

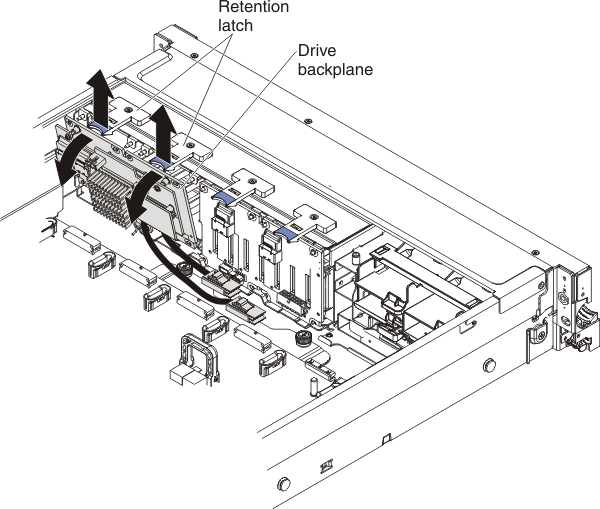
To remove 8x2.5-inch drive backplane with controller expander, complete the following steps:

  1. Read the safety information and installation guidelines, see Safety and Installation guidelines.
  2. Turn off the server (see Turning off the server) and all attached peripheral devices. Disconnect all power cords; then, disconnect all external cables as necessary to replace the device.
  3. Slide the server out of the rack.
  4. Remove the top cover (see Removing the server top cover).
  5. Pull the drives and filler panels out of the server slightly to disengage them from the drive backplane.
  6. Remove the fan cage assembly (see Removing the fan cage assembly).
  7. Disconnect the combination power/configuration cable from the backplane. If a SAS signal cable is attached to the drive backplane, disconnect it.
    Note
    You can also choose to disconnect the cables after removing the backplane, if that is easier for you.
  8. Disconnect the long SAS signal cables from the backplane.
  9. Disconnect the short interposer cables from the backplane (which attaches this backplane to the other backplane in this configuration).
  10. Lift the retention latch or latches on top of the backplane cage; then, rotate the backplane down and pull it out of the retention latch and remove it from the server.

    remove 8x2.5 in drive backplane

  11. Remove the two screws from the card with the short interposer cables attached to it from the old backplane and attached them to the new backplane using the two screws.
  12. If you are instructed to return the drive backplane, follow all packaging instructions, and use any packaging materials for shipping that are supplied to you.