
Replacing the 8x2.5-inch drive backplane with controller expander

Use this information to replace the 8x2.5-inch drive backplane with controller expander.

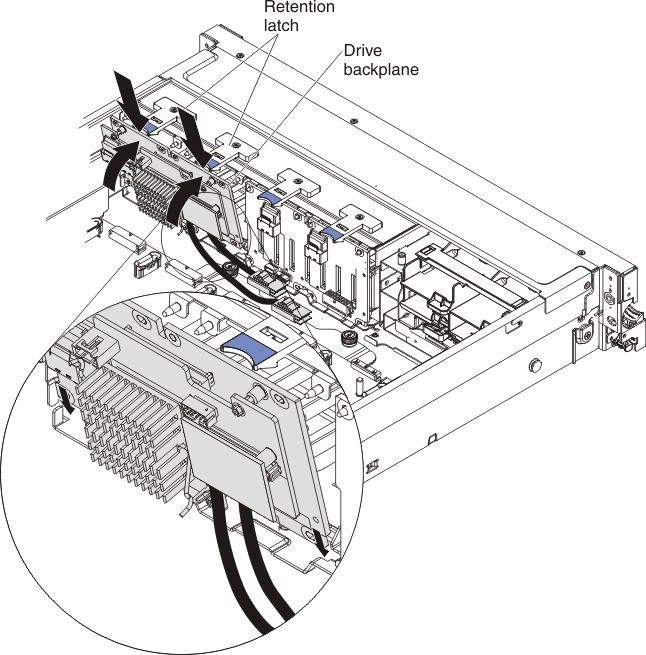
To install the 8x2.5-inch drive backplane with controller expander, complete the following steps:

  1. Read the safety information and installation guidelines, see Safety and Installation guidelines.
  2. Touch the static-protective package that contains the drive backplane to any unpainted surface on the outside of the server; then, grasp the backplane and remove it from the package.
  3. Make sure that you have attached the card with the short interposer cables from the old backplane to this replacement backplane.
  4. Align the tabs on the bottom of the drive backplane with the slots on the bottom of the backplane cage.
  5. Insert the drive backplane tabs into slots on the bottom of the backplane cage and push the drive backplane forward into the retention latch (on top of the backplane cage) until the backplane is locked in place.
    Note
    You can reconnect the cables to the drive backplane before installing the backplane onto the cage or you can connect the cables after you install the backplane, if that is easier for you.

    retention latch and drive backplane

  6. Reconnect the interposer cables to the other backplane.
  7. Reconnect the long SAS signal cables to the backplane and the system board that you disconnected them from earlier.
  8. Reinstall the fan cage assembly (see Replacing the fan cage assembly).
  9. Reinstall the drives and filler panels.
  10. Install the cover (see Replacing the server top cover).
  11. Slide the server in the rack.
  12. Reconnect the power cord and any cables that you removed.
  13. Turn on the peripheral devices and the server.