Attaching the cable chains
The final step in installing a drive drawer is attaching the left and right cable chains to the drive shelf. When attaching a cable chain, reverse the order you used when disconnecting the cable chain. You must insert the chain's horizontal connector into the horizontal bracket in the enclosure before inserting the chain's vertical connector into the vertical bracket in the enclosure.
Before you begin
- You have replaced the drive drawer and all of the drives.
- You have two replacement cable chains, marked as LEFT and RIGHT (on the horizontal connector next to the drive drawer).
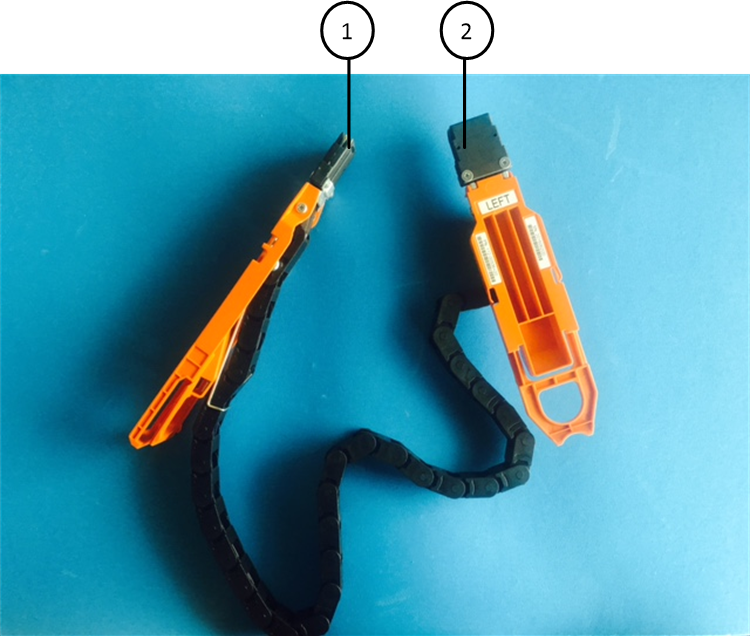
| Callout | Cable chain | Connector | Connects to |
|---|---|---|---|
| 1 | Left | Vertical | Midplane |
| 2 | Horizontal | Drive drawer |
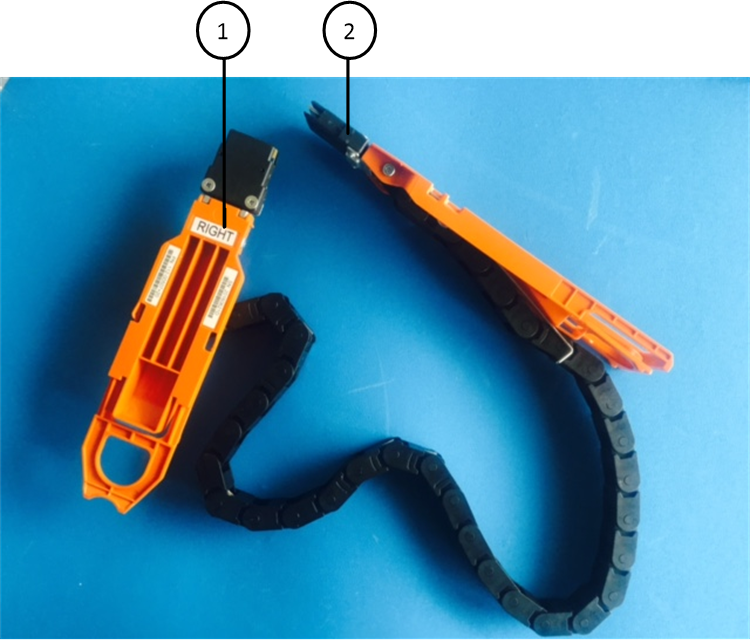
| Callout | Cable chain | Connector | Connects to |
|---|---|---|---|
| 1 | Right | Horizontal | Drive drawer |
| 2 | Vertical | Midplane |
- Follow these steps to attach the left cable chain:
- Slide the cable chain's horizontal connector under the guide rail on the horizontal bracket, and push it in as far as it can go.The figure shows the guide rail on the left side for the second drive drawer in the enclosure.
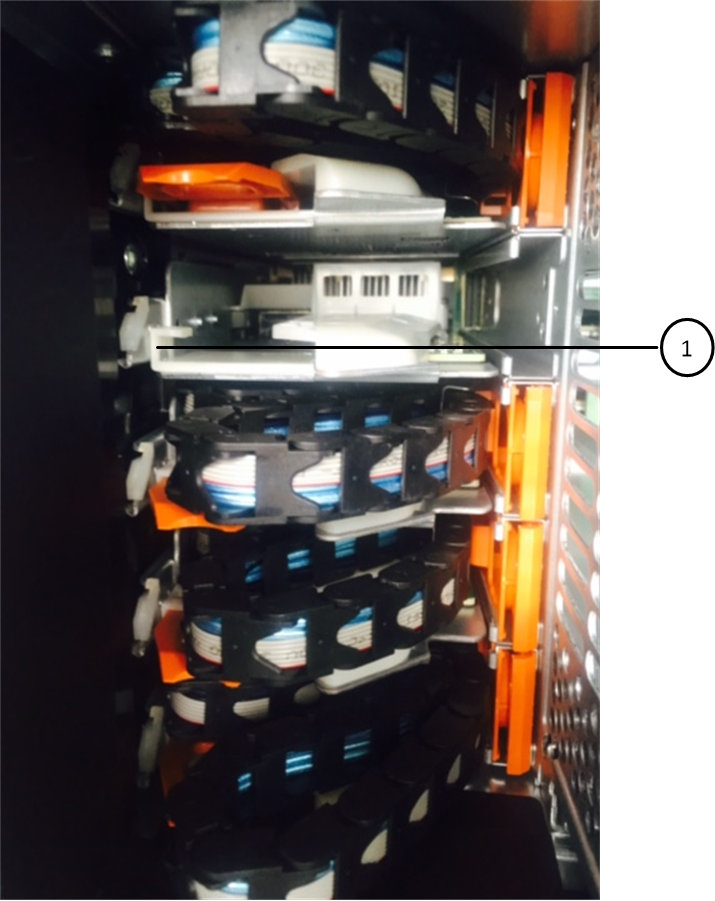
1 Guide rail CAUTIONRisk of equipment malfunction — Make sure to slide the connector underneath the guide rail on the bracket. If the connector rests on the top of the guide rail, problems might occur when the system runs.
- Slide the cable chain's horizontal connector under the guide rail on the horizontal bracket, and push it in as far as it can go.
- Reinstall the left fan module.
- Follow these steps to reattach the right cable chain:
- Reinstall the right fan module.
- Reapply power:
- Turn on both power switches on the drive shelf.
- Confirm that both fans come on and that the amber LED on the back of the fans is off.
Give documentation feedback