
Replacing the front LED card

Use these instructions to install the front LED card in the Flex System Enterprise Chassis.

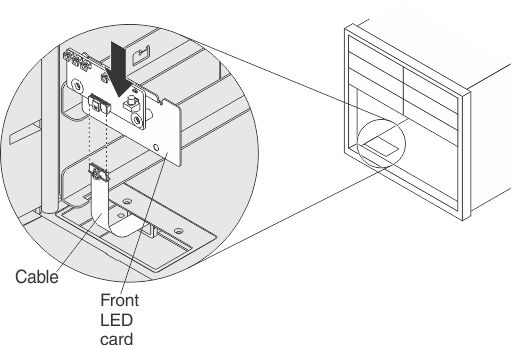
To install the front LED card, complete the following steps:

  1. Connect the cable to the front LED card.

    Illustration shows connecting the cable and installing the front LED card in the chassis
  2. Align the front LED card with the connector on the chassis and push it into the connector until it is firmly seated.
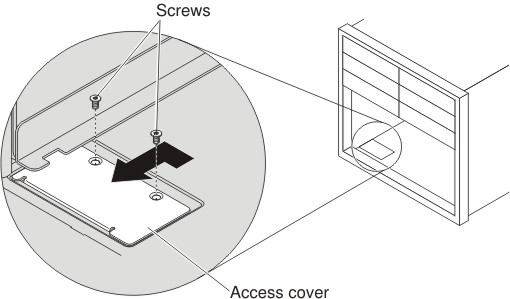
  3. Slide the access cover to the left and then forward to close it.

    Illustration shows closing the front LED card access cover and installing the Torx screws.
  4. Reinstall the two T-8 Torx screws that you removed earlier.
  5. Reinstall the chassis shelves (see Replacing a chassis shelf).
  6. Reinstall the compute nodes (see Replacing a 1-bay compute node or Replacing a 2-bay compute node).
    Attention
    Be sure to install any compute nodes that you removed in the same bays from which they were removed. Reinstalling a compute node into a different bay from the one from which it was removed can have unintended consequences.
  7. Reinstall the management node, if you removed one from node bays 1 through 8 (see Replacing a Flex System Manager management node for instructions).
After you install the front LED card, complete the following steps:
  1. Reconnect power to the chassis.
  2. Restart the compute nodes and the operating systems. See the documentation that comes with your compute nodes for detail instructions.
  3. Restart the management node, if one is installed. See the Flex System Manager Installation and Service Guide for instructions.