Remove the server from the rack
Follow instructions in this section to remove the server from the rack.
 |  |
| 18 - 32 kg (39 - 70 lb) | 32 - 55 kg (70 - 121 lb) |
Potential stability hazards exist. The rack might tip over and cause serious personal injury.
Before extending the rack to the installation position, read the Installation Guidelines. Do not put any load on the slide-rail mounted equipment in the installation position. Do not leave the slide-rail mounted equipment in the installation position.
About this task
Read Installation Guidelines and Safety inspection checklist to ensure that you work safely.
Power off the server and peripheral devices and disconnect the power cords and all external cables. See Power off the server.
Prevent exposure to static electricity, which might lead to system halt and loss of data, by keeping static-sensitive components in their static-protective packages until installation, and handling these devices with an electrostatic-discharge wrist strap or other grounding systems.
Procedure
- If the server comes with two shipping brackets on both rear ends of the chassis, remove them first.Figure 1. Removing the shipping bracket
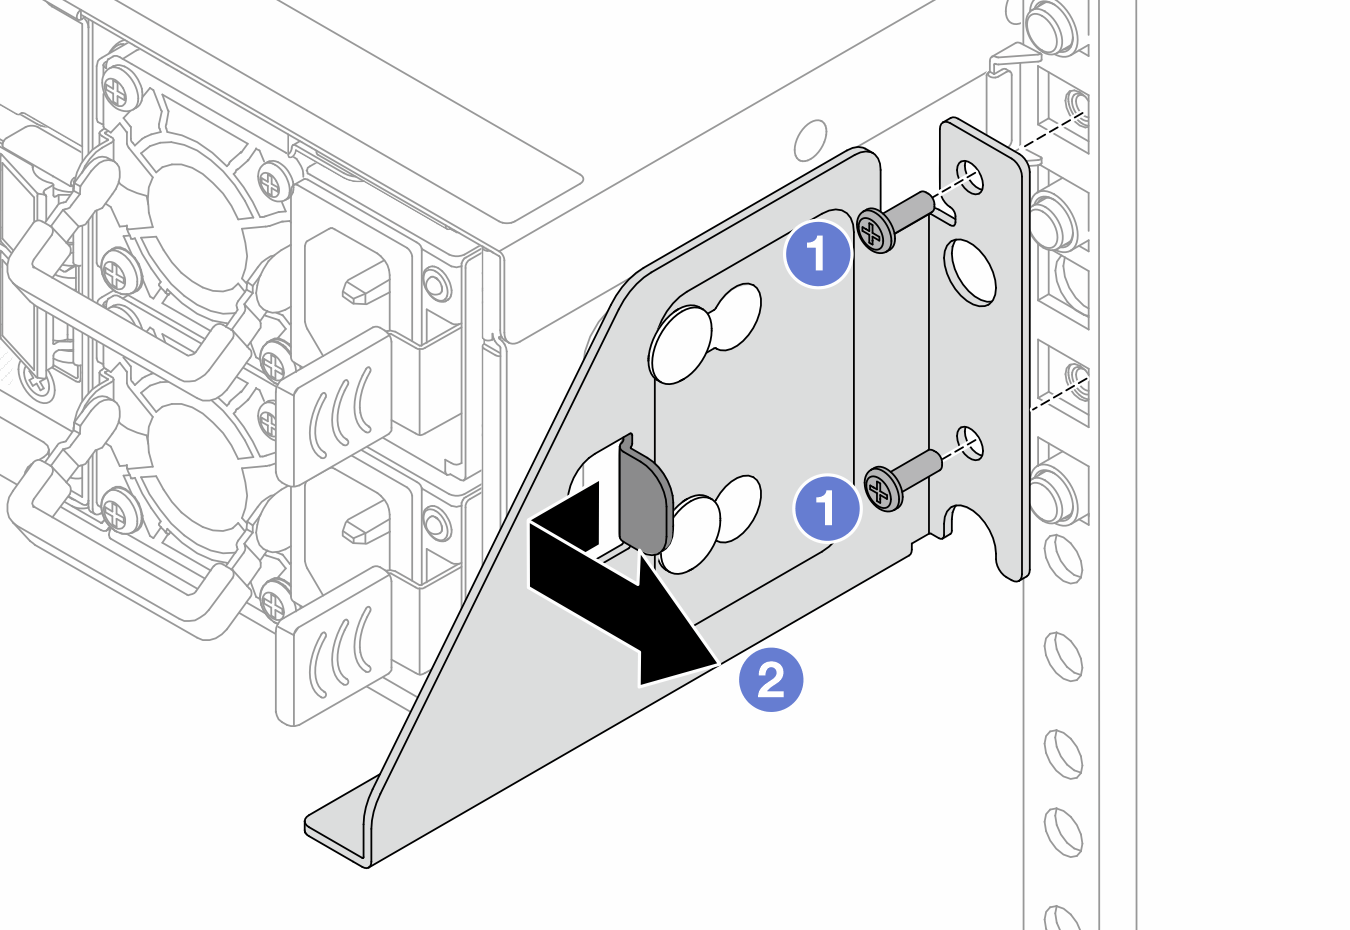
 Loosen the two screws on the shipping bracket.
 Pull the bracket backwards to latch the standoff screws on the right holes, and pull the bracket to the right to disengage it from the chassis.
- Use a screwdriver to loosen the captive screws and disengage the server from the rack.Figure 2. Disengaging the server from the rack

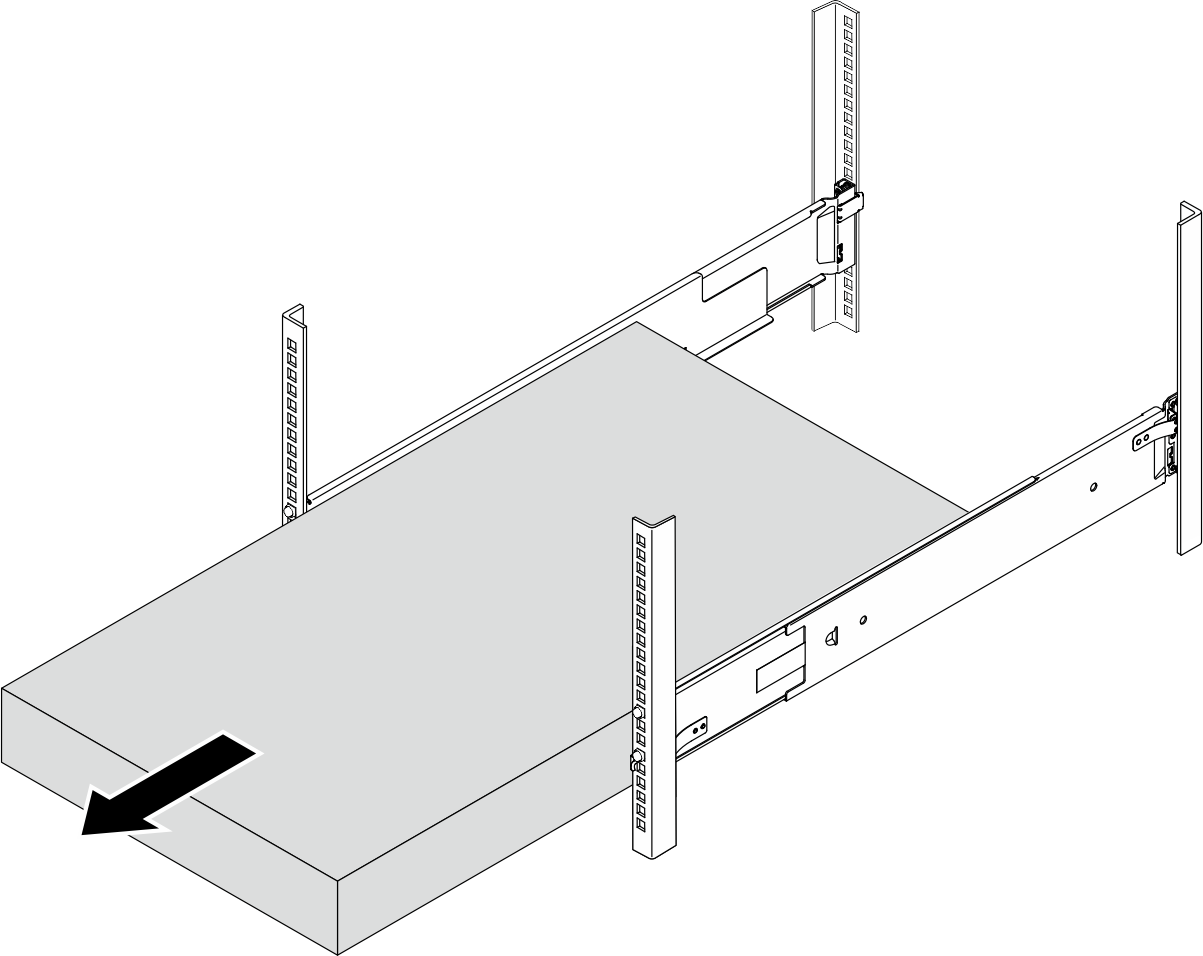
- Slide the server out along the rails.Figure 3. Pulling out the server
- Remove the rails from the rack.
- Press and hold the blue button on the front end of the rail to release the front latch gripping the rack flange; then, slightly push the rail towards the rear until the pins disengage from the holes in the EIA flange.Figure 4. Releasing the front latch

- Hold the rail with one hand and pull the rear latch with your other hand to release the rail from the rear mounting flange; then, remove the rail from the rack.Figure 5. Releasing the rear latch
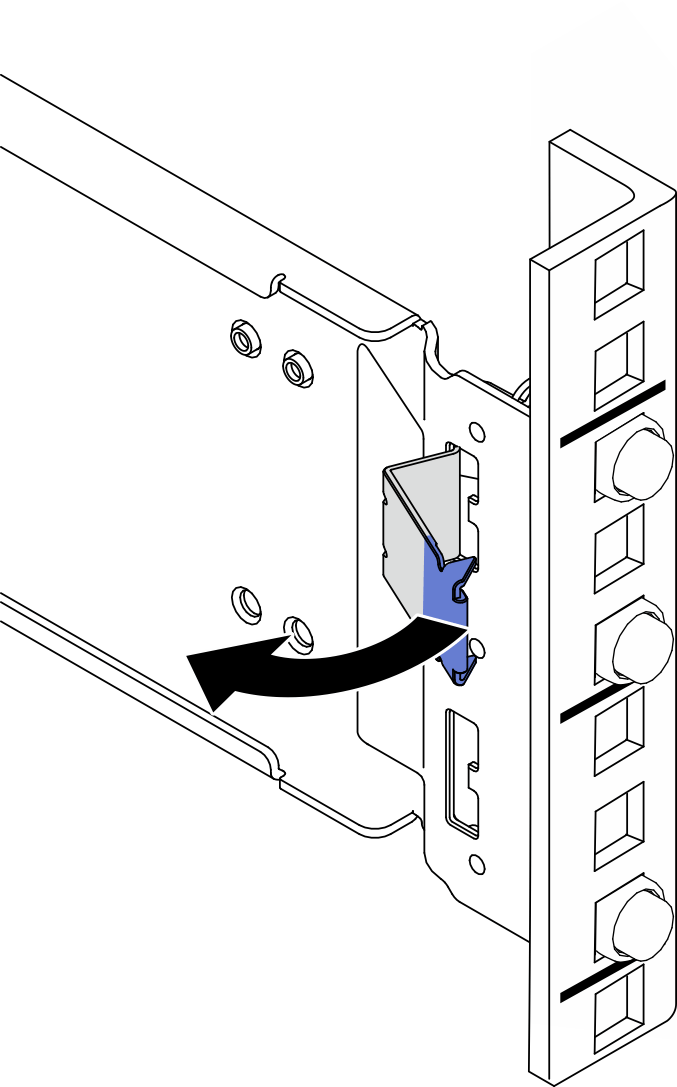
- Press and hold the blue button on the front end of the rail to release the front latch gripping the rack flange; then, slightly push the rail towards the rear until the pins disengage from the holes in the EIA flange.
Carefully lay the server on a flat, static-protective surface.