The UpdateXpress application can update a remote machine with UXSPs or individual updates acquired from the website.
Prerequisite:The UpdateXpress application is running on a machine installed with a supported operating system. For details of supported operating systems, see Supported operating systems.
To update a remote machine from the website, do the following:
- Launch the UpdateXpress application. See Launching the UpdateXpress application.
- In the Welcome window, click Next.
- In the Target Server window, select Manage the remote server, input the following information, and click Next.
IP address or Host name: BMC IP address or host name of the target system.
User Name: BMC user name of the target system.
Password: BMC password of the target system.
Port: BMC CIM or RSET port number. If users do not input, the default port is used.
If not checking the BMC server certificate, select Accept BMC server's certificate by default, and click Next.
- In the Task window, select Perform updating on target server and click Next.
- In the Update Setting window, select one or more of the options. If Use a separate remote server instead of the BMC one is selected, input the following information:
(SFTP/HTTP/HTTPS/FTP Setting) IP address or Host name: IP address or host name of the server.
(SFTP/HTTP/HTTPS/FTP Setting) User Name: User name of the server.
(SFTP/HTTP/HTTPS/FTP Setting) Password: Password of the server.
(SFTP/HTTP/HTTPS/FTP Setting) Port: Port number of the server. If users do not input, the default port is used.
(SFTP/HTTP/HTTPS/FTP Setting)
Directory: The location on the server where update packages are copied to.
Input a full path on the SFTP/HTTP/HTTPS/FTP server. The FTP server is only used for the ThinkServer marked with superscript 2 (Note 2) in
Supported server models.
- To configure the SFTP server key fingerprint, do one of the following:
To check the SFTP server key fingerprint, click Yes.
Not to check the SFTP/HTTPS server key fingerprint, select Skip check SFTP server's key fingerprint, and click Next.
- Do one or more of the following:
To downgrade the firmware, select Enable updating to a back-level firmware, and click Next.
To upgrade the backup system firmware, select Only update the backup image of the BMC (and UEFI where applicable), and click Next.
- In the Updates Location window, select Check the Lenovo Support website, and click Next.
- In the Target Directory window, specify the location for the updates to be downloaded or accept the default location, and click Next.
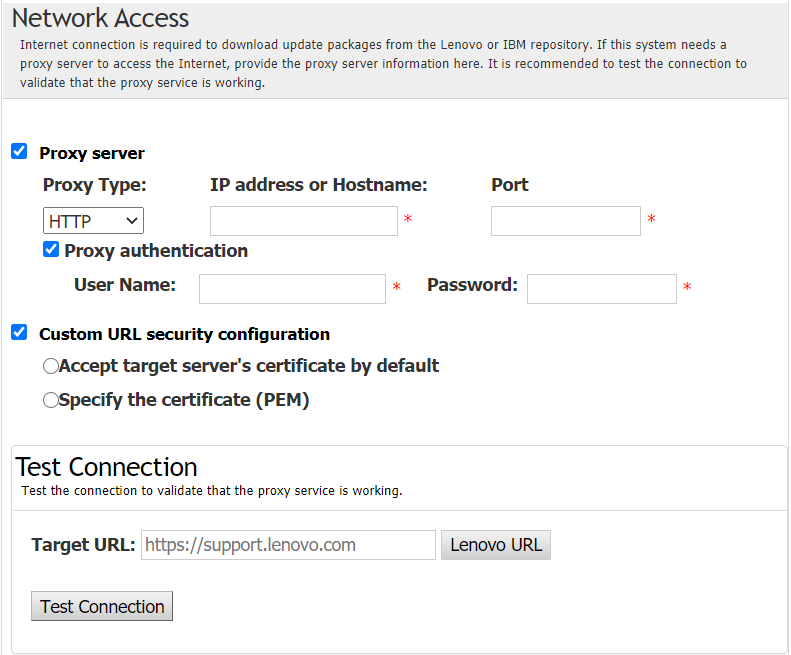
- On the Internet Access page, if users have no special requirement for security access, click Test Connection to check the network connection of the Target URL, and click Next. If users have more security concerns, before clicking Test Connection, configure Proxy server and/or Custom URL security configuration depending on the security requirements as follows:
- In the Update Type window, select the target update type, and click Next.
- In the Update Recommendation window, do one or more of the following:
To display all update packages, select Show updates of undetected devices.
To update the component, select the target component, and click Next.
- In the Acquire Updates window, the acquisition table displays the acquiring progress of the packages. When the progress is completed, click Next.
- In the Update Execution window, click Begin Update and confirm to continue on the pop window. The execution table displays the upgrade progress of the packages. When the upgrade progress is completed, click Next.
- In the Finish window, click the log to check the updates, and click Close to exit.