Running diagnostics
To view health status of server components, check active events, run memory test, disk drive test, and collect RAID logs, perform the Run Diagnostics
function.
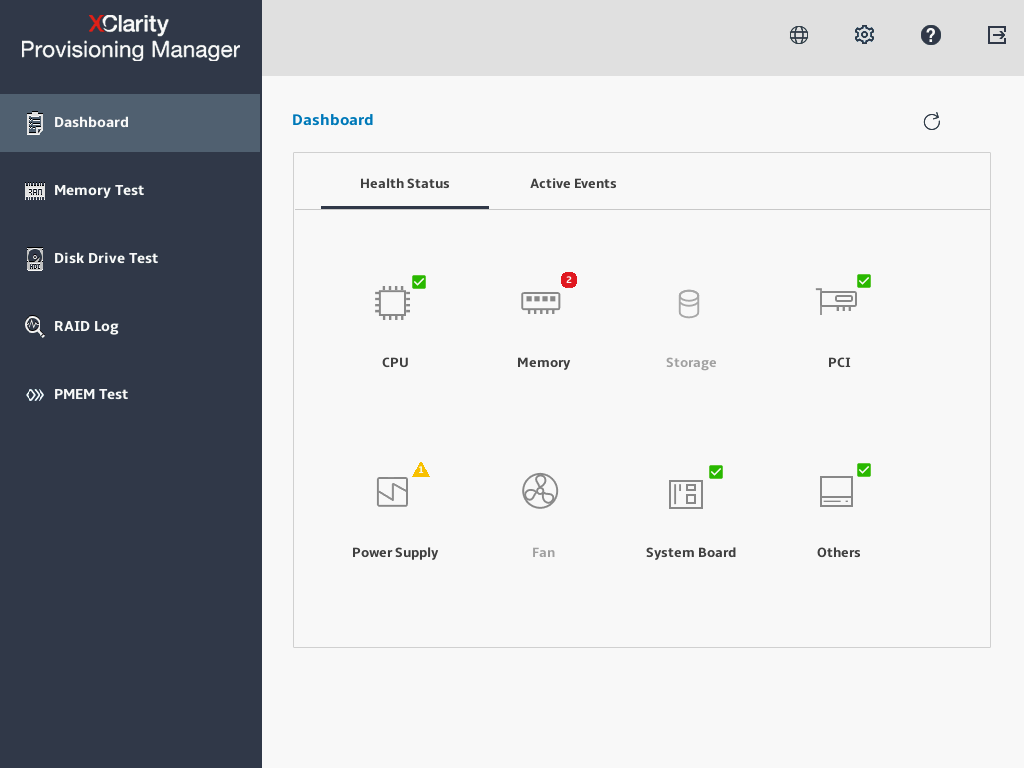
Dashboard: View the health status of each server component and check the active events if any one of the components has a problem.
Memory Test: Run the memory test.
Disk Drvie Test: Run the disk drive test.
RAID Log: Collect the logs for the selected RAID adapters.
PMEM Test: Run Intel® OptaneTMPersistent memory test.
NoteThis item is for servers with Intel processors only.
To exit this interface and return to the Diagnostics interface, click ![]() , and then click OK in the Exit window.
, and then click OK in the Exit window.
Running memory test
If you want to save the test result, attach a USB storage drive to the server or connect your server to a shared network. For instructions on how to connect to a shared network, refer to Configuring network settings.
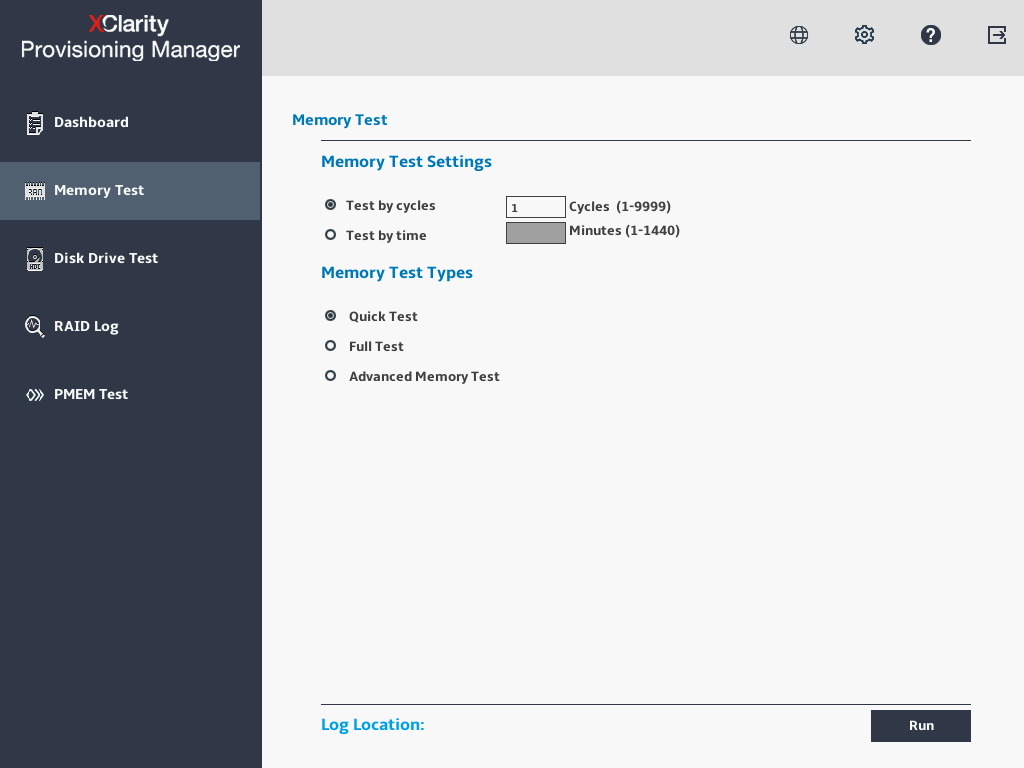
Click the Memory Test tab.
- Select the test options based on your need, and click Run to start testing.
Memory Test Types Function Memory Test Settings Log format Log save location Quick Test Default test type. Select this option to run the WriteRead test pattern only. Support test_mem_%date%.txt USB flash drive or website Full Test Select this option to runs all test patterns, which takes a long time to finish. Support Advanced Memory Test This option supports the in-depth memory test in all Dual In-line Memory Modules (DIMMs) installed in the Lenovo ThinkSystem server. It also permanently repairs the marginal DIMMs with hard Post Package Repair (PPR) feature during the test, which will reduce memory errors and increase the reliability of the servers. Not Support test_adv_mem_%date%.txt USB flash drive NoteFor Quick Test or Full Test:
The mouse pointer is not active during the test process.
After the testing process is completed, the test result will be displayed to show you if the test is passed or failed.
You can press Esc to stop the test.
For Advanced Memory Test:
The test time depends on the DIMM configuration.
The system will be restarted when running the test, and a dialog will be displayed on the Memory Test page after the test. You can save the logs.
- Click Save after the testing process is completed if you want to save the test result.NoteThe test result will be saved in a test_mem_%date%.txt file in the USB storage drive or the shared network folder. The file includes more details than the test result displayed on the interface.
Running disk drive test
If you want to save the test result, attach a USB storage drive to the server or connect your server to a shared network. For instructions on how to connect to a shared network, refer to Configuring network settings.
Click the Disk Drive Test tab.
- Select the test options according to your needs, and click Run to start testing.Note
Short Self Test is selected as the test type by default.
The mouse pointer is not active during the testing process.
If you are running test for NVMe SSDs, no matter you select Short Self Test or Long Self Test, the test item only includes the Self-Monitoring, Analysis, and Reporting Technology (SMART) flag status.
You can press Esc to stop the test.
- If you want to save the test result after the testing process is completed, click Save.Note
The test result will be saved in a test_hdd.txt file in the USB storage drive or the shared network folder. The file includes more details than the test result displayed on the interface.
If two M.2 drives are configured as a RAID array, the drives are not supported in the disk drive test. If you want to use disk drive test function to test the M.2 drives, do not configure them as a RAID array.
To exit this interface and return to the Diagnostics interface, click
 , and then click OK in the Exit window.
Collecting RAID logs
If you want to save the logs, attach a USB storage drive to the server or connect your server to a shared network. For instructions on how to connect to a shared network, refer to Configuring network settings.
Click the RAID Log tab.
- Select the RAID adapter that you want to collect the logs, and click Collect RAID Log to start the collection.Note
The mouse pointer is not active during the collecting process.
Only the Broadcom HardsWare RAID Adapter series support the log collection function. M.2/RSTe/NVMe RAID Controller does not support this function because the adapter cannot save the raid log.
After the collecting process is completed, the summary information for the RAID adapter will be displayed. You can click View Recent Log to see the recent logs of the RAID adapter.
- If you want to save the detailed logs, click Save Detailed Log. The collected logs will be saved in three TXT files in the USB storage drive or the shared network folder. The three TXT files include the following information respectively:
Basic information about the RAID adapter
Firmware logs for troubleshooting
Event logs for the RAID adapter
NoteYou can press Esc to stop the test. To exit this interface and return to the Diagnostics interface, click
, and then click OK in the Exit window.
Running PMEM test
If you want to save the test result, attach a USB storage drive to the server or connect your server to a shared network. For instructions on how to connect to a shared network, refer to Configuring network settings.
- Click the PMEM Test tab.NoteThe mouse pointer is not active during the testing process.
- Select one of the following test options according to your need:
Select All: Run the following four test options.
- Quick diagnostics: Verify the basic health status for installed PMEMs.
- Config diagnostics: Verify whether the BIOS platform configuration matches the installed hardware or not.
- FW diagnostics: Verify the firmware consistency for installed PMEMs.NoteThis test cannot verify whether the installed firmware is the optimal version or not.
- Security diagnostics: Verify the consistent security state for installed PMEMs.NoteIt is recommended that security setting is enabled for all installed PMEMs.
- If you want to save the test result, click Saveafter the testing process is completed.NoteThe test result will be saved in a test_PMEM_%date%.txt file in the USB storage drive or the shared network folder. The file includes more details than the test result displayed on the interface.