Setting up the rotate fixture cart assembly
Use this information to set up the rotate fixture cart assembly, which is a mandatory tool for tray removal and installation.
About this task
Setting up the rotate fixture cart assembly requires the following items:
Rotate fixture included in the “GL-8 Kit for N1380 and SC Systems”
Rotate fixture customized cart
Attention
Read Installation Guidelines and Safety inspection checklist to ensure that you work safely.
The following illustration might differ slightly from your hardware, but the installation method is the same.
Watch the procedure
- A video of this procedure is available at YouTube.
Procedure
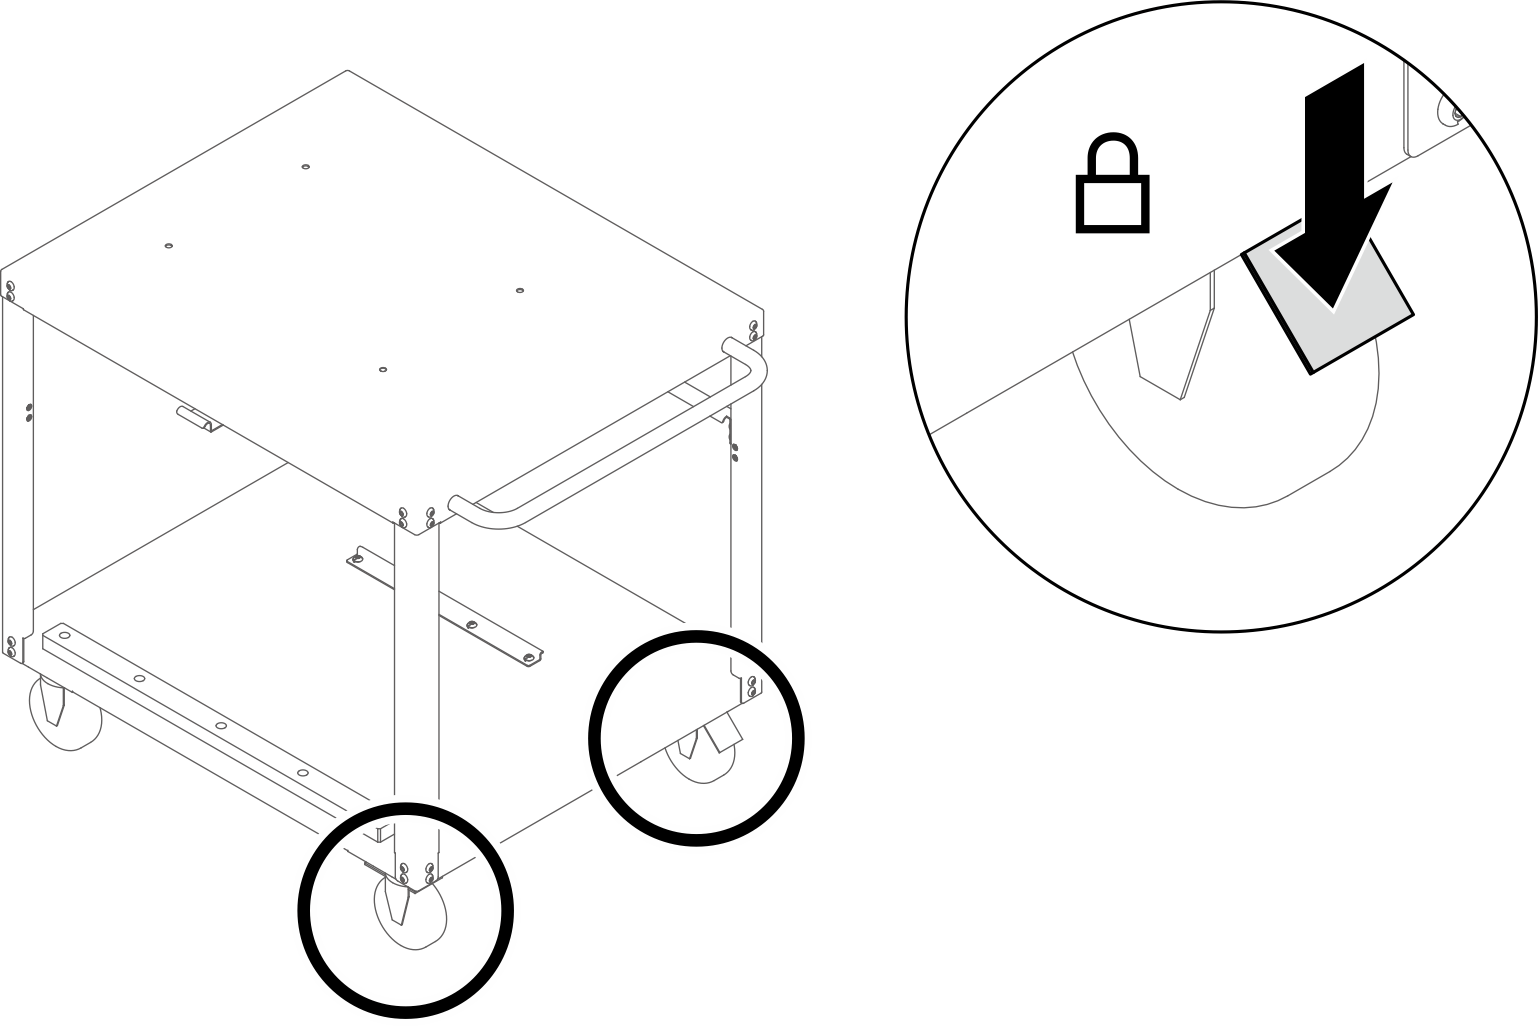
- Lock the cart wheel brakesFigure 1. Locking the cart wheel brakes
- Open the rotate fixture.
 Grab the handle, and hold the handle down with extra force.Figure 2. Holding down the rotate fixture handle
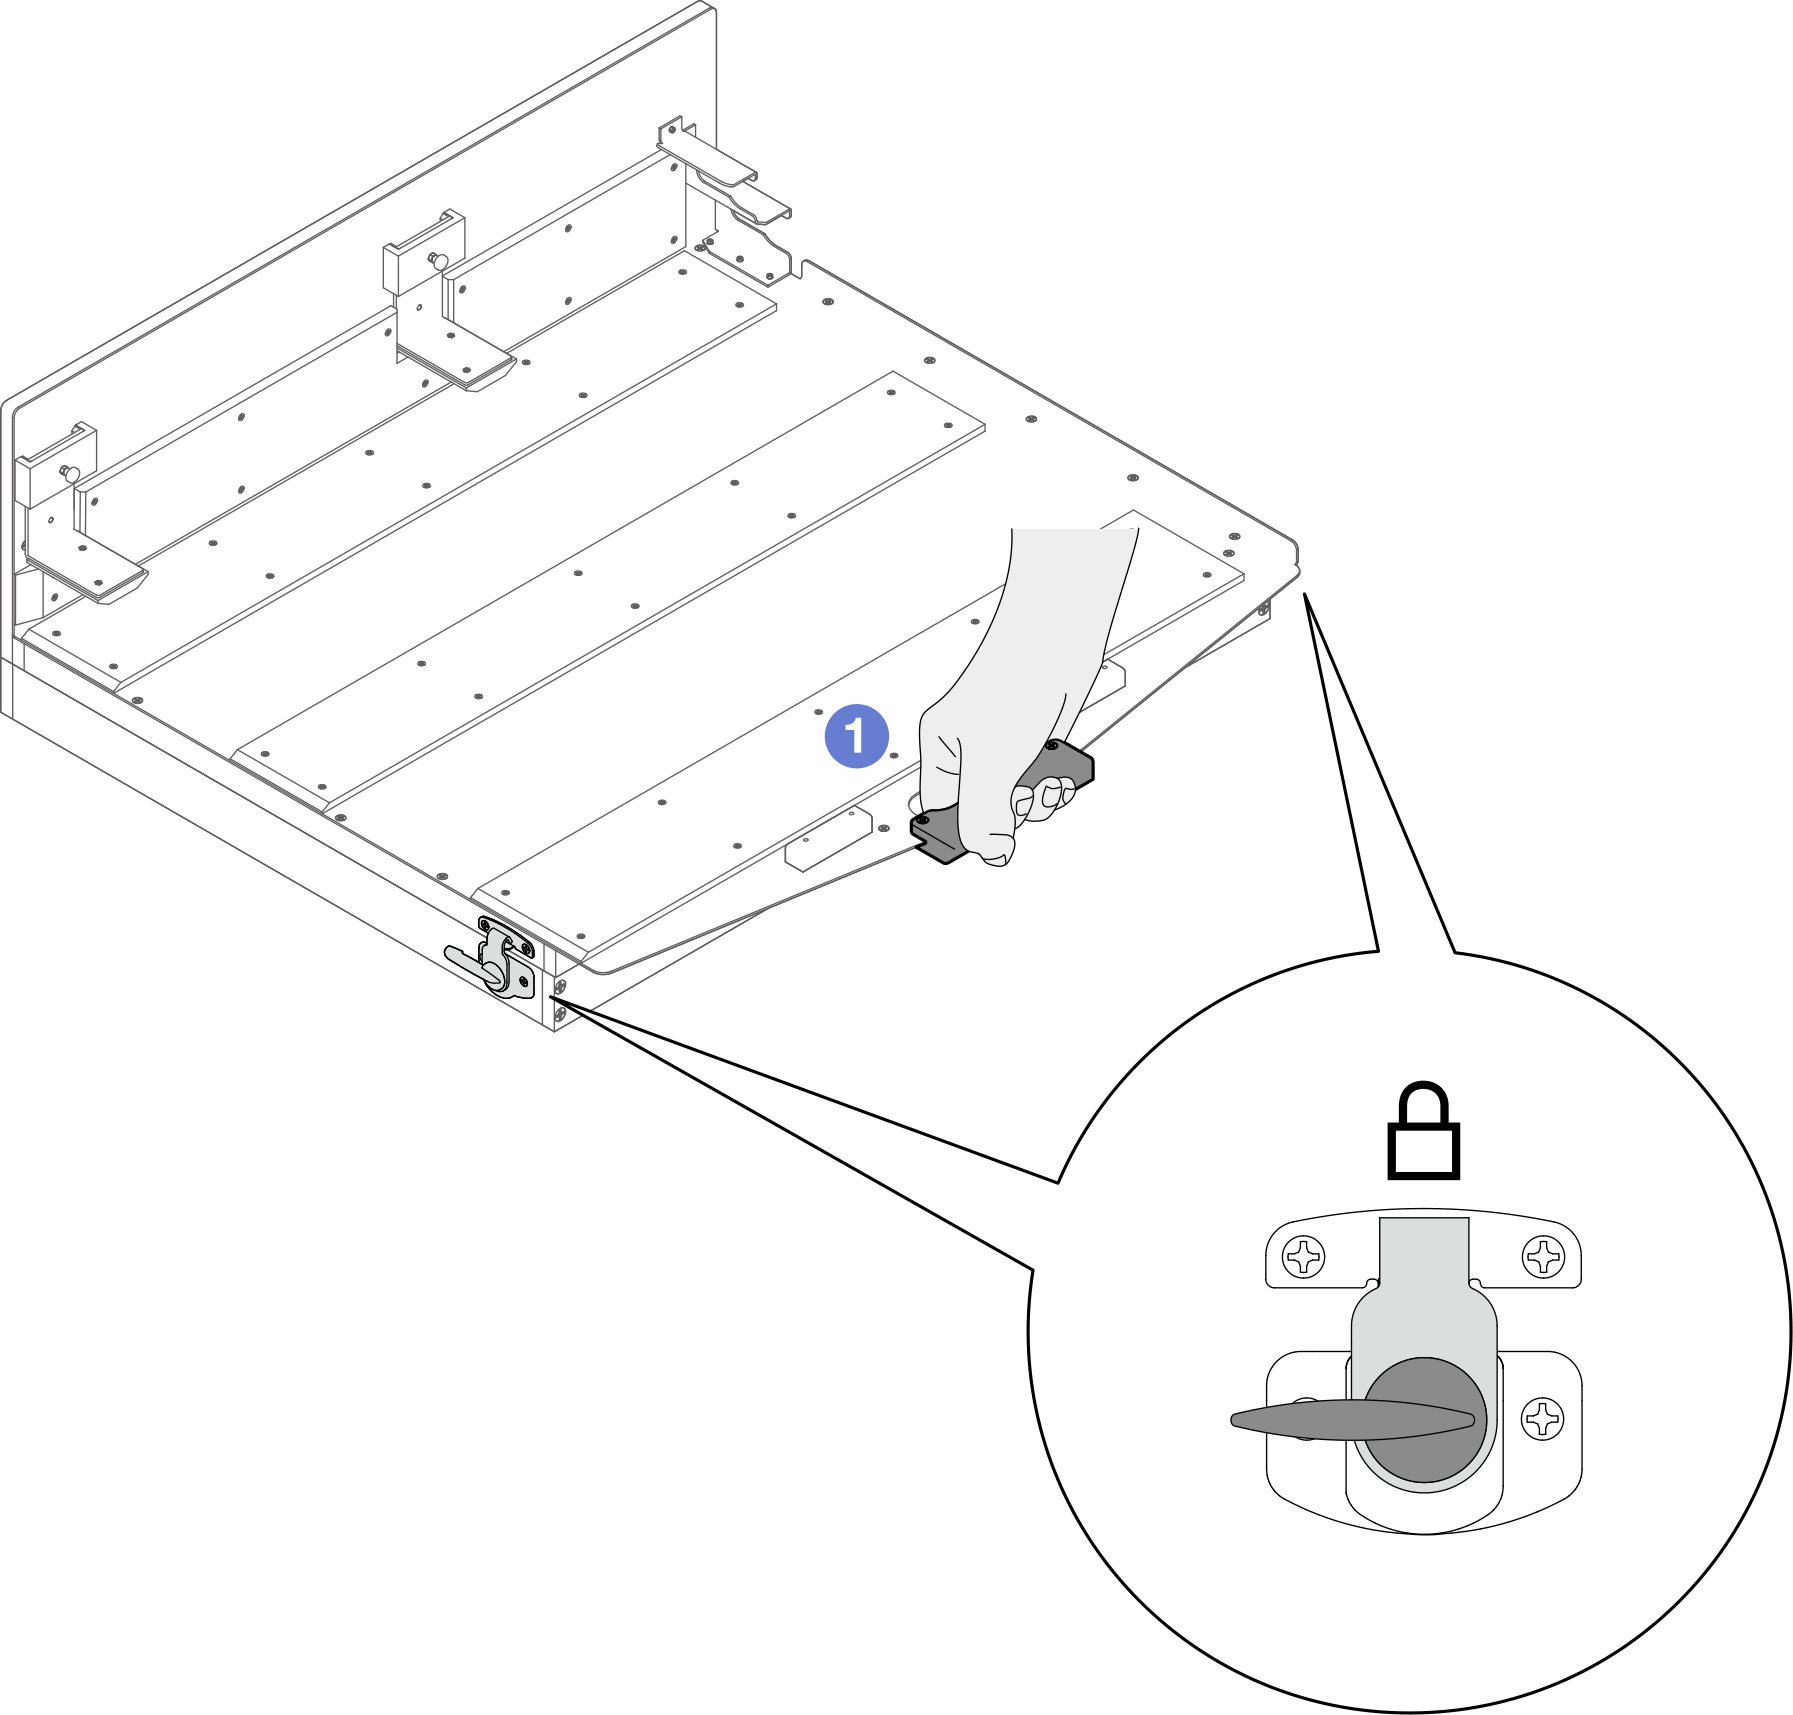
 Keep holding down the handle. Meanwhile, rotate the latch counterclockwise until it is unlocked. Make sure to unlock the latches on the right and left sides of the fixture.AttentionMake sure you are holding down the handle while unlocking the latches.Figure 3. Unlock the rotate fixture latches
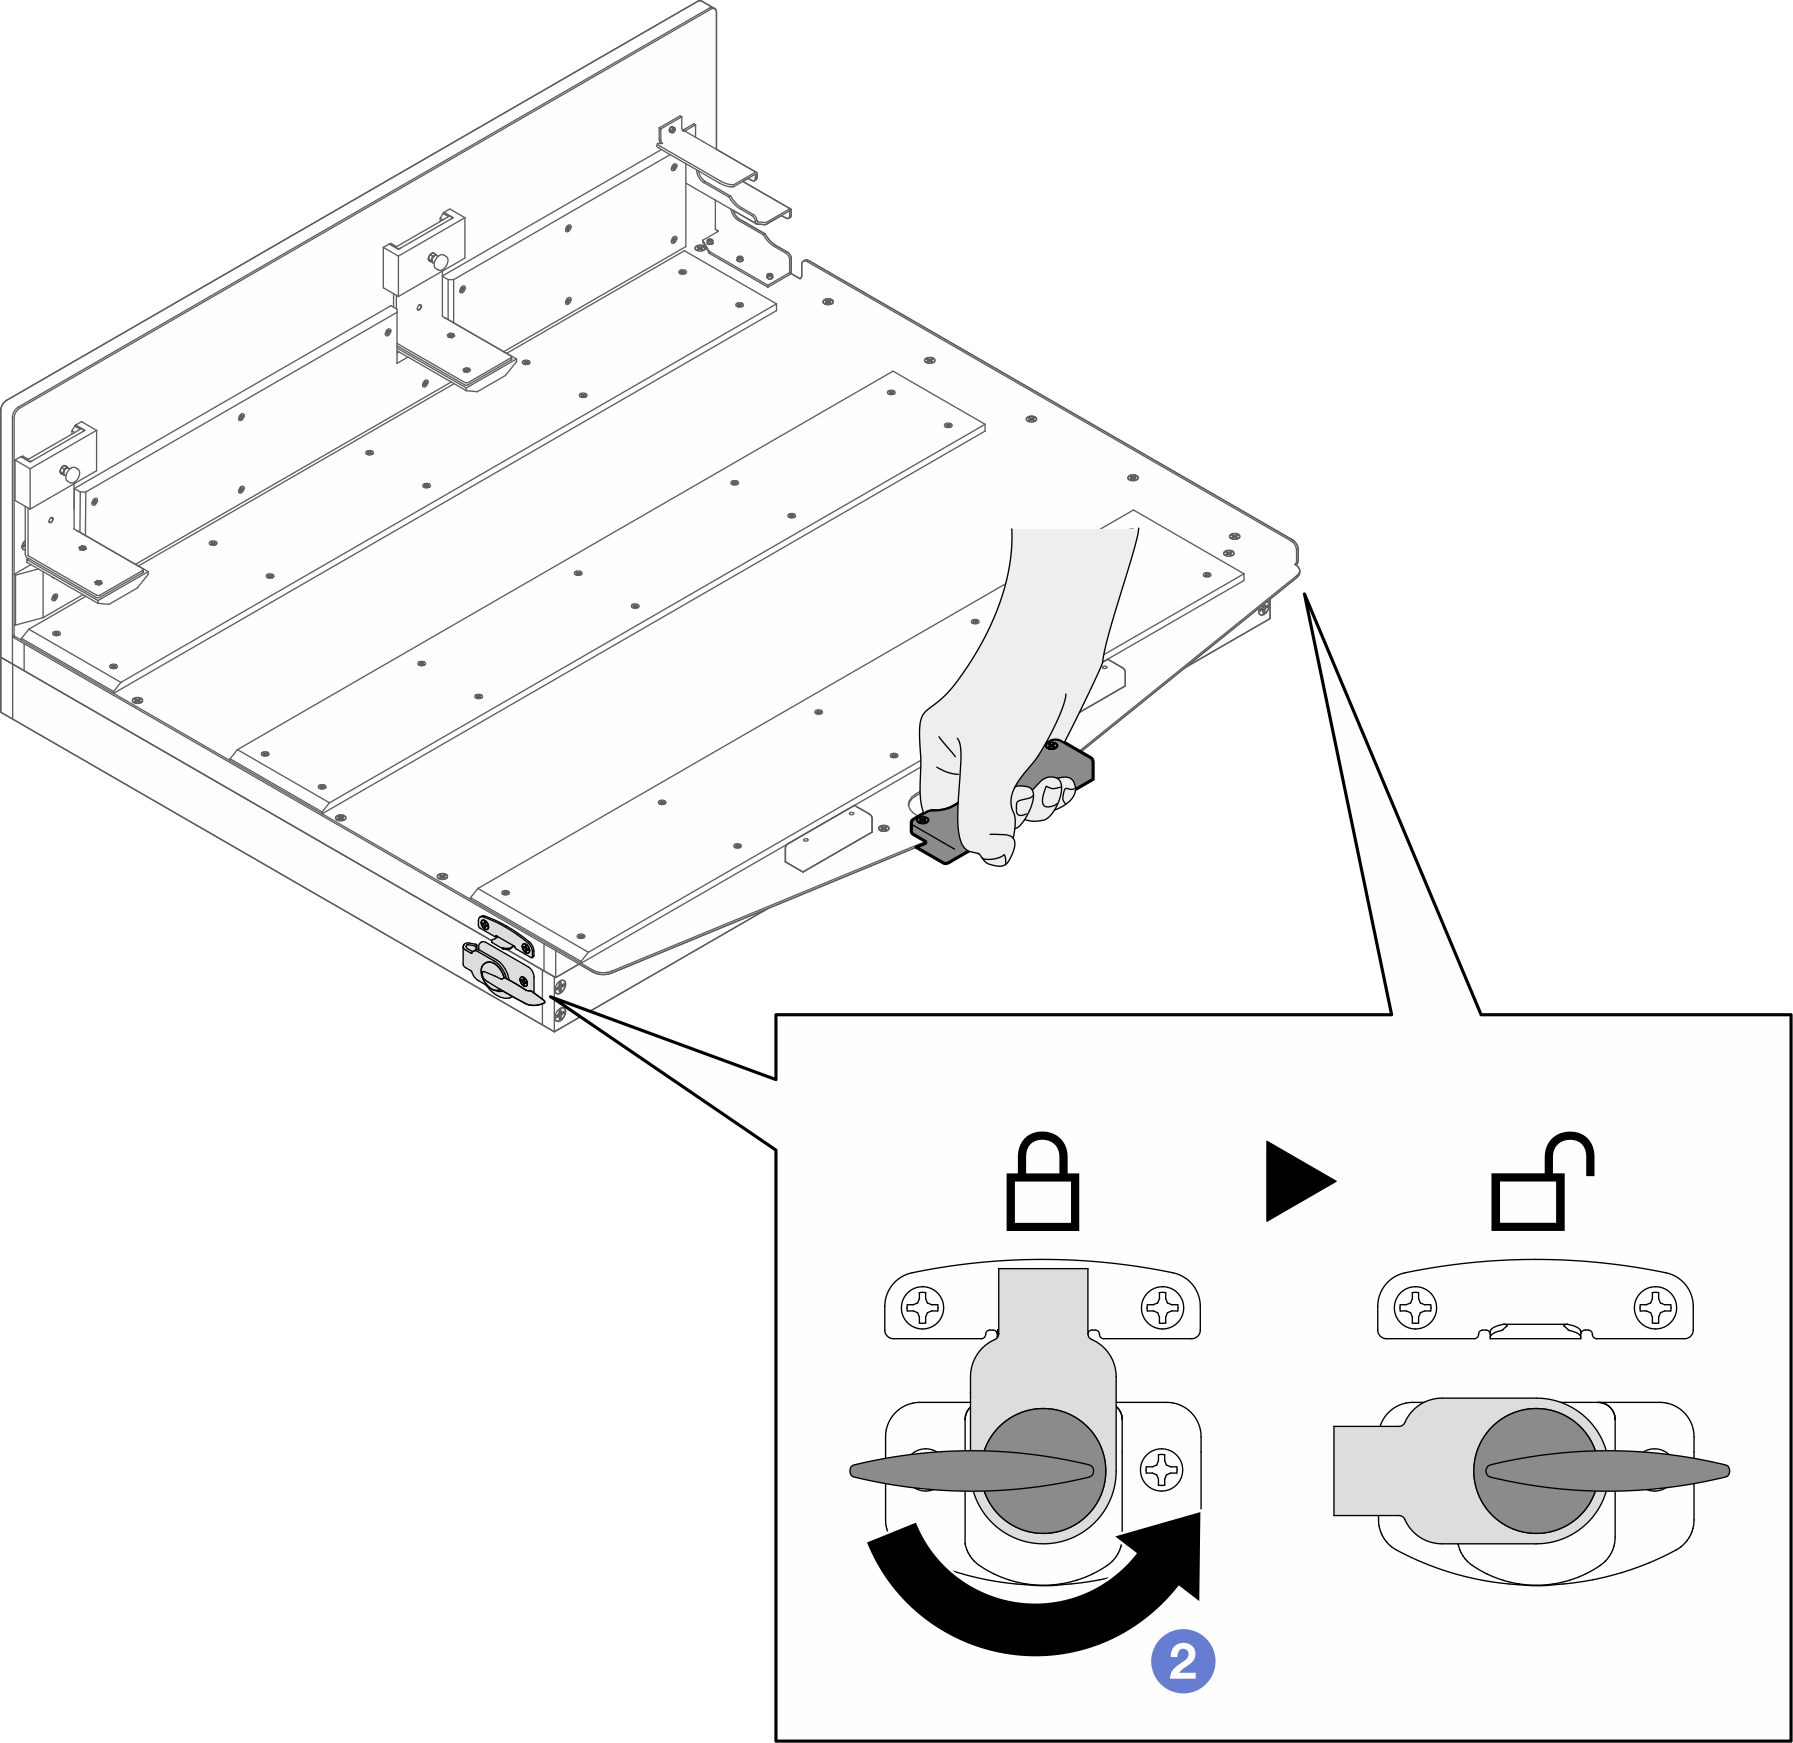
 Hold the handle; then, slowly rotate it upward until it stands vertically.
AttentionMake sure you are holding the handle while opening the rotate fixture.Figure 4. Open the rotate fixture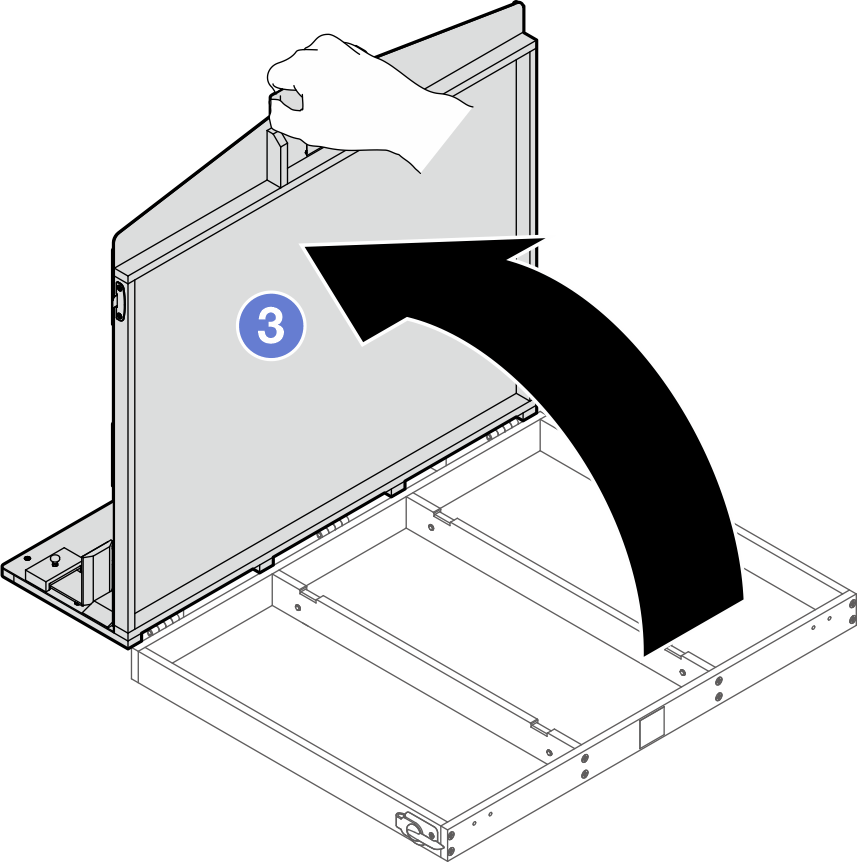
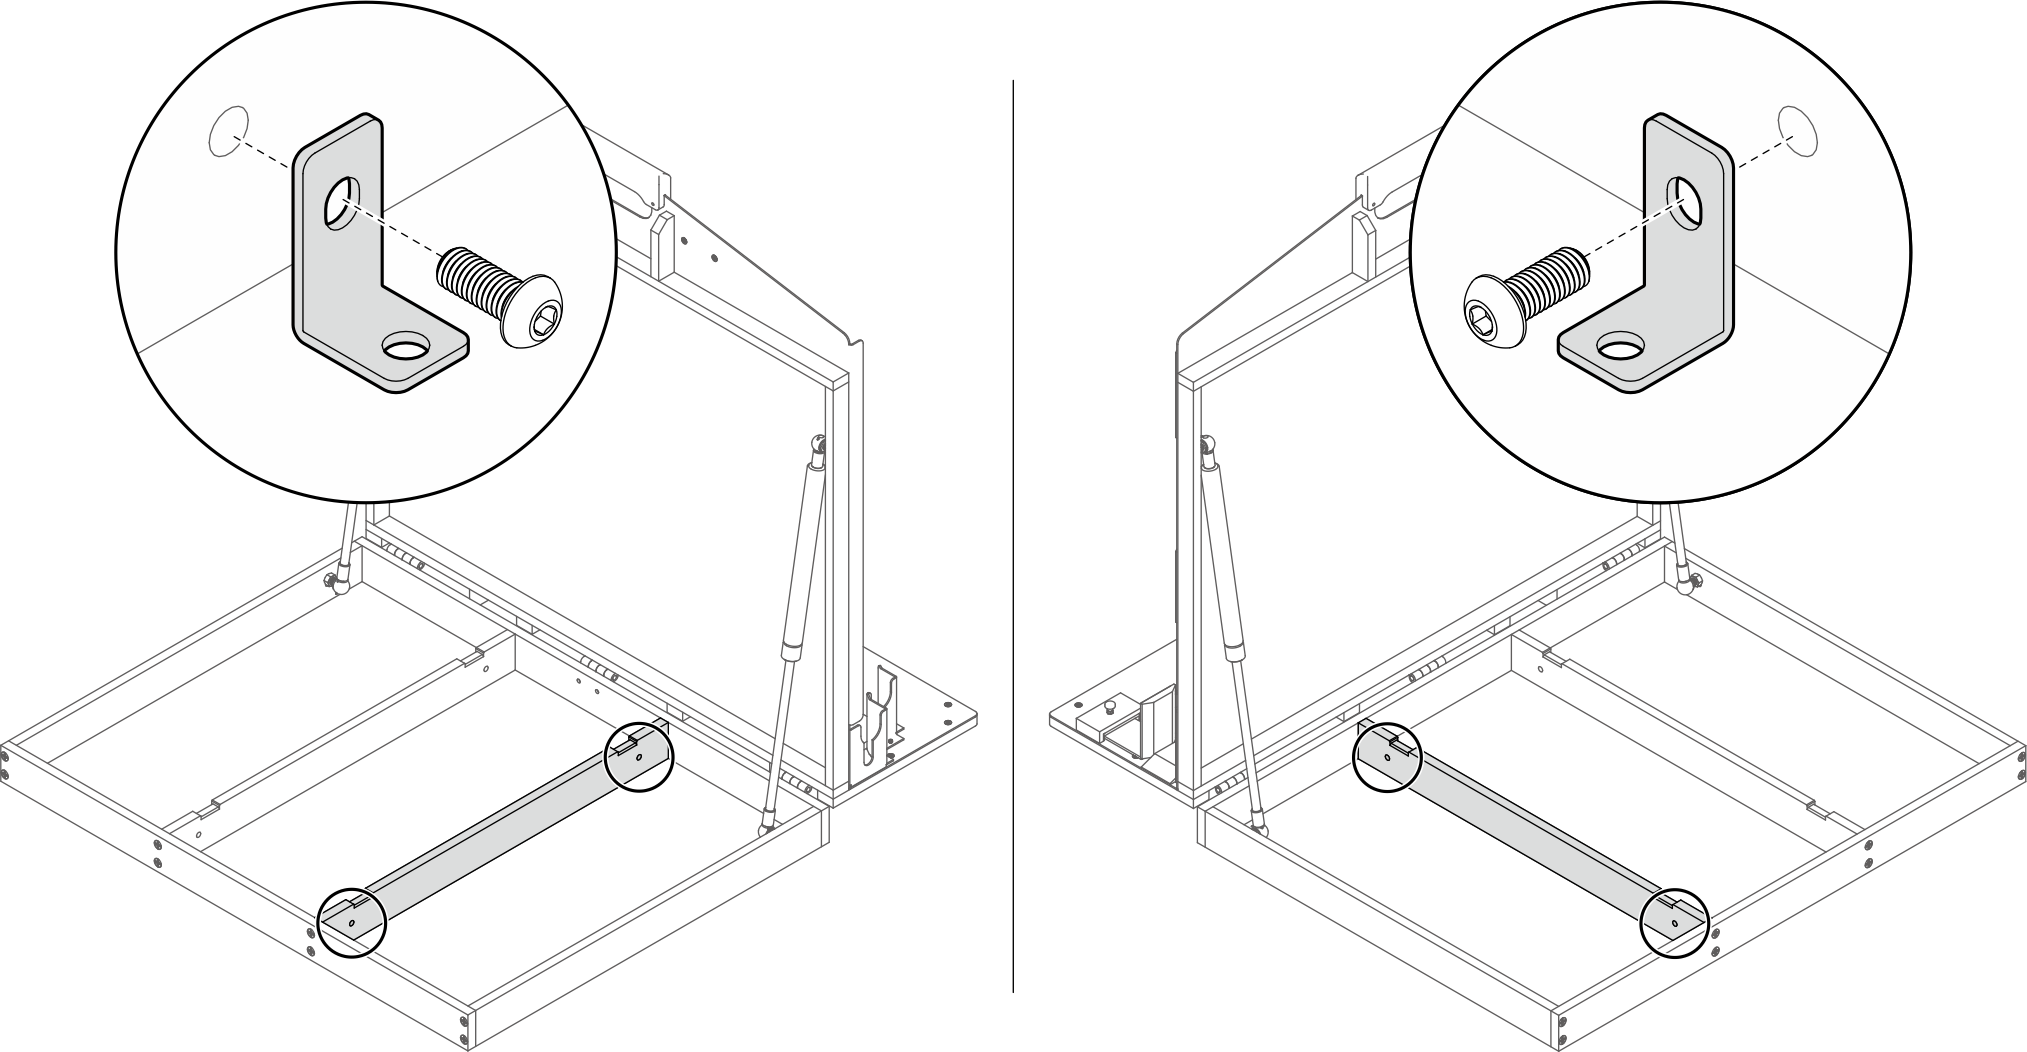
- Install screws to attach four L-shape retainer to the support bars of the rotate fixture (two retainers per support bar).Figure 5. Installing L-shape retainers to the rotate fixture
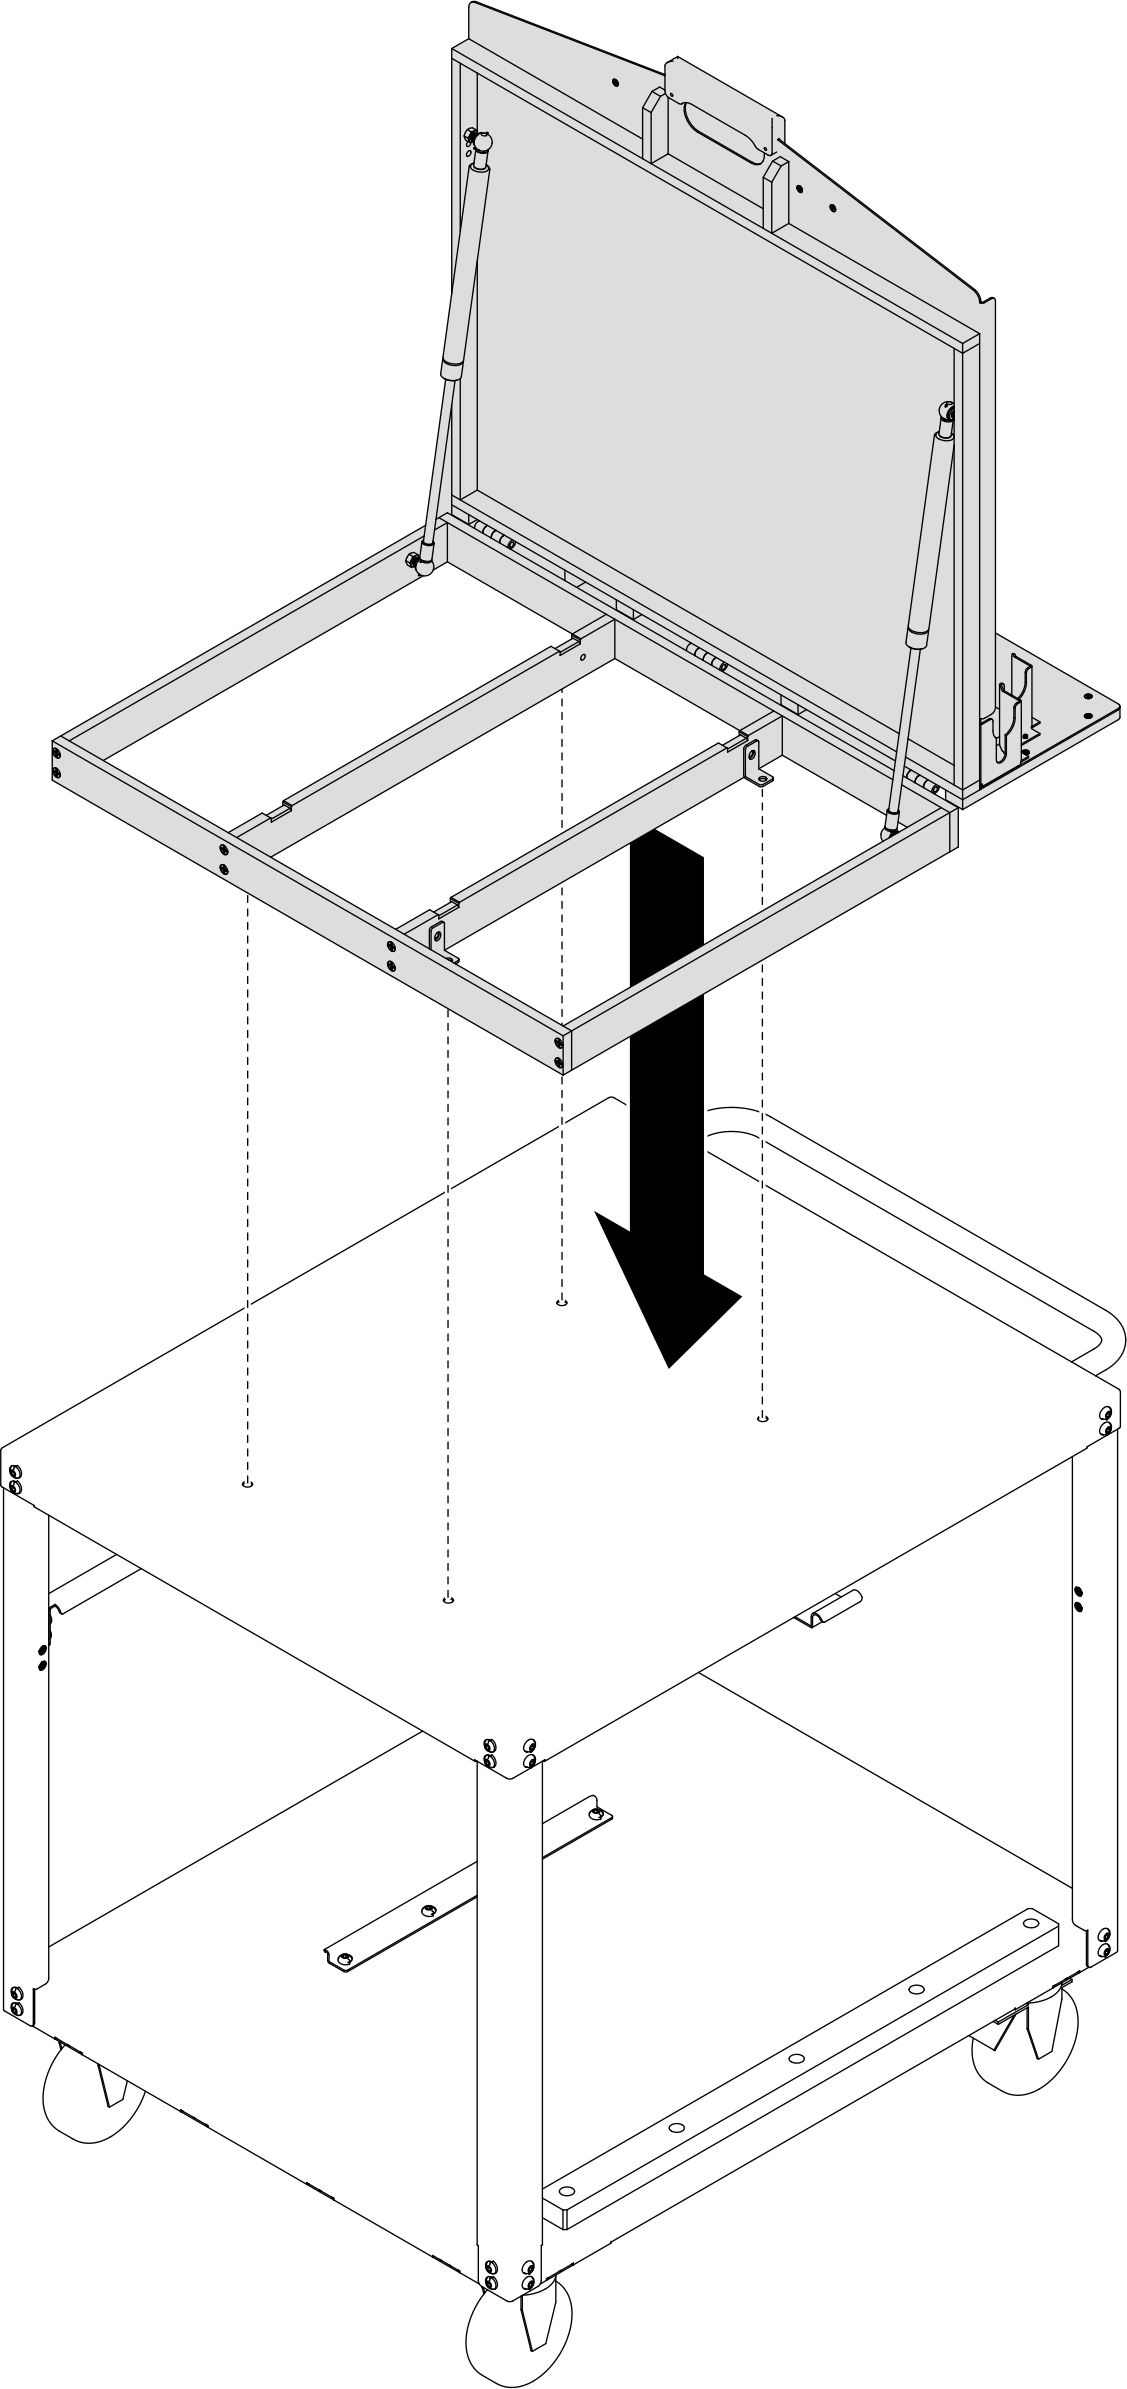
- Align the screw holes on the L-shape retainer to the screw holes on the cart top; then, place the rotate fixture on the cart.Figure 6. Placing the rotate fixture on the cart
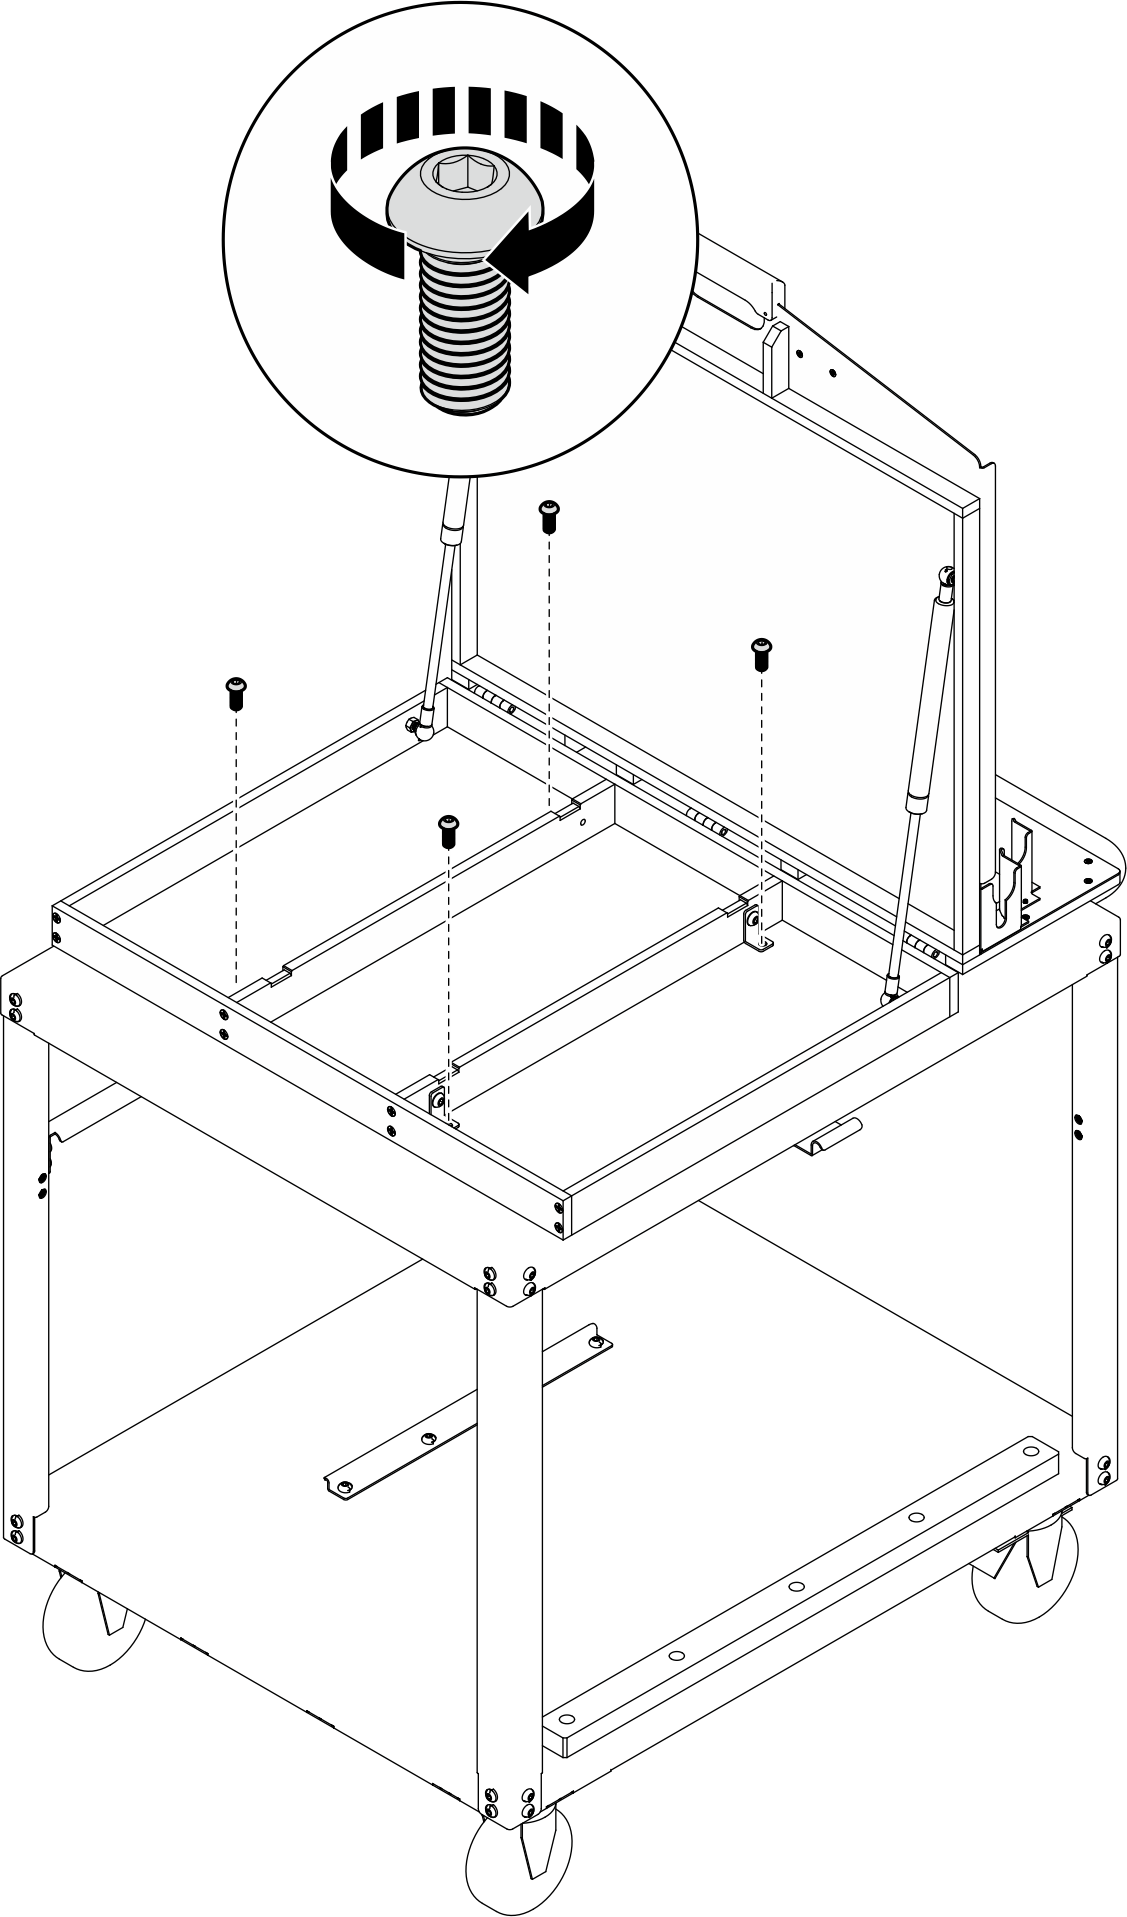
- Install four screws to secure the rotate fixture to the cart top.Figure 7. Installing the rotate fixture to the cart
After you finish
Proceed to removing or installing tray.
Give documentation feedback