Install a drive bay blank
Use this procedure to install a drive bay blank.
Before installing a drive bay blank:
- Read the following section(s) to ensure that you work safely.
- Remove the compute node (see Remove a compute node from the enclosure).
- Remove the compute node cover (see Remove the compute node cover).
Complete the following steps to install a drive bay blank.
- Fasten the screw.
For the drive bay blank in drive bay 0 and 1
Figure 1. Drive bay blank (in drive bay 0 and 1) installation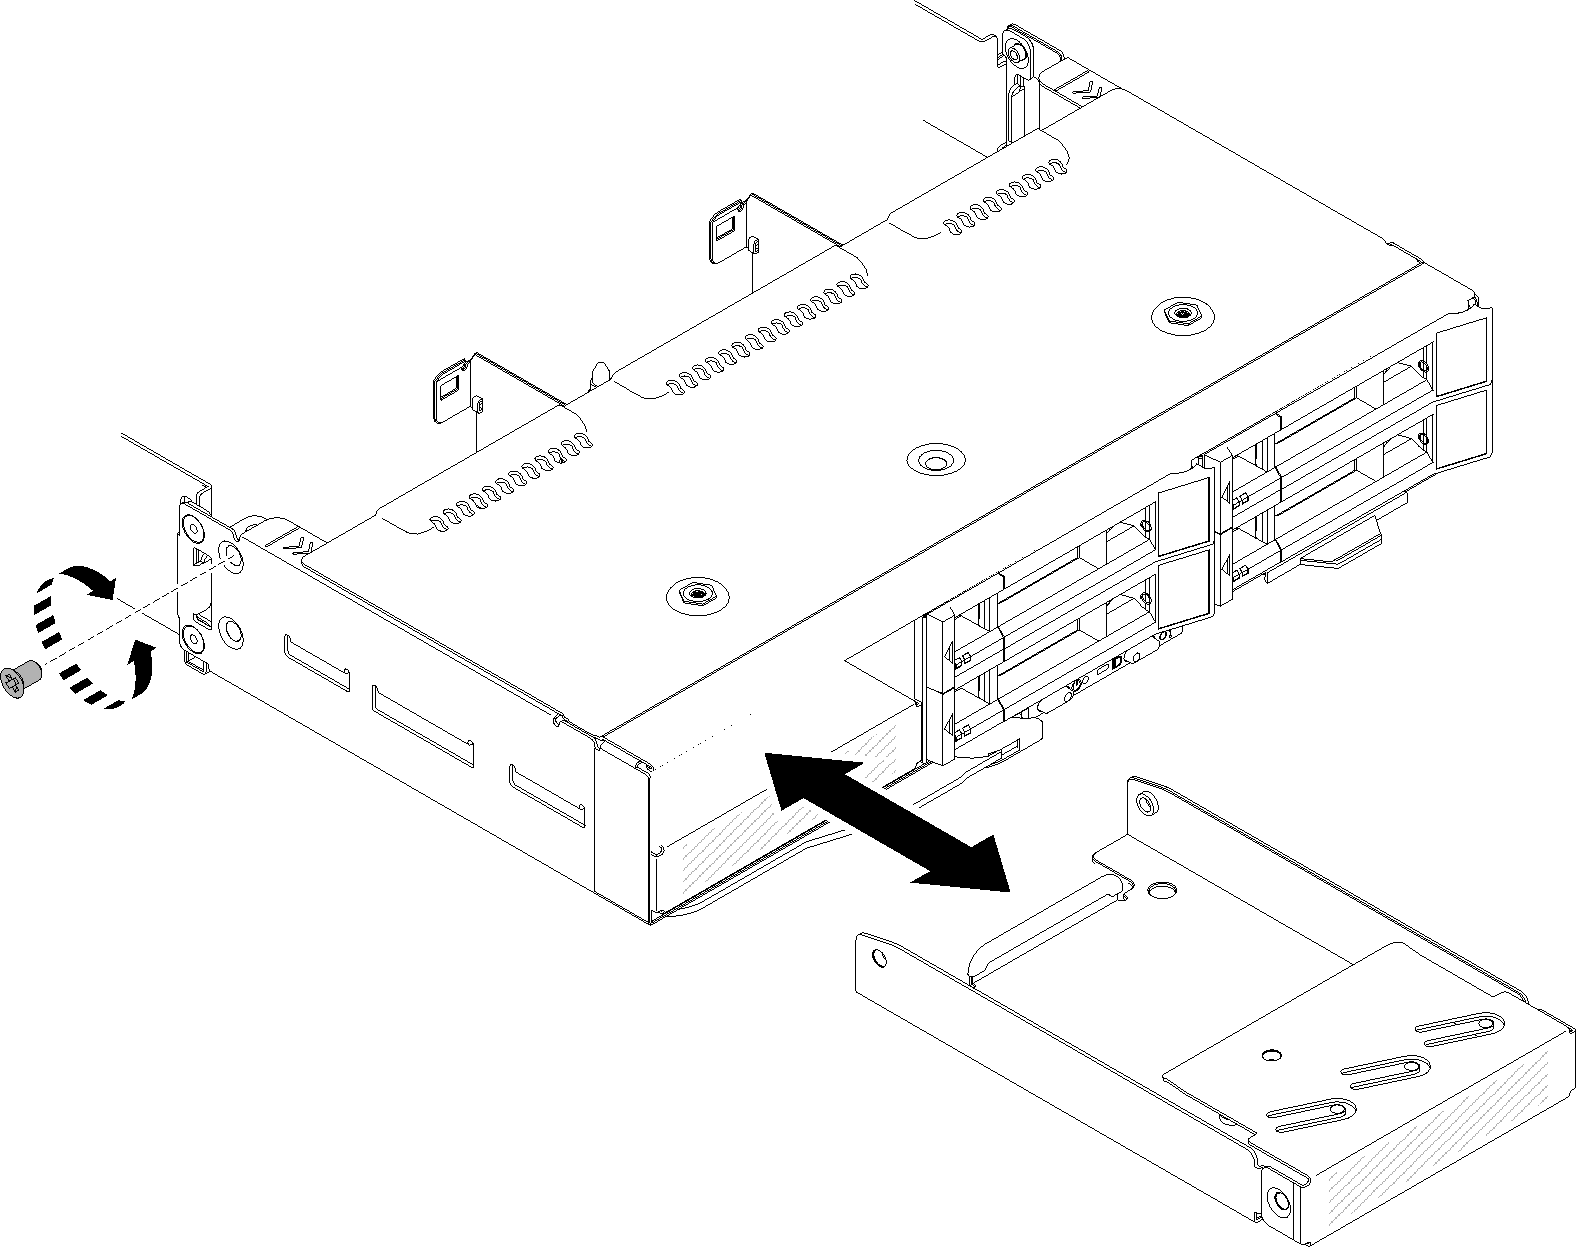
For the drive bay blank in drive bay 2
Figure 2. Drive bay blank (in drive bay 2) installation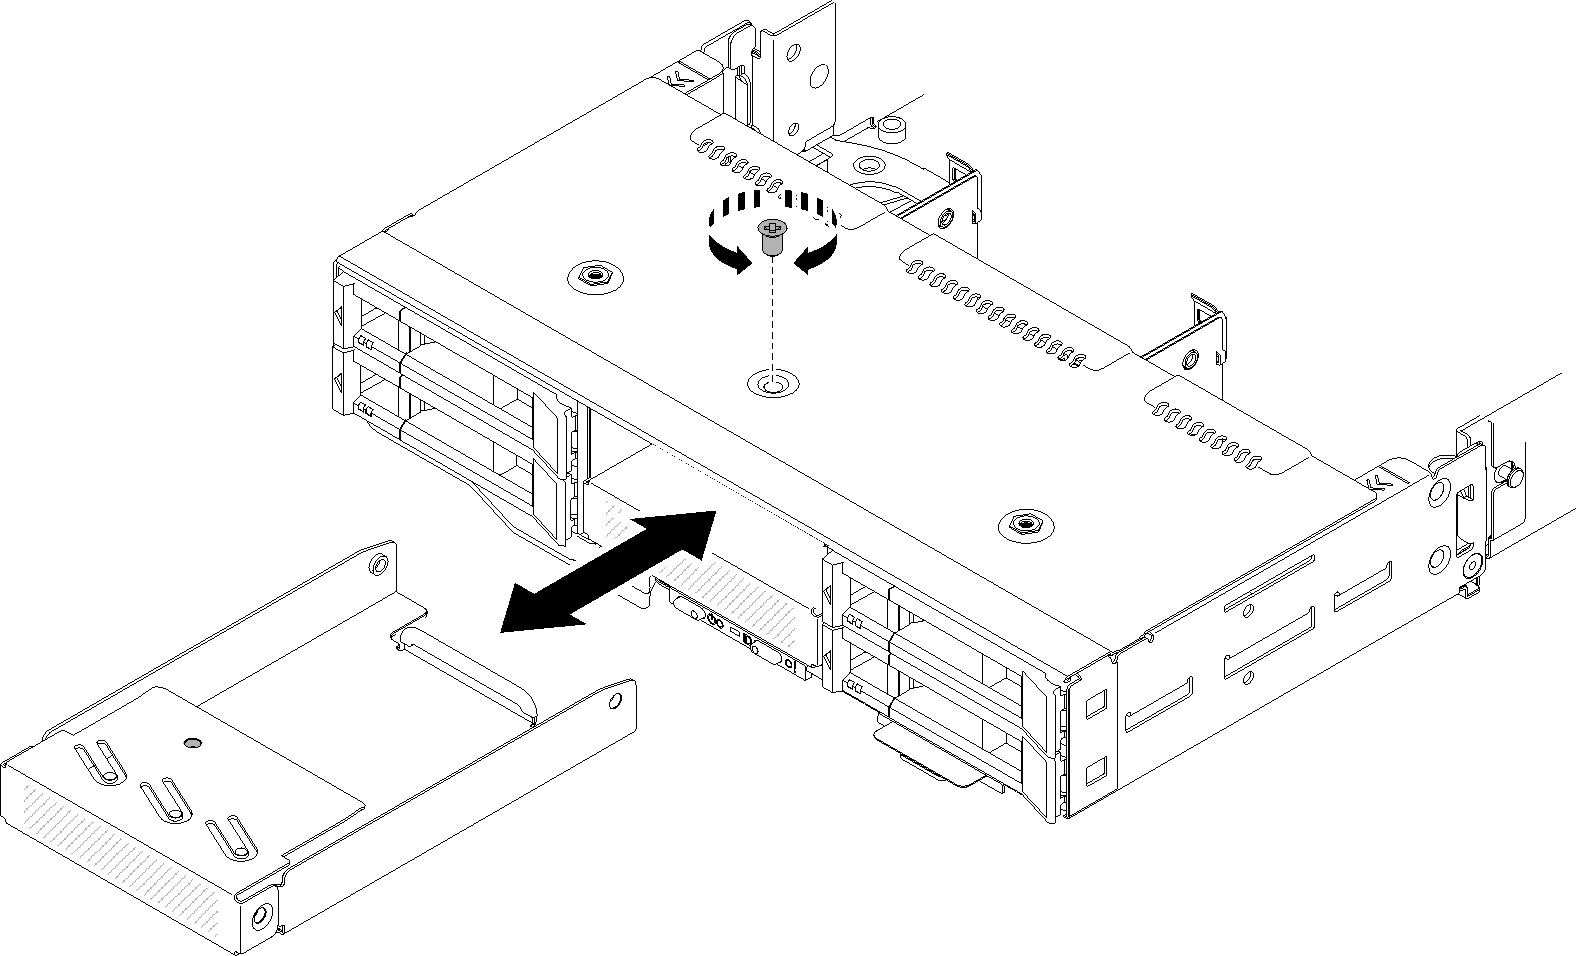
For the drive bay blank in drive bay 3
NoteThe following illustration shows the underside of the node.Figure 3. Drive bay blank (in drive bay 3) installation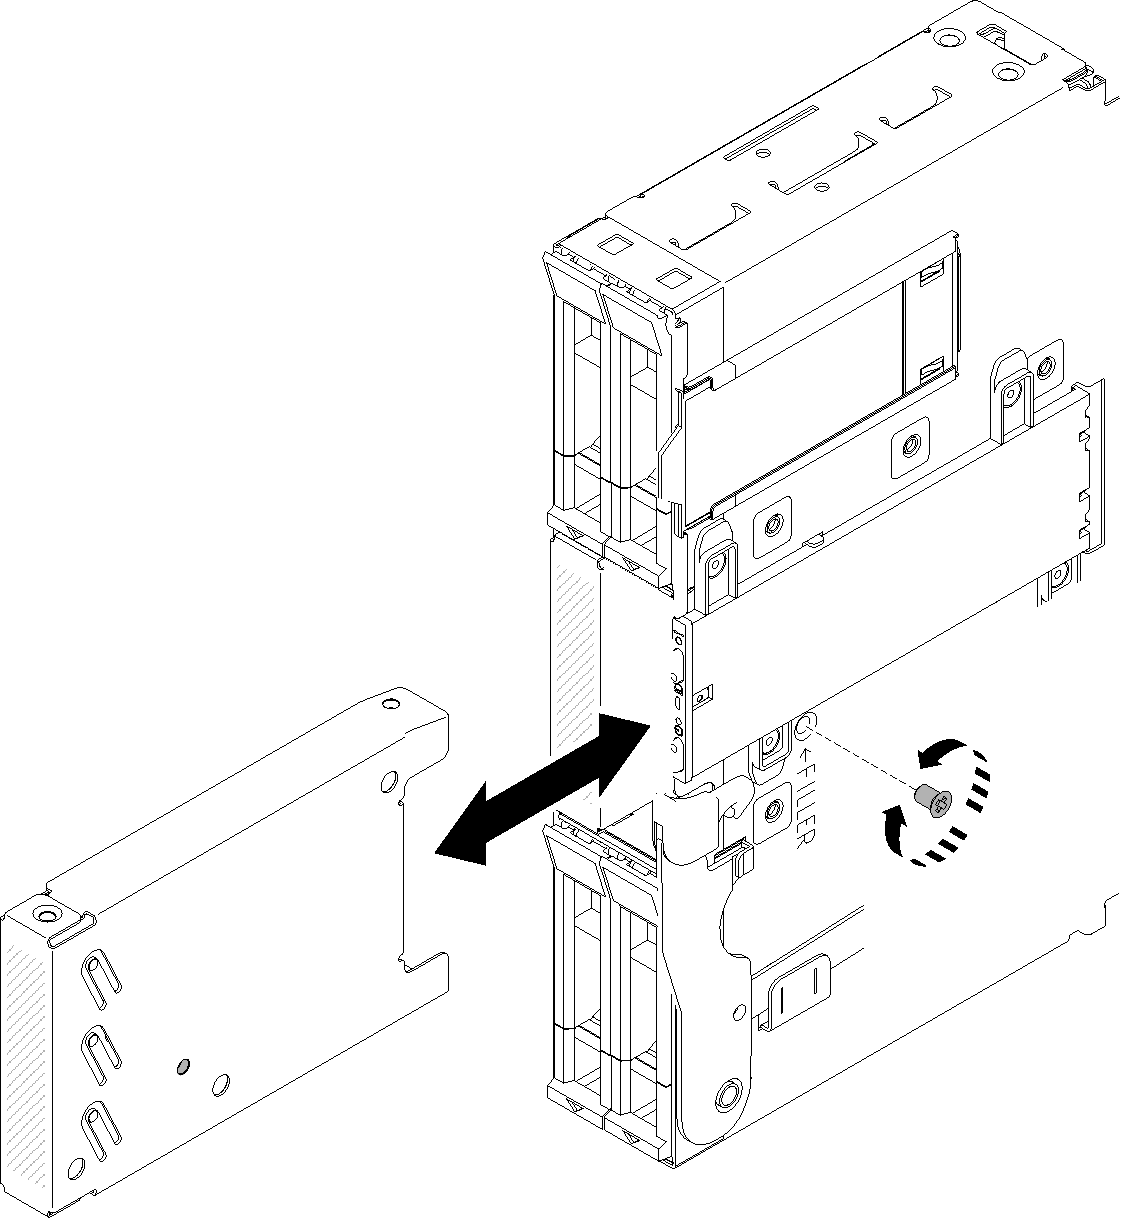
For the drive bay blank in drive bay 4 and 5
Figure 4. Drive bay blank (in drive bay 4 and 5) installation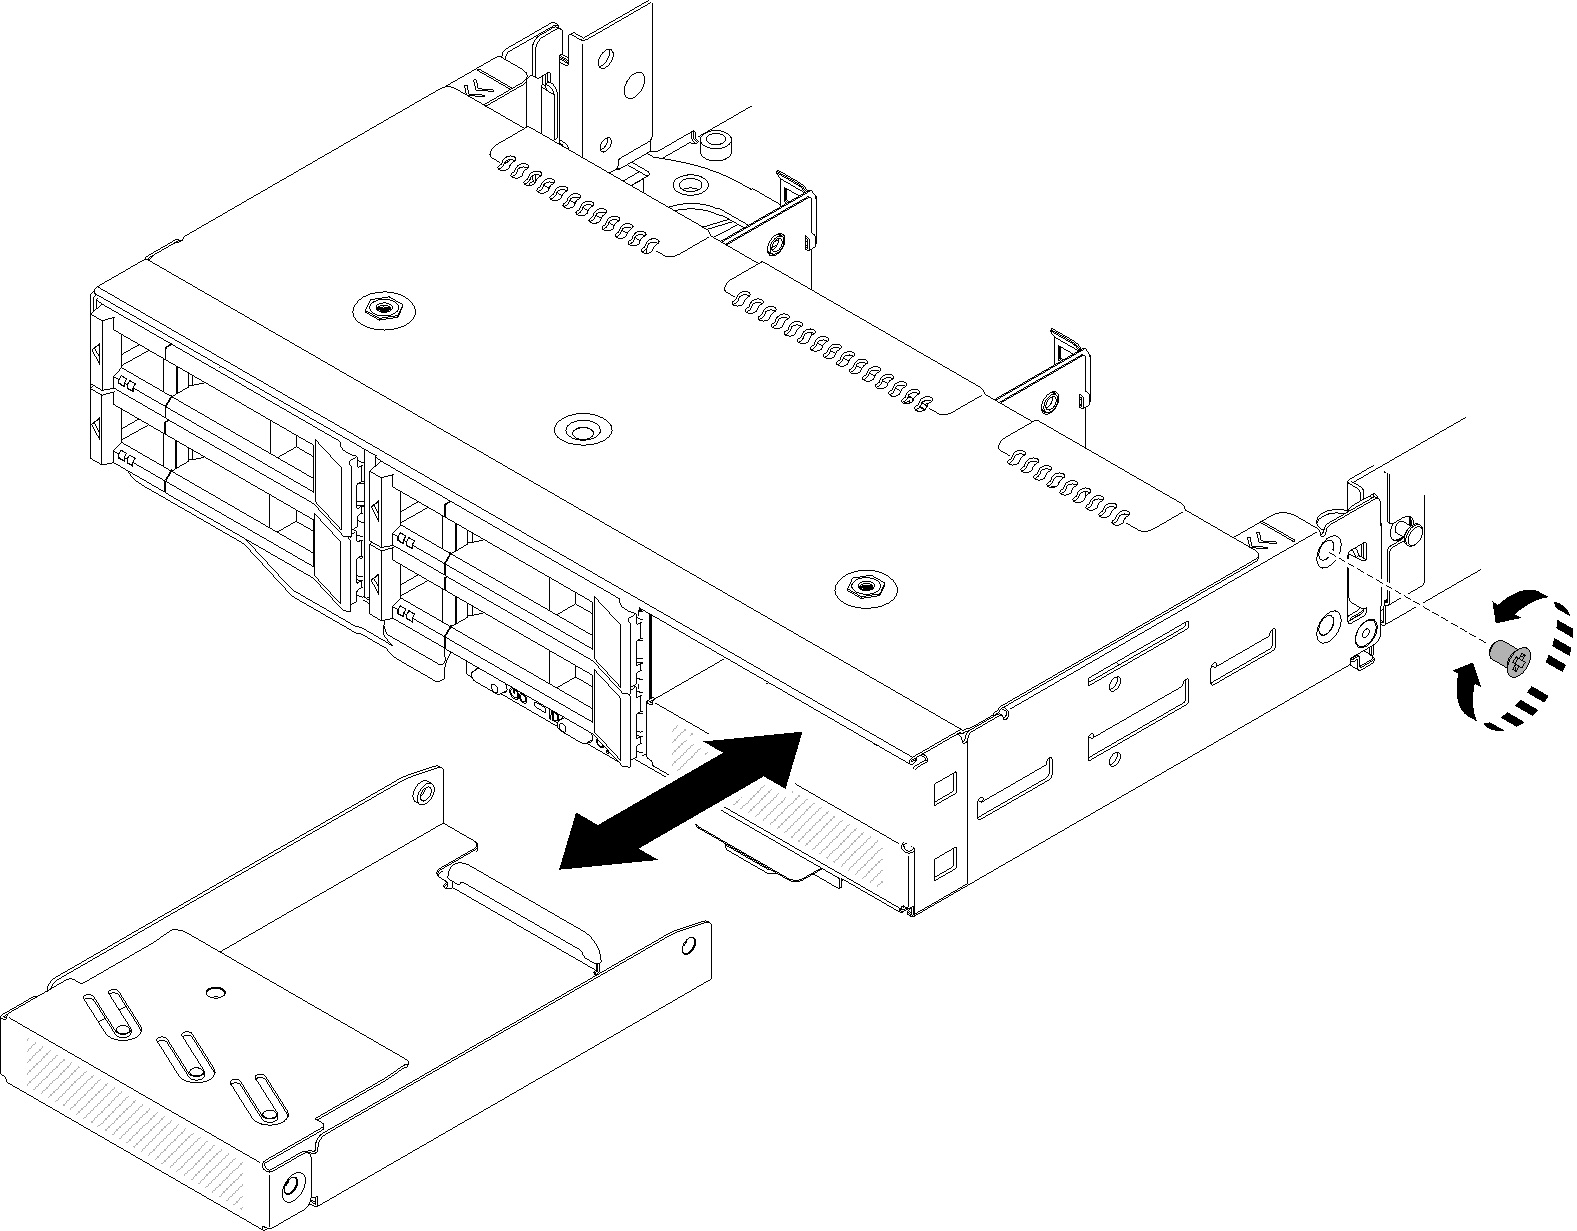
After you install a drive bay blank, complete the following steps:
Reinstall the compute node cover (see Install the compute node cover).
Reinstall the compute node (see Install a compute node in the enclosure).
Give documentation feedback