Install the shuttle
Use this information to install the shuttle.
Before you install the shuttle:
- Read the following section(s) to ensure that you work safely.
Power off all the compute nodes and peripheral devices (see Power off the compute node).
Disengage all the compute nodes from the enclosure.
Disconnect the power cords and all external cables from the rear of the enclosure.
If the cable management arm is installed, remove it (see Remove the cable management arm).
Attention
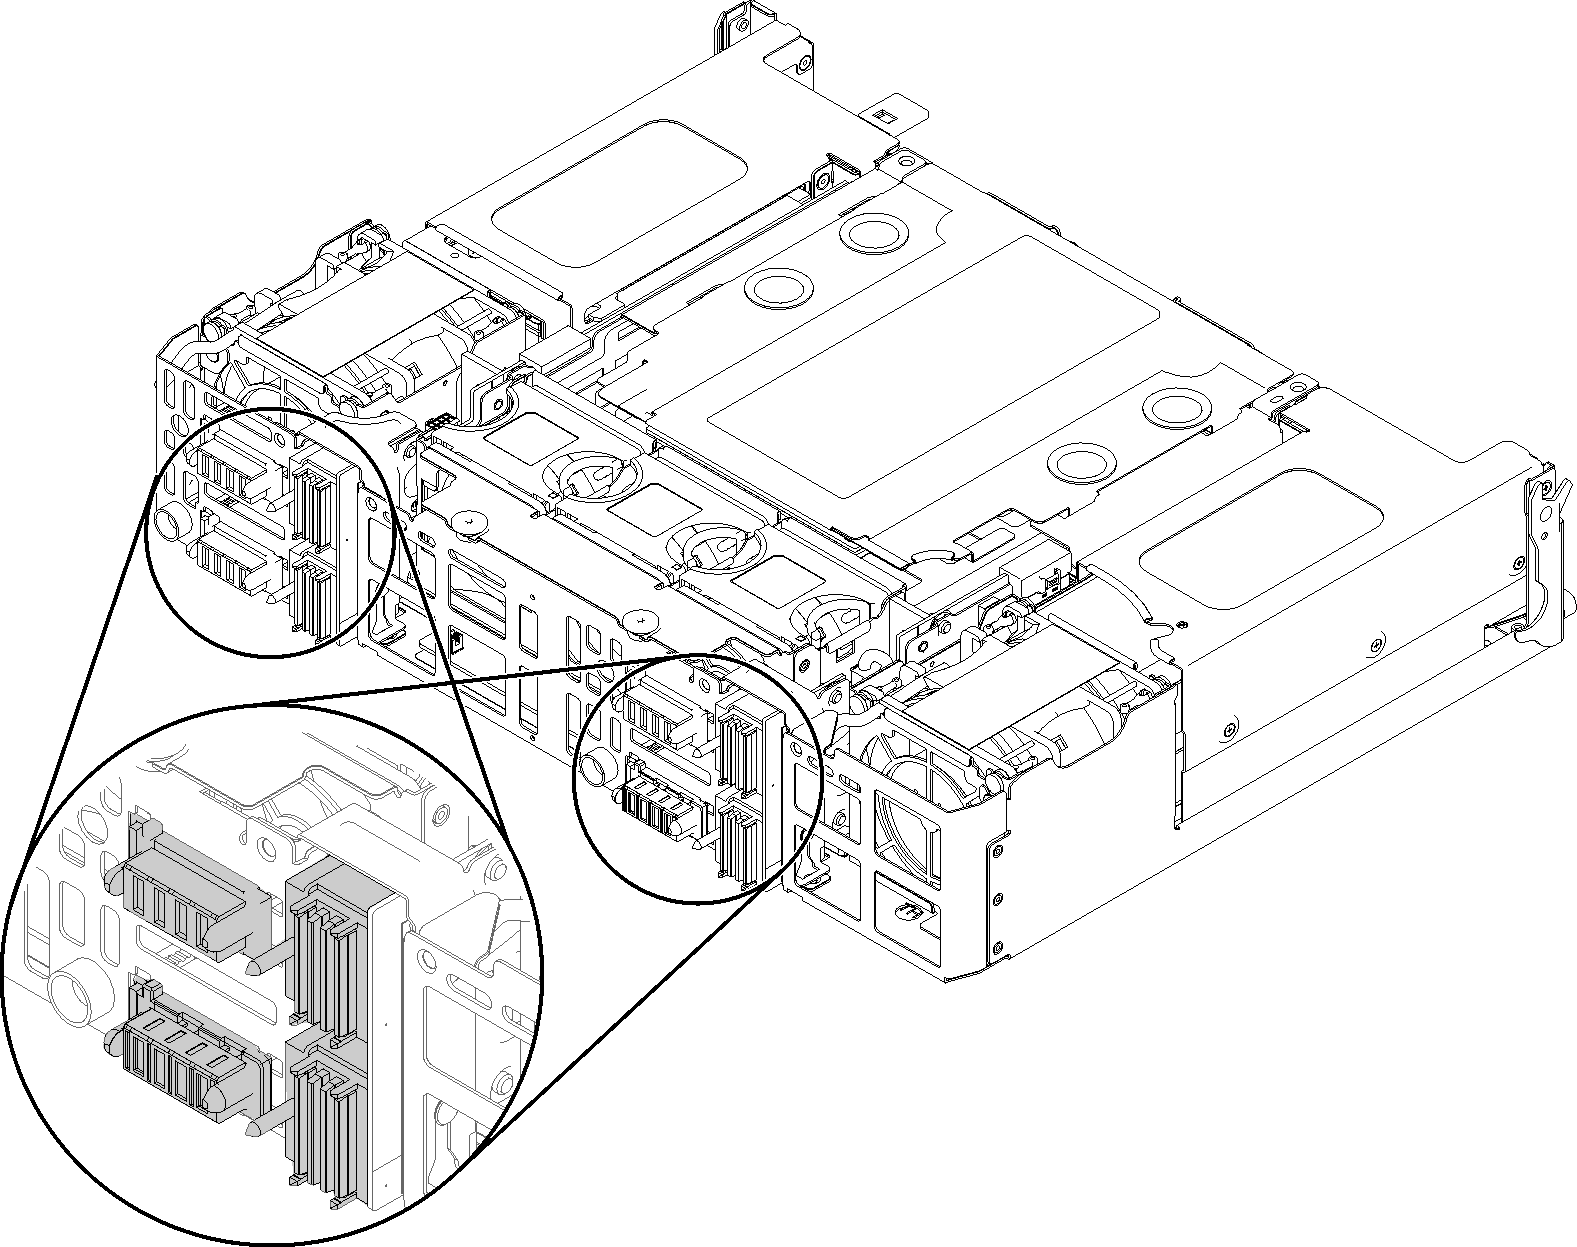
Be careful when you are removing or installing the shuttle to avoid damaging the shuttle connectors.
Figure 1. Shuttle connectors
Complete the following steps to install the shuttle.
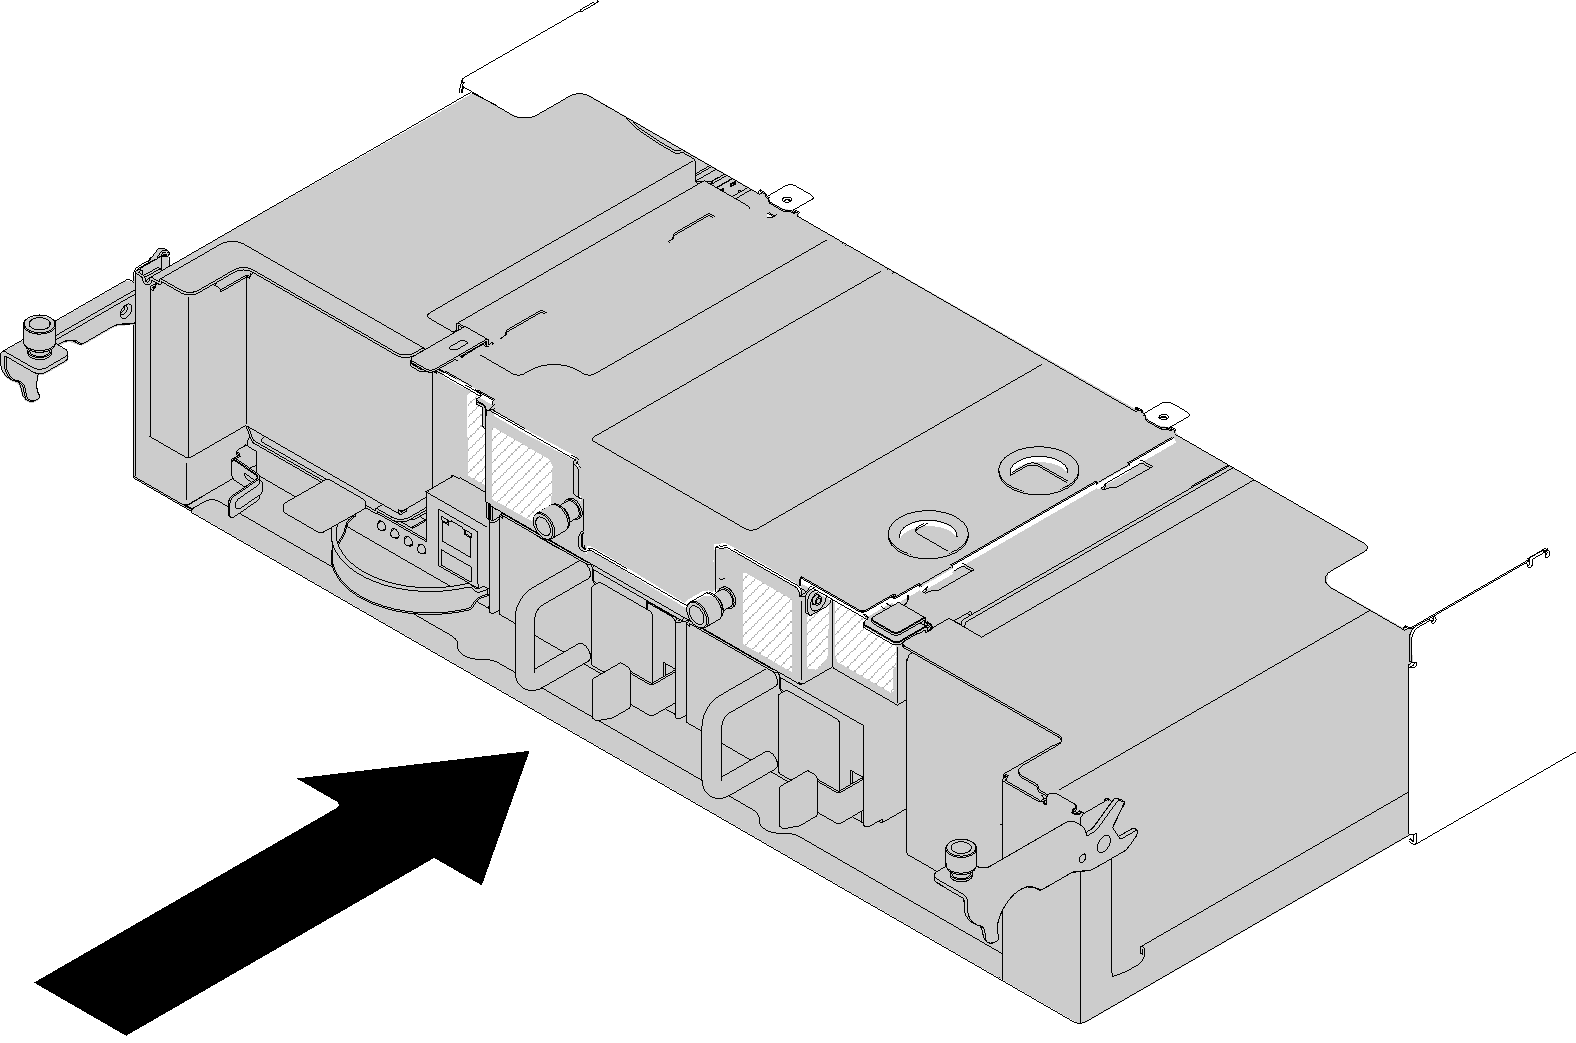
- Align the shuttle with rails and pins; then, slide the shuttle into the enclosure.Figure 2. Shuttle installation
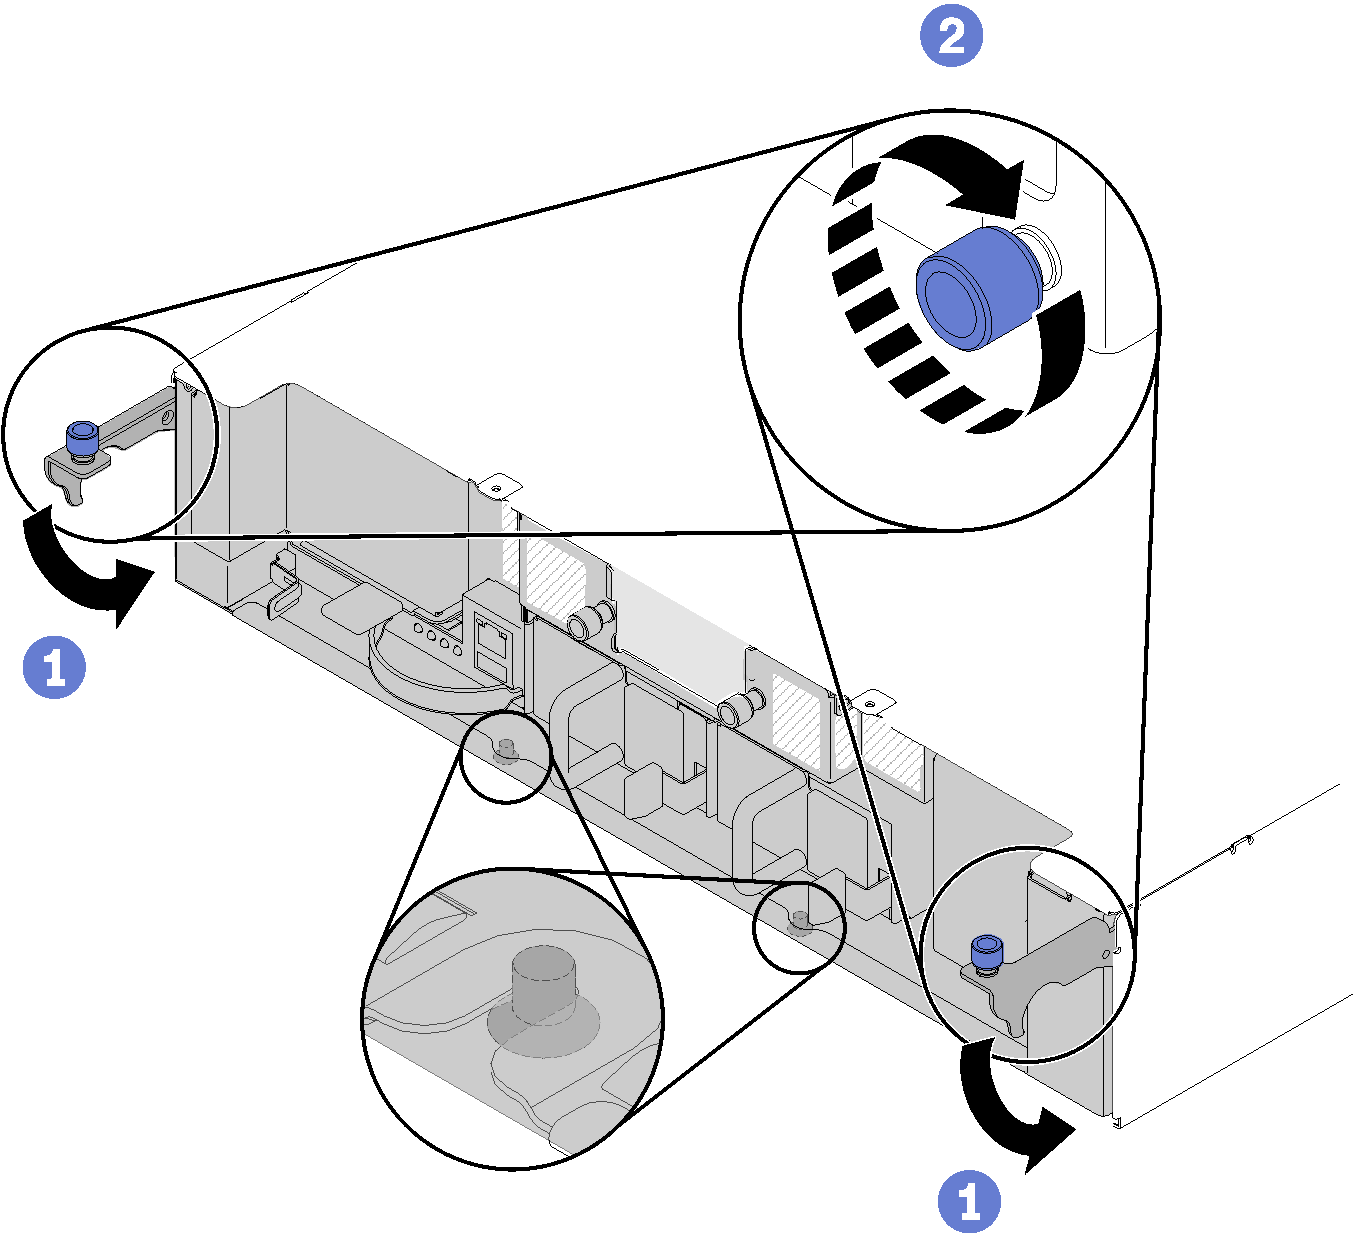
- Push the handles down and turn the thumbscrews clockwise.Figure 3. Shuttle installation
After you install the shuttle, complete the following steps:
If the cable management arm is removed, install it (see Install the cable management arm).
Reconnect the power cords and any cables that you removed.
Push all compute nodes back into the enclosure (see Install a compute node in the enclosure).
Turn on all compute nodes.
Demo video
Give documentation feedback