Install an air baffle
Follow instructions in this section to install a front or rear air baffle.
About this task
To avoid potential danger, make sure to read and follow the safety information.
Read Installation Guidelines and Safety inspection checklist to make sure that you work safely.
For proper cooling and airflow, make sure to install the required air baffles before turning on the node. Operating the node without the air baffle(s) might damage node components.
Depending on the specific configuration, the hardware might look slightly different from the illustrations in this section.
Procedure
- Lower the air baffle into the node; then, press it down until it is securely seated.Important
Make sure that the lower partitions of the air baffle properly separate the DIMMs and the cables as illustrated.
Depending on the specific configuration, the node might or might not come with a rear air baffle.
Figure 1. Installation of the front air baffle Figure 2. Installation of the rear air baffle
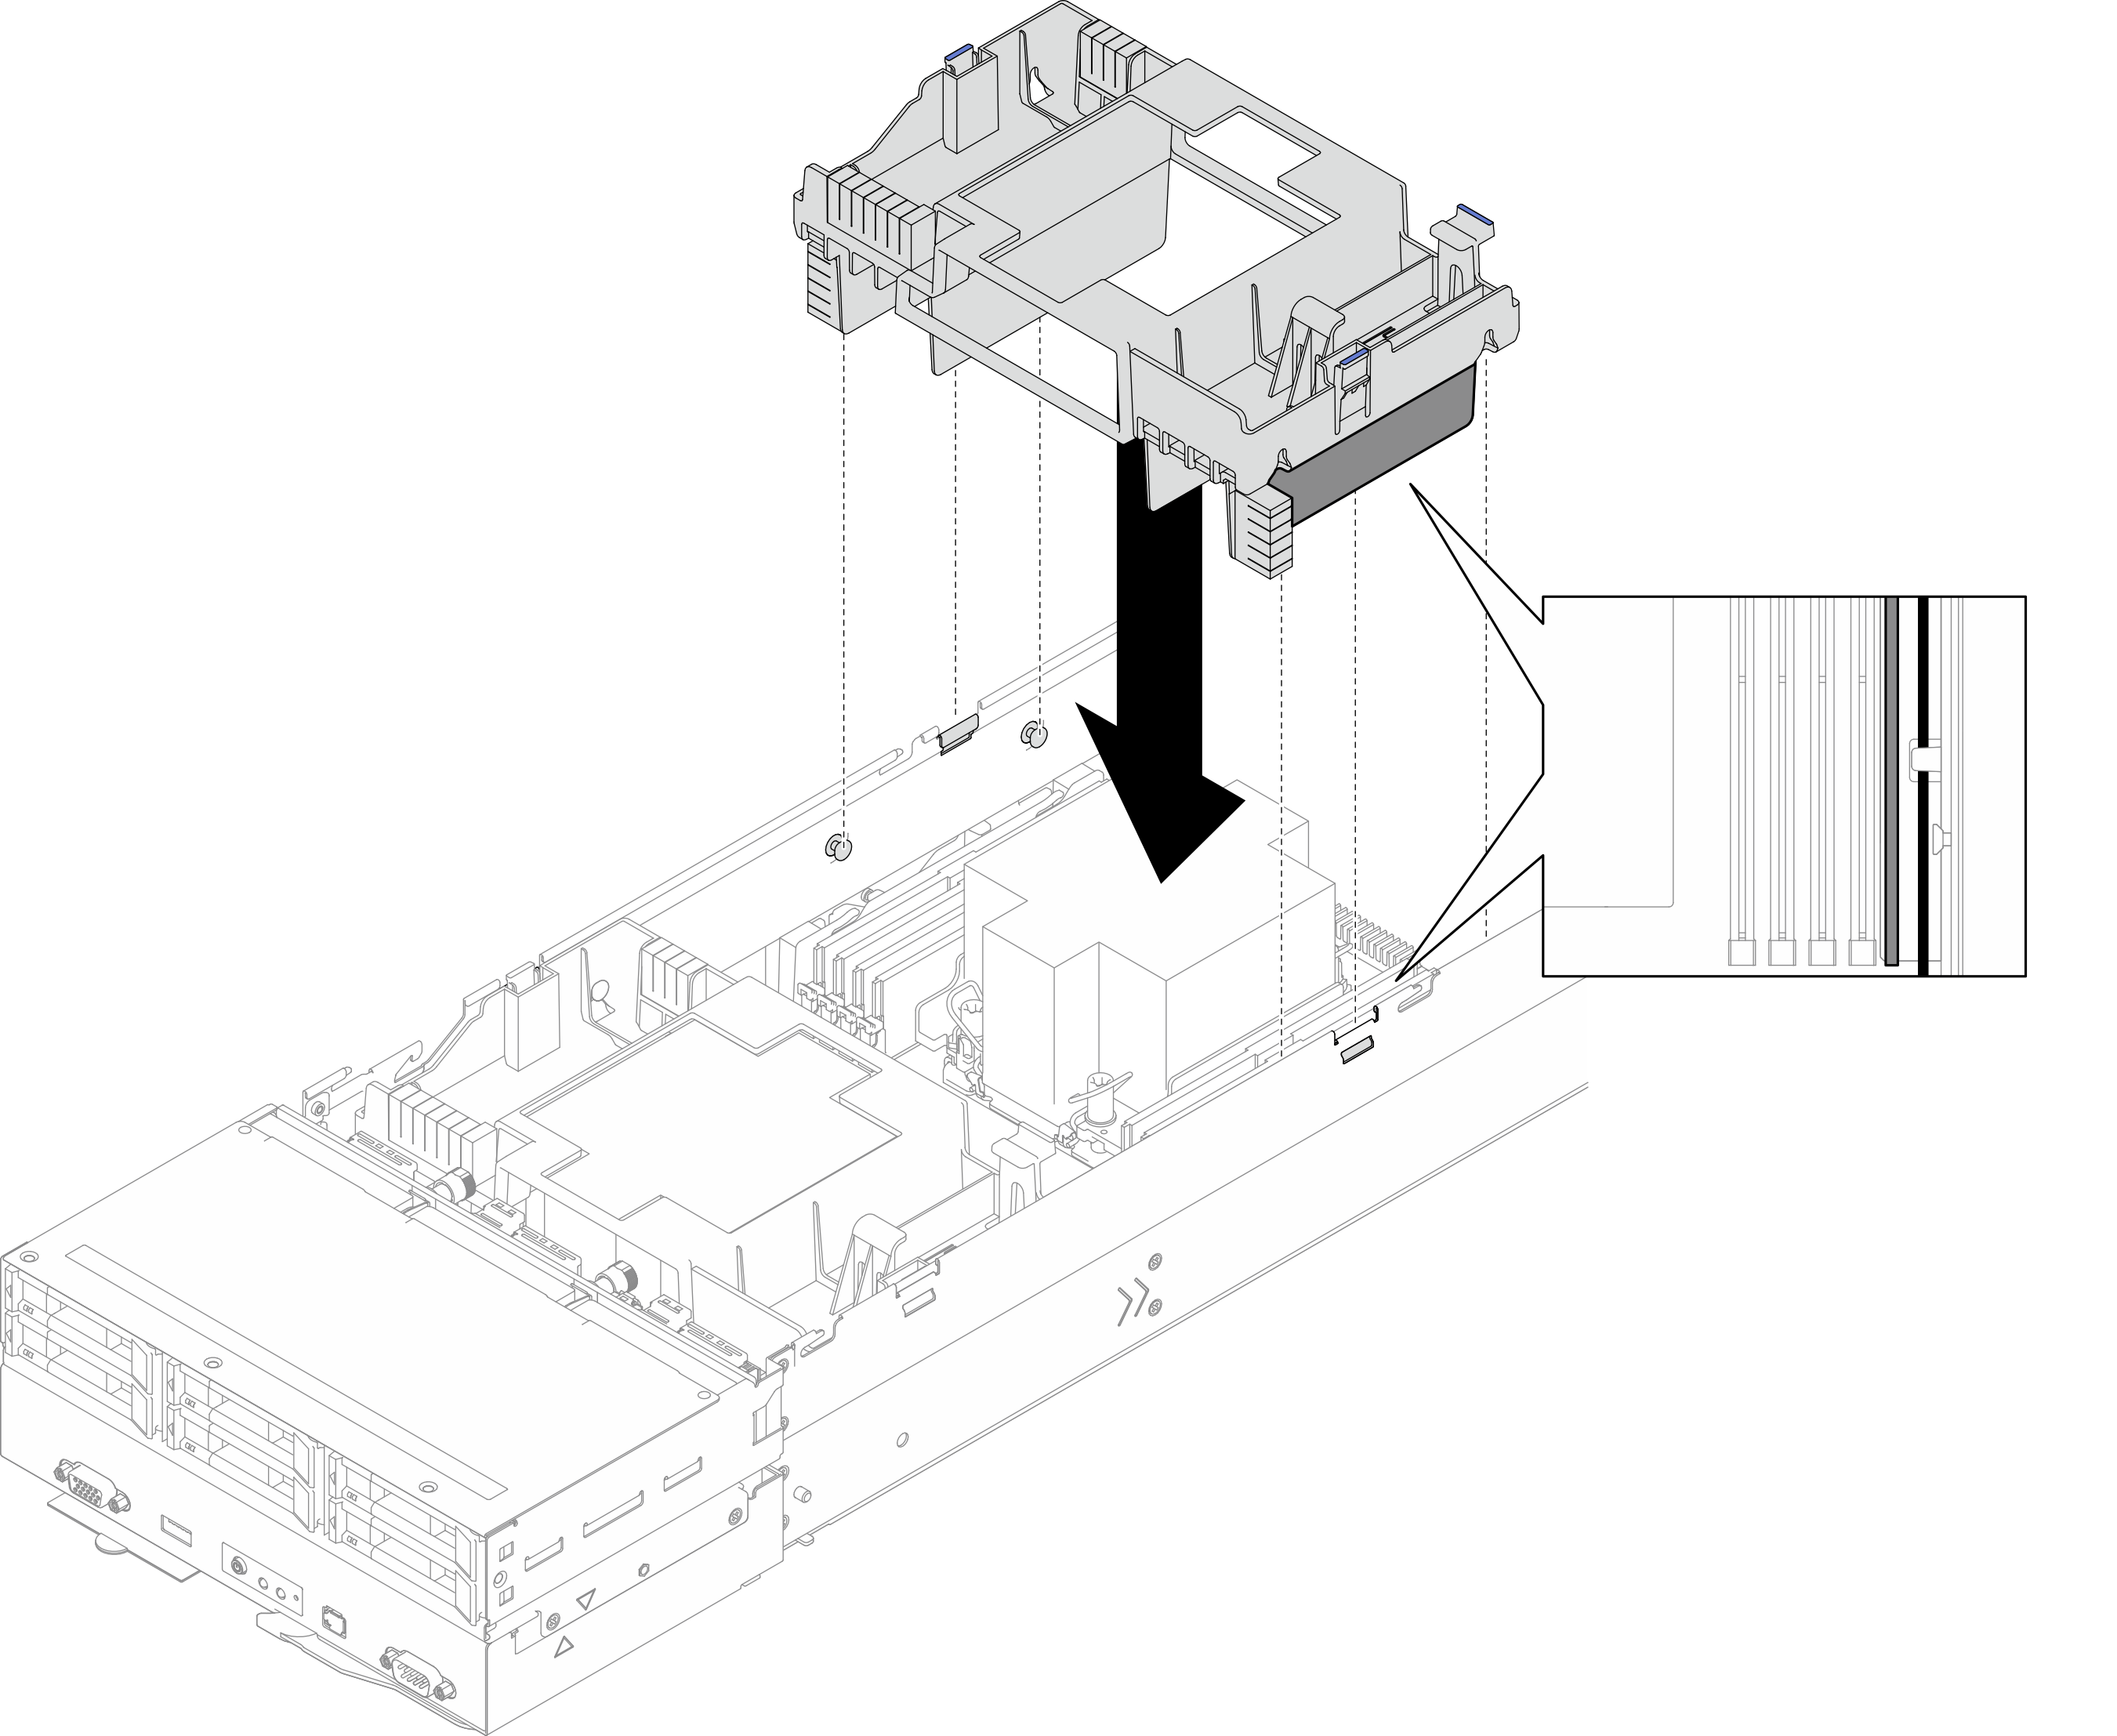
After you finish
- If necessary, reinstall the flash power module and reconnect the flash power module cable (see Install a flash power module).
- Make sure that all the required cables are routed and connected correctly; then, reinstall the top cover (see Install the top cover).
- Reinstall the node into the chassis (see Install a node to the chassis).
- Make sure that the required power supply units are installed and power cords are connected; then, power on the node (see Install a hot-swap power supply and Power on the node).
- Proceed to complete the parts replacement (see Complete the parts replacement).
Demo video