การเดินสายโหนดในช่องใส่
ทำตามคำแนะนำในส่วนนี้เพื่อเรียนรู้วิธีเดินสายสำหรับสายโหนดในช่องใส่
หมายเหตุ
การเชื่อมต่อระหว่างขั้วต่อ: 1↔1, 2↔2, 3↔3, ... n↔n
เมื่อเดินสาย ตรวจสอบให้แน่ใจว่าเดินสายทั้งหมดอย่างเหมาะสมผ่านช่องร้อยสายและคลิปยึดสาย
เมื่อติดตั้งโหนด ThinkEdge SE100 ในช่องใส่ 1U2N หรือช่องใส่ 1U3N ตรวจสอบให้แน่ใจว่ามีการเดินสายจากขั้วต่อ I/O ด้านหลังและสายจากชุดขยายอย่างถูกต้อง ทำตามขั้นตอนต่อไปนี้เพื่อทำการเดินสายโหนดในช่องใส่
ขั้นตอน
- ถอดส่วนประกอบต่อไปนี้ที่ติดตั้งบนช่องใส่ และเก็บไว้ในที่ปลอดภัยและมีการป้องกันไฟฟ้าสถิต
ถอดครอสบาร์ออกจากช่องใส่
 คลายสกรูยึดสองตัวที่ยึดครอสบาร์ออก
 จับครอสบาร์เอาไว้ แล้วนำออกมาจากช่องใส่
รูปที่ 1. การถอดครอสบาร์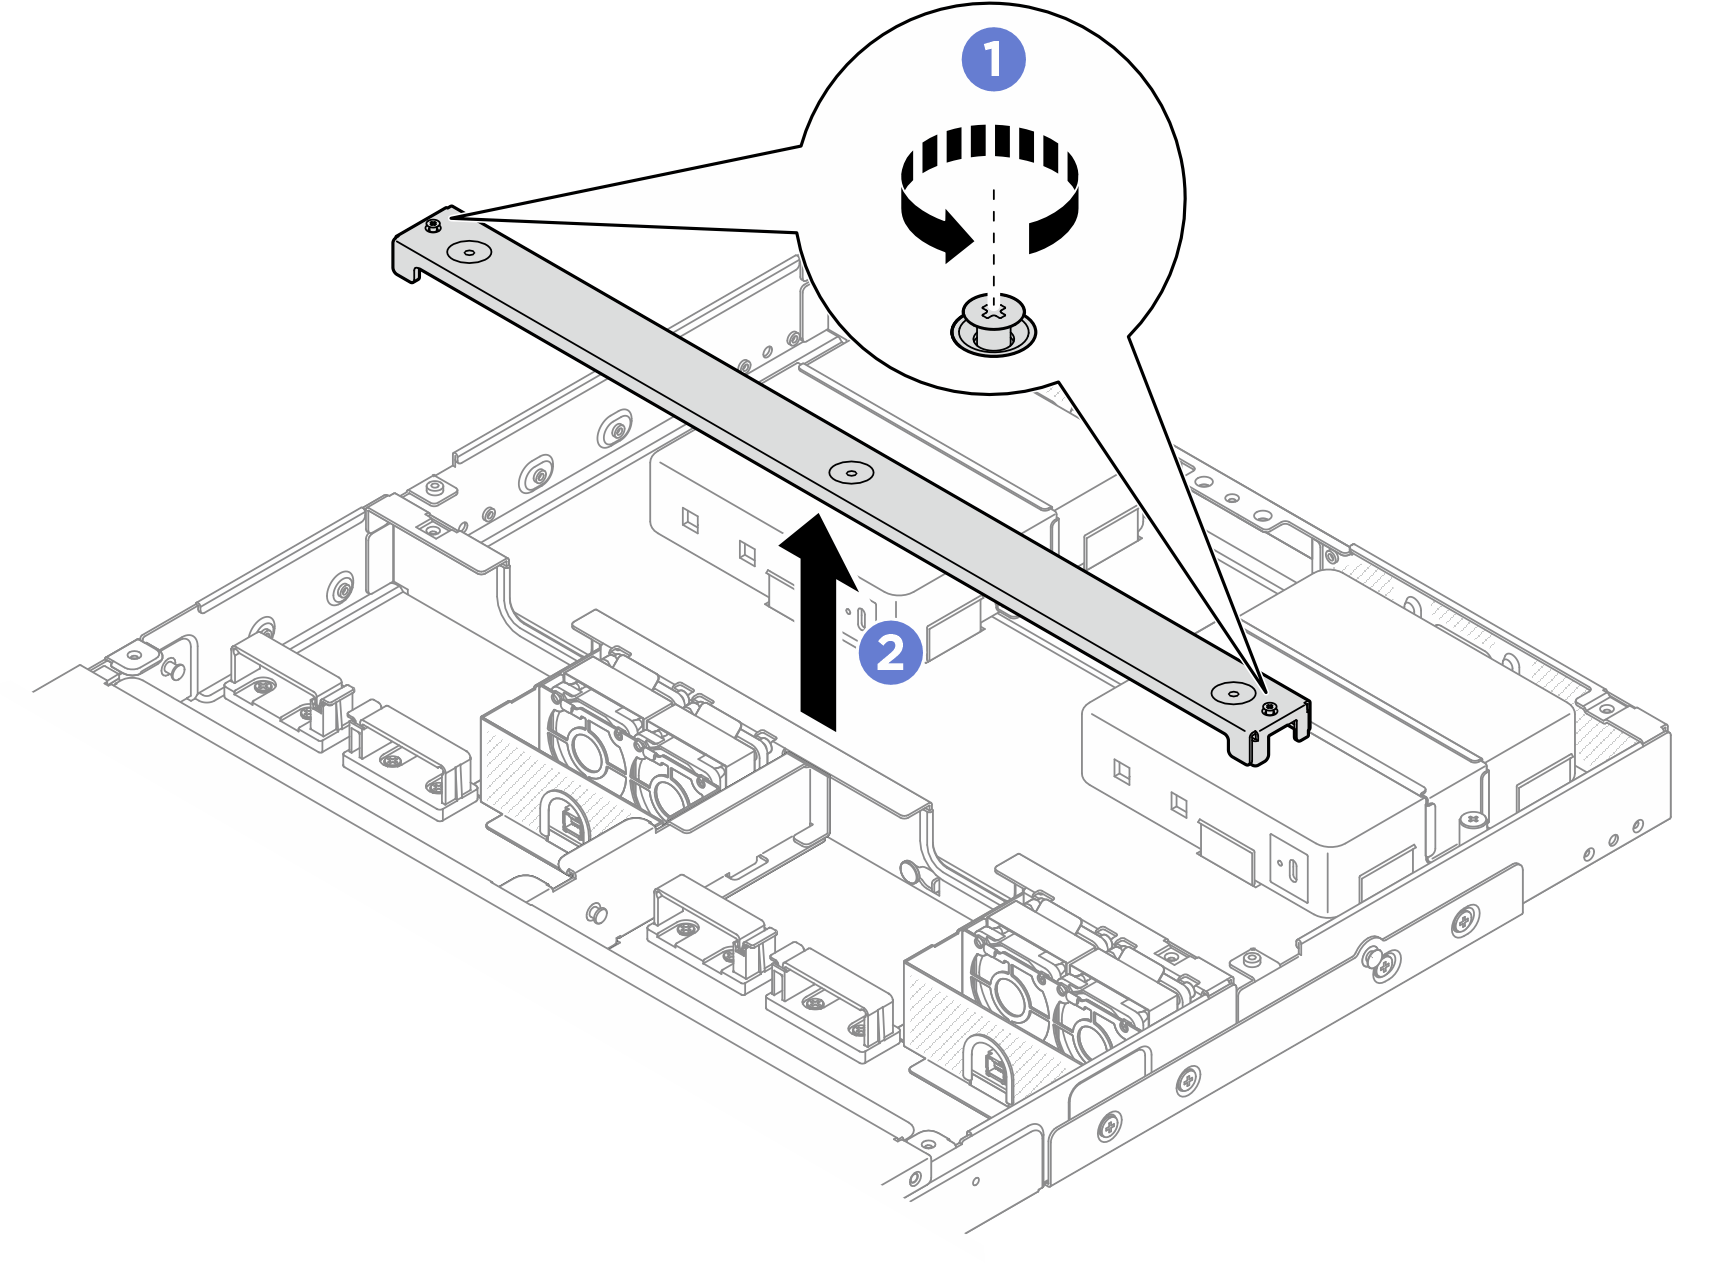
- คลายสกรูสองตัวที่ยึดโครงยึดด้านหลัง จากนั้น ให้ถอดโครงยึดด้านหลังออกจากช่องใส่รูปที่ 2. การถอดโครงยึดด้านหลังช่องใส่

- ตรวจสอบให้แน่ใจว่าสายที่เกี่ยวข้องผ่านคลิปยึดสายและตัวกั้นตามภาพด้านล่าง:รูปที่ 3. การเดินสายโหนดในช่องใส่ 1U2N

โหนด สาย โหนดในช่องใส่ 1 1 สายเคเบิลจากชุดขยาย 2 สายจากขั้วต่อ I/O ด้านหลังของโหนด โหนดในช่องใส่ 2 3 สายเคเบิลจากชุดขยาย 4 สายจากขั้วต่อ I/O ด้านหลังของโหนด รูปที่ 4. การเดินสายโหนดในช่องใส่ 1U3N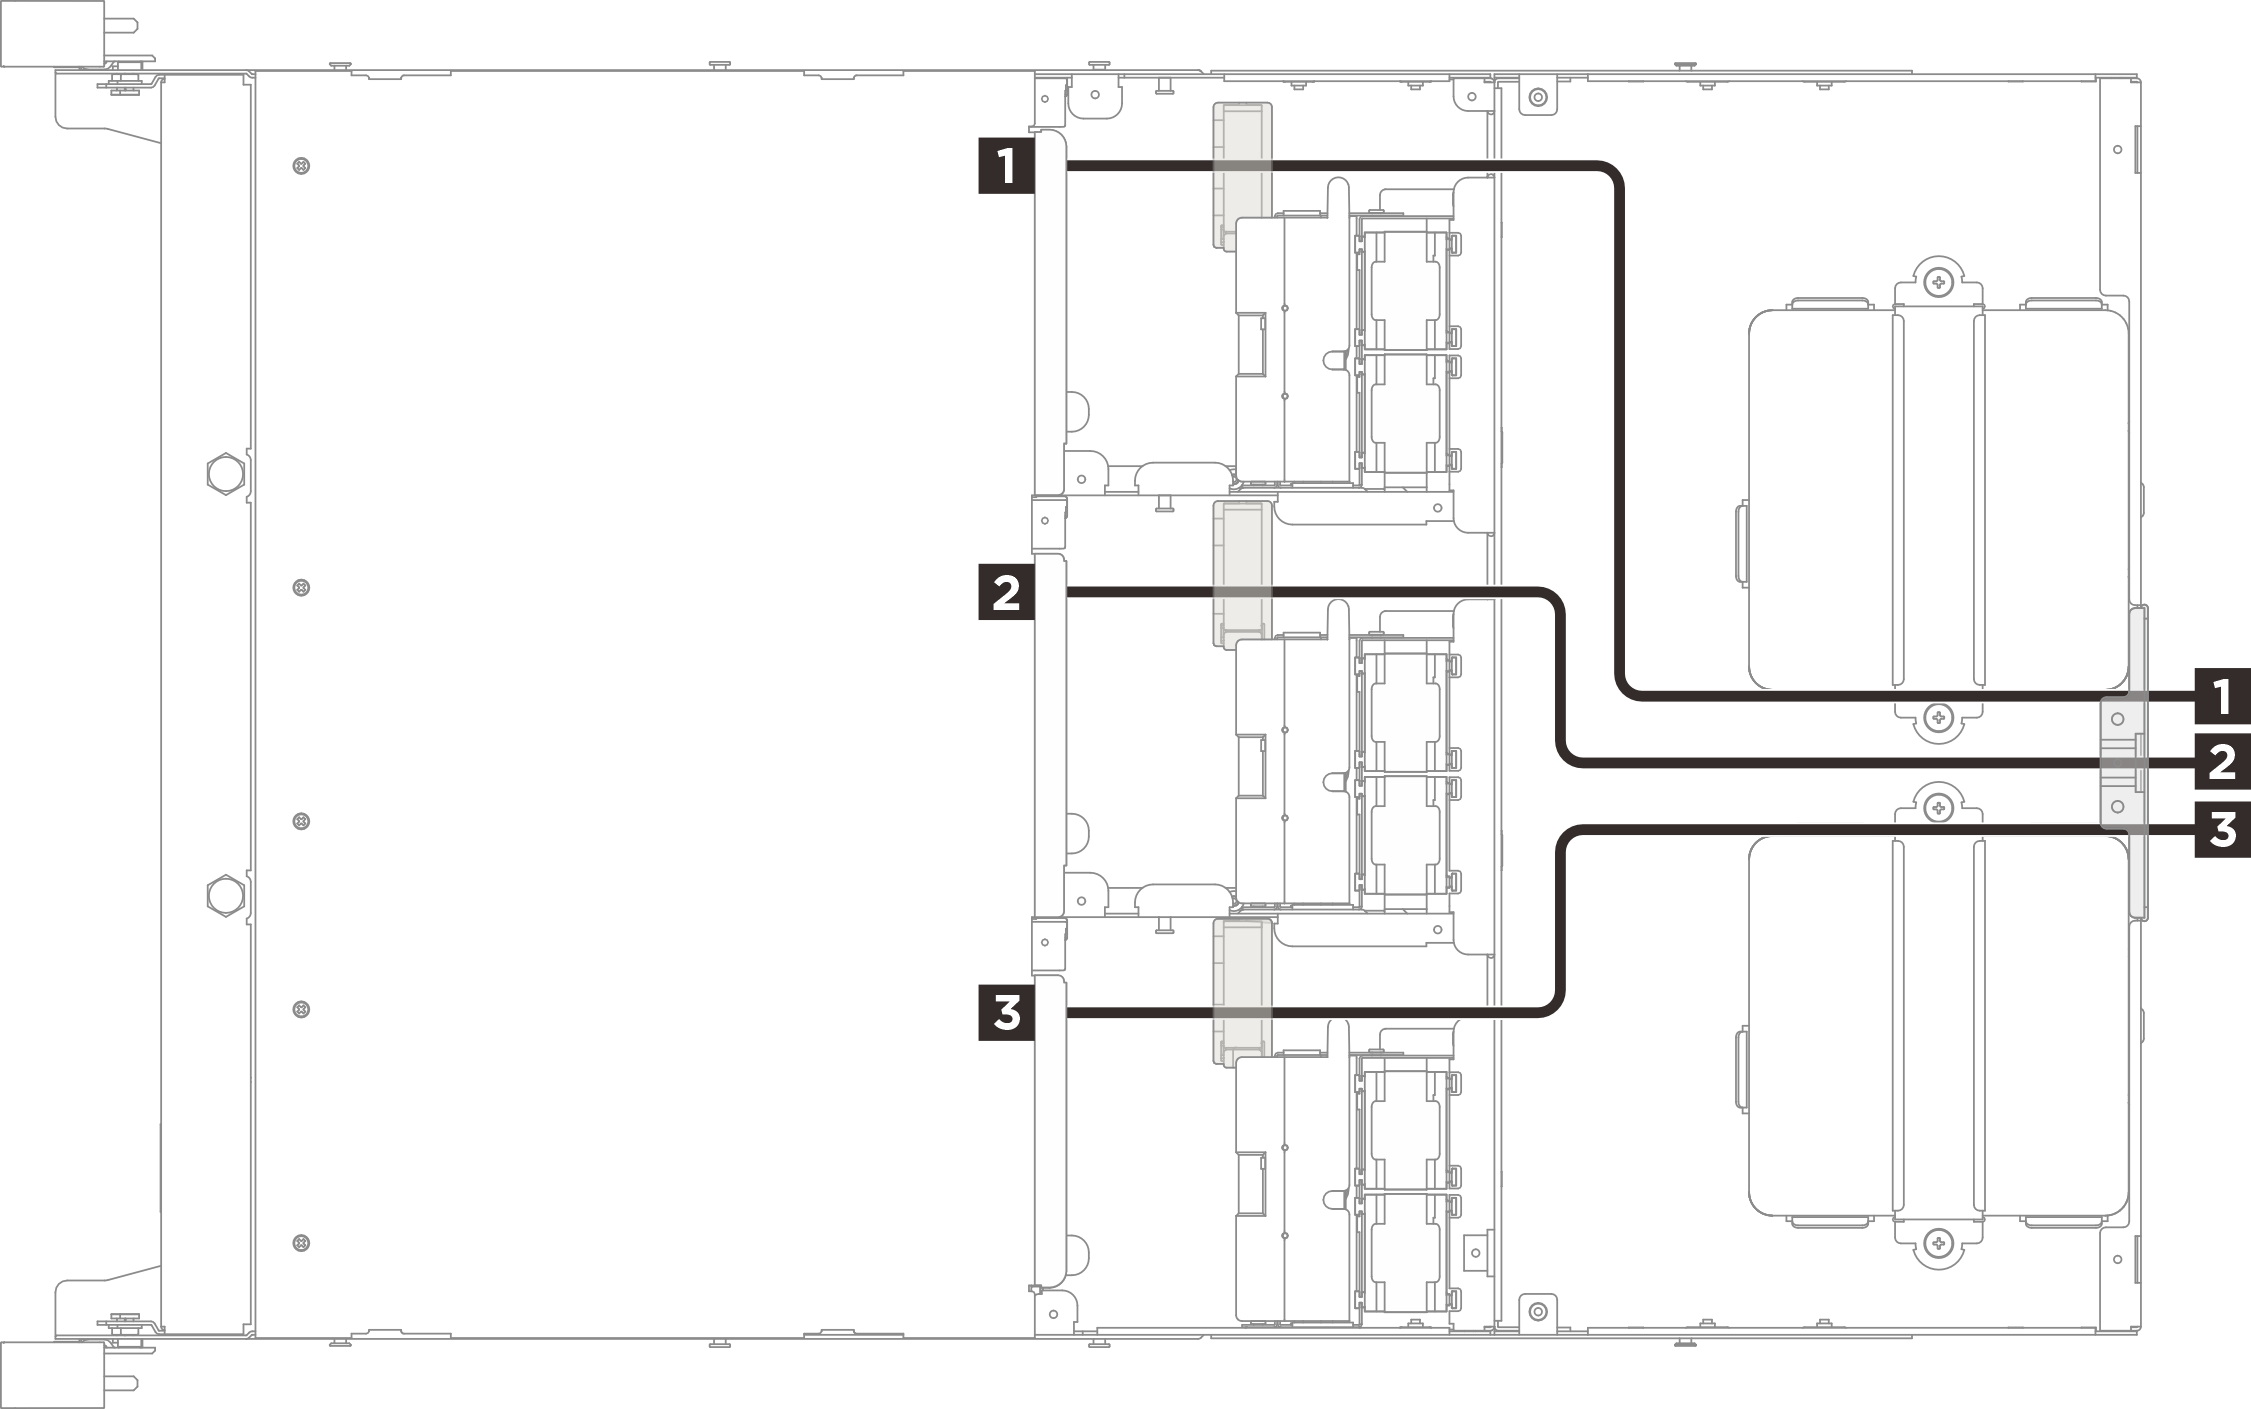
โหนด สายจากขั้วต่อ I/O ด้านหลังของโหนด โหนดในช่องใส่ 1 1 โหนดในช่องใส่ 2 2 โหนดในช่องใส่ 3 3
ส่งคำติชม