Rear view
The rear of the server provides access to several components, including the power supplies and Ethernet port.
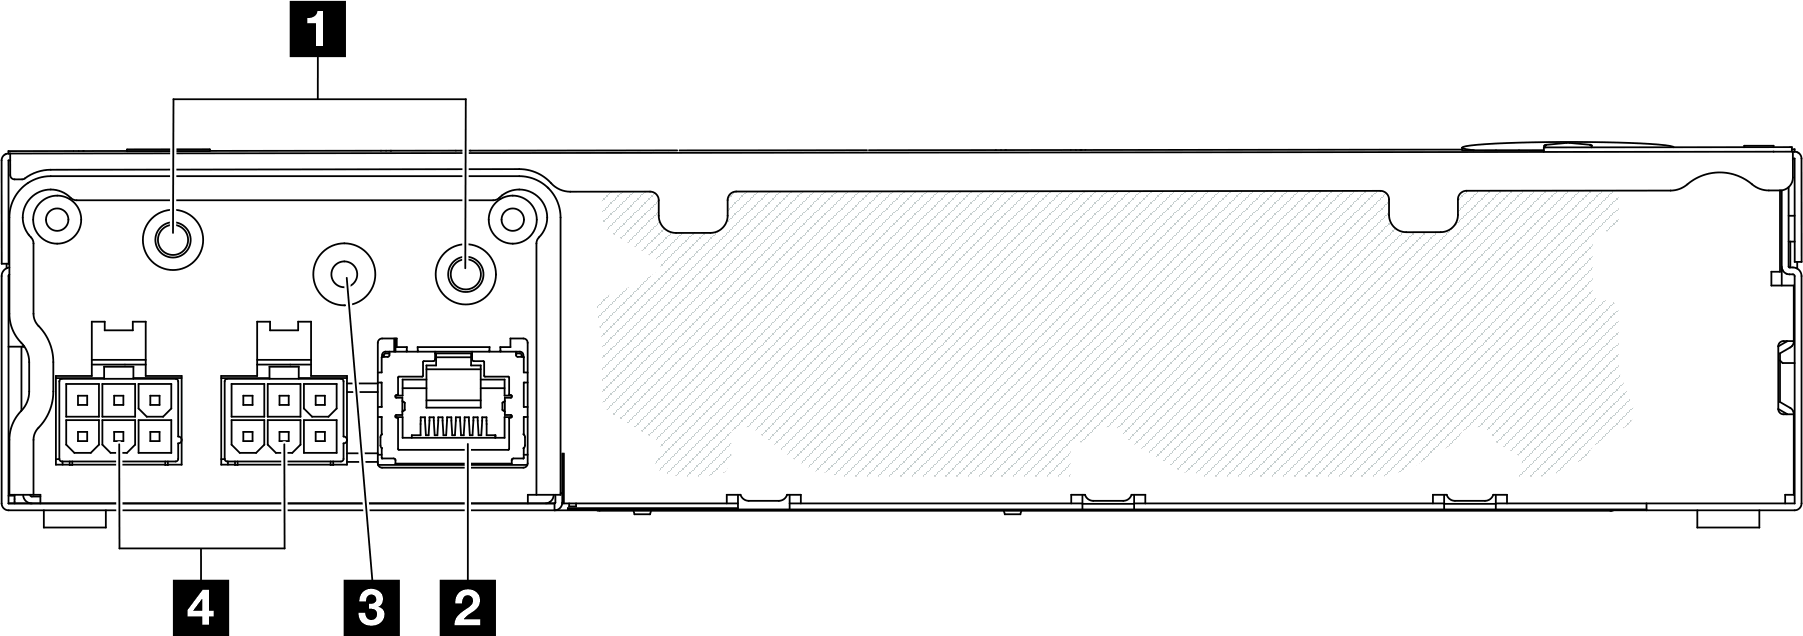
Rear view of ThinkEdge SE350 V2, DC power input
Figure 1. Rear view of ThinkEdge SE350 V2, DC power input


| 1 Threaded studs for grounding | 3 PMB status LED |
| 2 RJ-45 RS-232 serial console connector for OS/BIOS or XCC | 4 DC power inputs (two 6-pins 12V-48V power connectors) |
Figure 2. Rear view of ThinkEdge SE350 V2, AC power input


| 1 RJ-45 RS-232 serial console connector for OS/BIOS or XCC | 3 PMB status LED |
| 2 AC power input (3-pins 120V-240 VAC) |
Power connectors
Connect DC or AC power source directly or external power adapters to these connectors. Make sure the power cords are connected properly.
To connect 300W external power adapter, see Install a power adapter.
To connect DC power source with ThinkEdge SE350 V2 DC Terminal Block Cable, see DC terminal block cable for more information.
RJ-45 RS-232 serial console connector for OS/BIOS or XCC
Connect a external RJ-45 serial COMM console cable to this connector.
PMB status LED
For more information about this LED, see PMB status LED.
Threaded studs for grounding
Connect the grounding wires to these lugs.
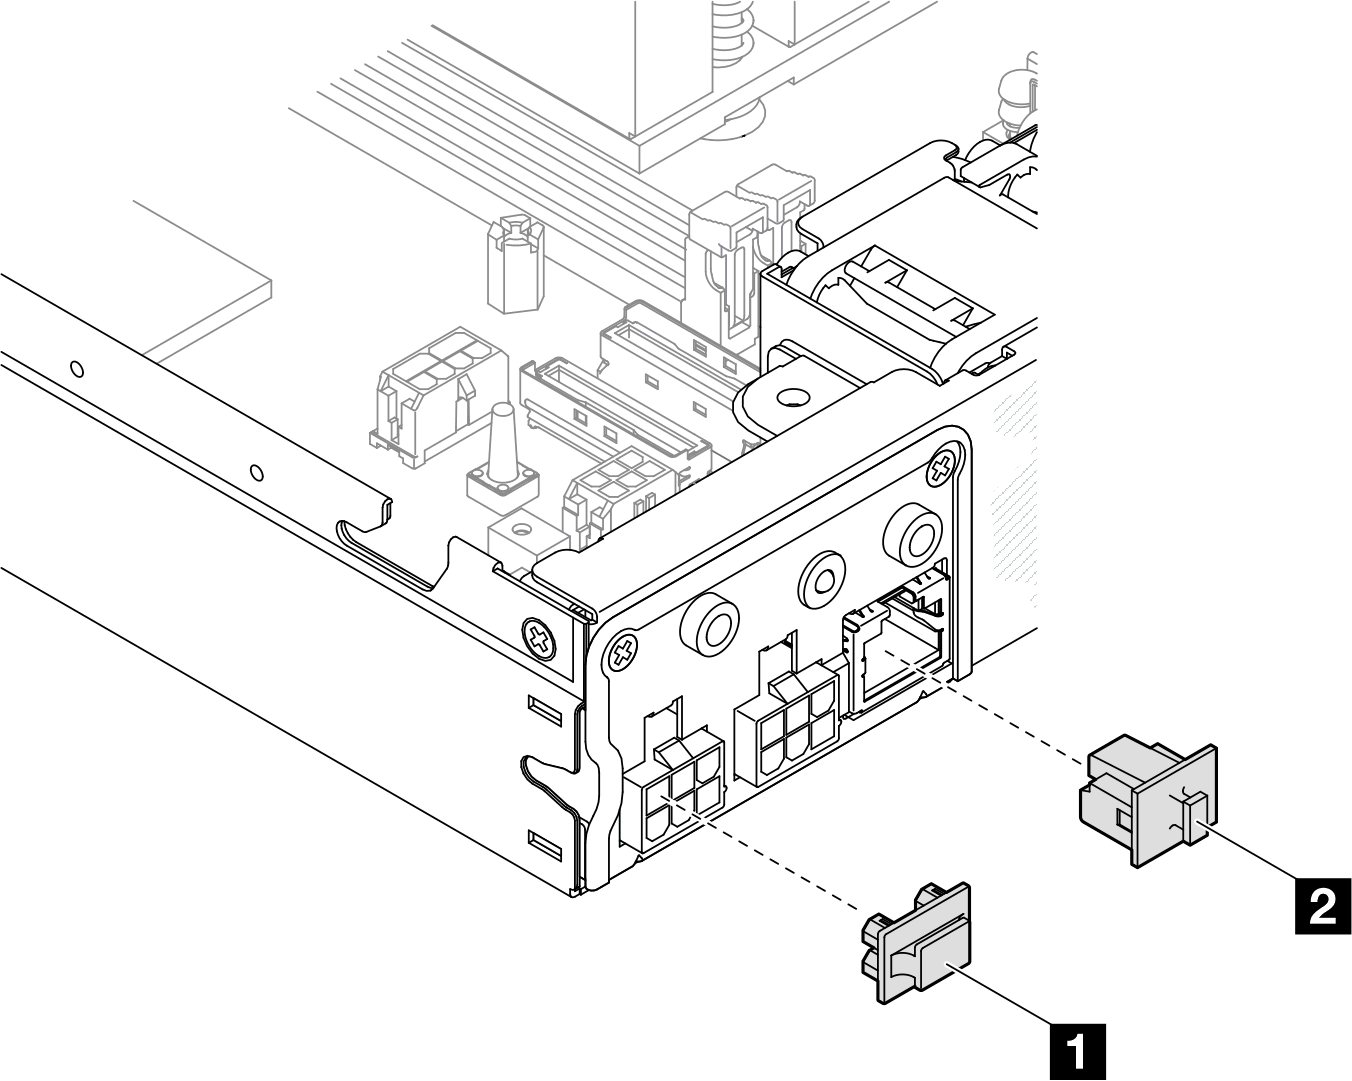
Install I/O fillers
Install the I/O fillers when the connectors are not in use. The connectors could be damaged without proper protection of the fillers.
Figure 3. Rear I/O fillers


| 1 Power-connector filler (x2) | 2 RJ-45 filler (x1) |
Give documentation feedback