
Install the bezel

Use this information to install the bezel.

Before you install the bezel, complete the following steps:
  1. Read Installation Guidelines to ensure that you work safely.

    Note
    Several different types of bezel can be installed in the compute node, all are removed and installed in a similar manner. The bezel shown in the illustrations might differ slightly from the bezel installed on your compute node.

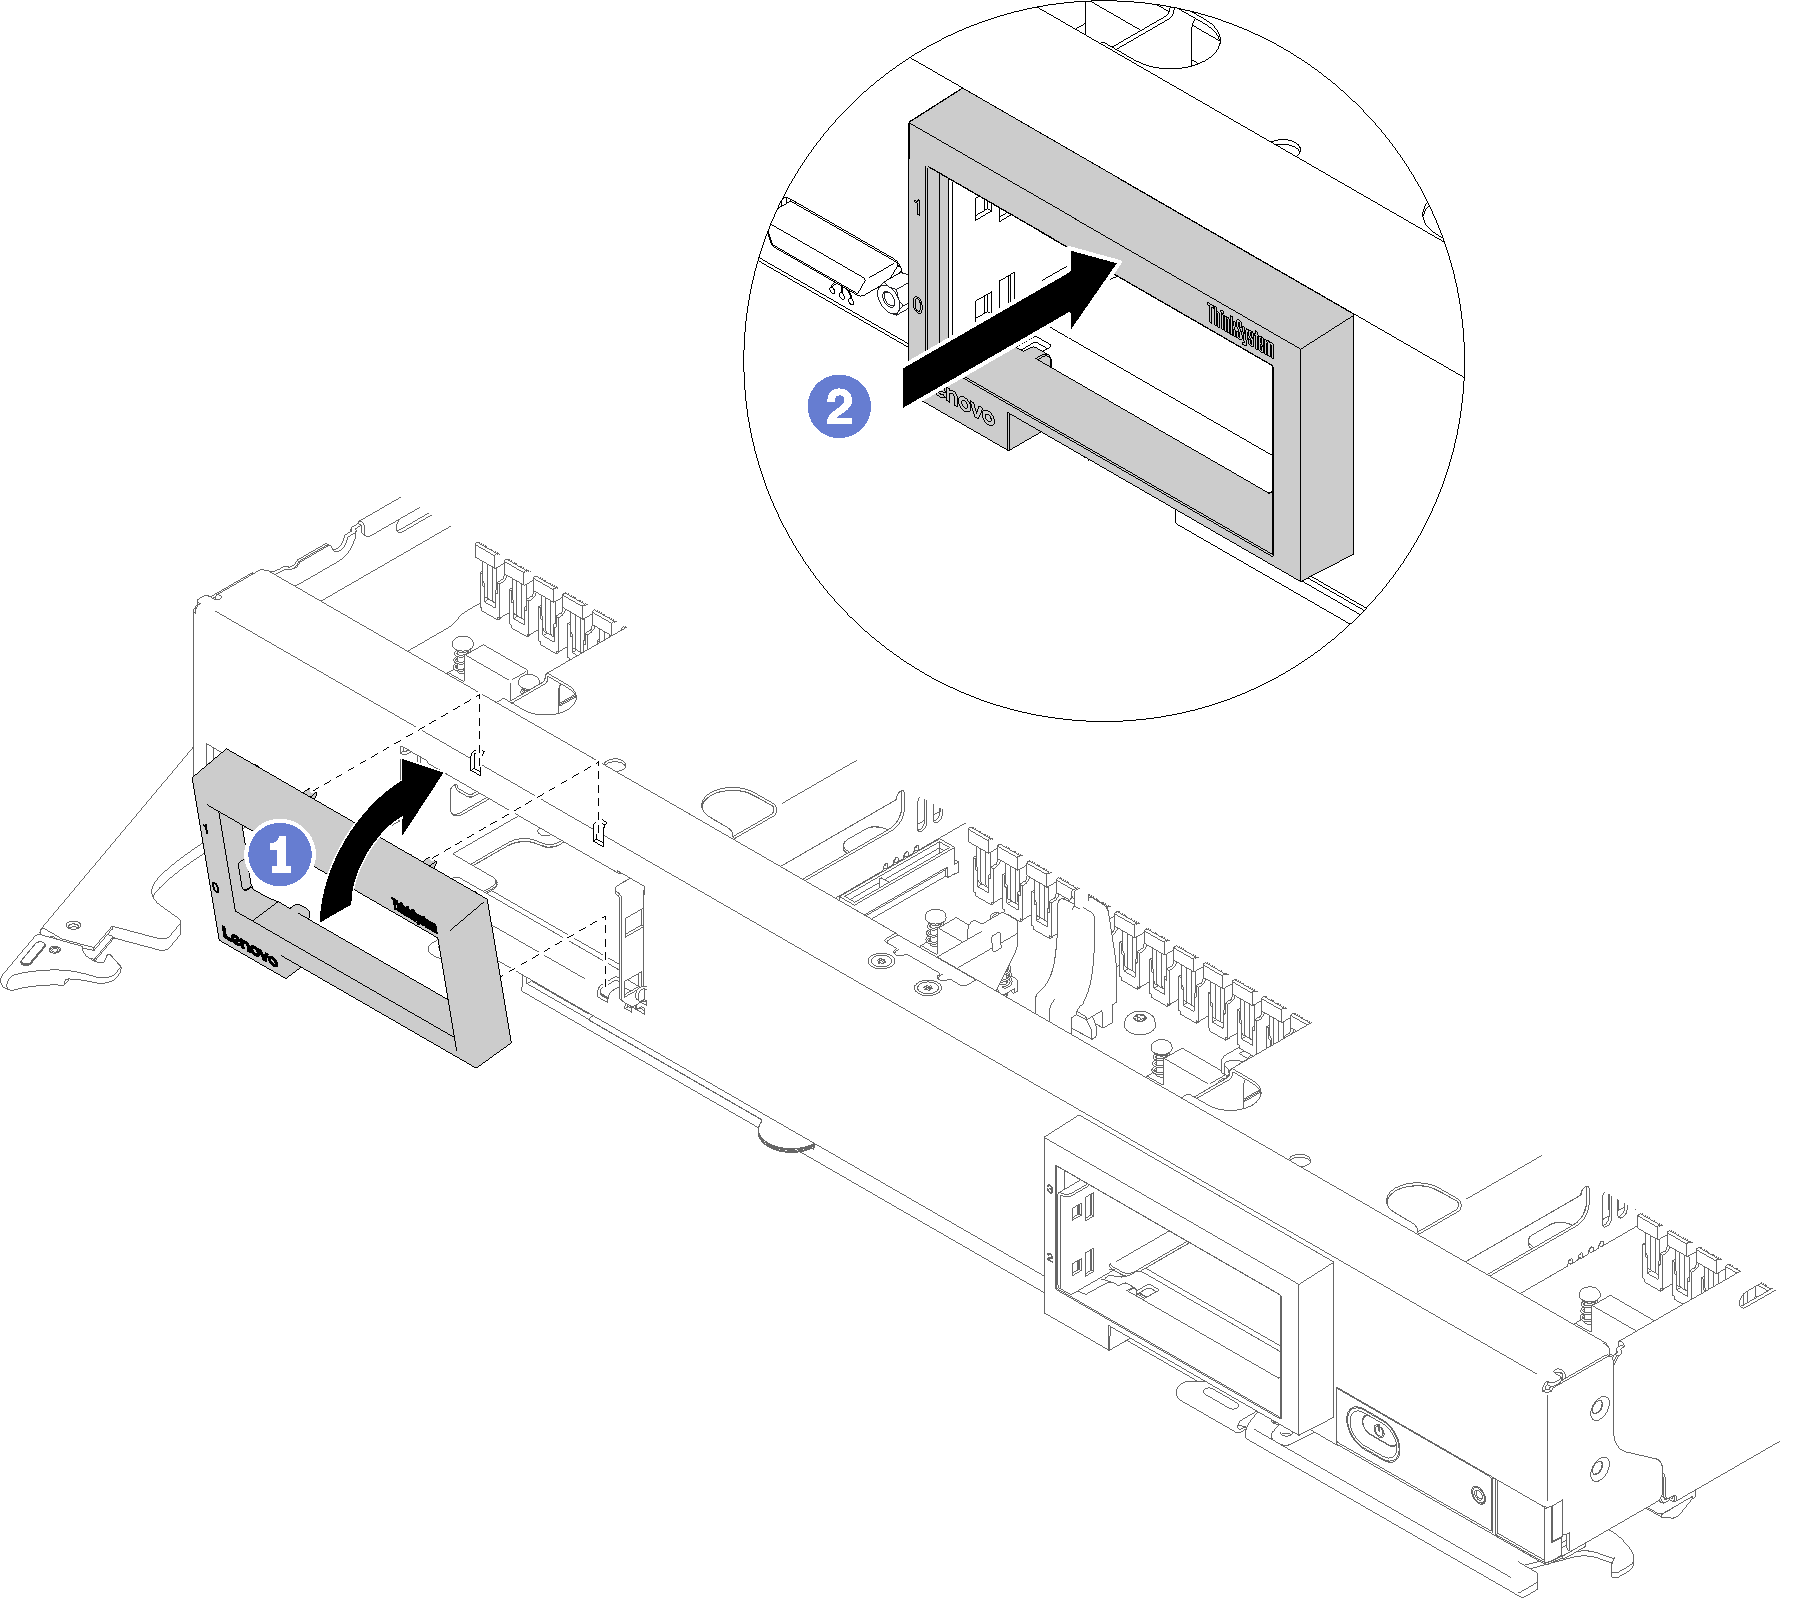
To install the bezel, complete the following steps:

Figure 1. Bezel installation
Graphic illustrating the installation of a bezel

  1. Release the handle and rotate to the fully open position.
  2. Position the bezel on the front of the compute node.
  3. Hook the bottom edge of the bezel into a pair of openings on the front of the compute node; then, rotate the top of the bezel toward the compute node.
  4. Press the bezel securely against the compute node to snap it in place.
    Note
    Make sure that the bezel is pressed flat against the chassis. Lifting up slightly on the top edge of the bezel as you press it might make it easier to seat the clips.
  5. Rotate the handle back to a closed position.
  6. Install any removed drives or drive bay fillers (see Install a 2.5-inch hot-swap drive for instructions).