Install the front handle
Use this information to install the front handle.
Before you install the front handle:
Read Installation Guidelines to ensure that you work safely.
- If the compute node is installed in a chassis, remove it (see Remove a compute node for instructions).
- Carefully lay the compute node on a flat, static-protective surface with the cover side down, orienting the compute node with the bezel pointing toward you.
To install the front handle, complete the following steps:
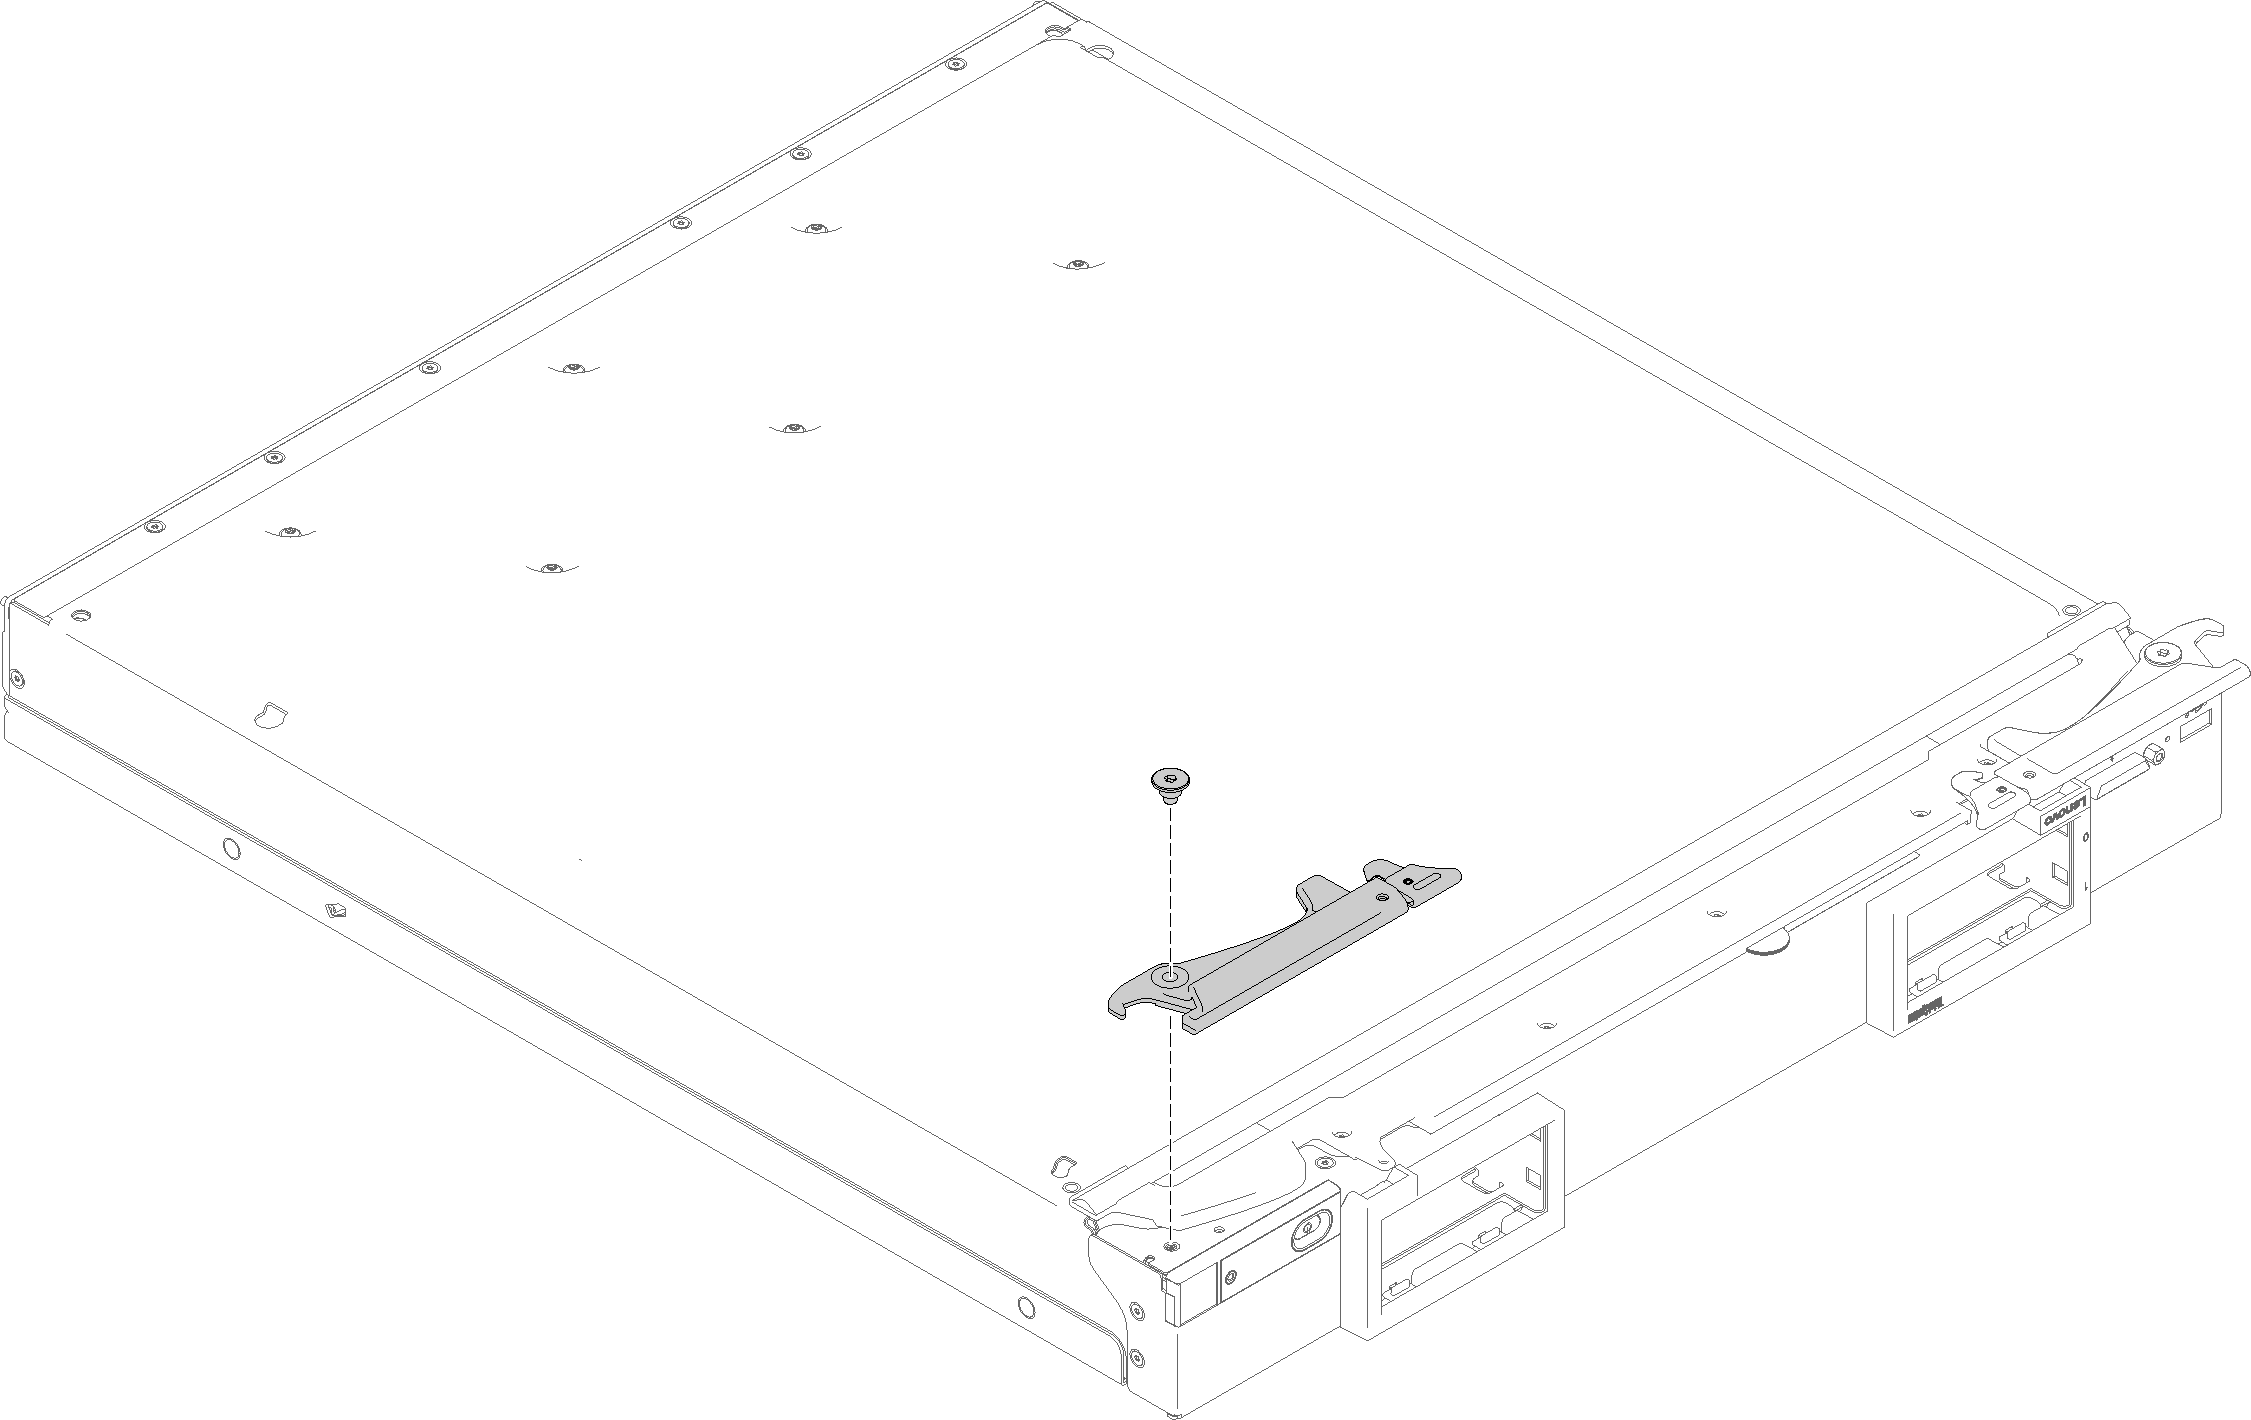
Figure 1. Front handle installation


- Carefully place the compute node in the up-side-down orientation.
- Align the hole in the handle with the hole on the compute node where the handle is installed.
- Using a T15 Torx screwdriver, install the screw that secures the handle. Use the same screw which was removed when you removed the handle.
- Install the other handle in a similar manner.
- Carefully return the compute node to the bottom-side-down orientation.
After you install the front handle, install the compute node into the chassis (see Install a compute node for instructions).
Demo video
Give documentation feedback