Remove the front handle
Use this information to remove the front handle.
Before you remove the front handle, complete the following steps:
Read Installation Guidelines to ensure that you work safely.
- If the compute node is installed in a chassis, remove it (see Remove a compute node for instructions).
- Carefully lay the compute node on a flat, static-protective surface with the cover side down, orienting the compute node with the bezel pointing toward you.
To remove the front handle, complete the following steps:
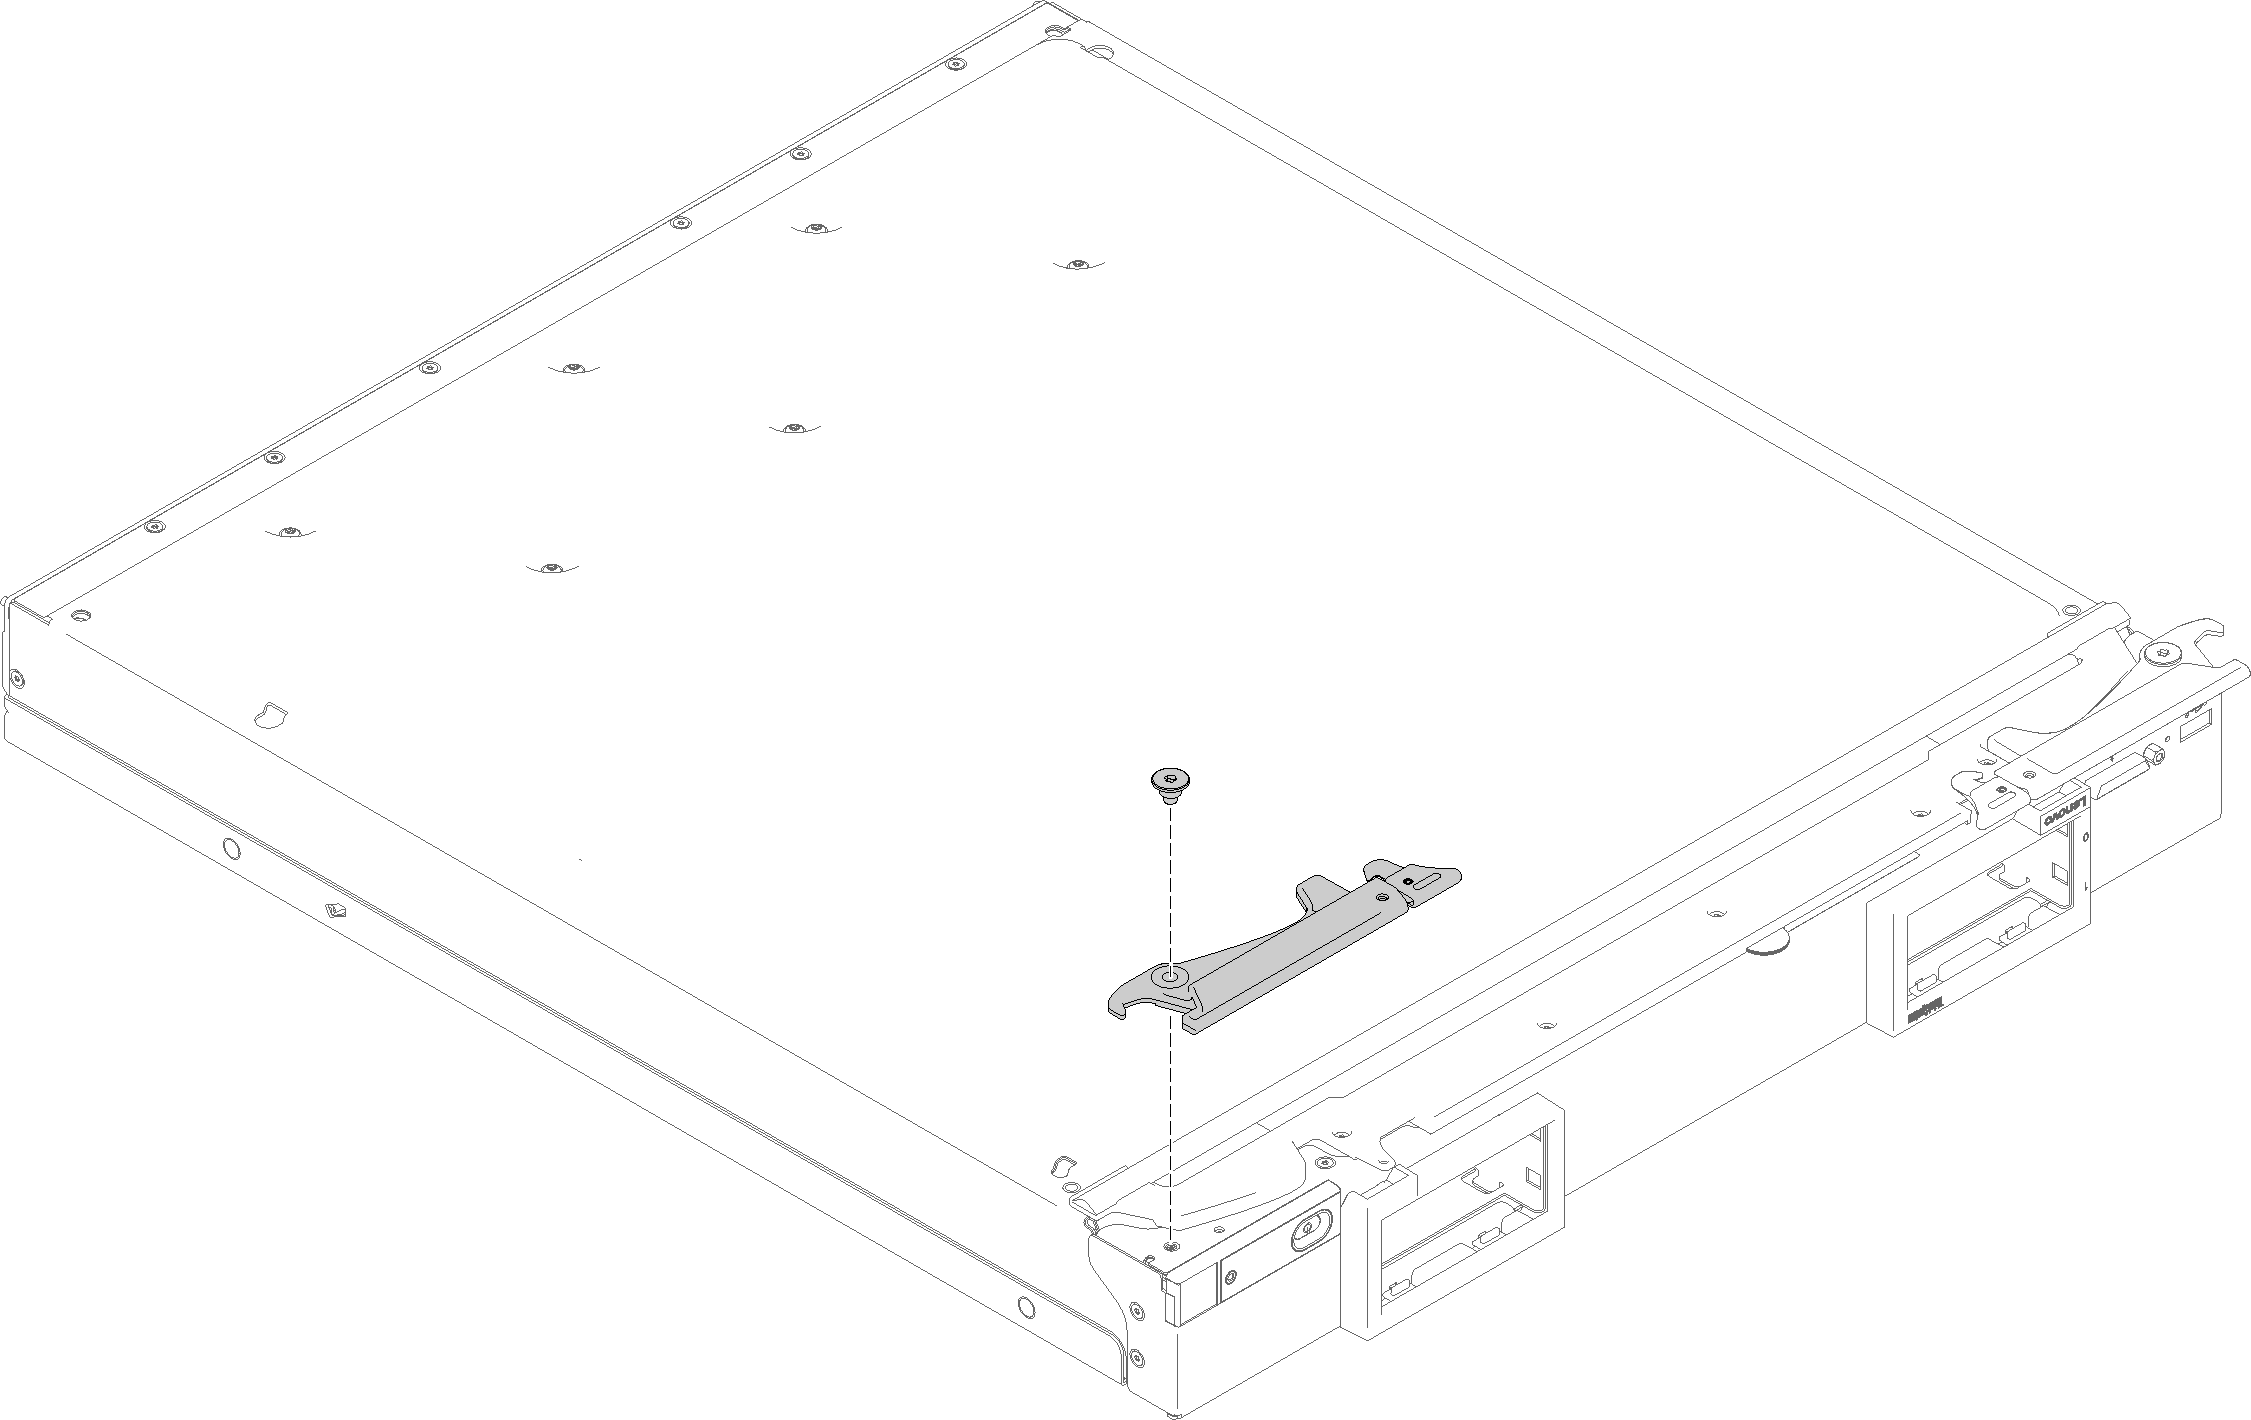
Figure 1. Front handle removal


- Carefully place the compute node in the up-side-down orientation.
- Locate the screw that attaches the handle to the compute node.
- Using a T15 Torx screwdriver, remove the screw from the front handle and save the screw in a safe place. Use the same screw when you install a front handle.
- Remove the other handle (if necessary) in a similar manner.
- Carefully return the compute node to the bottom-side-down orientation.
If you are instructed to return the front handle, follow all packaging instructions, and use any packaging materials for shipping that are supplied to you.
Demo video
Give documentation feedback