2.5-inch hot-swap drives model
The front view of 2.5-inch hot-swap drives model.
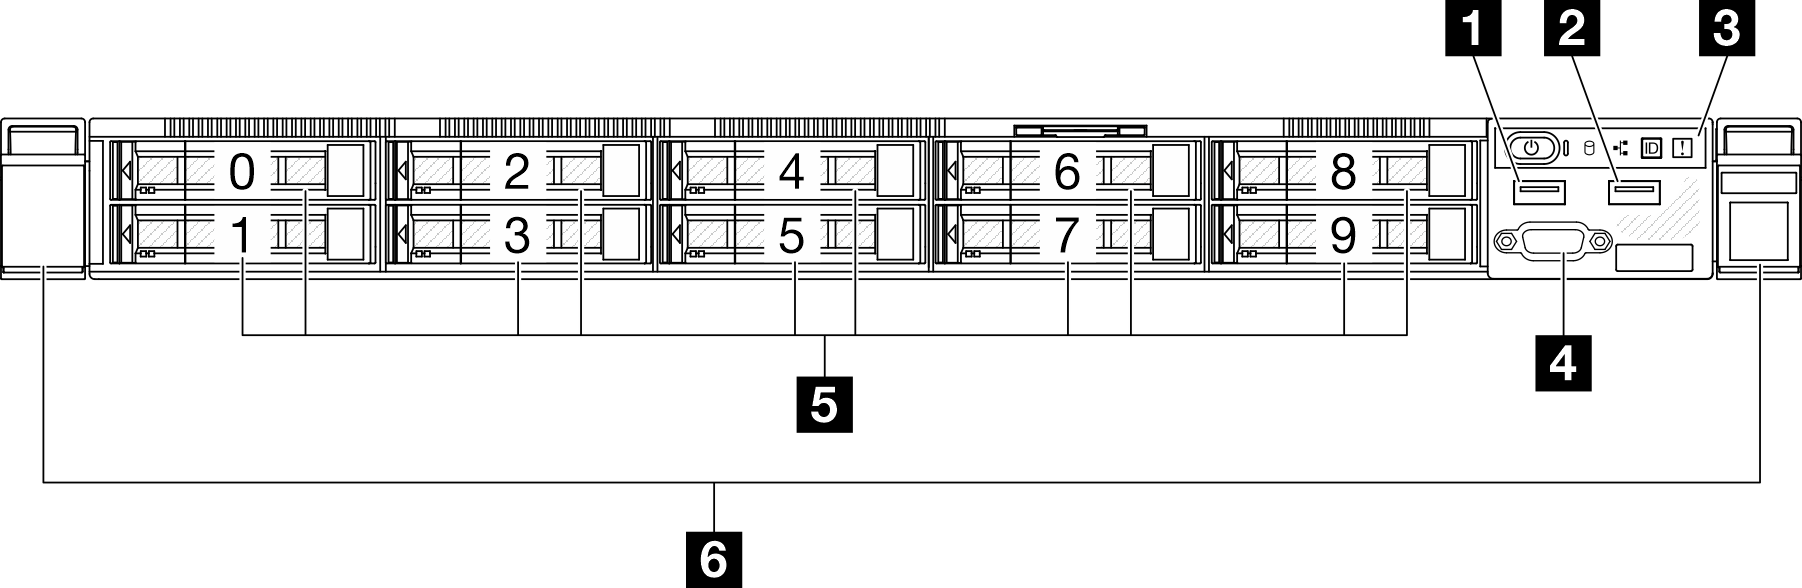
| 1 USB 2.0 connector with Lenovo XClarity Controller management | 4 VGA connector (optional) |
| 2 USB 3.2 Gen 1 (5 Gbps) connector | 5 2.5-inch hot-swap drive bays |
| 3 Front I/O module | 6 Rack release latches |
1 USB 2.0 connector with Lenovo XClarity Controller management
Connection to Lenovo XClarity Controller is primarily intended for users with a mobile device running the Lenovo XClarity Controller mobile application. When a mobile device is connected to this USB port, an Ethernet over USB connection is established between the mobile application running on the device and the Lenovo XClarity Controller.
Select Network in BMC Configuration to view or modify settings.
Four types of settings are available:
Host only mode
In this mode, the USB port is always solely connected to the server.
BMC only mode
In this mode, the USB port is always solely connected to Lenovo XClarity Controller.
Shared mode: owned by BMC
In this mode, connection to the USB port is shared by the server and Lenovo XClarity Controller, while the port is switched to Lenovo XClarity Controller.
Shared mode: owned by host
In this mode, connection to the USB port is shared by the server and Lenovo XClarity Controller, while the port is switched to the server.
2 USB 3.2 Gen 1 (5 Gbps) connector
The USB 3.2 Gen 1 (5 Gbps) connector can be used to attach a USB-compatible device, such as a USB keyboard, USB mouse, or USB storage device.
3 Front I/O module
For more information about the front I/O module, see Front I/O module.
4 VGA connector (optional)
Connect a monitor to this connector.
5 2.5-inch hot-swap drive bays
Install 2.5-inch hot-swap drives to these bays. See Install a hot-swap drive.
6 Rack release latches
Press on the latch on both sides to disengage the server from the rack and slide it out.