安裝 PCIe 配接卡和擴充卡組件
使用此資訊來安裝 PCIe 配接卡和擴充卡組件。


註
ThinkSystem Broadcom 57454 10/25GbE SFP28 4 埠 PCIe 乙太網路配接卡_重新整理 (V2) 需要全高托架,而且必須安裝在全高插槽中。
- 只有在符合下列需求時才支援 ThinkSystem Xilinx Alveo U50 資料中心加速器配接卡:
僅適用於安裝了四個 3.5 吋 SAS/SATA 硬碟、四個 3.5 吋 SAS/SATA/NVMe 硬碟、八個 2.5 吋 SAS/SATA 硬碟或十個 2.5 吋 SAS/SATA/NVMe 硬碟的伺服器模組。
若是安裝一個 CPU 的伺服器型號,僅支援一個配接卡並且必須安裝在 PCIe 插槽 1 中。
若是安裝兩個 CPU 的伺服器型號,最多支援兩個配接卡並且必須安裝在 PCIe 插槽 1 和插槽 3 中。
支援的最大處理器 TDP 是 165 瓦特。
作業溫度上限為 30 °C。
沒有風扇故障。
在安裝 PCIe 配接卡和擴充卡組件之前:
將裝有新 PCIe 配接卡的防靜電保護袋接觸到伺服器外部任何未上漆的表面。然後從保護袋中取出新的 PCIe 配接卡,並將其放置在防靜電表面上。
將含有新擴充卡組件的防靜電保護袋接觸到伺服器外部任何未上漆的表面。然後從保護袋中取出新的擴充卡組件,並將其放置在防靜電表面上。
找出適用於 PCIe 配接卡的正確 PCIe 插槽。如需 PCIe 插槽與支援之 PCIe 配接卡的相關資訊,請參閱背面圖。
您的伺服器隨附下列其中一種擴充卡組件配置:
圖 1. 配置 1
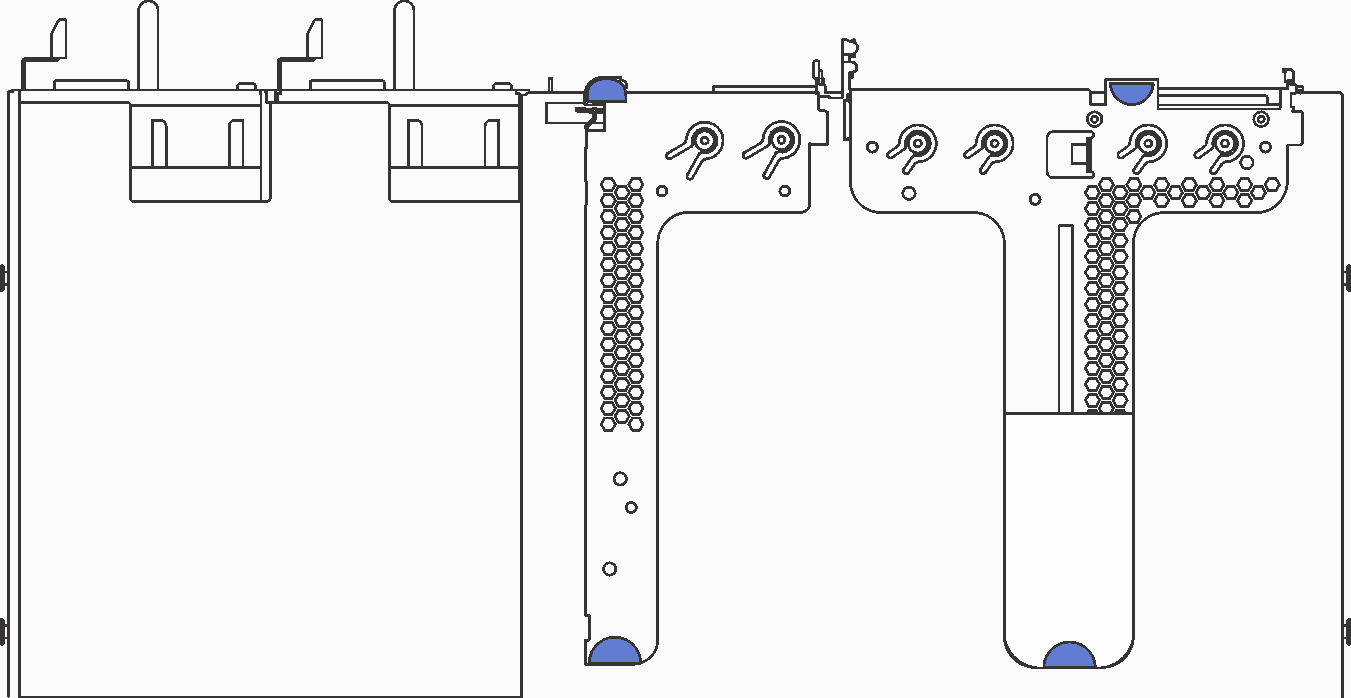
註
擴充卡 2 組件可能無法在部分型號上使用。
圖 2. 配置 2
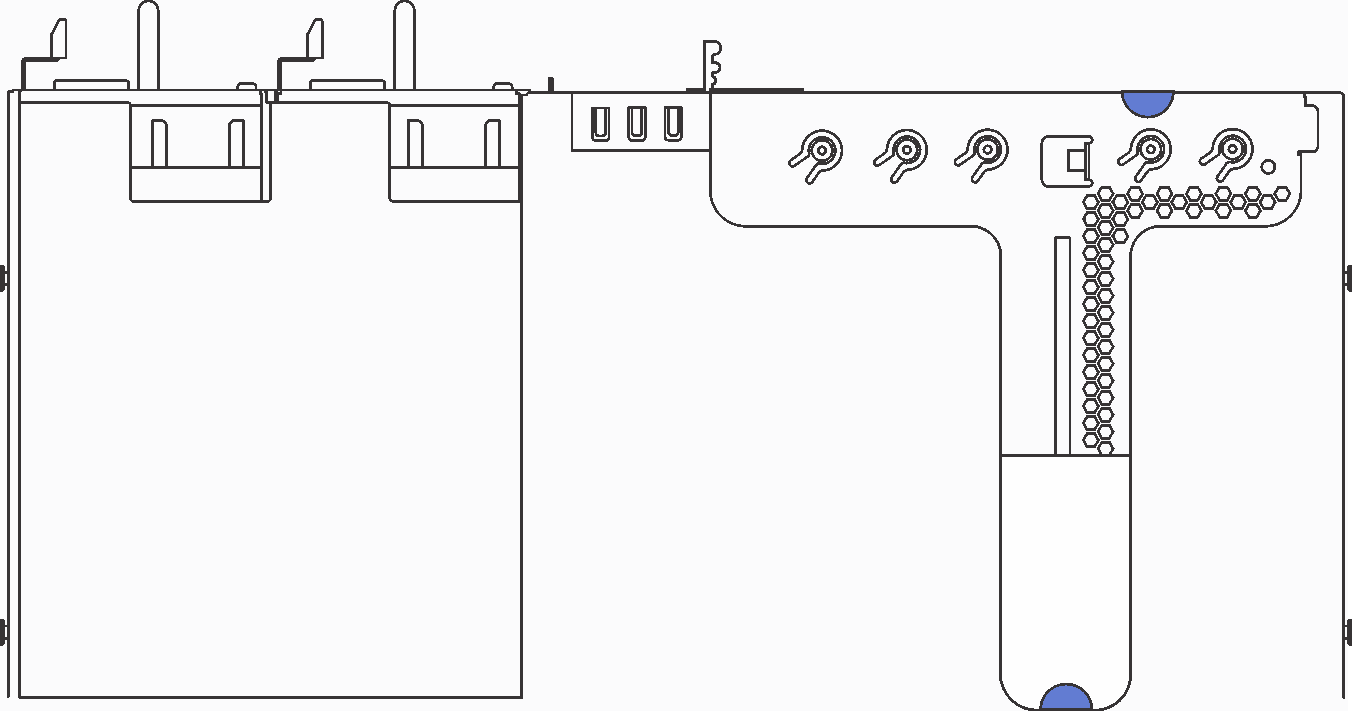
圖 3. 配置 3
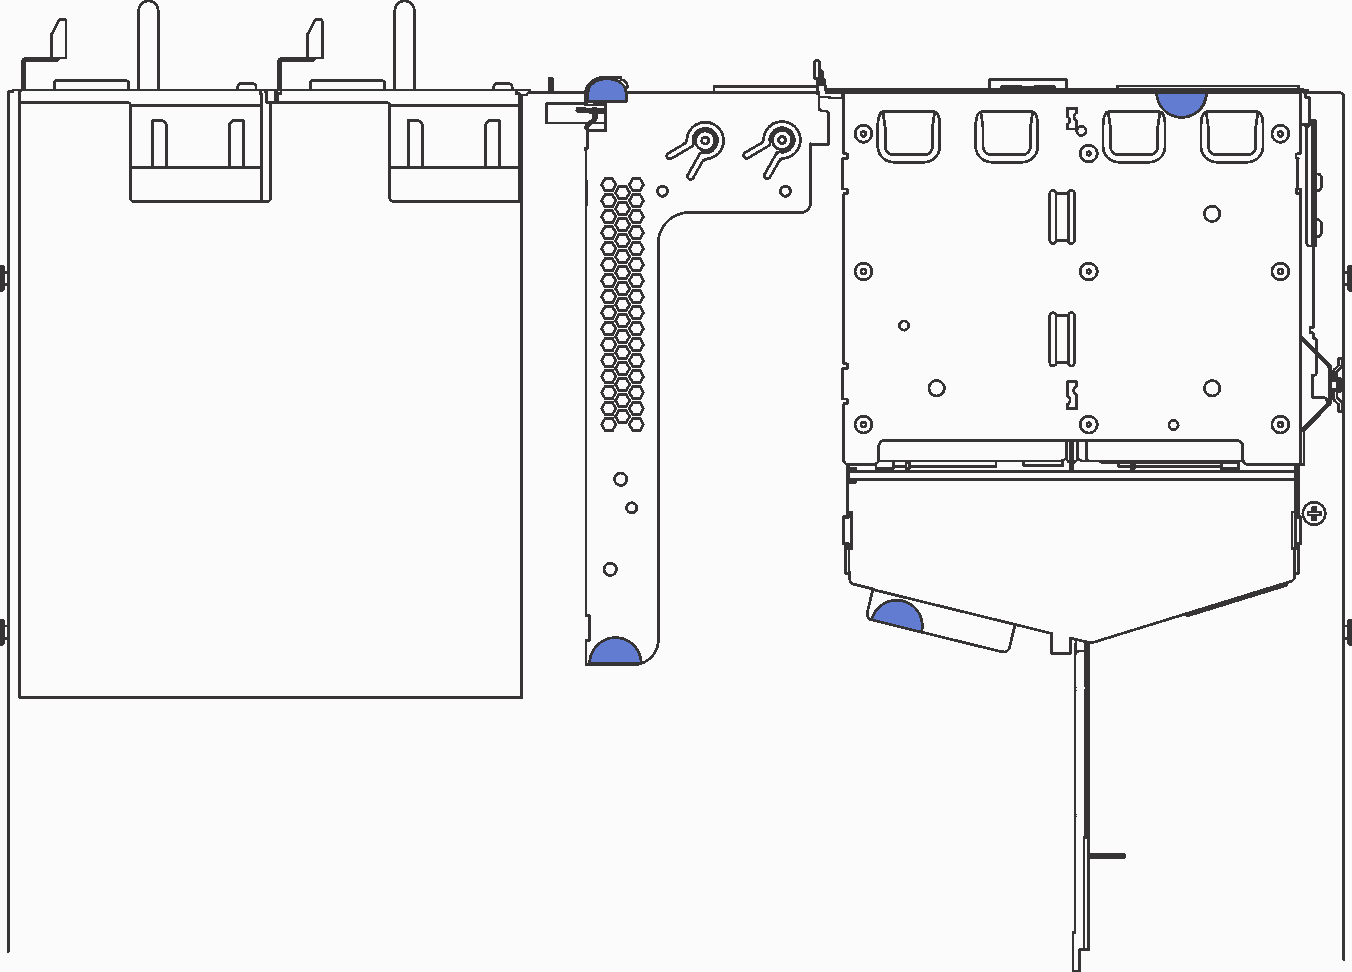
註
擴充卡 2 組件可能無法在部分型號上使用。
若要安裝 PCIe 配接卡和擴充卡組件,請完成下列步驟:
- 將 PCIe 配接卡安裝擴充卡組件中。
表 1. PCIe 配接卡安裝 圖 4. 擴充卡 1 組件 (LP+LP)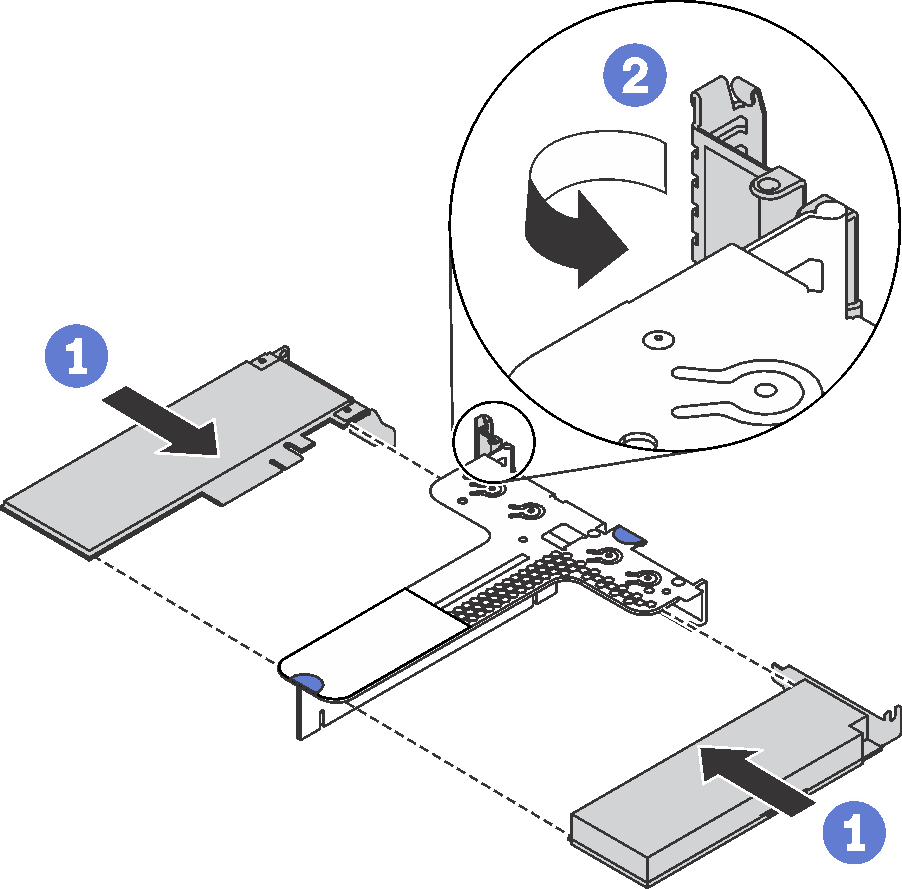 圖 5. 擴充卡 1 組件 (LP+FHHL)
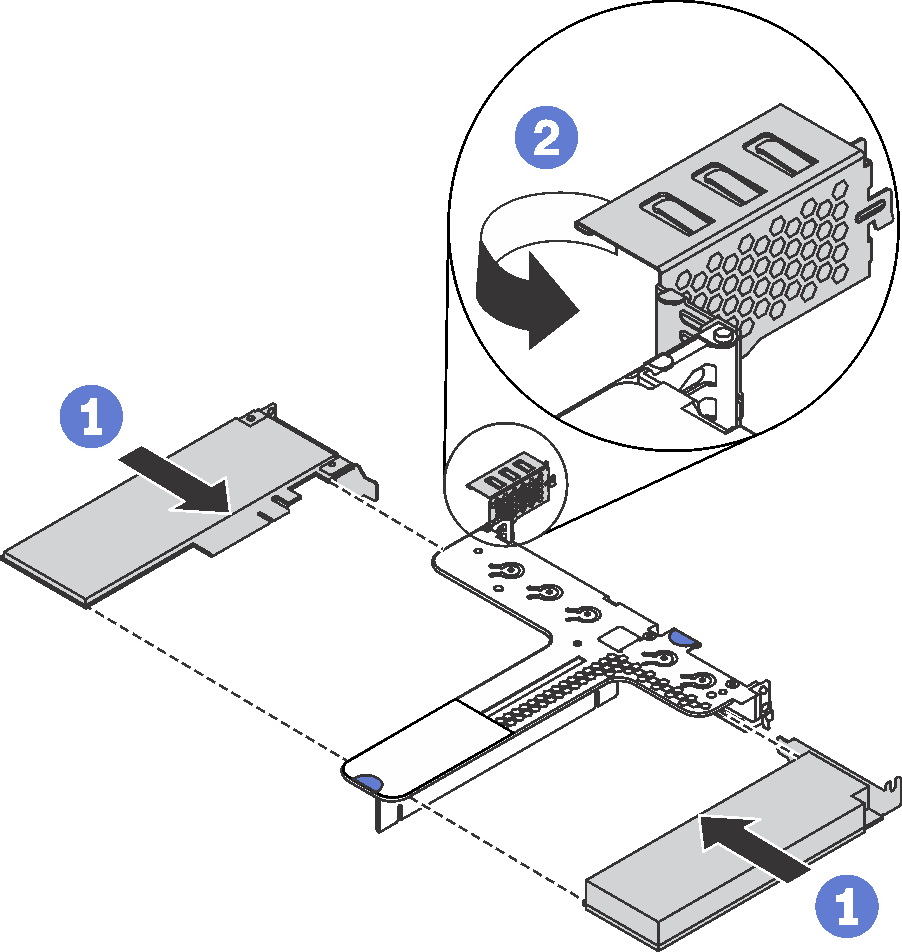 圖 6. 擴充卡 2 組件 (LP)
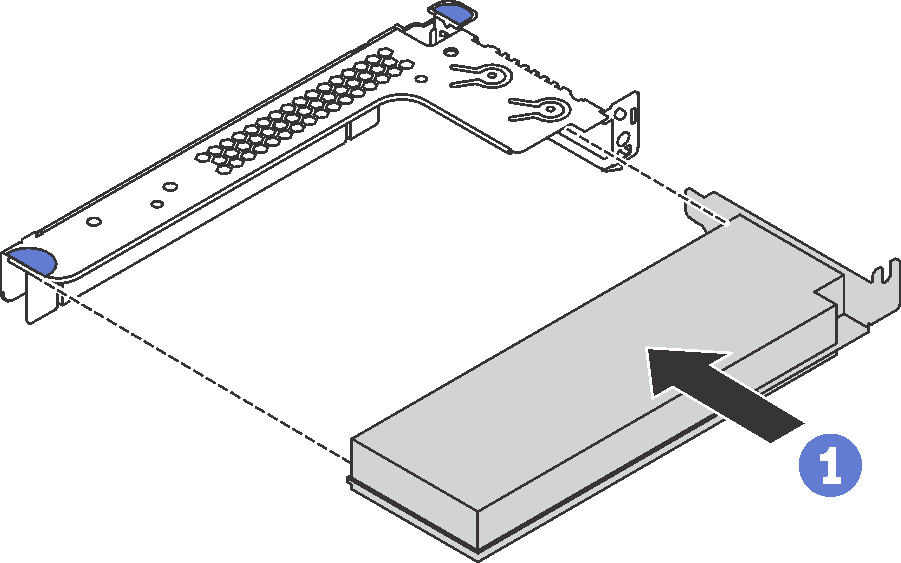
- 將擴充卡組件放在機箱上。將托架上的兩個插腳對齊機箱上的兩個孔,並將擴充卡對齊主機板上的擴充卡插槽。然後小心地將擴充卡組件向下垂直壓入插槽,直到其完全固定為止。註您要安裝的擴充卡組件可能與下圖不同,但安裝方法是相同的。圖 7. 安裝擴充卡組件

提供意見回饋