Follow the instructions in this section to disassemble the system board (system board assembly) before recycling.
About this task
The system board (system board assembly) contains the system I/O board and processor board. Before recycling each unit, you need to disassemble the system board (system board assembly).
Procedure
- Remove the system board (system board assembly) from the server. See Remove the system I/O board.
- Remove the Firmware and RoT Security Module from the system I/O board. See Remove the firmware and RoT security module.
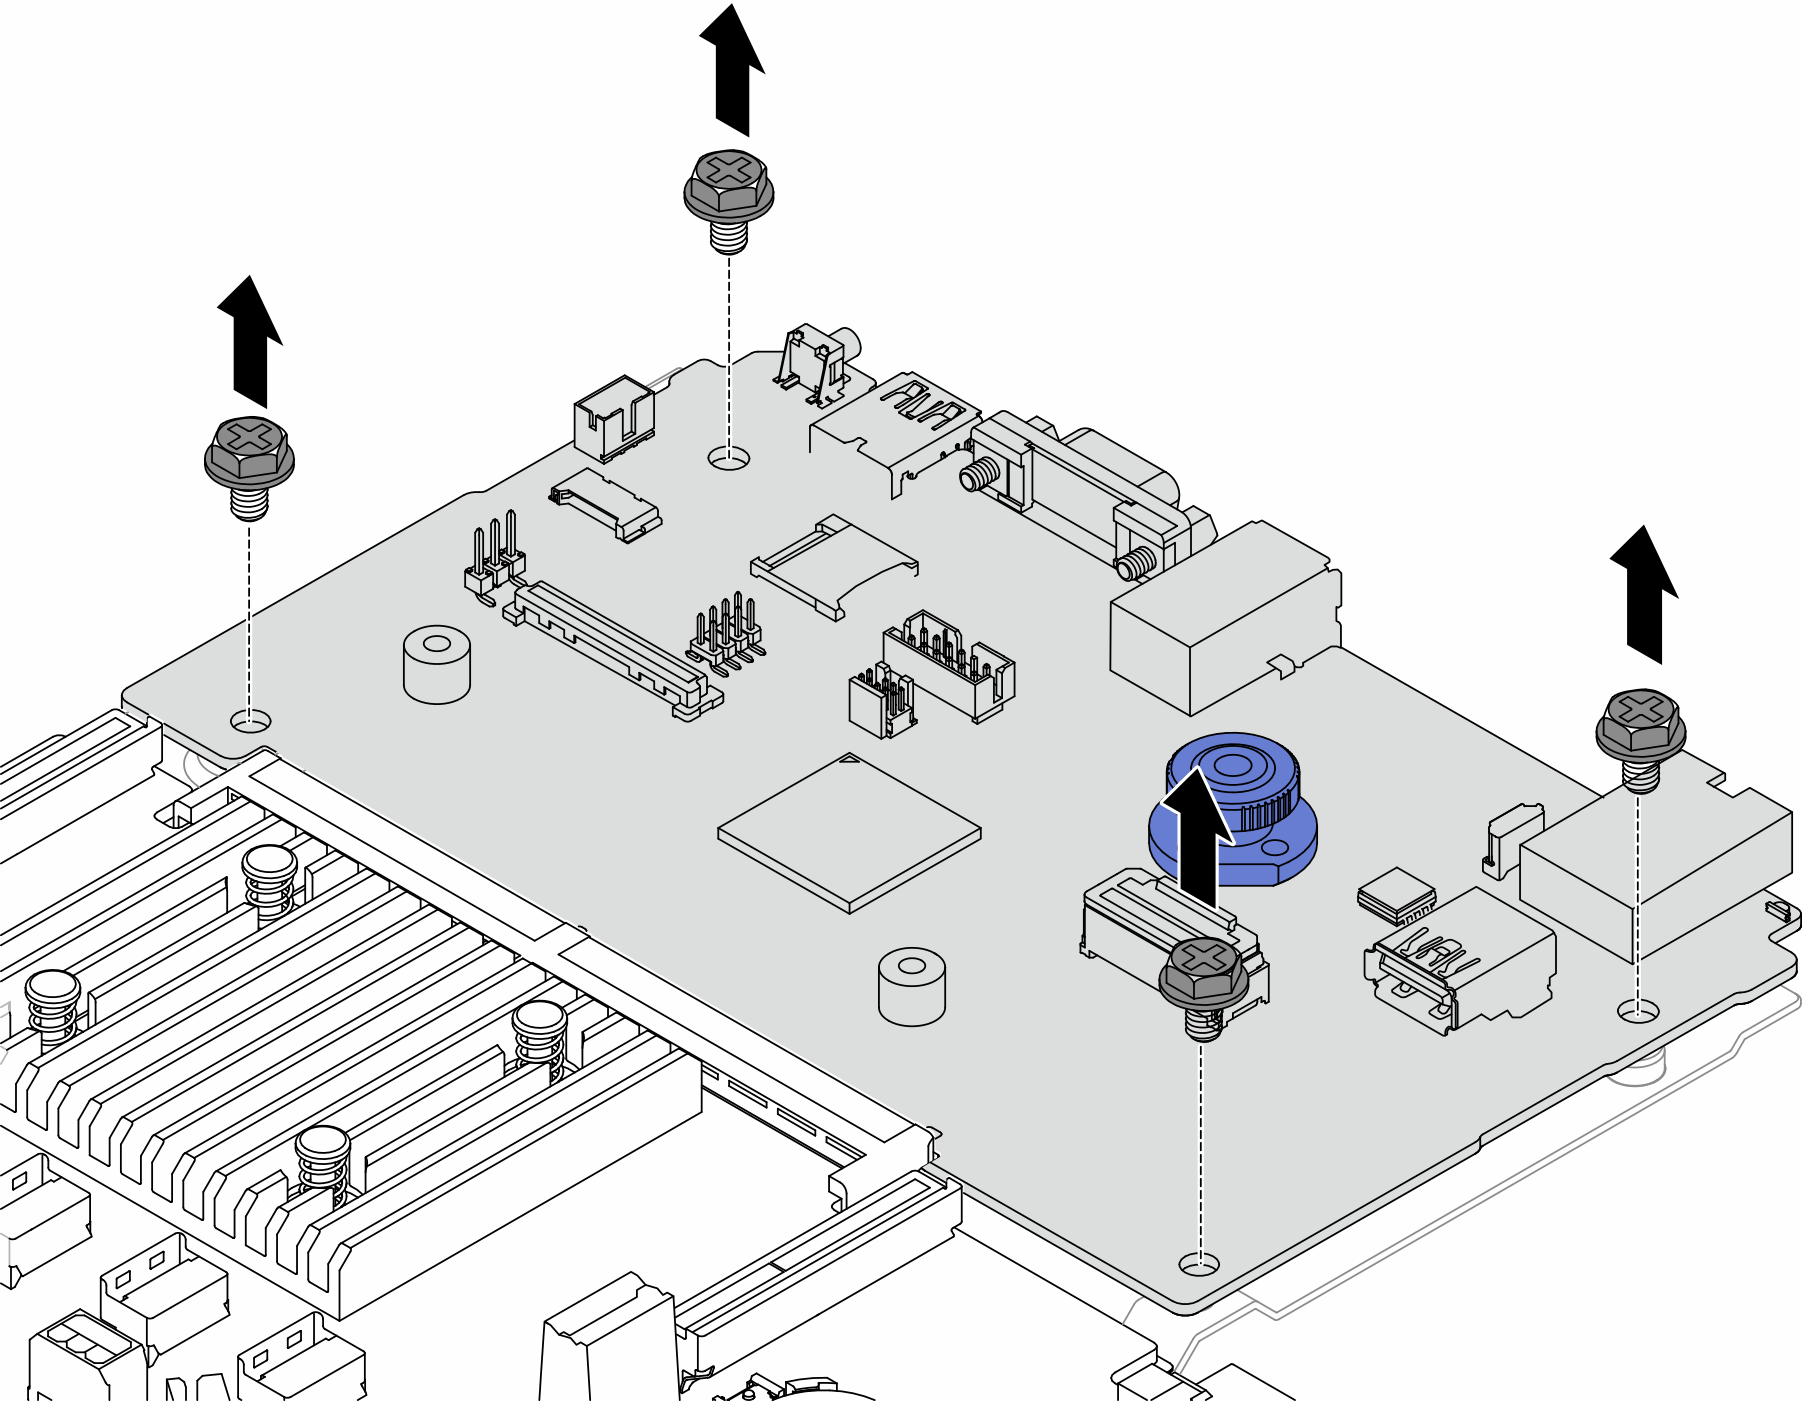
- Remove the screws that secure the system I/O board.
Figure 1. Removing the screws - Separate the system I/O board from the processor board.
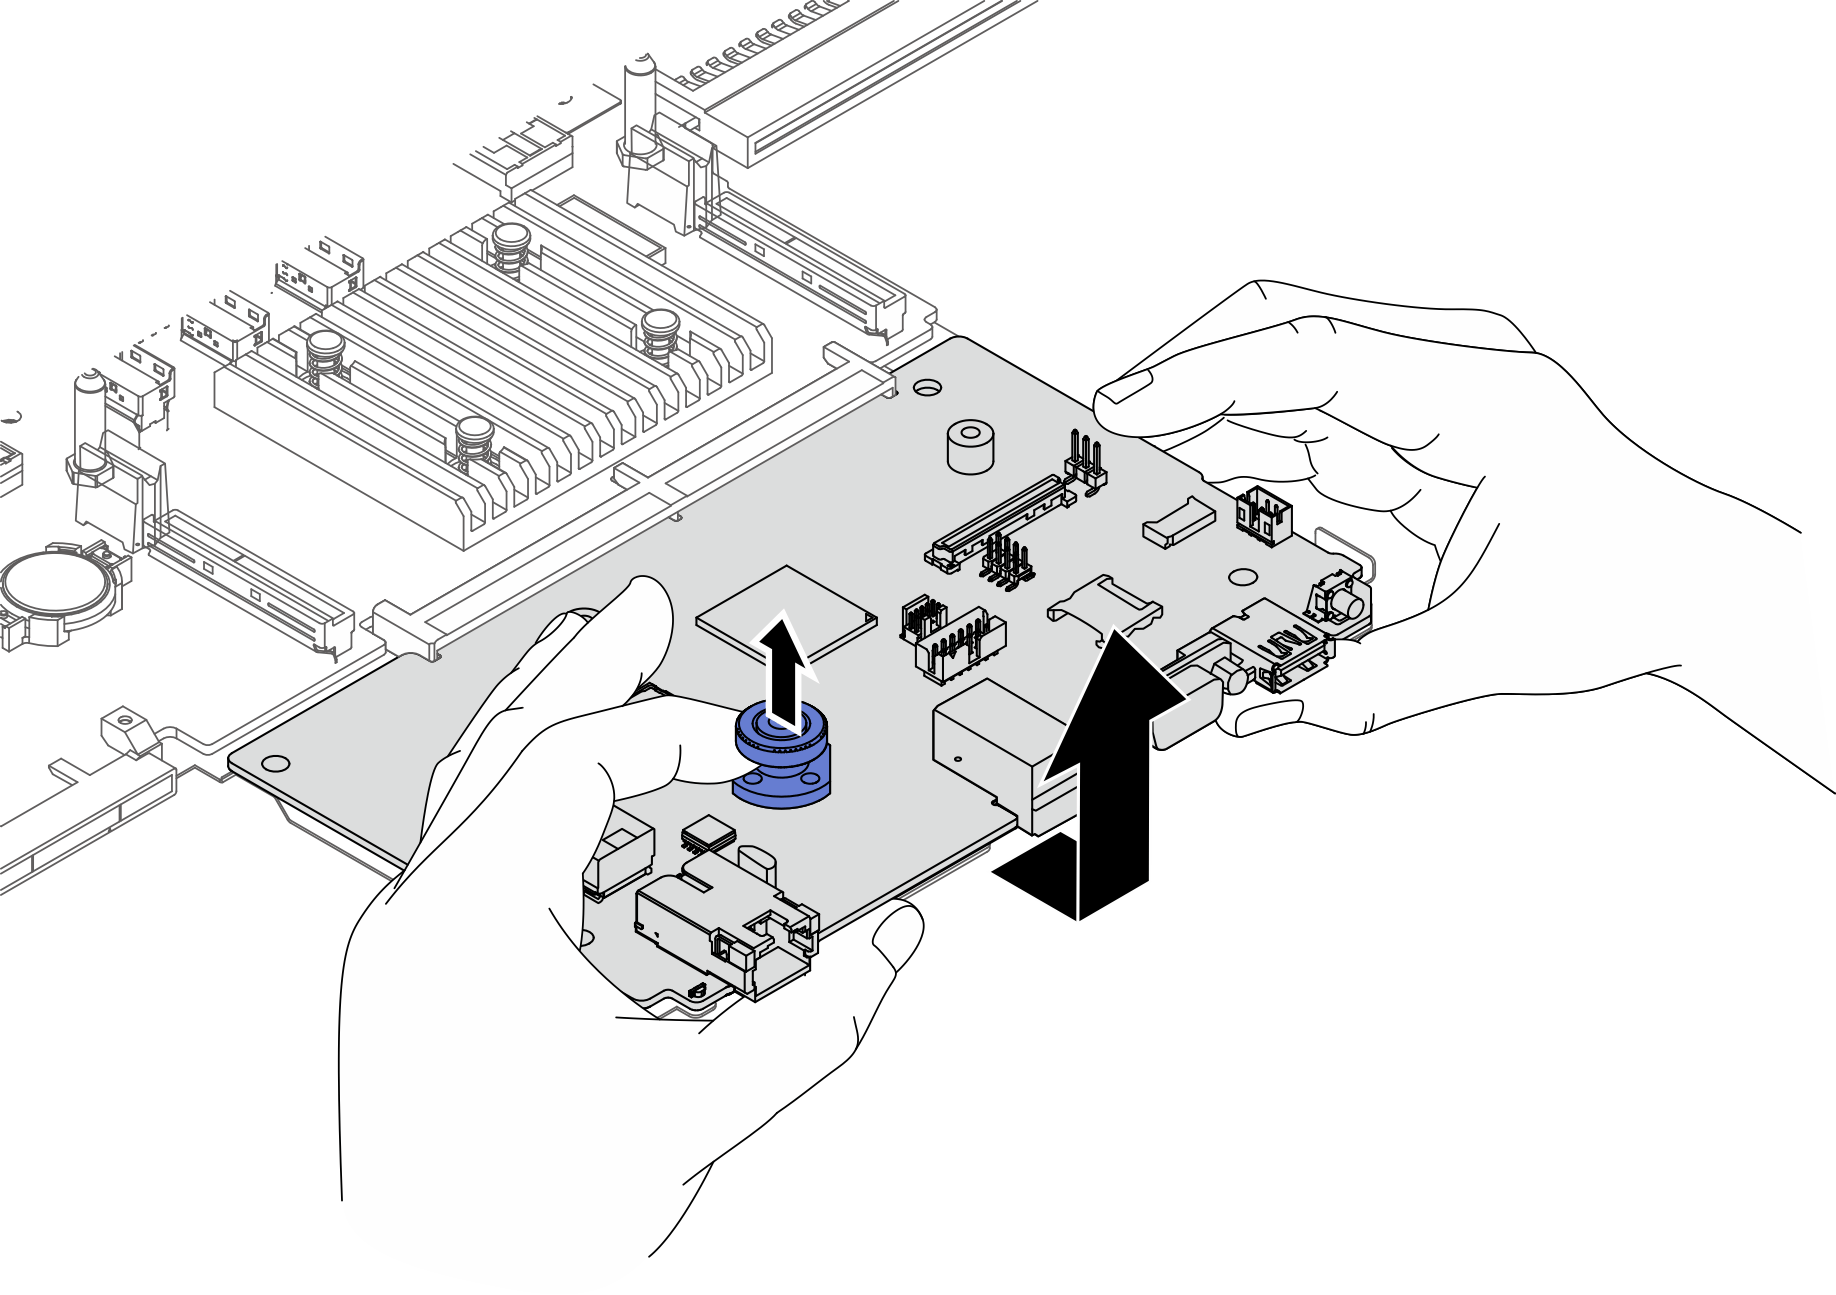
- Hook your left index finger onto the plunger and lift it.
- Place both thumbs under the edge of the system I/O board, brace them against the supporting sheet metal, and lift the edge up by approximately 3 to 6 degrees.
- Keeping your thumbs braced to provide counterforce, use your left index finger to pull the system I/O board away from the processor board. Then, lift the system I/O board up.
To prevent damage to the system I/O board, ensure the following:
During the pulling action, use your right hand to guide and stabilize the system I/O board, preventing it from rotating.
After pulling, ensure the gold finger of the system I/O board is less than 10 mm away from the slot on the processor board. This prevents damage to the system I/O board caused by rubbing against the supporting sheet metal.
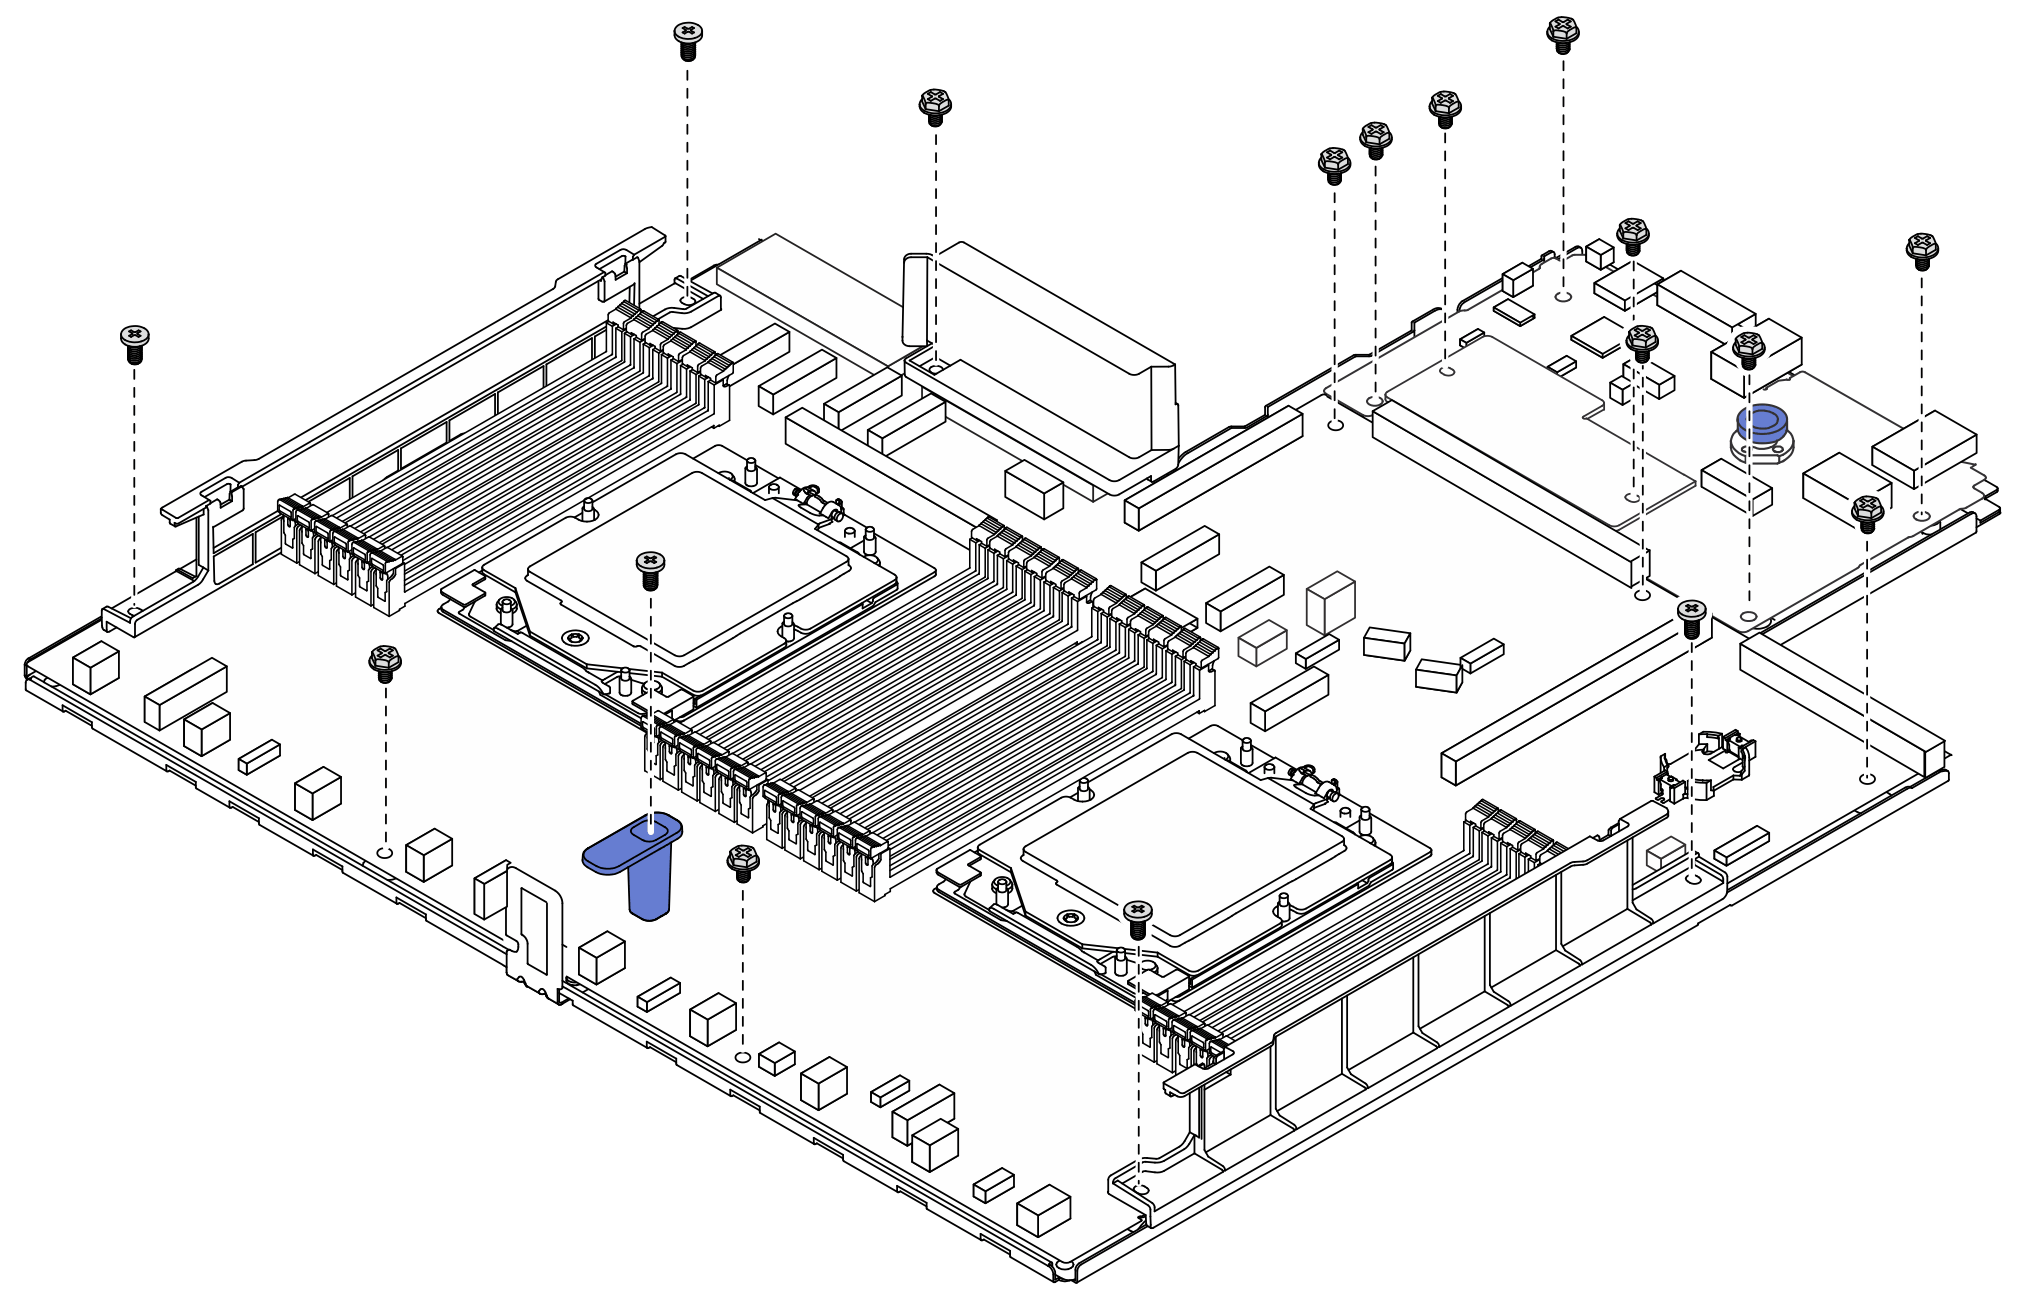
Figure 2. Separating the system I/O board from the processor board - Remove the screws from the processor board as illustrated.
Figure 3. Removing screws from the processor board Table 1. Screw type| Screw type | Quantity | Tool type |
|---|
 | 12 | PH2 screwdriver |
 | 5 |
- Remove the following components from the processor board.
Figure 4. Removing components from the processor board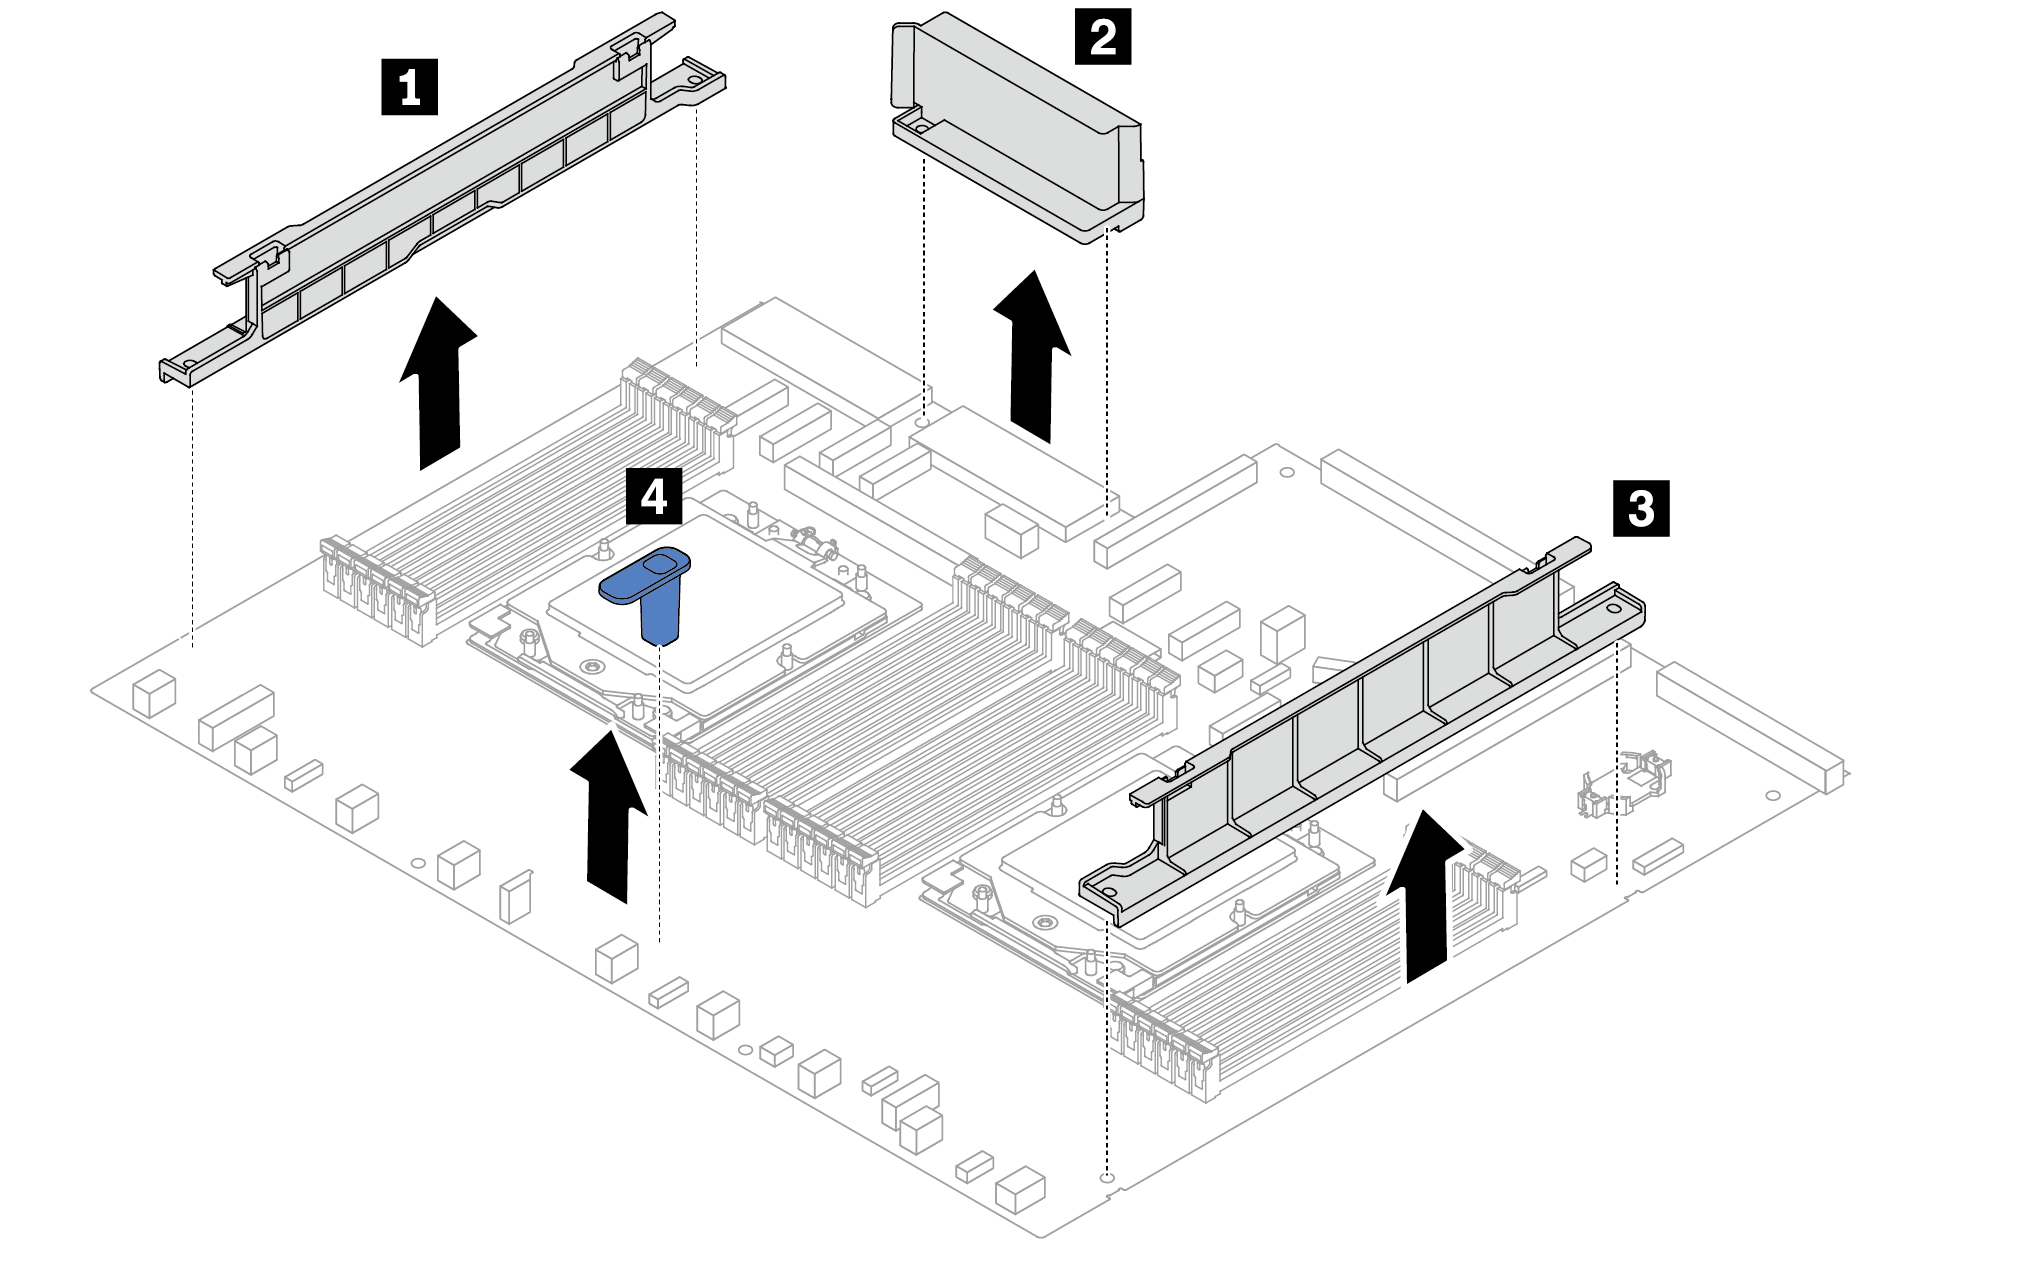
- Separate the processor board from the supporting sheet metal.
Figure 5. Separating the processor board from the supporting sheet metal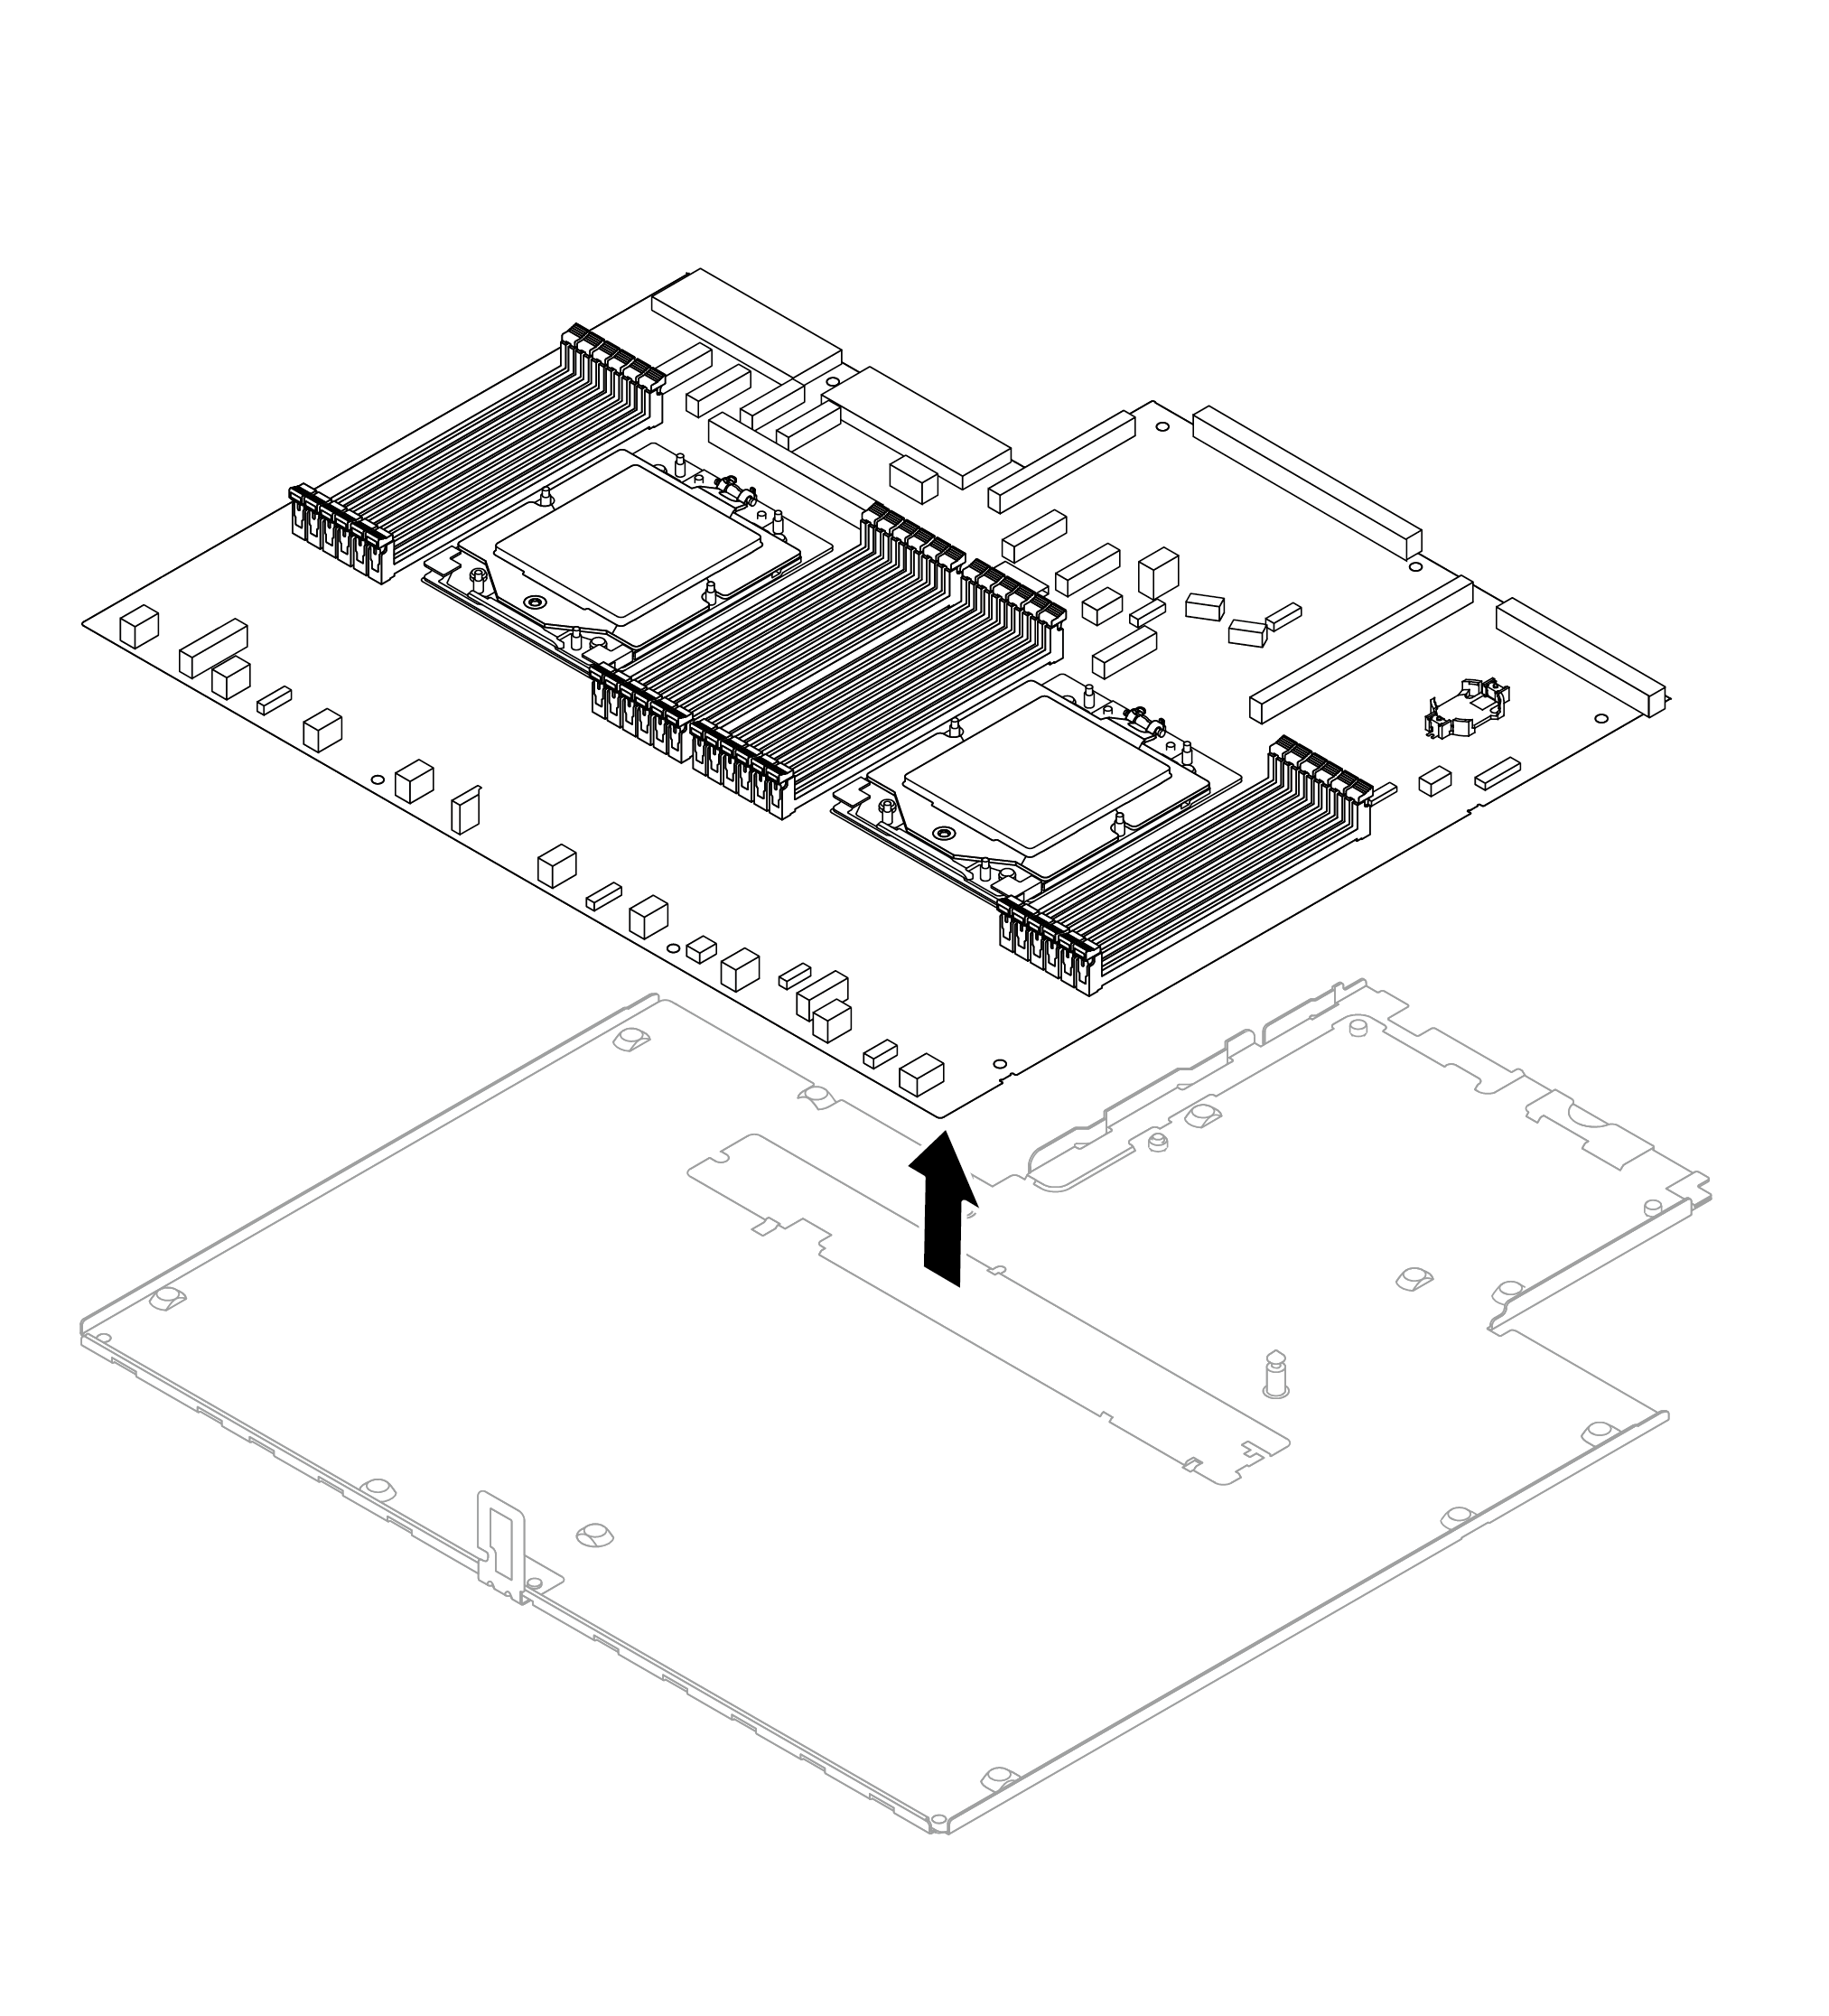
After you finish
After disassembling the system board (system board assembly), recycle the units in compliance with local regulations.
