Install the RAID adapter
Use this information to install the RAID adapter in the RAID adapter slot on the system board.


The RAID adapter slot on the system board
The PCIe slot 4 on the system board if the serial port module is not installed
A PCIe slot on the riser card
The following procedure is based on the scenario that the RAID adapter will be installed in the RAID adapter slot on the system board. For the procedure about installing the RAID adapter in PCIe slot 4 or a PCIe slot on the riser assembly, see Install a PCIe adapter
Depending on the specific server model, a NVMe switch adapter might be installed in the RAID adapter slot. The NVMe switch adapter might be different from the RAID adapter illustration in this topic, but the installation and removal procedures are the same.
Touch the static-protective package that contains the new RAID adapter to any unpainted surface on the outside of the server. Then, take the new RAID adapter out of the package and place it on a static-protective surface.
If the RAID adapter is installed with a bracket, remove the bracket.
To install the RAID adapter in the RAID adapter slot on the system board, complete the following steps:
Watch the procedure
A video of this procedure is available at YouTube.
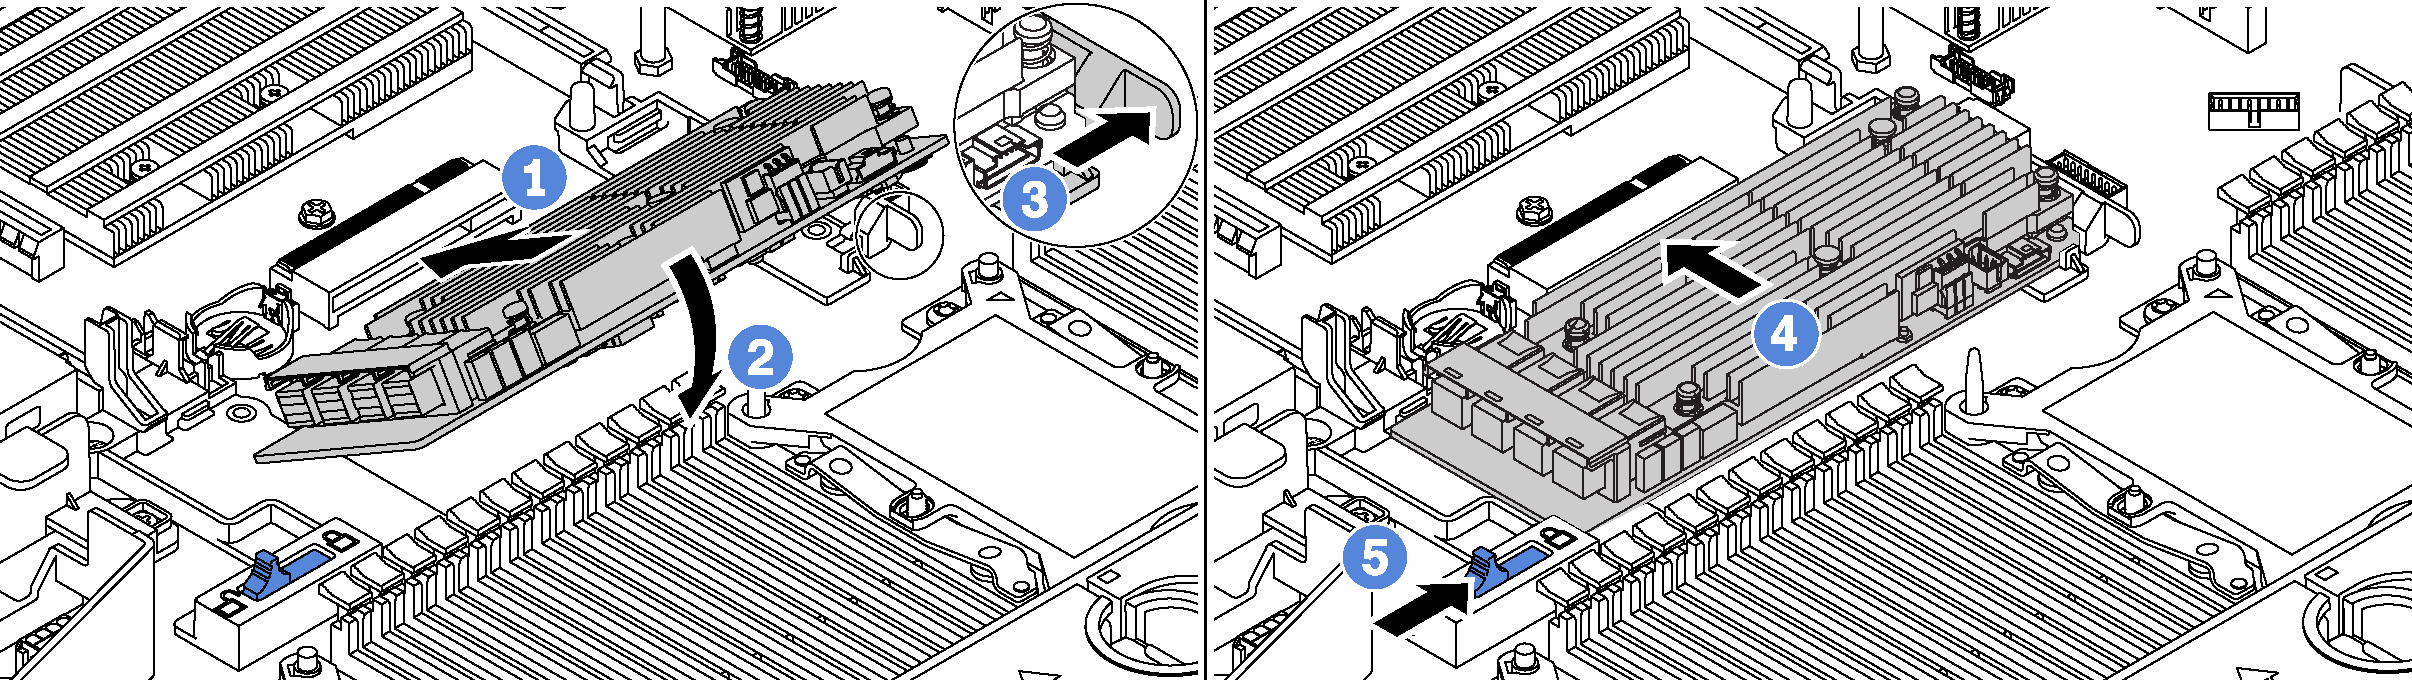
- Place the RAID adapter into the slot at an angle.
- Rotate the RAID adapter down.
- Push the right-side latch open.
- Push the RAID adapter to the fully horizontal position and insert it into the RAID adapter slot.
- Slide the left-side latch to the locked position.
After installing the RAID adapter, connect cables to the RAID adapter. See Internal cable routing.