Install a heat sink
This task has instructions for installing a heat sink.
About this task
Attention
Read Installation Guidelines to ensure that you work safely.
Power off the server and disconnect all power cords for this task.
Prevent exposure to static electricity, which might lead to system halt and loss of data, by keeping static-sensitive components in their static-protective packages until installation, and handling these devices with an electrostatic-discharge wrist strap or other grounding system.
Procedure
- If you use the existing heat sink:
Remove the thermal grease on the heat sink by using an alcohol cleaning pad.
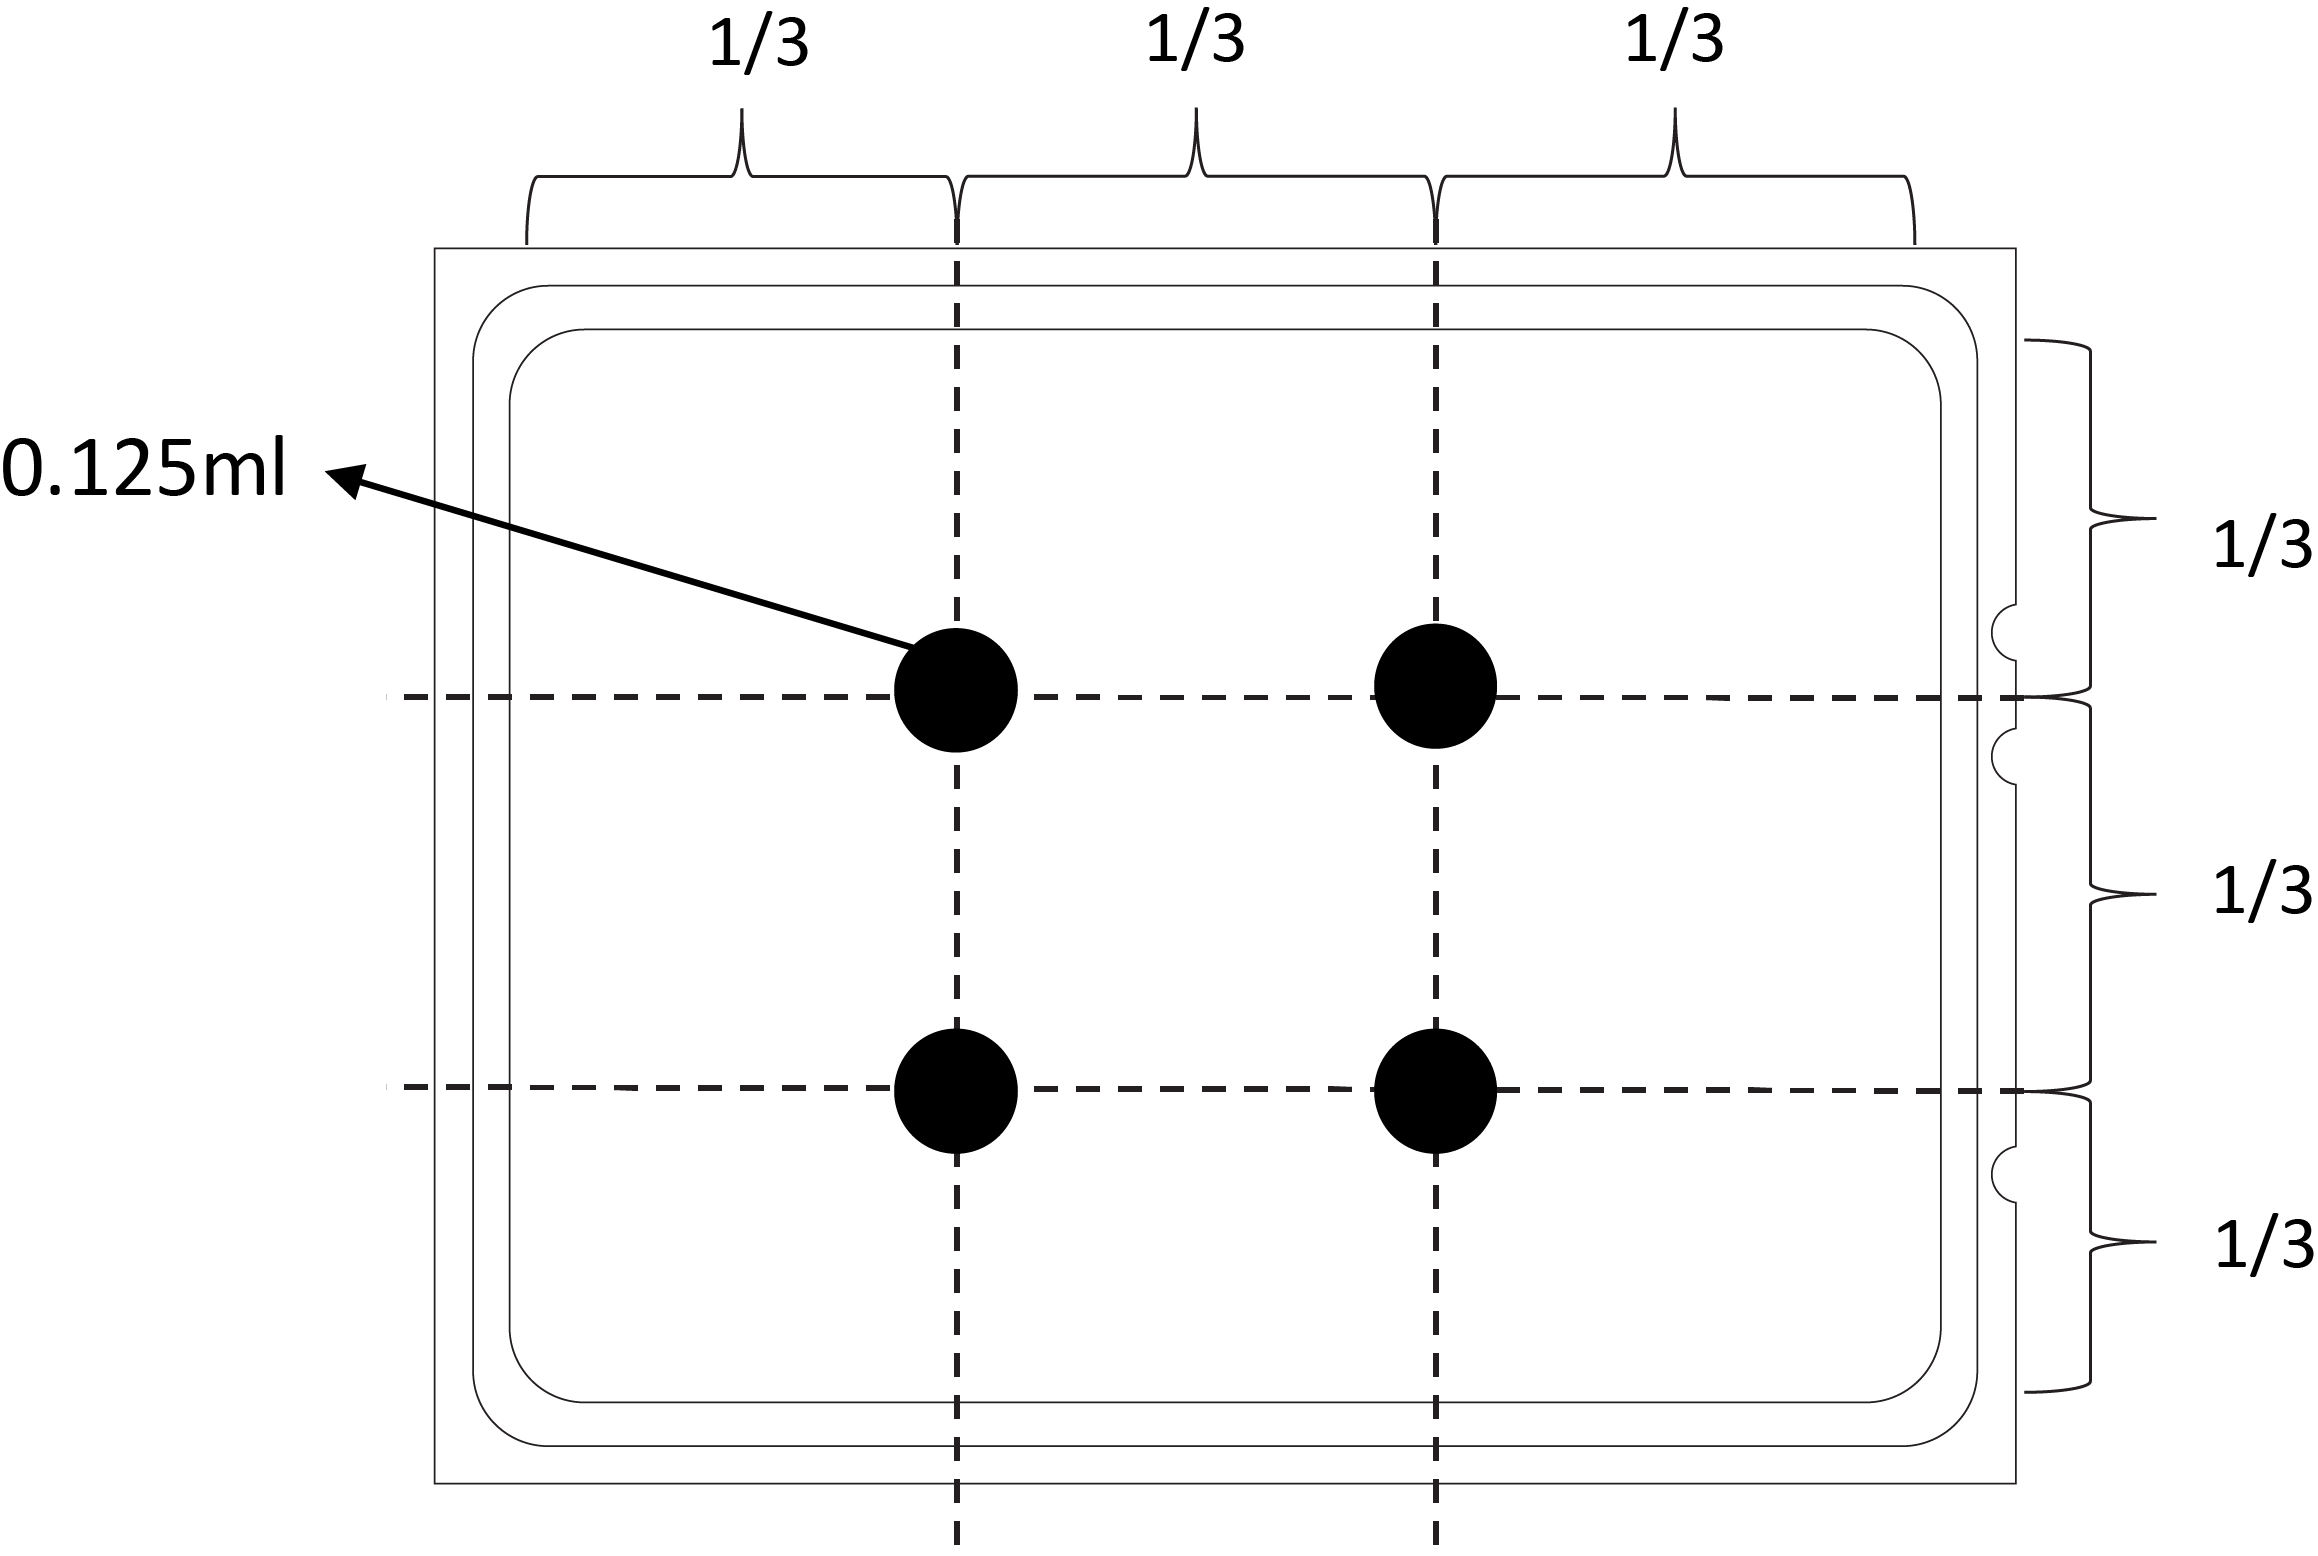
- Apply new thermal grease in a quadrilateral design on the top of the processor.NoteDo not apply too much thermal grease. Too much thermal grease can result in excess grease coming in contact with and contaminating the processor socket.Figure 1. Applying thermal grease
- Install the standard or performance heat sink.NoteFor a new heat sink, the thermal grease is pre-applied to the heat sink. Remove the protective cover and install the heat sink.NoteUse an ESD safe screwdriver and set the maximum torque value to 14.0 ± 0.5 inch-pounds.Figure 2. Installing a standard heat sink
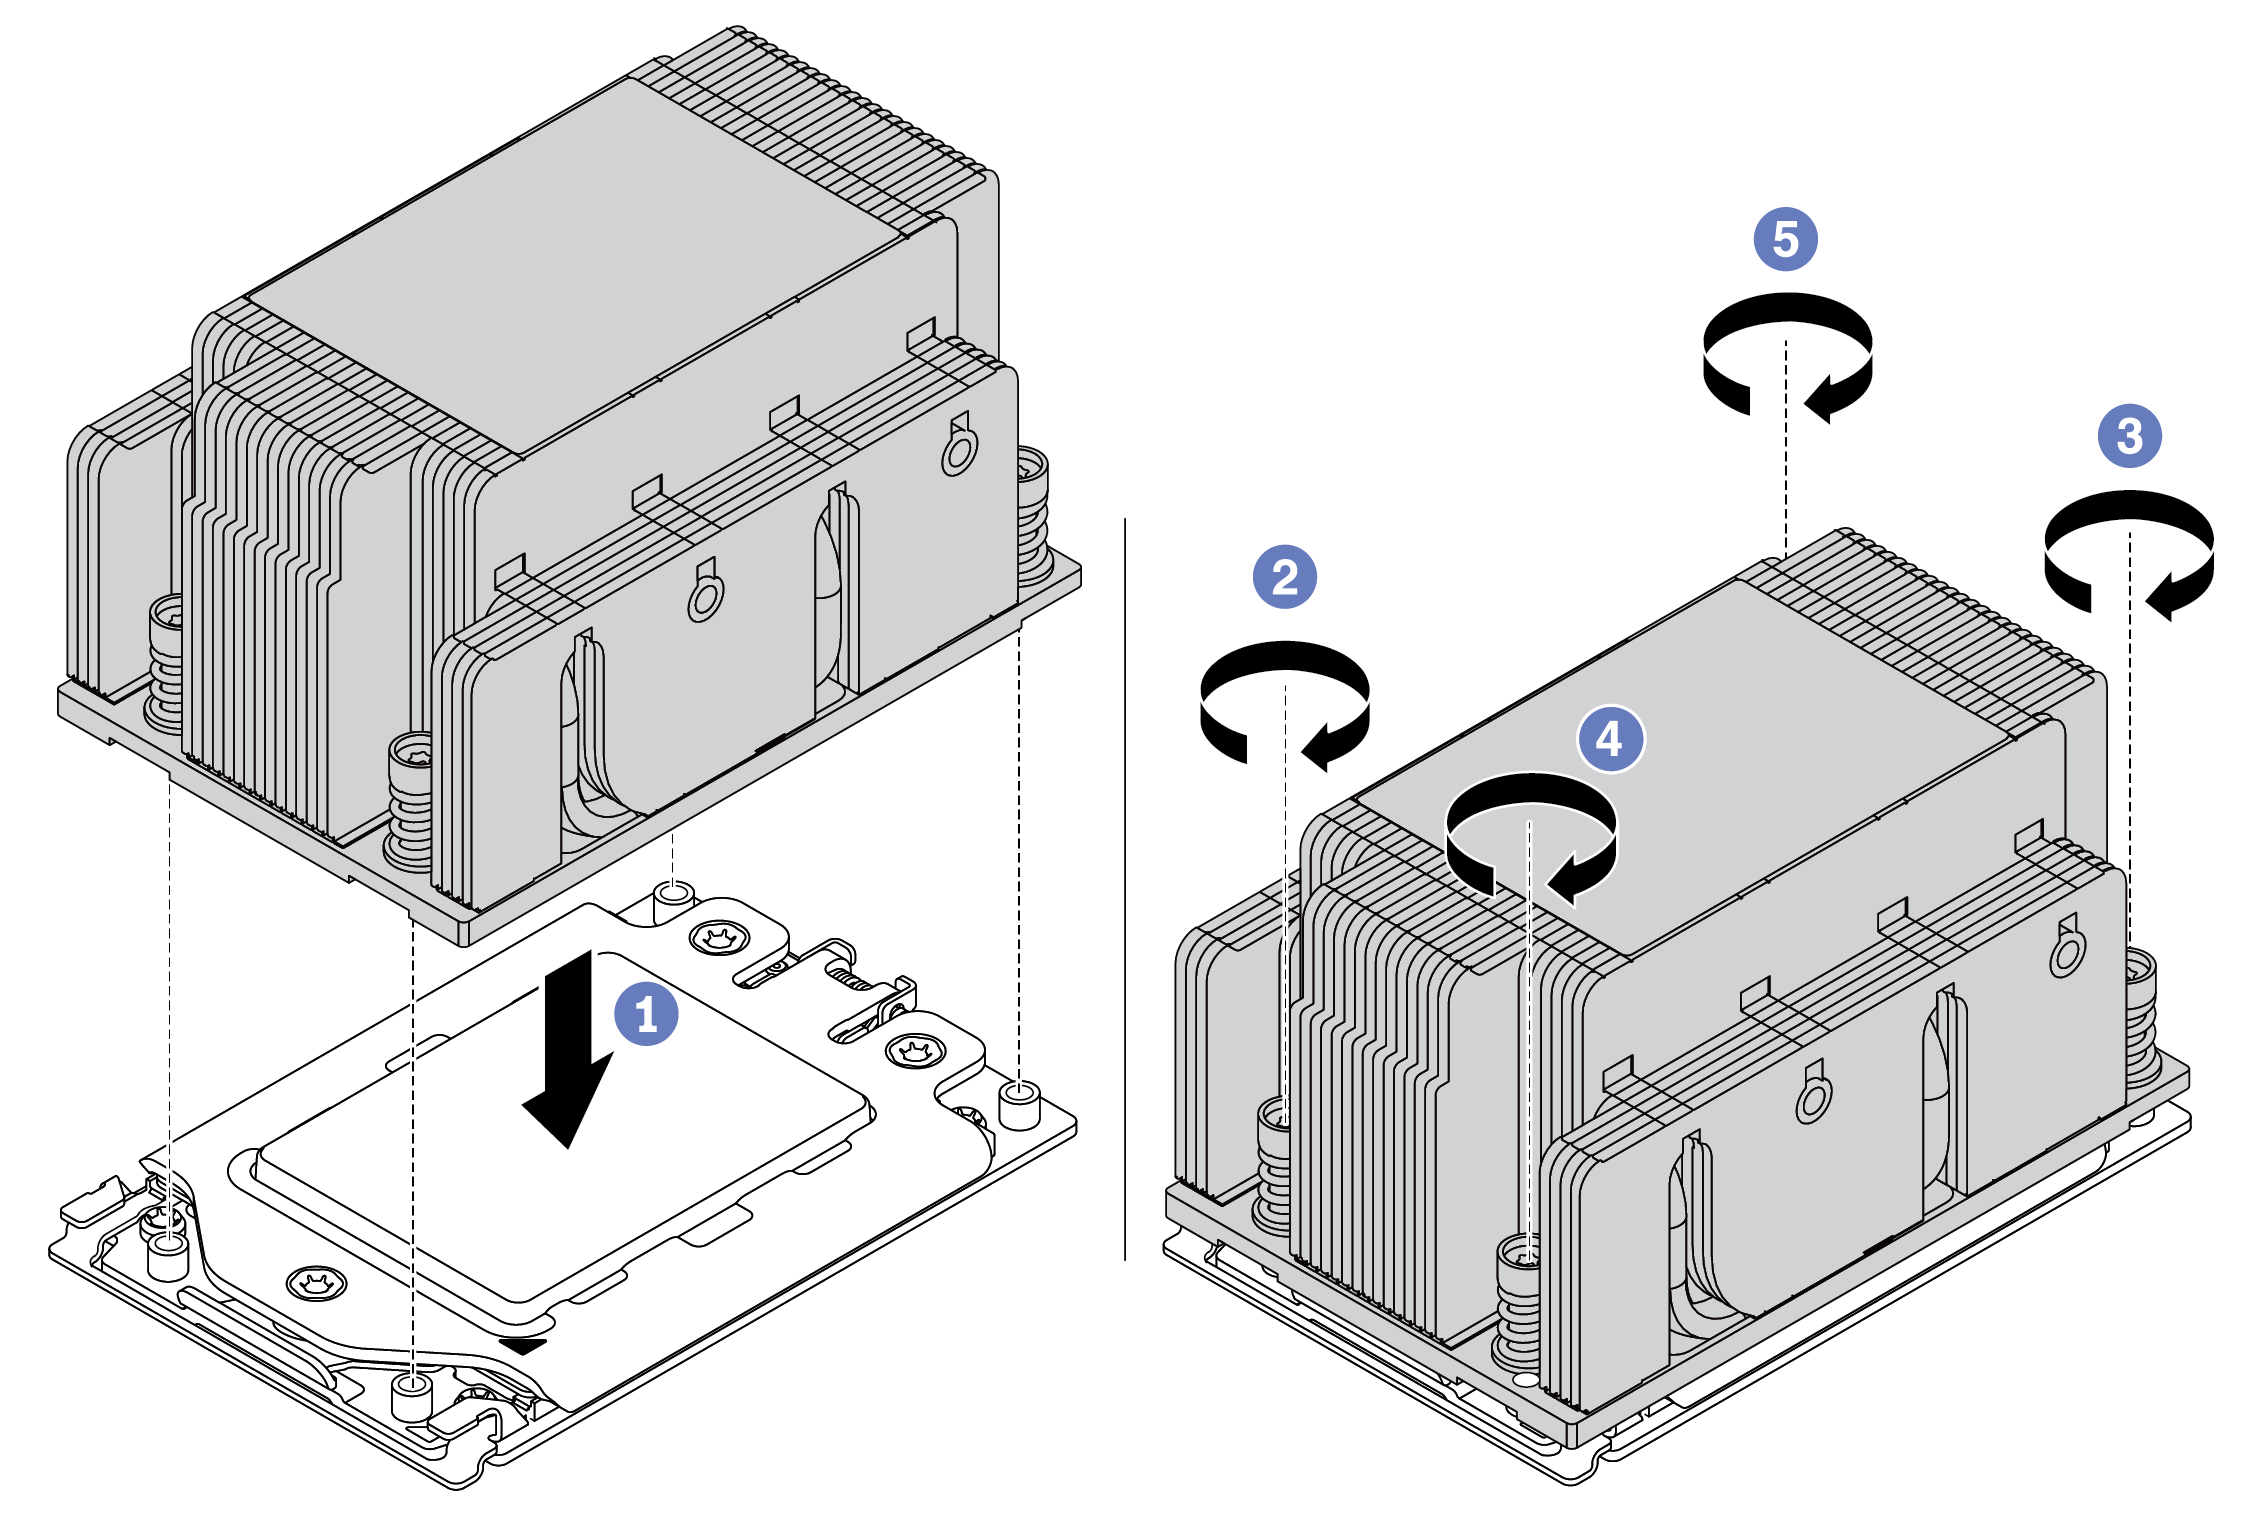 Figure 3. Installing a performance heat sink
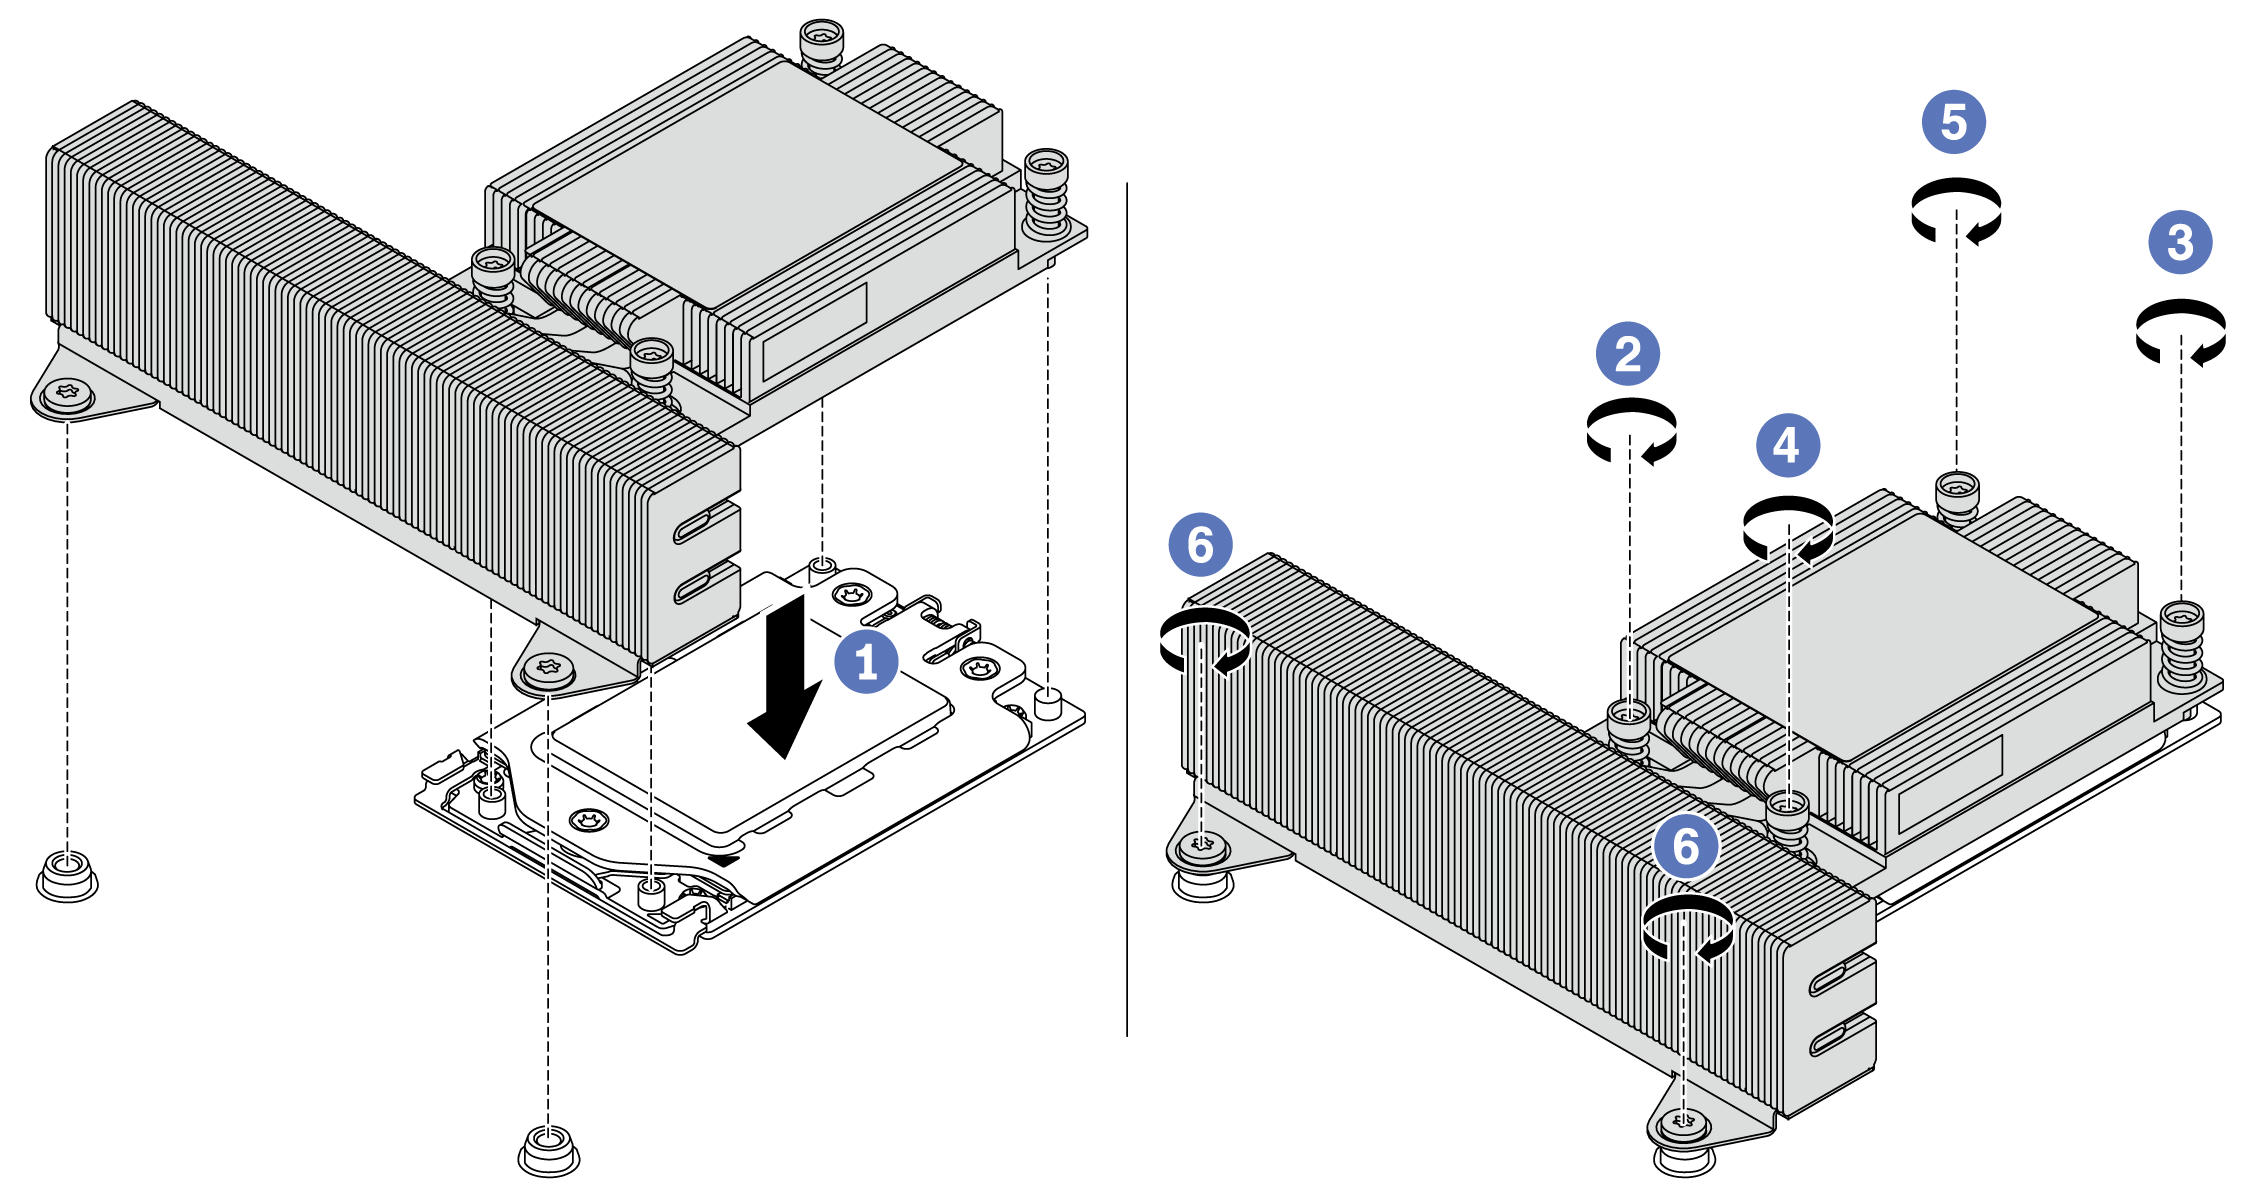
After you finish
Install the air baffle. See Install the air baffle.
Install any parts that you have removed.
Complete the parts replacement. See Complete the parts replacement.
Demo video
Give documentation feedback