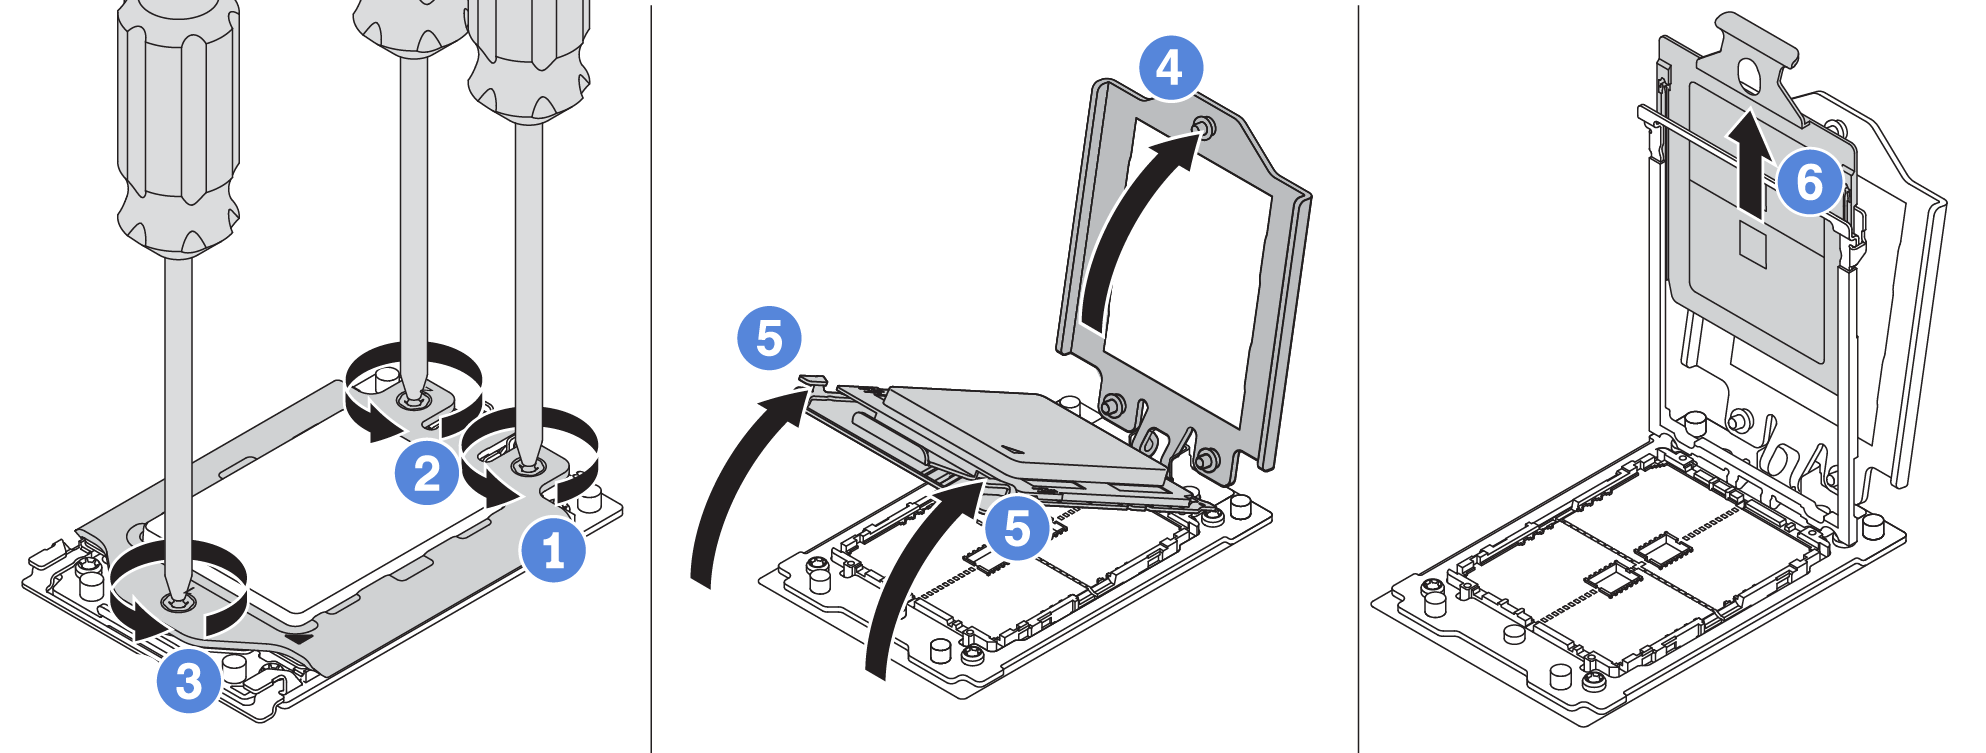
Remove a processor
Use this information to remove a processor.
About this task
Attention
Read Installation Guidelines to ensure that you work safely.
Power off the server and disconnect all power cords for this task.
Prevent exposure to static electricity, which might lead to system halt and loss of data, by keeping static-sensitive components in their static-protective packages until installation, and handling these devices with an electrostatic-discharge wrist strap or other grounding system.
The system will load factory default UEFI settings when Processor 1 is removed. In this case, make sure to back up the UEFI settings before processor removal.
Procedure
Figure 1. Processor removal


Give documentation feedback