Install a PCIe adapter in the I/O expansion cage
Use the following information to install a PCIe adapter in the I/O expansion cage.
Depending on the specific type, your PCIe adapter might look different from the illustration in this topic.
Use any documentation that comes with the PCIe adapter and follow those instructions in addition to the instructions in this topic.
Disconnect power cords from both power supplies.
Disconnect all cables from the front of the PCIe adapters that are installed in the I/O expansion cage.
Loosen the two captive screws located on the front of the server.
Pull the server forward until the slide rails click into place.
Remove the top cover. See Remove the top cover.
Remove the fan cage. See Remove the system fan cage.
Remove the air baffle. See Remove the air baffle.
Remove the I/O expansion cage (see Remove the I/O expansion cage).
Lift the blue retention tabs at the back of the I/O expansion cage.
Slide the I/O expansion cage back and then lift it away from the server chassis.
Rotate the I/O expansion cage so that the screw for the expansion cage cover is facing up; then, carefully remove the P1 screw for the I/O expansion cage cover.
Push the I/O expansion cage cover out of the way.
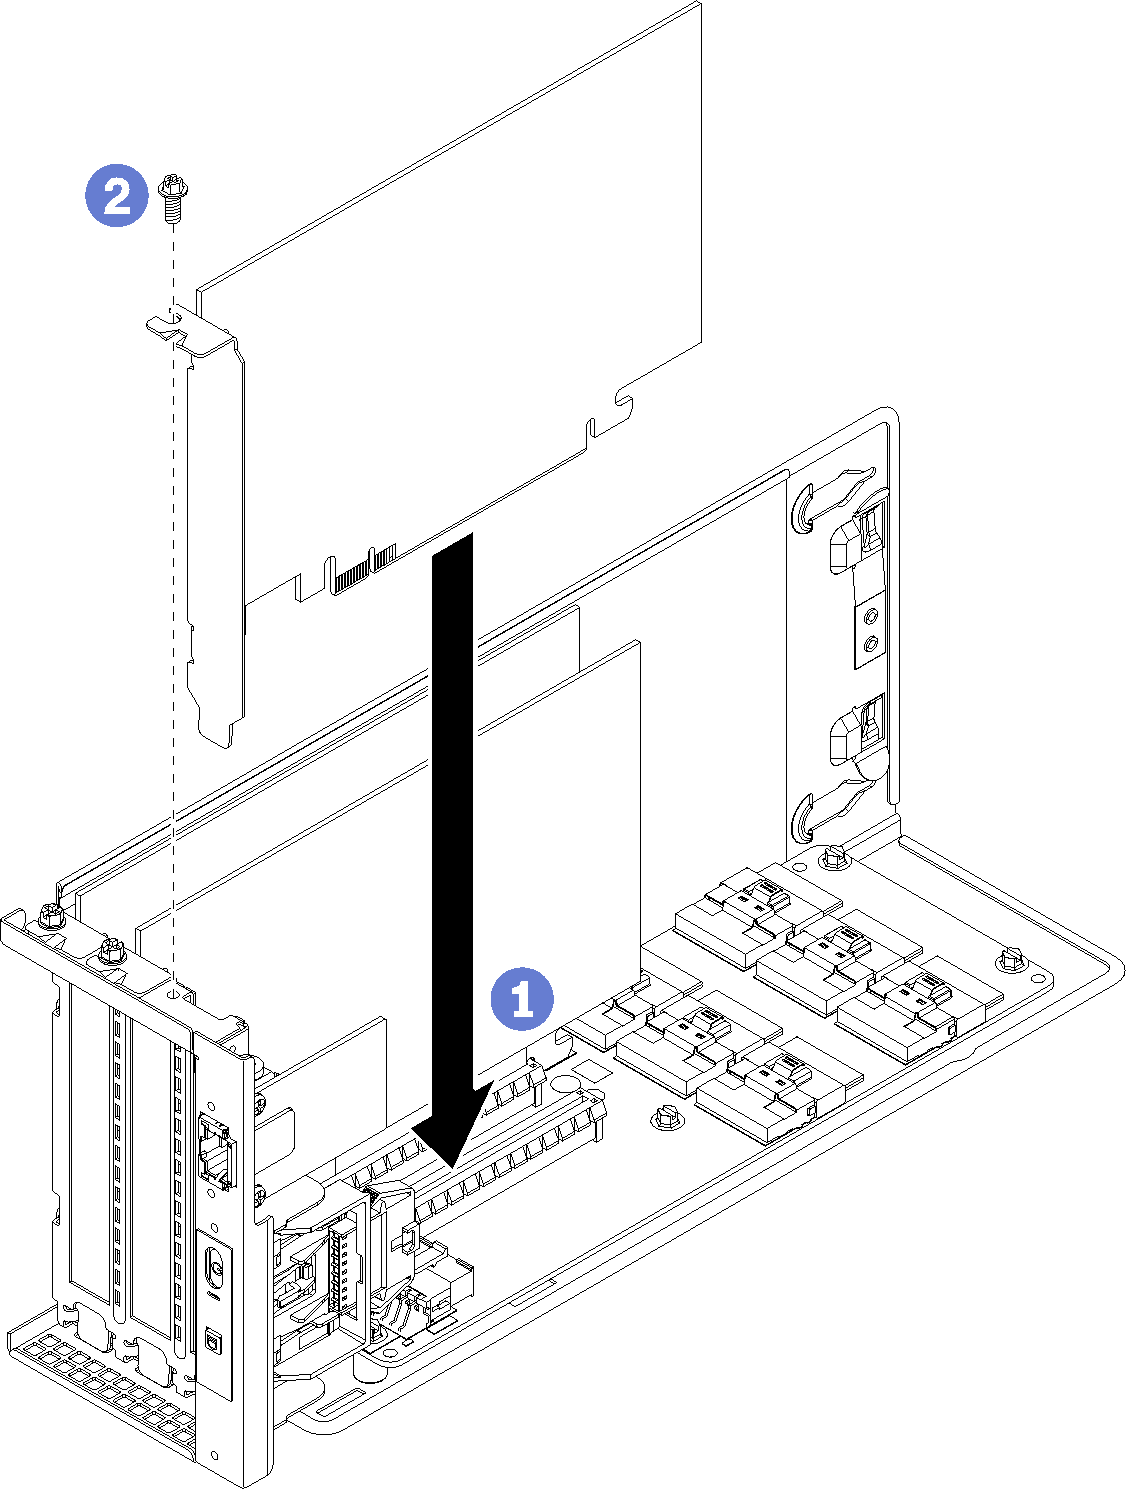
Remove the adapter filler by removing the adapter retention screw for the filler and lifting it away from the I/O expansion cage.
Touch the static-protective package that contains the new PCIe adapter to any unpainted surface on the outside of the server. Then, take the new PCIe adapter out of the package and place it on a static-protective surface.
To install a PCIe adapter in the I/O expansion cage, complete the following steps:
Connect the cables back to the PCIe adapter.
Install the I/O expansion cage. See Install the I/O expansion cage.
Install the fan cage. See Install the system fan cage.
Install the air baffle. See Install the air baffle.
Install the top cover. See Install the top cover.
Push up on the latches on the slide rails and push the server back into the rack.
Tighten the two captive screws located on the front of the server to secure the server in the rack.
NoteAlways secure the system in the rack if your are moving the rack.Connect all cables to the ports on the front of the server, including the management port, if necessary, and all PCIe adapter ports. The management port and PCIe adapter ports are located in the I/O expansion cage.
Connect power cords to both power supplies, which are located at the rear of the server.
Demo video