Remove the system board
Use this information to remove the system board.
Power off the server. See Power off the server.
Disconnect power cords from both power supplies, which are located in the rear of the server. Disengage both power supplies from the server.
Record the location of the cables in the front of the PCIe adapters that are installed in the I/O expansion cage at the front of the server, and disconnect the cables.
Disconnect the management port cable from the management port in the I/O expansion cage, if necessary.
Loosen the two captive screws located on the front of the server. If necessary, use a P2 screwdriver to loosen the screws.
Pull the server forward until the slide rails click into place.
Remove the top cover. See Remove the top cover.
Remove the air baffle. See Remove the air baffle.
Remove the system fan cage assembly. See Remove the system fan cage.
Remove the drive cage. See Remove the drive cage.
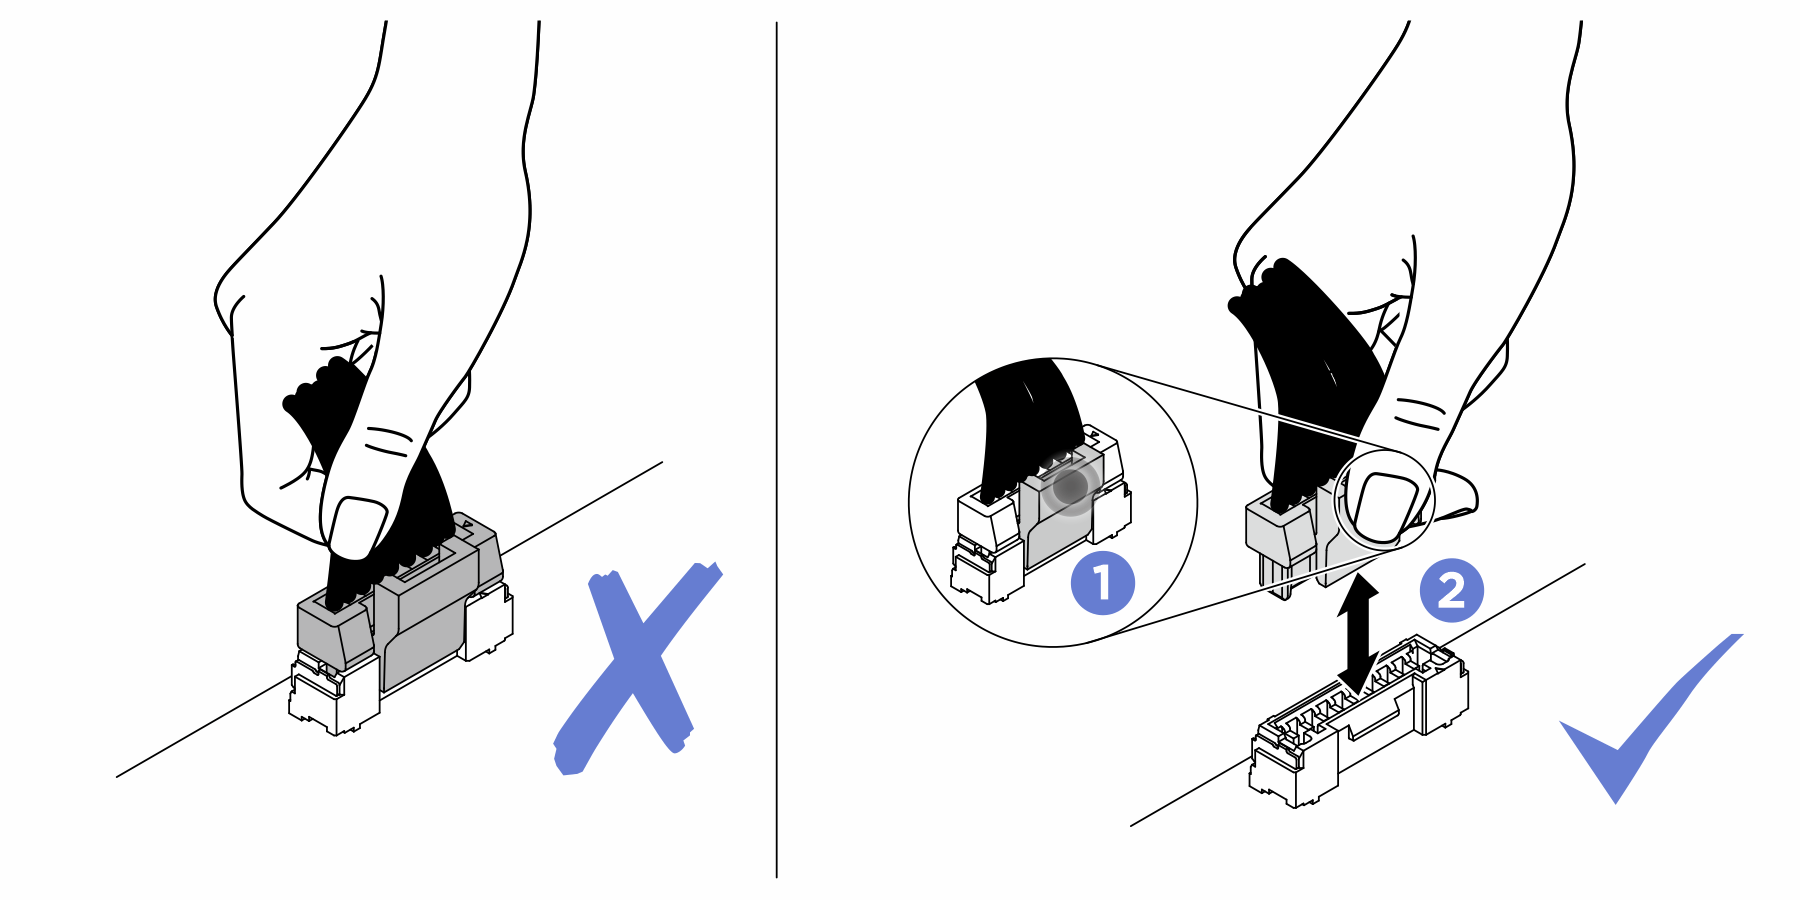
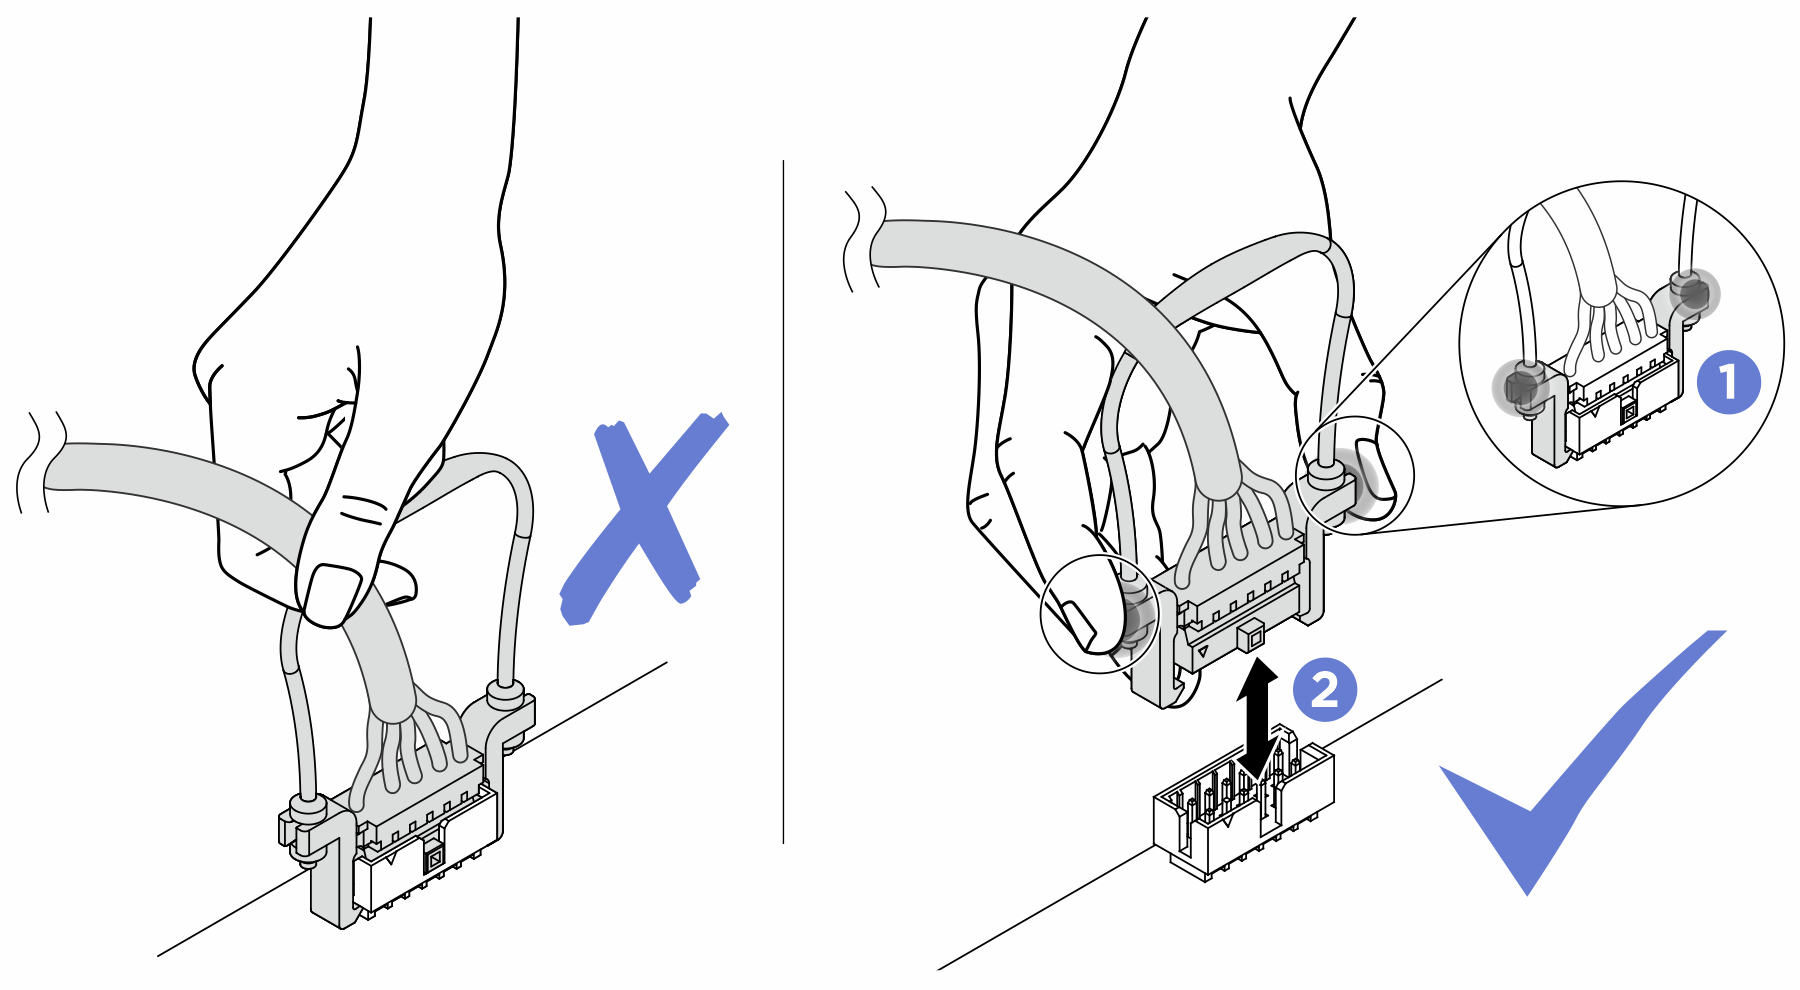
- Remove all cables from the system board.NoteYou do not need to remove the PCIe expansion cages or the I/O expansion cage. However, you do need to remove the cable connections for this cages from the system board.AttentionStrictly observe the following instructions to avoid damaging cable sockets on the system board. Any damage to the cable sockets might require replacing the system board.
Connect cable connectors vertically or horizontally in alignment with the orientations of the corresponding cable sockets, avoiding any tilt.
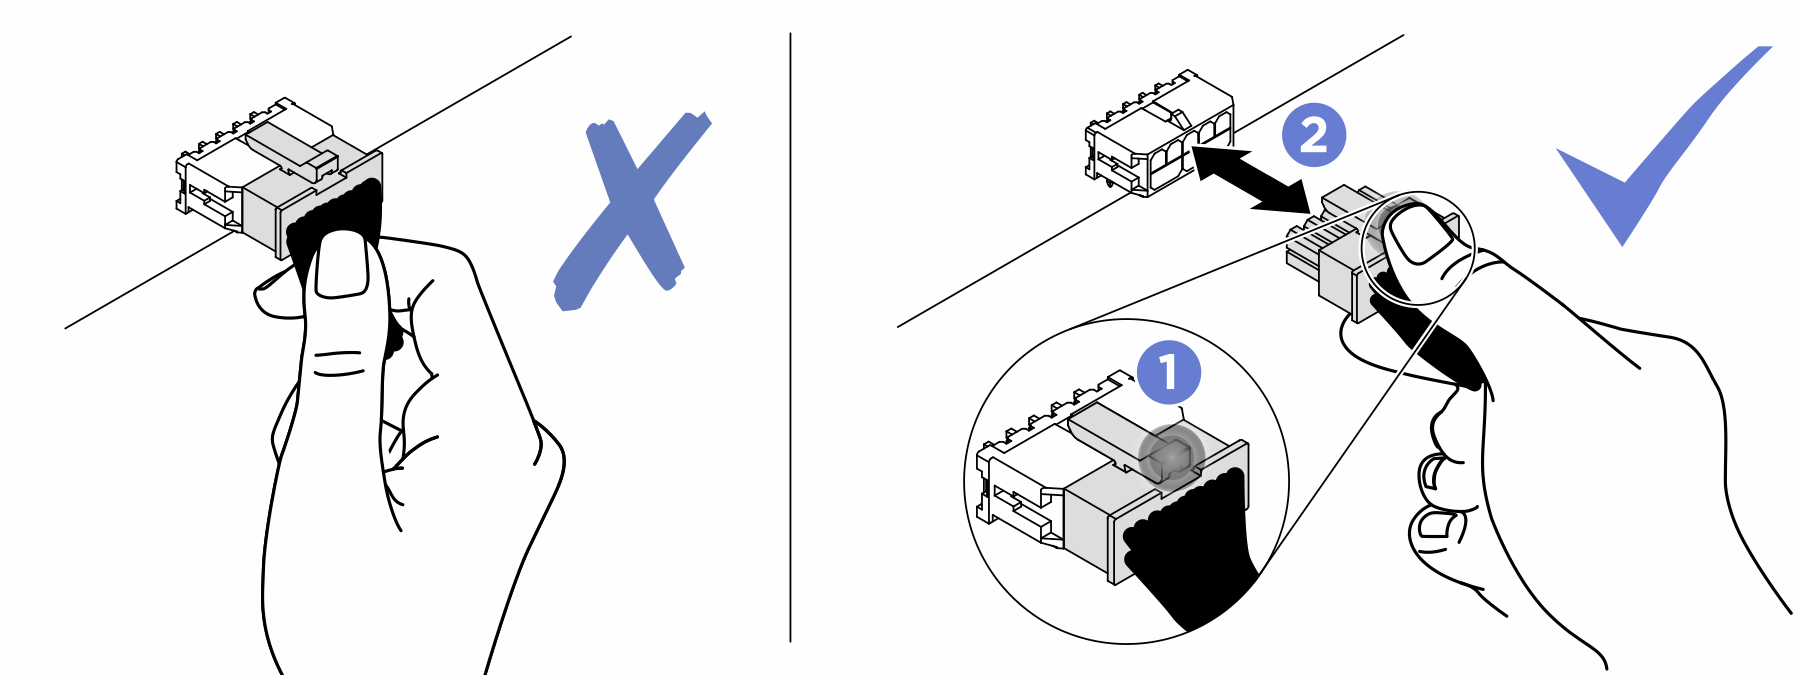
- To disconnect cables from the system board, do as follows:
Press and hold all latches, release tabs, or locks on cable connectors to release the cable connectors.
- Remove the cable connectors vertically or horizontally in alignment with the orientations of the corresponding cable sockets, avoiding any tilt.NoteThe cable connectors might look different from those in the illustration, but the removal procedure is the same.
Remove any of the following components that are installed on the system board and put them in a safe, static-protective place. See the related topics in this chapter.
DIMMs
M.2 backplane
TPM card (for Chinese Mainland only)
CMOS battery
PHM
ImportantDo not disassemble the PHM.
Remove the cable routing troughs that are installed on each side of the server chassis.
To remove the system board, complete the following step:
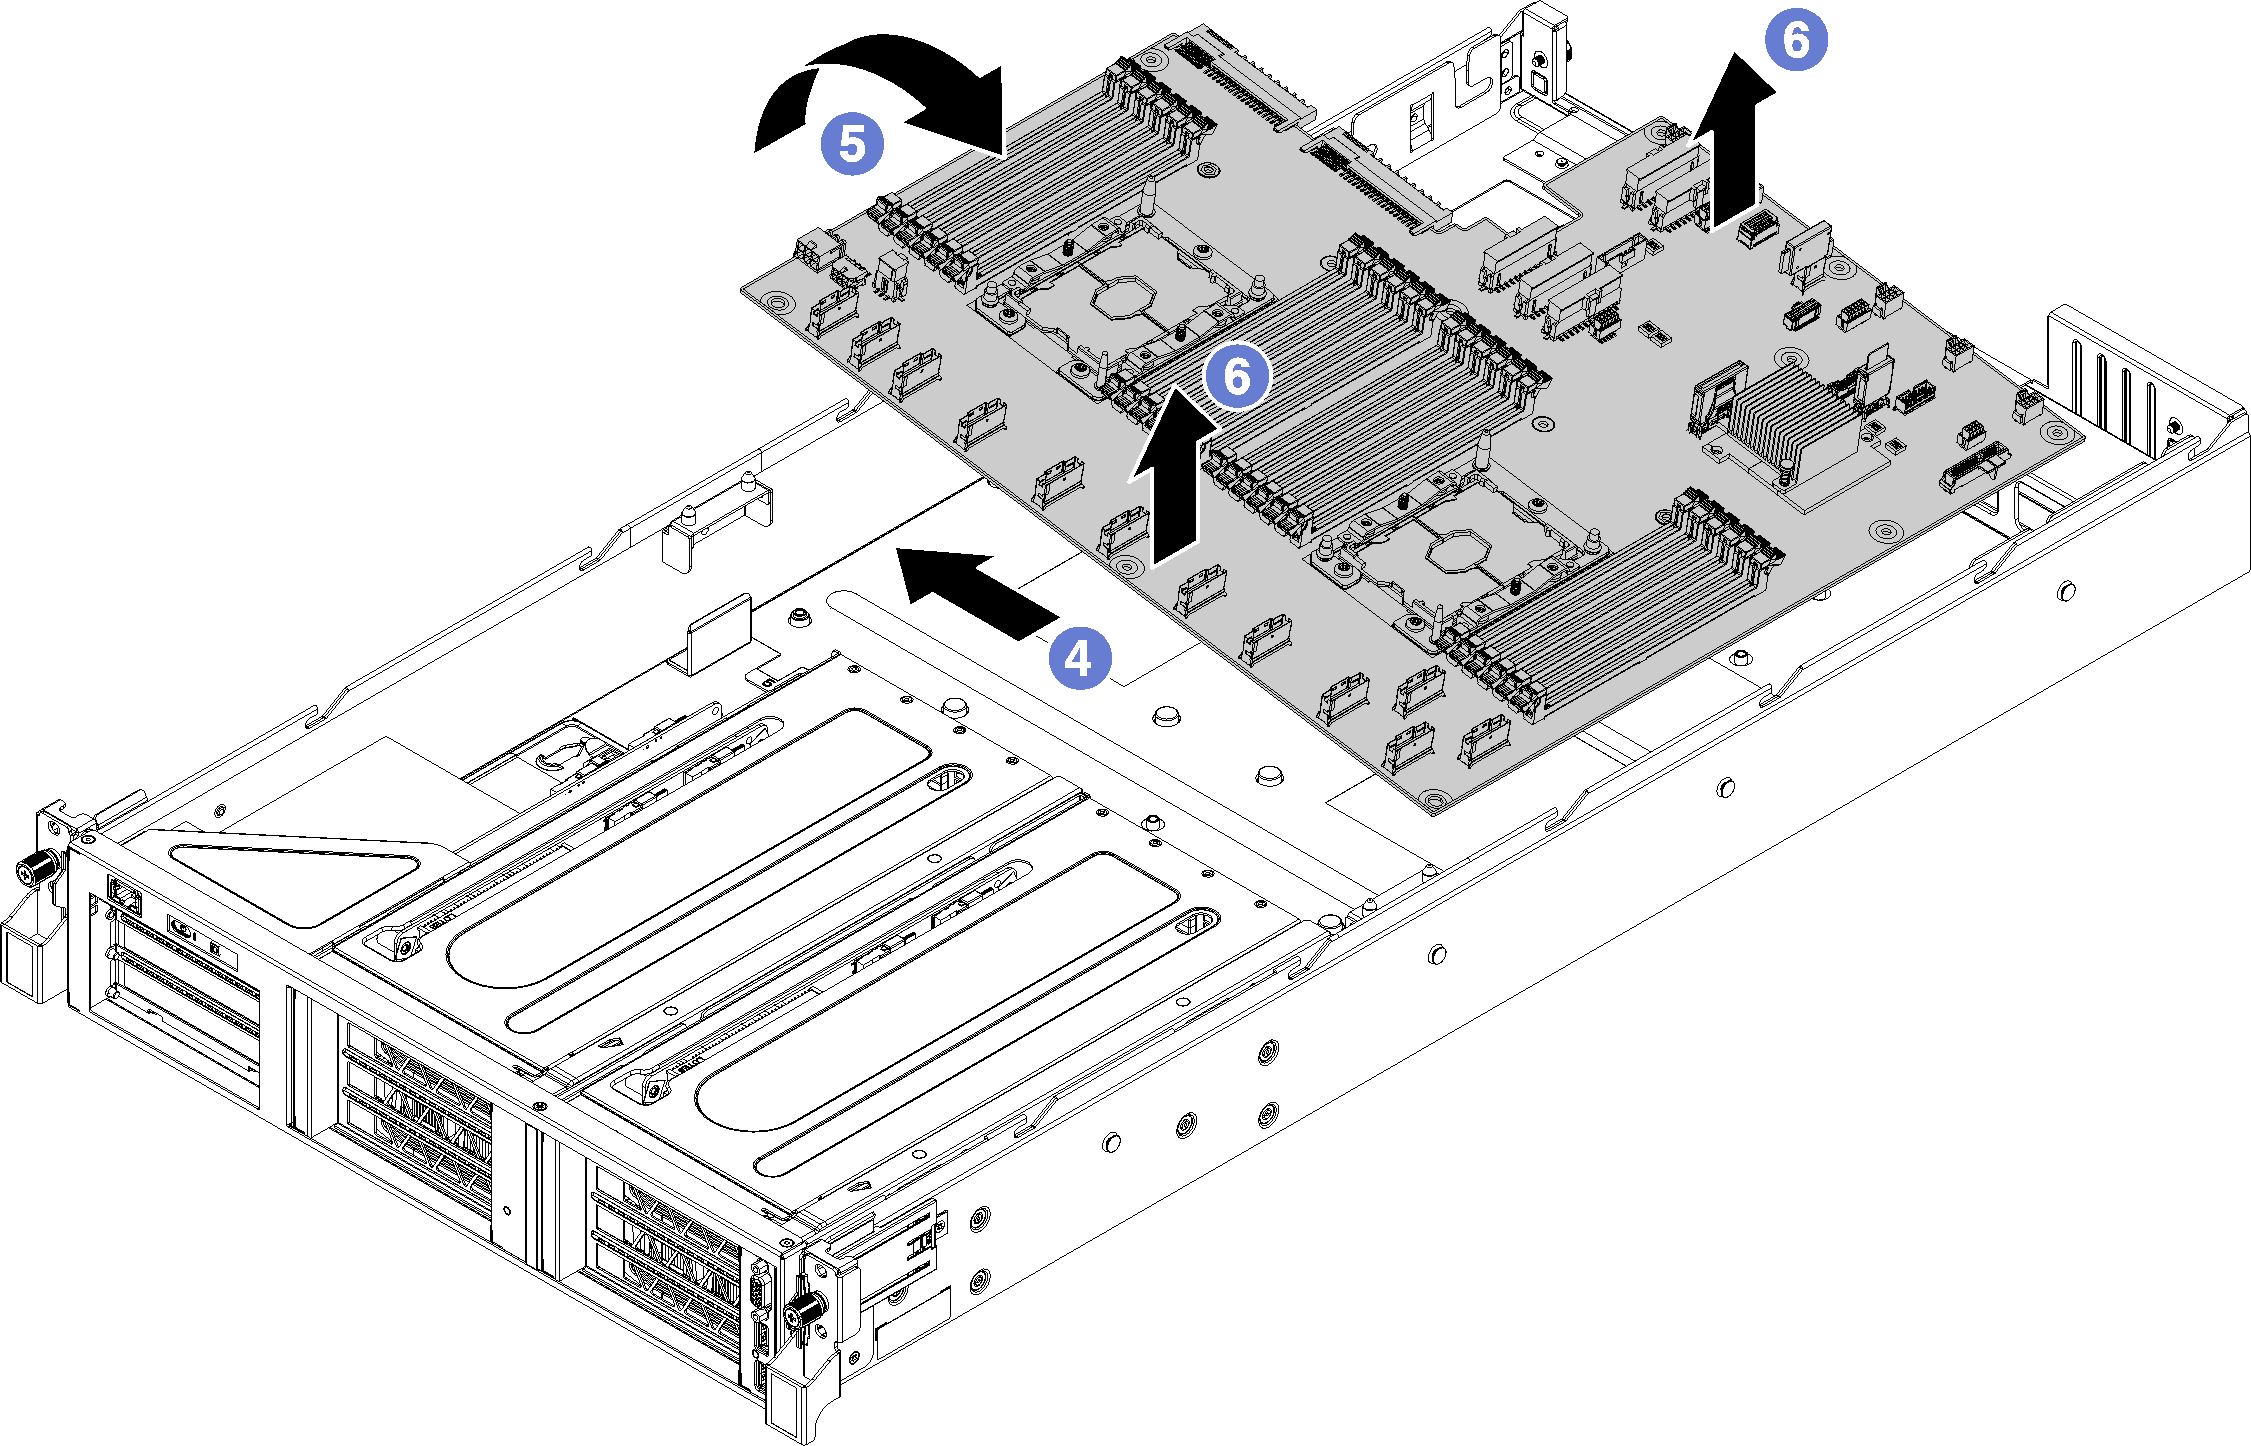
- Remove the two air baffle posts.
- Remove the two M.2 adapter guideposts using the 6mm deep, nut drive tool (hex socket) that was provided with the system board replacement.
- Remove the 10 screws.
- Disengage the system board from the screw holes in the bottom of the server chassis and slide the system board slightly to the left of the server chassis (if you are looking at the server from the front).
- Rotate the left side of the system board up.
- Grasp the system board near the center at the front and rear edges; then, carefully lift the system board away from the server chassis.
If you are instructed to return the old system board, follow all packaging instructions and use any packaging materials that are provided.
Take a dust cover from the CPU socket assembly on the new system board and orient it correctly above the CPU socket assembly on the removed system board.
Gently press down the dust cover legs to the CPU socket assembly, pressing on the edges to avoid damage to the socket pins. You might hear a click on the dust cover is securely attached.
Make sure that the dust cover is securely attached to the CPU socket assembly.
Demo video