Install a GPU adapter
Follow instructions in this section to install a GPU adapter.
About this task
Attention
- Read Installation Guidelines and Safety inspection checklist to ensure that you work safely.
- Touch the static-protective package that contains the component to any unpainted metal surface on the server; then, remove it from the package and place it on a static-protective surface.
- Depending on the specific type, the GPU adapter might look slightly different from the illustrations in this section.
- Follow the additional instructions in any documentation that comes with your GPU adapter.
Important
Some chassis might come with standard fans. Make sure to install high-performance fans when GPU adapters with TDP greater than 400W are installed in the system.
Procedure
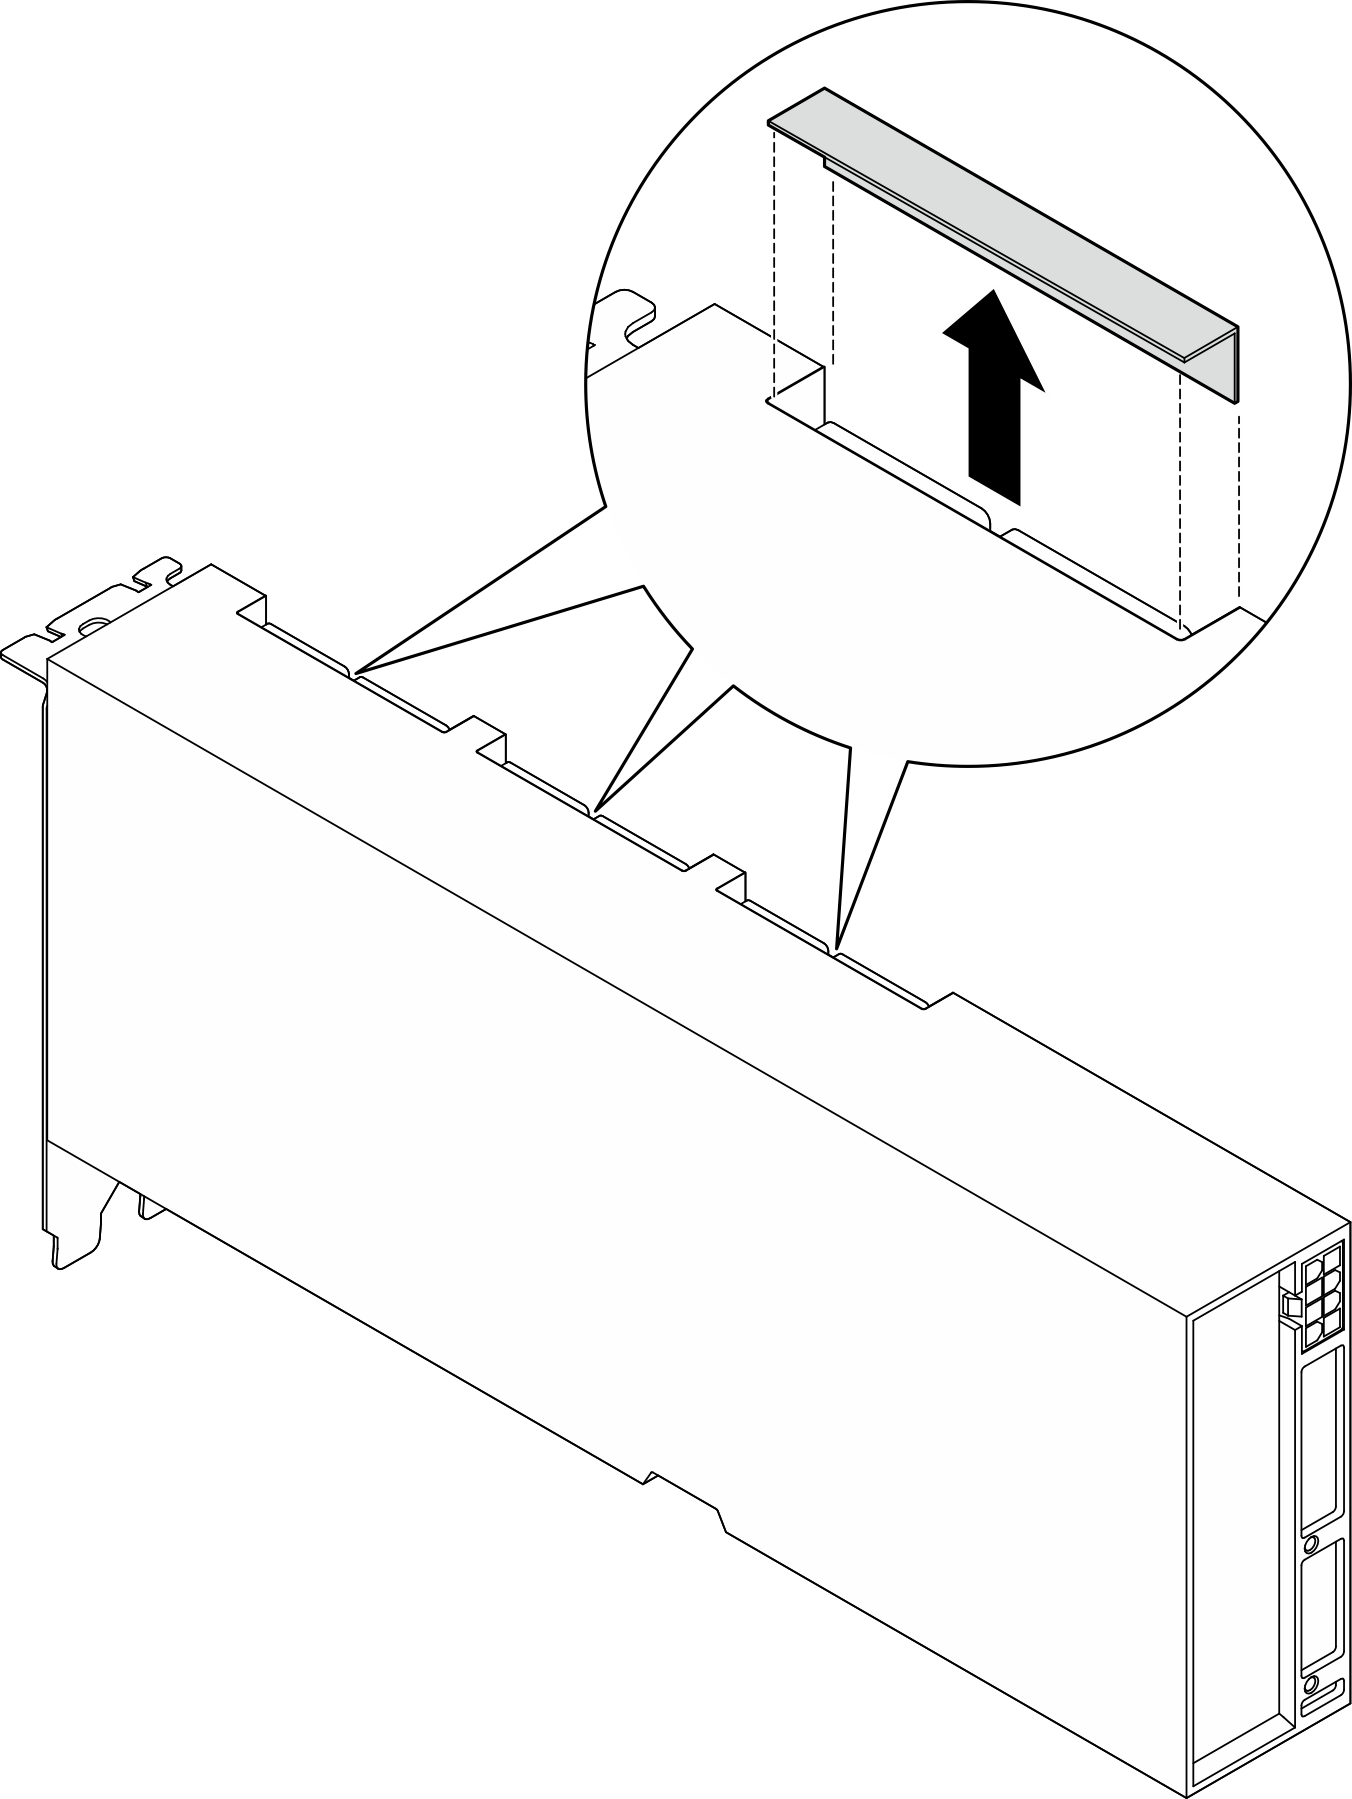
- (Optional) If the GPU adapter link bridges are to be installed, remove the link connector cover from the GPU adapter. Keep the link connector cover in case it is needed in the future.NoteDepending on the configuration, there may be one or three GPU adapter link bridges on the GPU adapters. When linking a GPU pair, all link connectors on the GPU adapters must be linked.Figure 1. Link connector cover removal
- Install the GPU adapter.NoteIf the PCIe slot is covered with a slot bracket, remove the bracket from the chassis first.
 Align the GPU adapter with the PCIe slot on the chassis. Then, carefully press both ends of the GPU adapter straight into the slot until it is securely seated.
 Connect the power cable to the GPU adapter.
 Fasten the screw(s) that secure the GPU adapter to the chassis.NoteDepending on the configuration, fasten one screw or two screws to secure the GPU adapter.
- Single-wide GPU adapter: one screw
- Double-wide GPU adapter: two screws
 Fasten the five screws on the top of the cross bar.Figure 2. GPU adapter installation
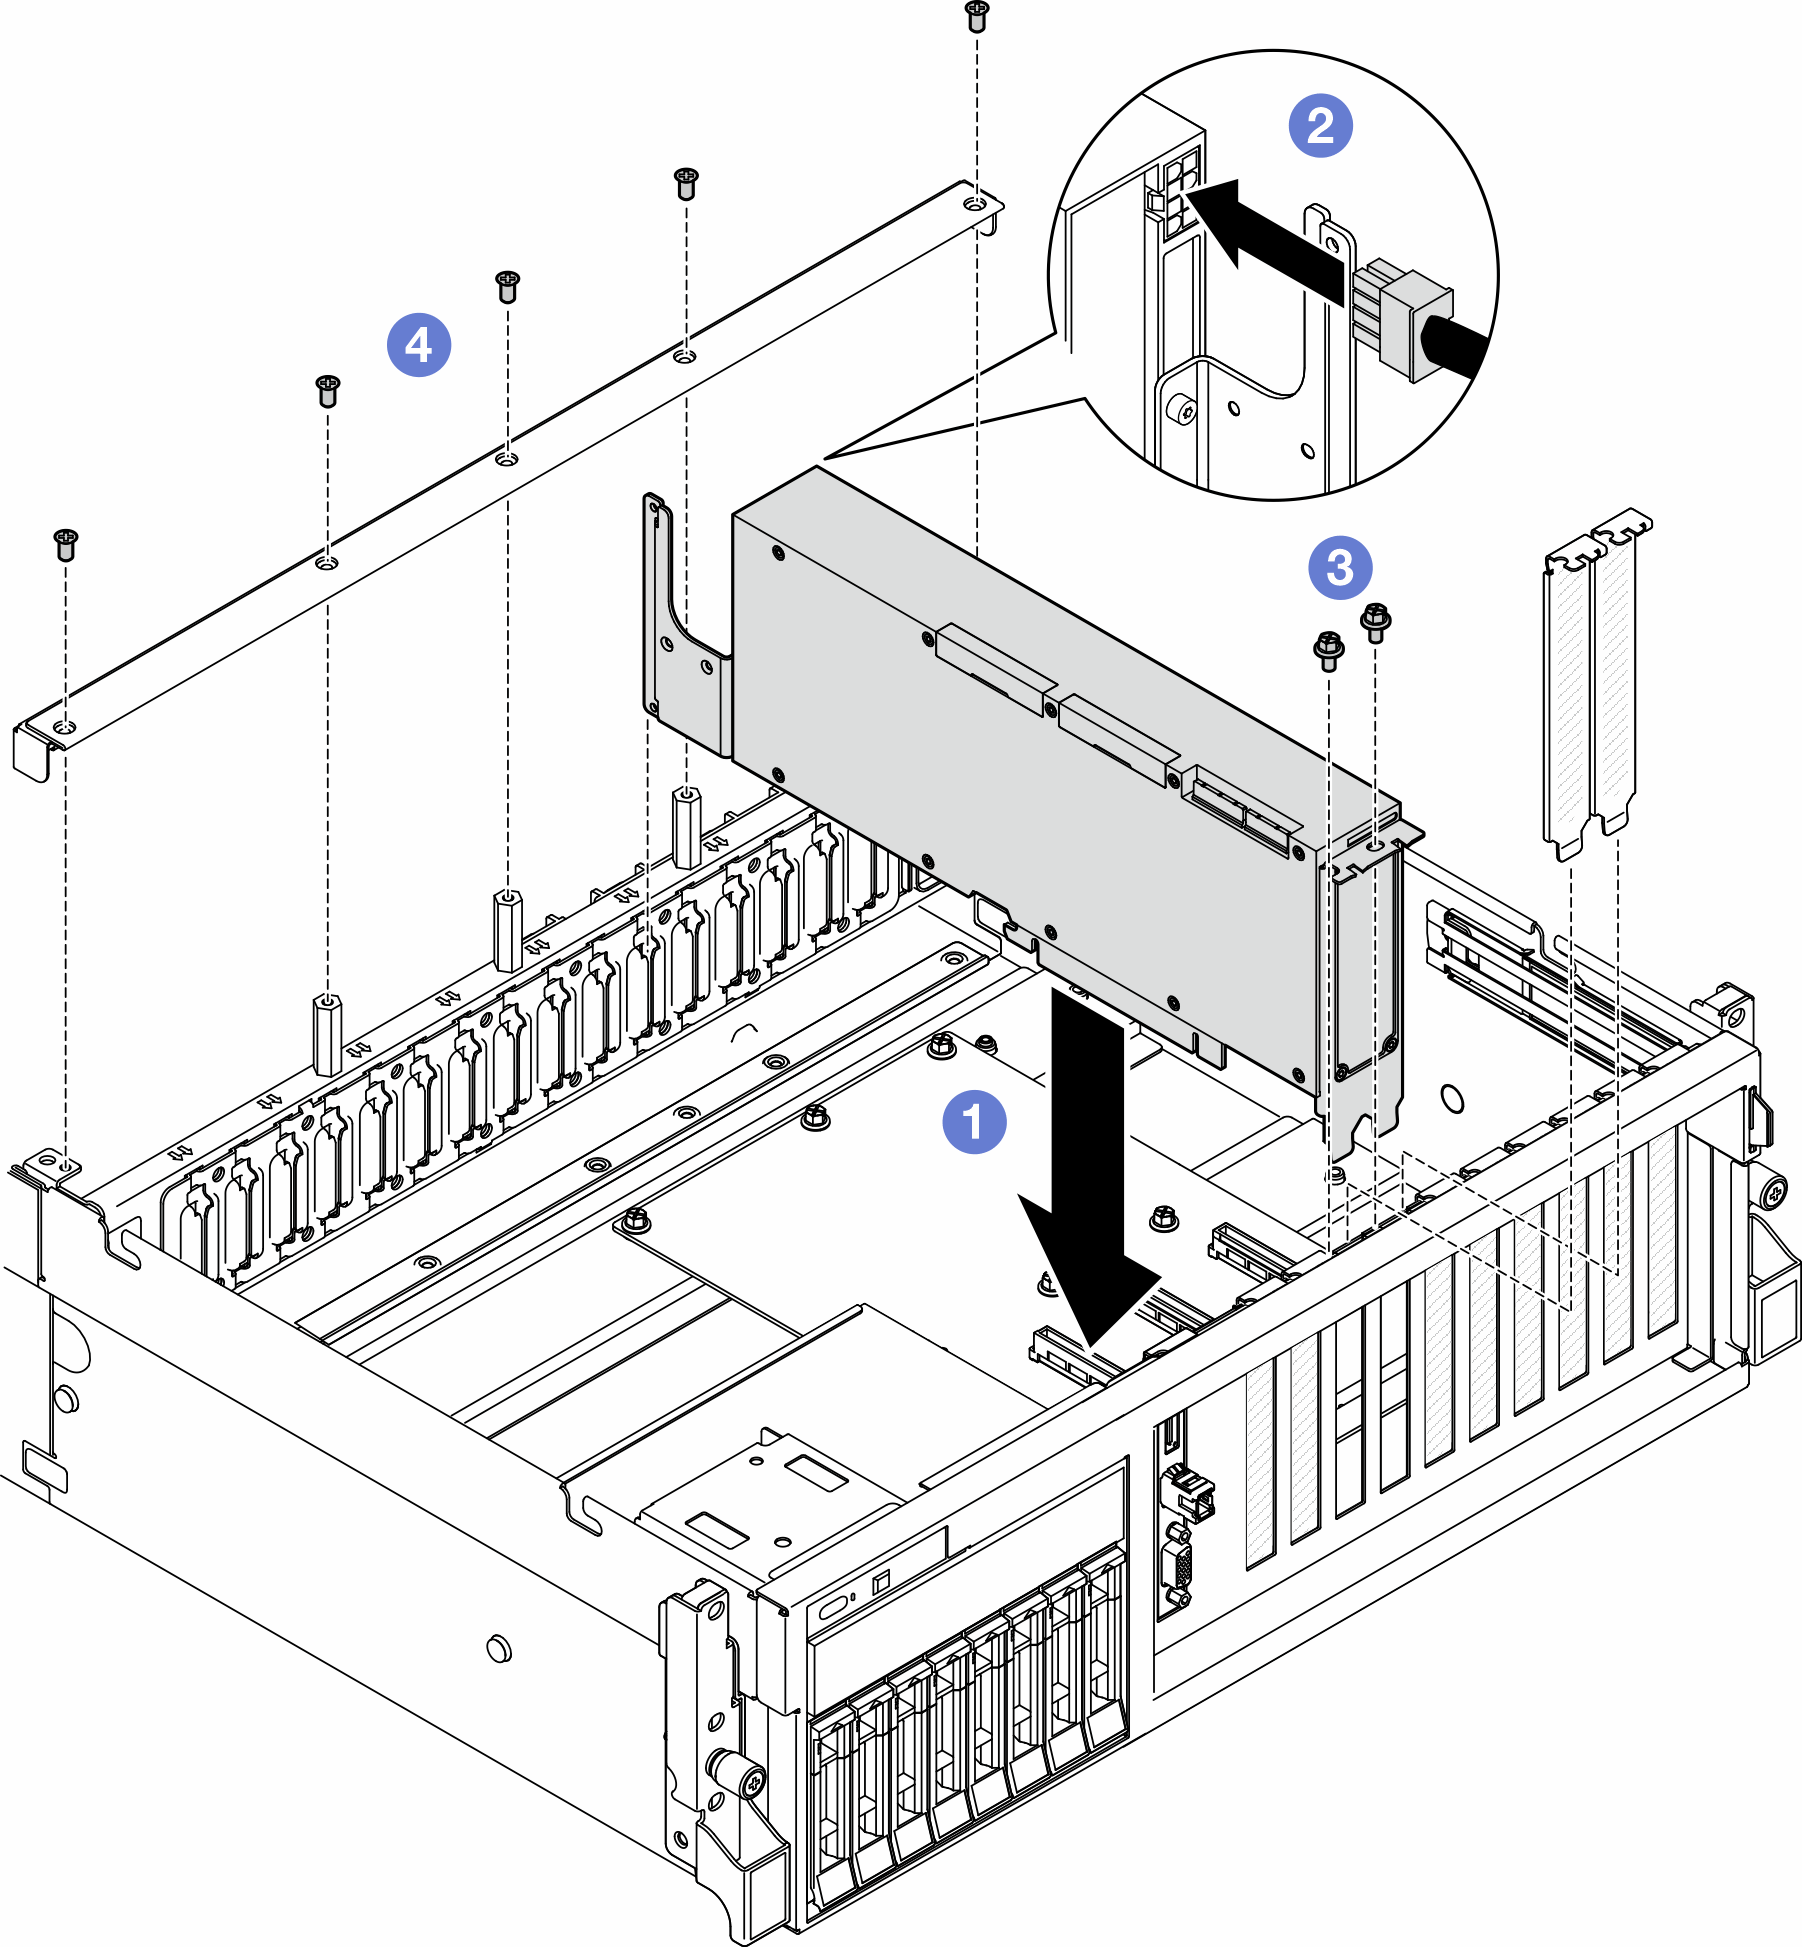
NoteMake sure to route the GPU power cable through the cable guide that is located behind the cross bar.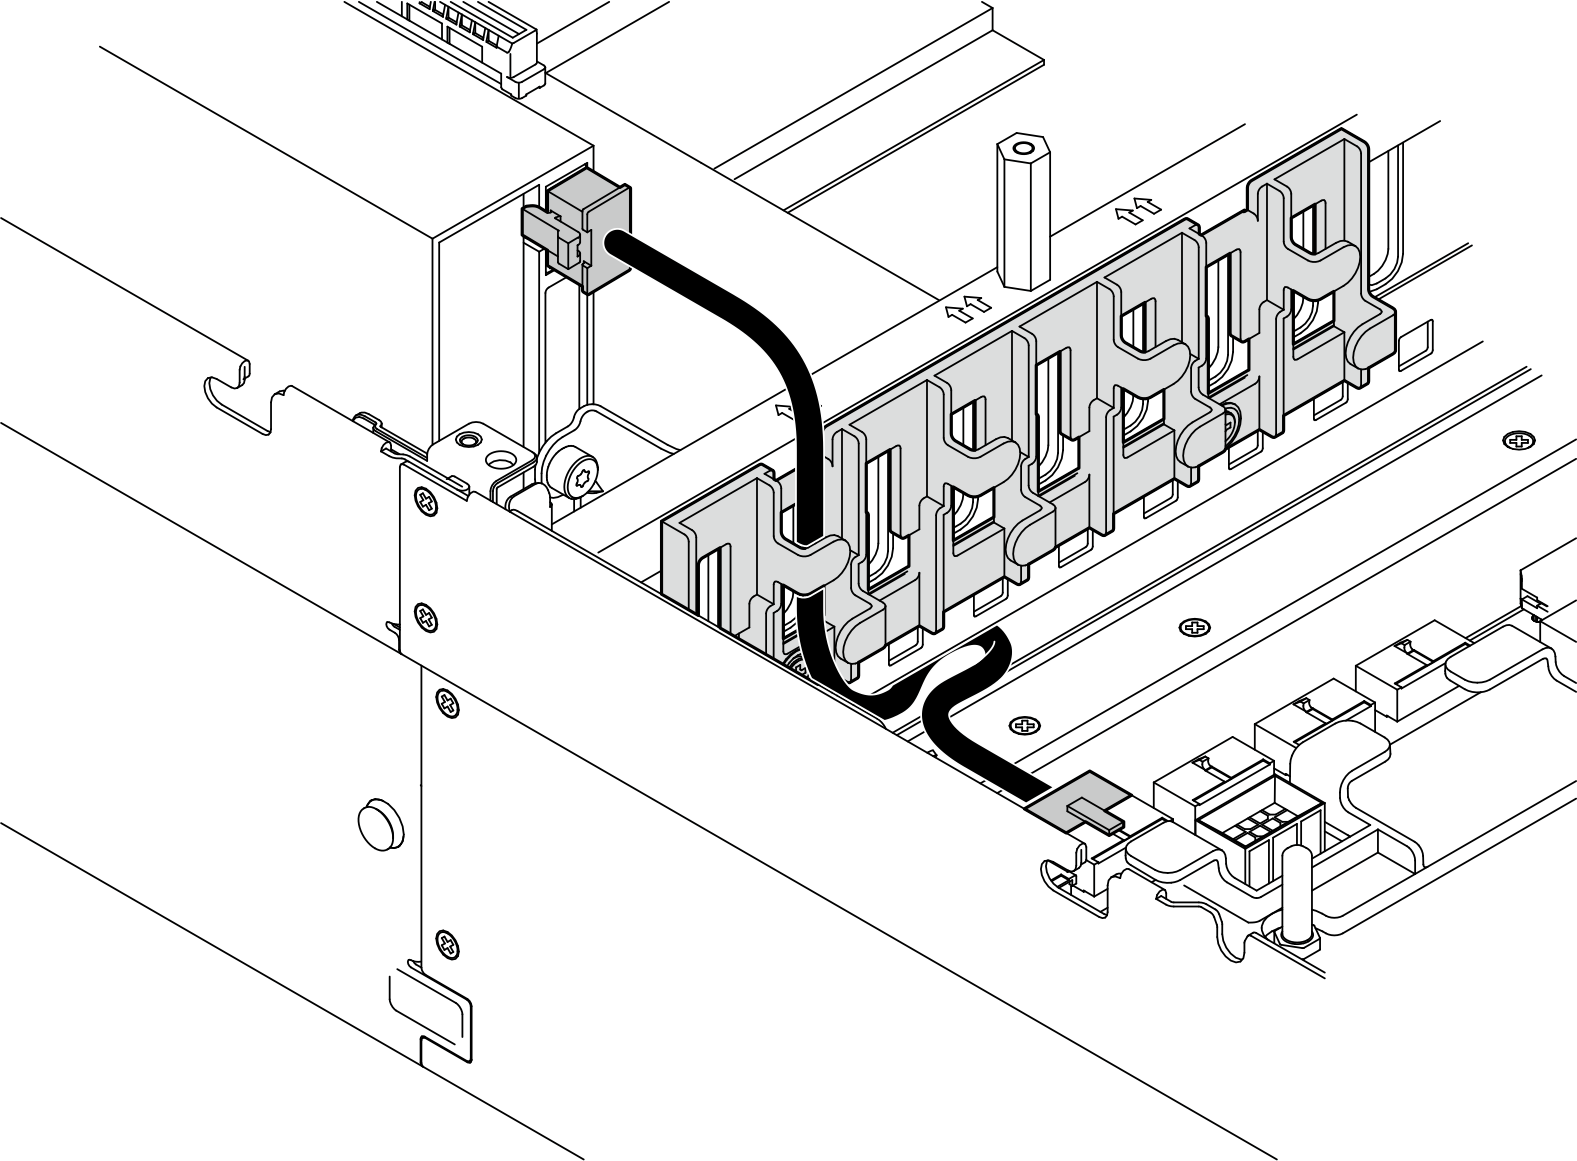
After you finish
- To install the GPU adapter link bridge, see Install a GPU adapter link bridge.
- Complete the parts replacement. See Complete the parts replacement.
Demo video
Give documentation feedback