Install a processor
Follow instructions in this section to install a processor. This task requires a Torx T20 driver. The procedure must be executed by a trained technician.
About this task
Attention
- Read Installation Guidelines and Safety inspection checklist to ensure that you work safely.
- Power off the server and peripheral devices and disconnect the power cords and all external cables. See Power off the server.
- Prevent exposure to static electricity, which might lead to system halt and loss of data, by keeping static-sensitive components in their static-protective packages until installation, and handling these devices with an electrostatic-discharge wrist strap or other grounding system.
Note
- See Lenovo ServerProven website for a list of processors supported for your server. All processors on the system board assembly must have the same speed, number of cores, and frequency.
- Before you install a new processor, update your system firmware to the latest level. See Update the firmware.
Firmware and driver download: You might need to update the firmware or driver after replacing a component.
Go to Drivers and Software download website for ThinkSystem SR675 V3 to see the latest firmware and driver updates for your server.
Go to Update the firmware for more information on firmware updating tools.
Procedure
- Remove the processor socket cover.
- Install the processor.
 Slide the processor carrier into the rail frame.
 Push the rail frame down until the blue latches lock into place; then, close the retention frame.
 Use a Torx T20 screwdriver to tighten the screw.Attention
- Make sure the processor carrier is well seated inside the rail frame.
- Make sure the rear of processor carrier does not float above the rail frame.
Figure 1. Processor installation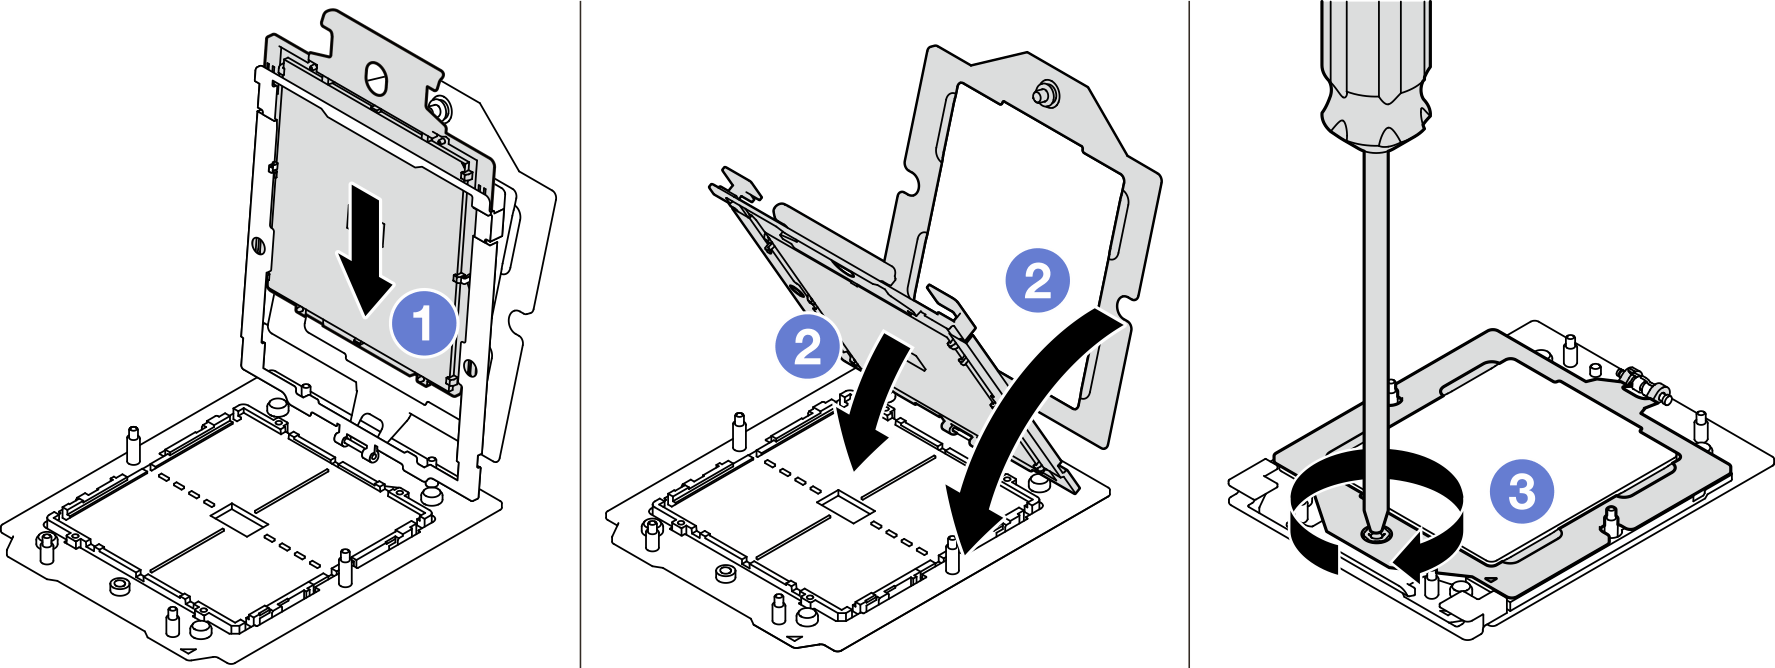
After you finish
- Install the heat sink. See Install a heat sink.
- Complete the parts replacement. See Complete the parts replacement.
Demo video
Give documentation feedback