Install a PCIe riser
Follow instructions in this section to install a PCIe riser.
About this task
Attention
- Read Installation Guidelines and Safety inspection checklist to ensure that you work safely.
- Touch the static-protective package that contains the component to any unpainted metal surface on the server; then, remove it from the package and place it on a static-protective surface.
Note
- To maintain proper system cooling, do not operate the server without a PCIe riser or a riser filler installed in the chassis.
- The PCIe riser might look different from the illustration.
Firmware and driver download: You might need to update the firmware or driver after replacing a component.
Go to Drivers and Software download website for ThinkSystem SR675 V3 to see the latest firmware and driver updates for your server.
Go to Update the firmware for more information on firmware updating tools.
Select the PCIe riser installation scenario
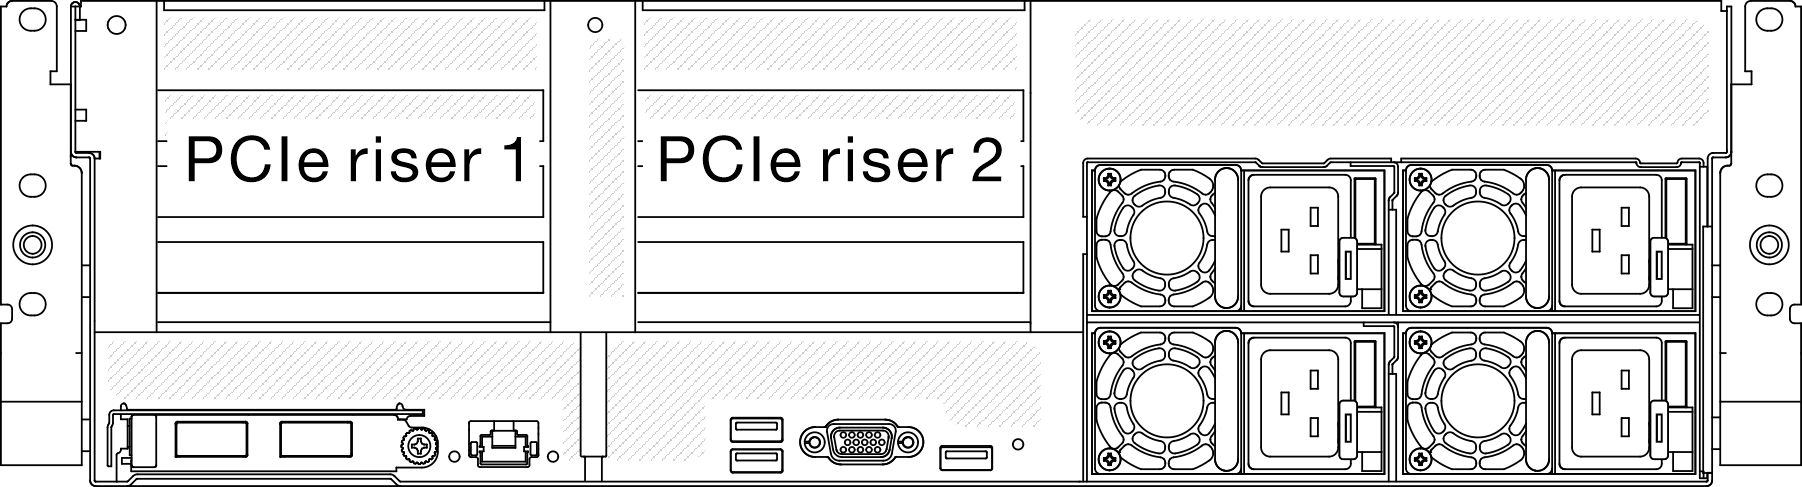
There are three PCIe riser installation scenarios differentiated by PCIe riser location and serial port installation. See corresponding instructions below for proper installation procedure.
Figure 1. PCIe riser locations
Install a PCIe riser without serial port module
Procedure
 Align the guide hole on the PCIe riser with the guide post on the system board assembly; then, insert the PCIe riser into the PCIe slot on the system board assembly.
 Fasten the thumbscrew to secure the PCIe riser.Figure 2. PCIe riser installation (without serial port module)
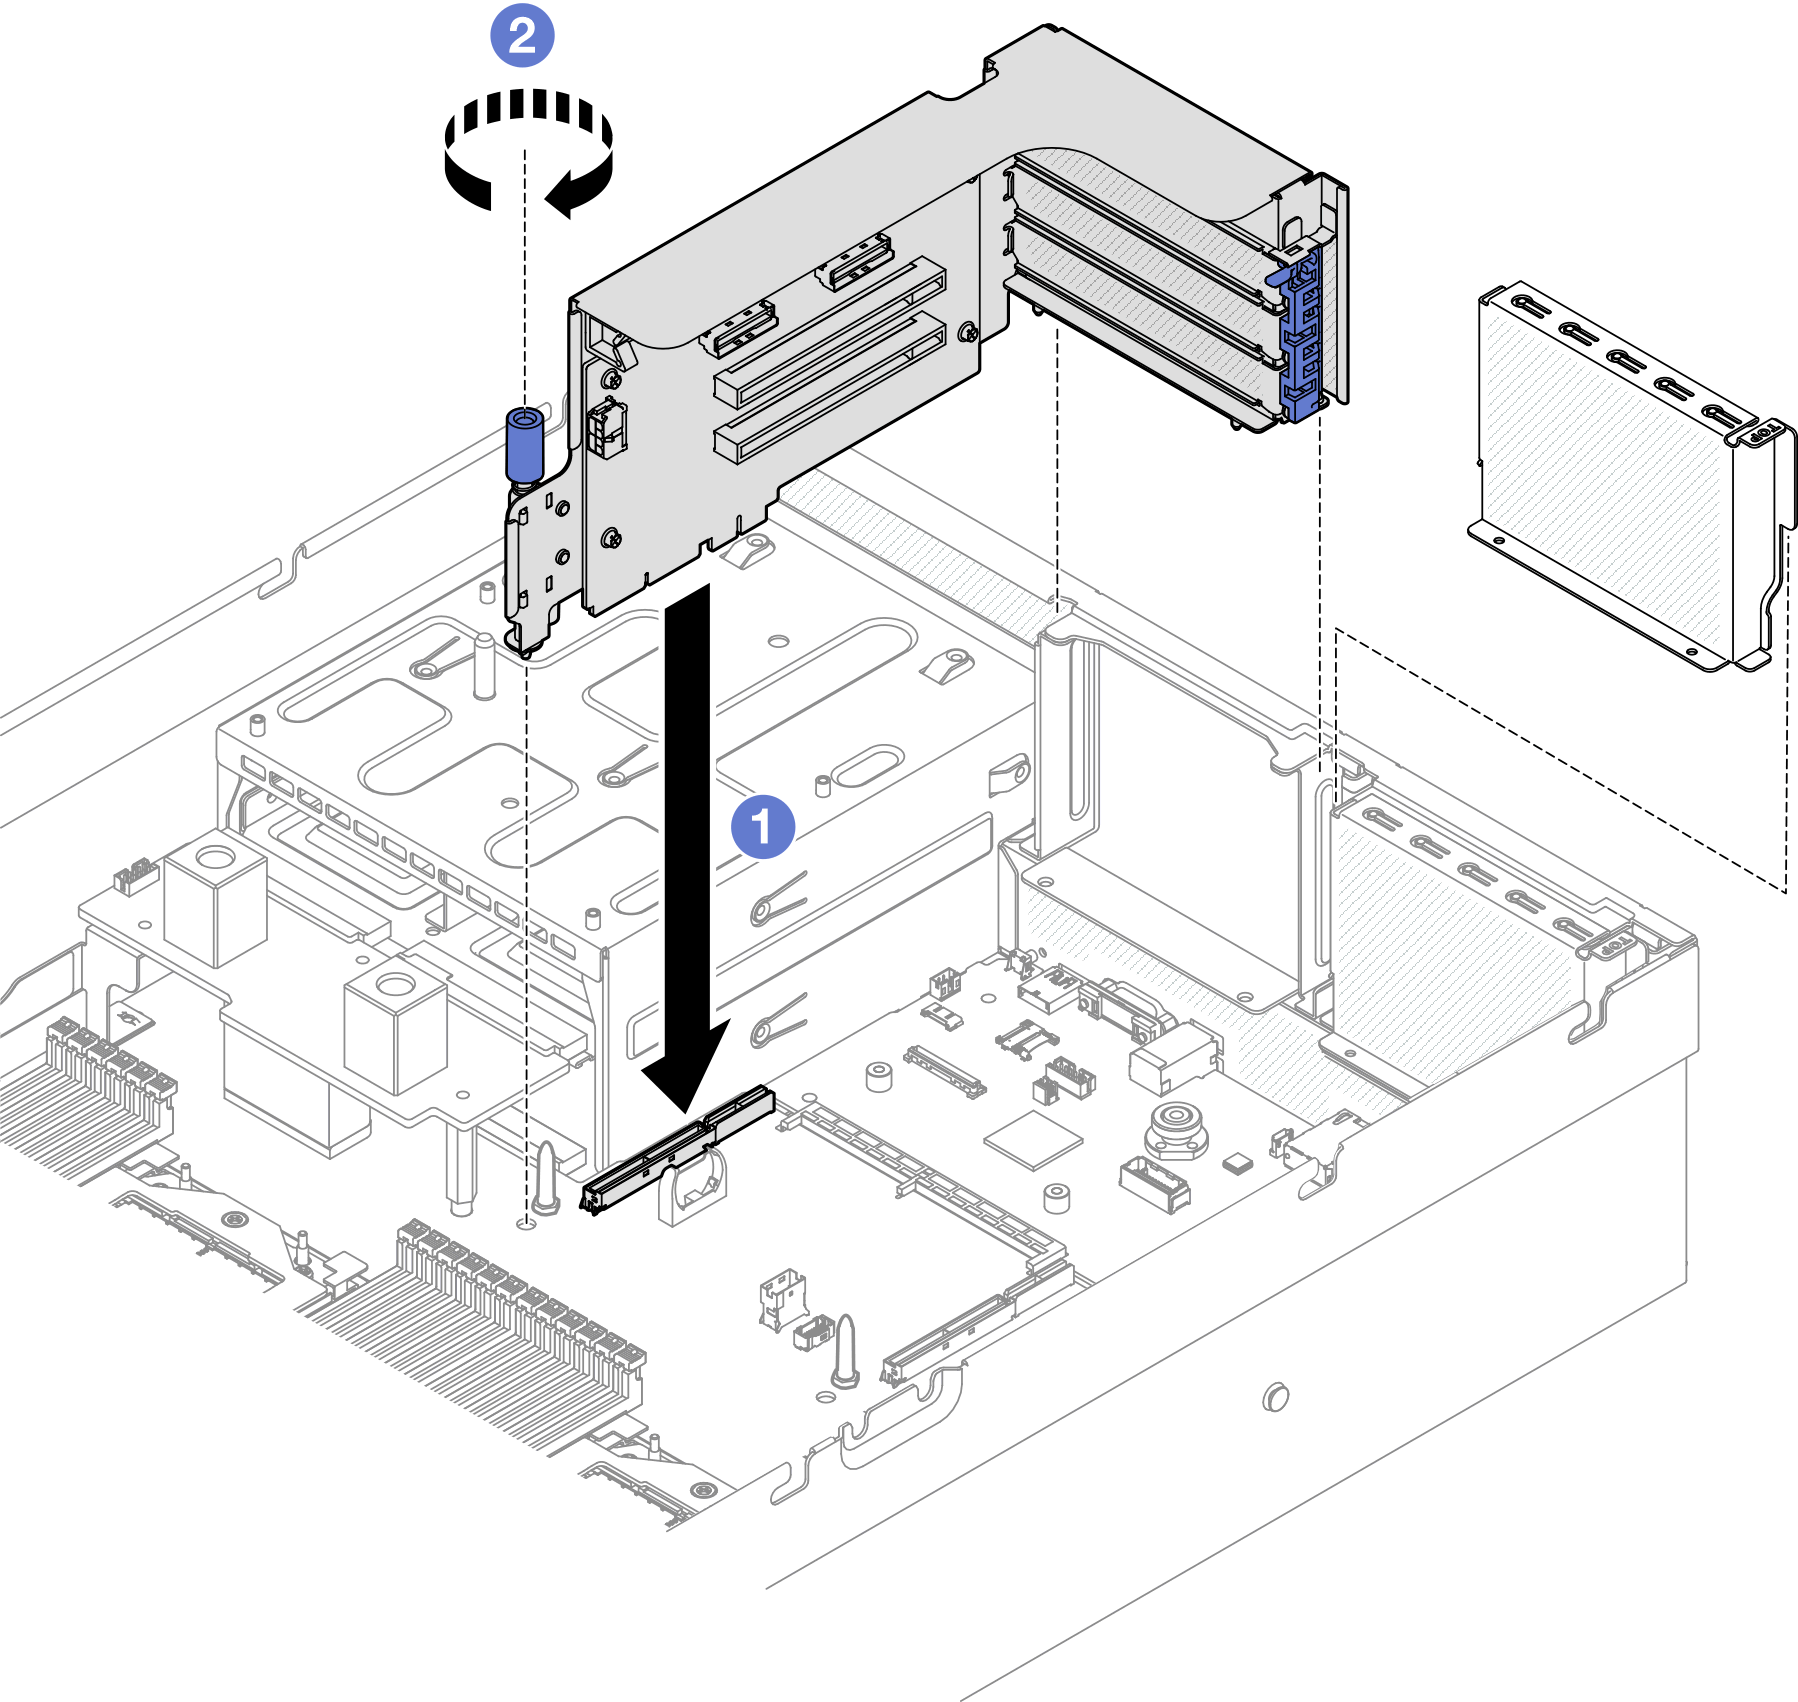
- If applicable, connect the cable(s) to the PCIe riser.Note
- Refer to the PCIe riser cable routing guide for each server model.
- 4-DW GPU Model: PCIe riser 1 cable routing
- 8-DW GPU Model: PCIe riser 1 cable routing or PCIe riser 2 cable routing
- SXM5 GPU Model: PCIe riser 1 cable routing or PCIe riser 2 cable routing
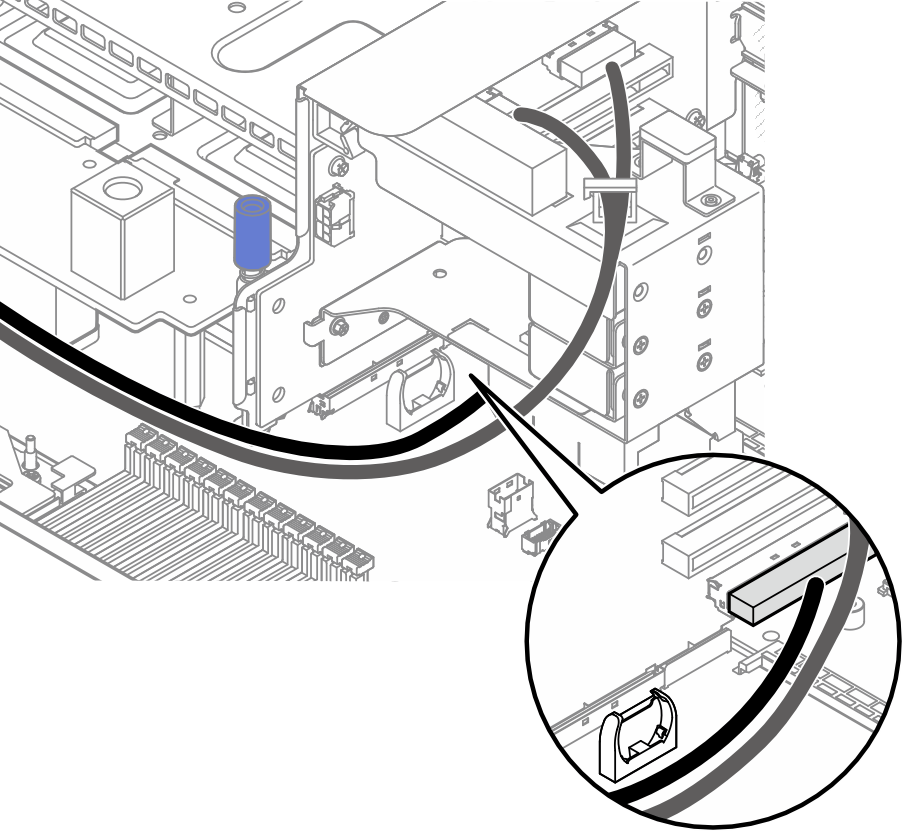
- If the PCIe riser comes with the PCIe adapter retention bracket, make sure to route the cable that connects to MCIO connectors A and B through the cable clip on the top of the retention bracket.

- If the PCIe riser 2 comes with the three cabled host interface PCIe riser card, make sure to route the cable that connects to MCIO connector C along the CMOS battery to avoid damage.
- Refer to the PCIe riser cable routing guide for each server model.
Install PCIe riser 1 installed with serial port module
Procedure
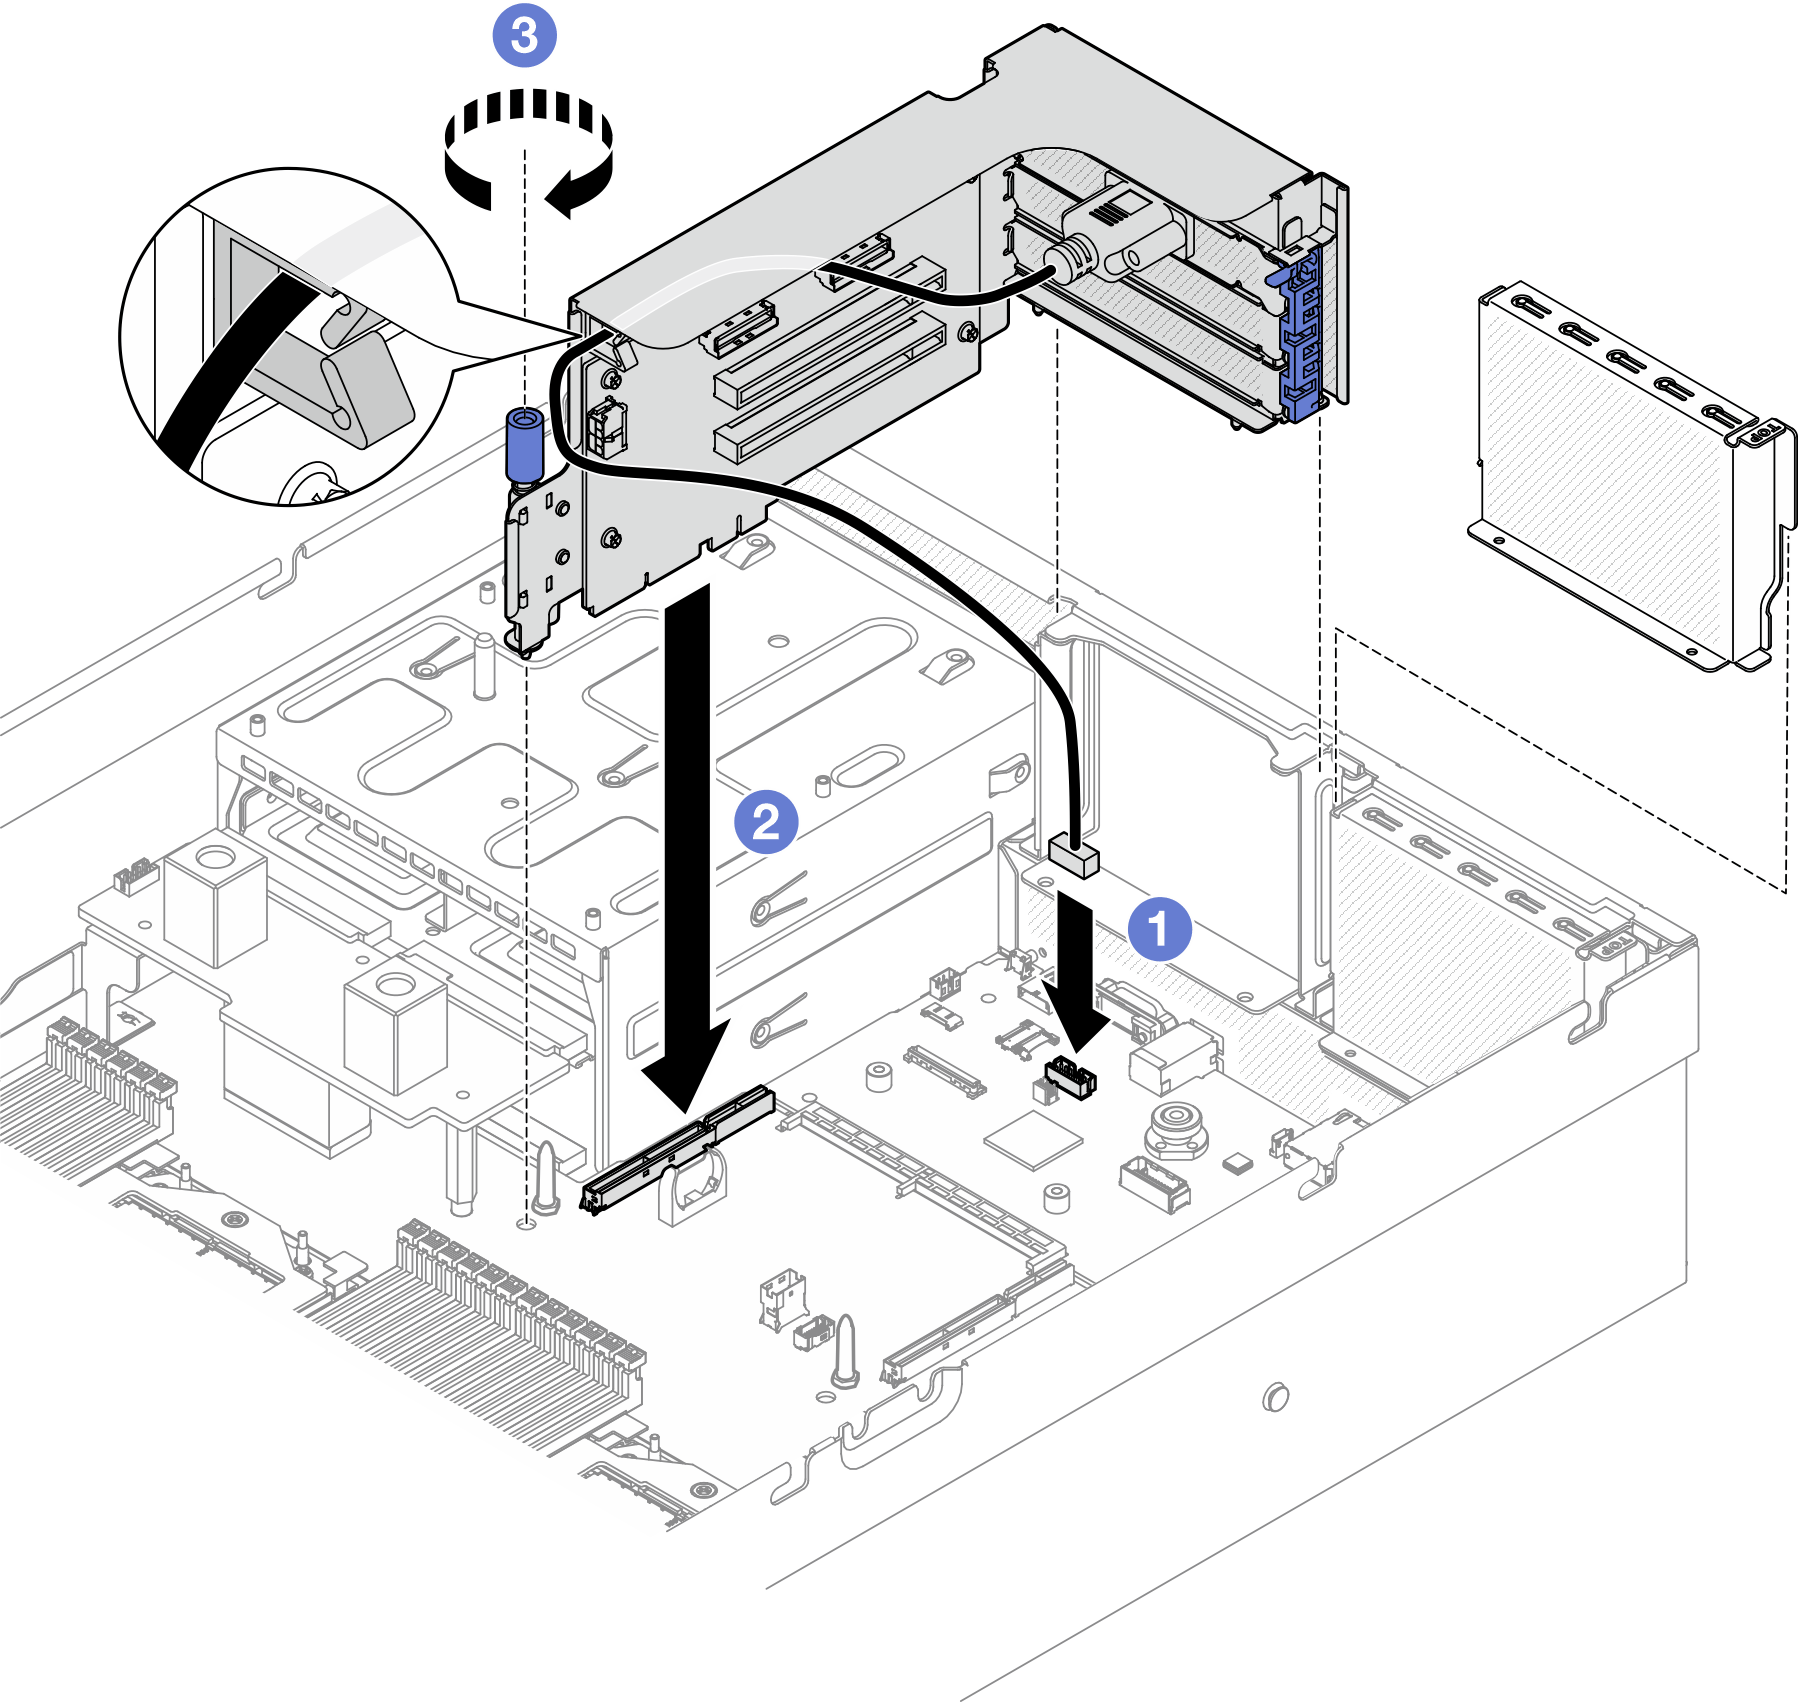
- Install the PCIe riser 1 installed with serial port.AttentionMake sure the serial port cable is routed through the cable clip inside the PCIe riser.
- Align the guide hole on the PCIe riser with the guide post on the system board assembly; then, insert the PCIe riser into the PCIe slot on the system board assembly.
- Fasten the thumbscrew to secure the PCIe riser.
 Connect the serial port cable to the serial port connector on the system board assembly. Figure 3. PCIe riser 1 installation (with serial port module)
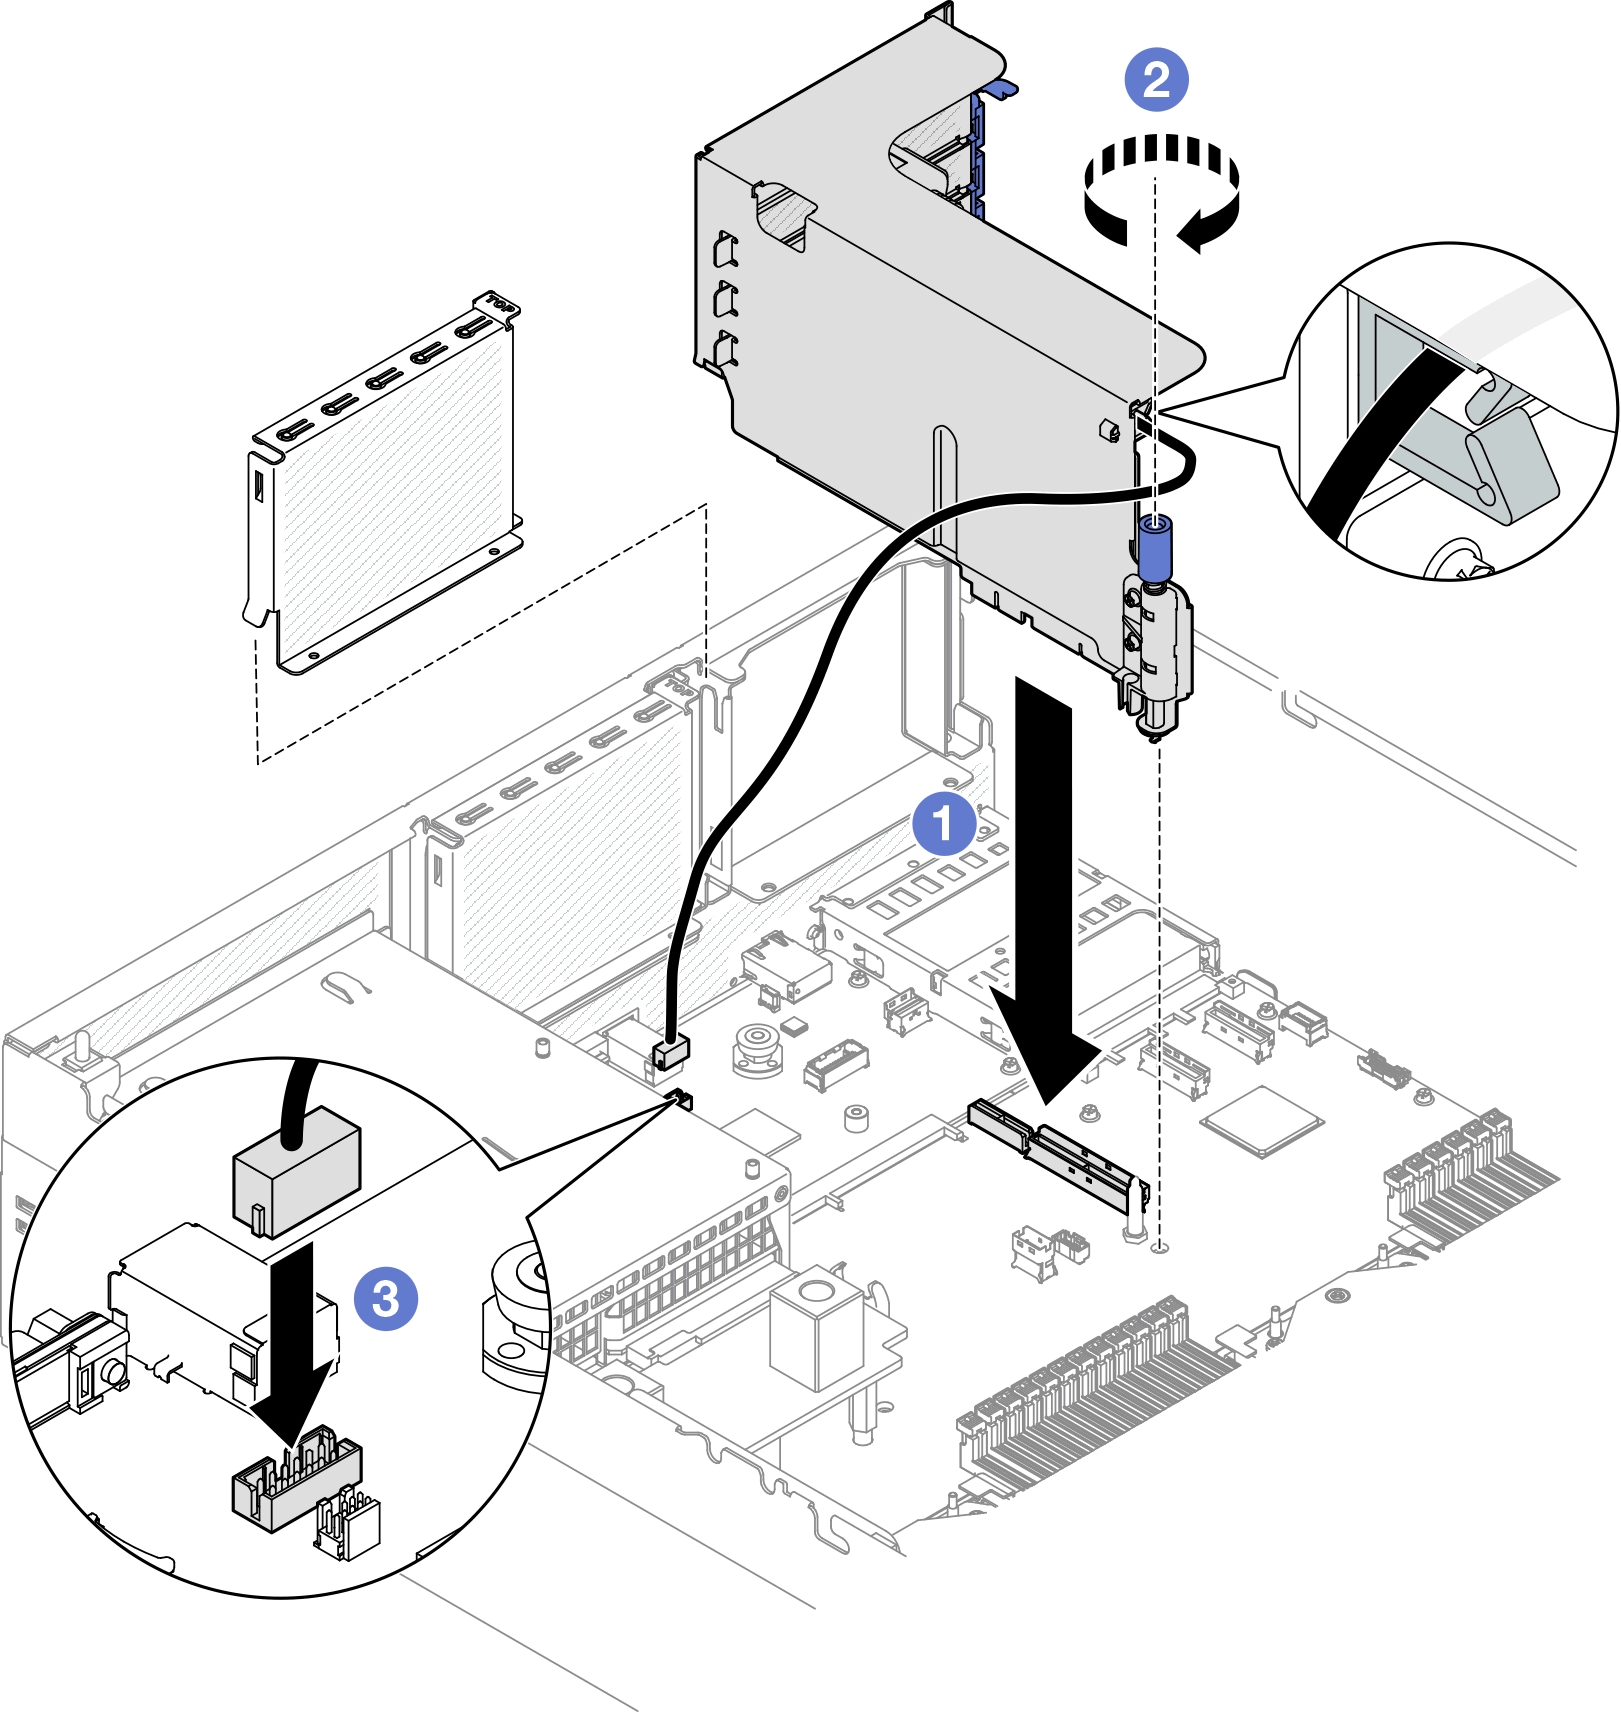
- If applicable, connect the cable(s) to the PCIe riser.Note
- Refer to the PCIe riser cable routing guide for each server model.
- 4-DW GPU Model: PCIe riser 1 cable routing
- 8-DW GPU Model: PCIe riser 1 cable routing
- SXM5 GPU Model: PCIe riser 1 cable routing
- If the PCIe riser comes with the PCIe adapter retention bracket, make sure to route the cable that connects to MCIO connectors A and B through the cable clip on the top of the retention bracket.
- Refer to the PCIe riser cable routing guide for each server model.
After you finish
- Reinstall the PCIe riser 2. See Install a PCIe riser.
- Complete the parts replacement. See Complete the parts replacement.
Demo video
Install PCIe riser 2 installed with serial port module
Procedure
- Install the PCIe riser 2 installed with the serial port module.AttentionMake sure the serial port cable is routed through the cable clip inside the PCIe riser.
- Connect the serial port cable to the serial port connector on the system board assembly.
- Align the guide hole on the PCIe riser with the guide post on the system board assembly; then, insert the PCIe riser into the PCIe slot on the system board assembly.
- Fasten the thumbscrew to secure the PCIe riser.Figure 4. PCIe riser 2 installation (with serial port module)
- If applicable, connect the cable(s) to the PCIe riser.Note
- Refer to the PCIe riser cable routing guide for each server model.
- 8-DW GPU Model: PCIe riser 2 cable routing
- SXM5 GPU Model: PCIe riser 2 cable routing
- If the PCIe riser comes with the PCIe adapter retention bracket, make sure to route the cable that connects to MCIO connectors A and B through the cable clip on the top of the retention bracket.
- If the PCIe riser 2 comes with the three cabled host interface PCIe riser card, make sure to route the cable that connects to MCIO connector C along the CMOS battery to avoid damage.
- Refer to the PCIe riser cable routing guide for each server model.
Give documentation feedback