Install the 2.5-inch drive cage
Follow instructions in this section to install the 2.5-inch drive cage.
About this task
Attention
- Read Installation Guidelines and Safety inspection checklist to ensure that you work safely.
- Touch the static-protective package that contains the component to any unpainted metal surface on the server; then, remove it from the package and place it on a static-protective surface.
Procedure
 Align the 2.5-inch drive cage with the opening on the front of the server; then, slide the drive cage into the chassis until it is seated in place.
 Fasten the two thumbscrews to secure the 2.5-inch drive cage to the front drive tray.Figure 1. 2.5-inch drive cage installation
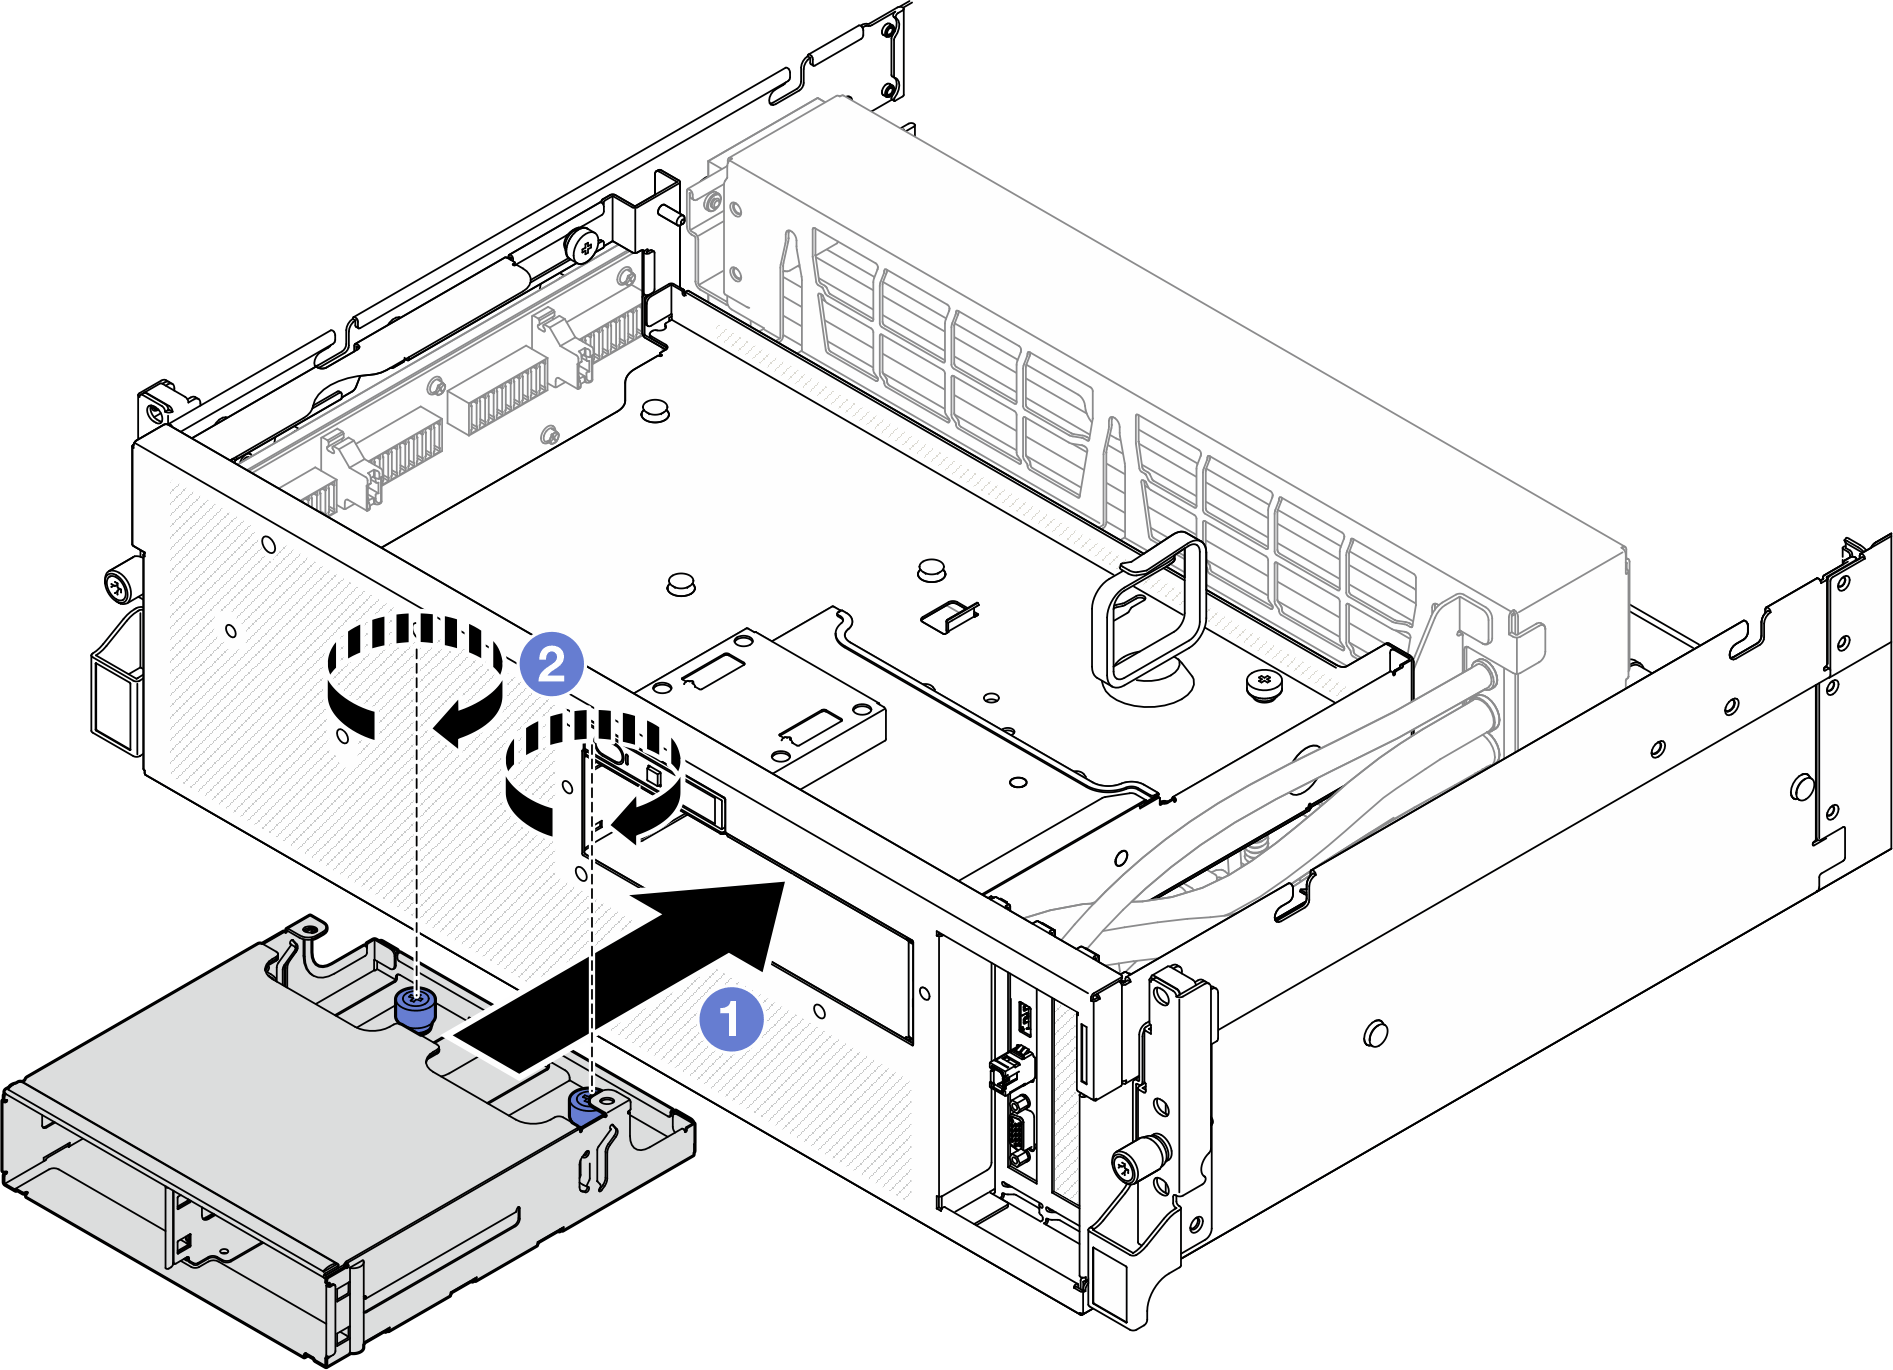
After you finish
- Reinstall the 2.5-inch drive backplane module. See Install the 2.5-inch drive backplane module.
- Reconnect the power and signal cables to the 2.5-inch drive backplane. See 2.5-inch drive backplane cable routing for more information.
- Reinstall the 2.5-inch hot-swap drives or drive bay fillers (if any) into the drive bays. See Install a 2.5-inch hot-swap drive.
- Complete the parts replacement. See Complete the parts replacement.
Demo video
Give documentation feedback