Install the CX-7 assembly
Follow instructions in this section to install the CX-7 assembly. The procedure must be executed by a trained technician.
About this task
Attention
- Read Installation Guidelines and Safety inspection checklist to ensure that you work safely.
- Touch the static-protective package that contains the component to any unpainted metal surface on the server; then, remove it from the package and place it on a static-protective surface.
Procedure
 Hold the CX-7 carrier board handle and the CX-7 carrier board tab, and align the CX-7 assembly with the five guide pins on the front drive tray; then, lower it into the front drive tray.
 Push the CX-7 assembly toward the interposer card to connect it to the interposer card.NoteMake sure the two retention clips on the
CX-7 carrier board handle are facing up before connecting the CX-7 assembly to the interposer card.  Press down the rubber pad on the CX-7 carrier board handle so that the rubber pad is located underneath the front drive tray handle.
 Insert the two retention clips on the CX-7 carrier board handle into the slots on the interposer card.
 Rotate the CX-7 carrier board handle down to lock the CX-7 assembly in place.
 Fasten the thumbscrew to secure the CX-7 assembly to the front drive tray.Figure 1. CX-7 assembly installation
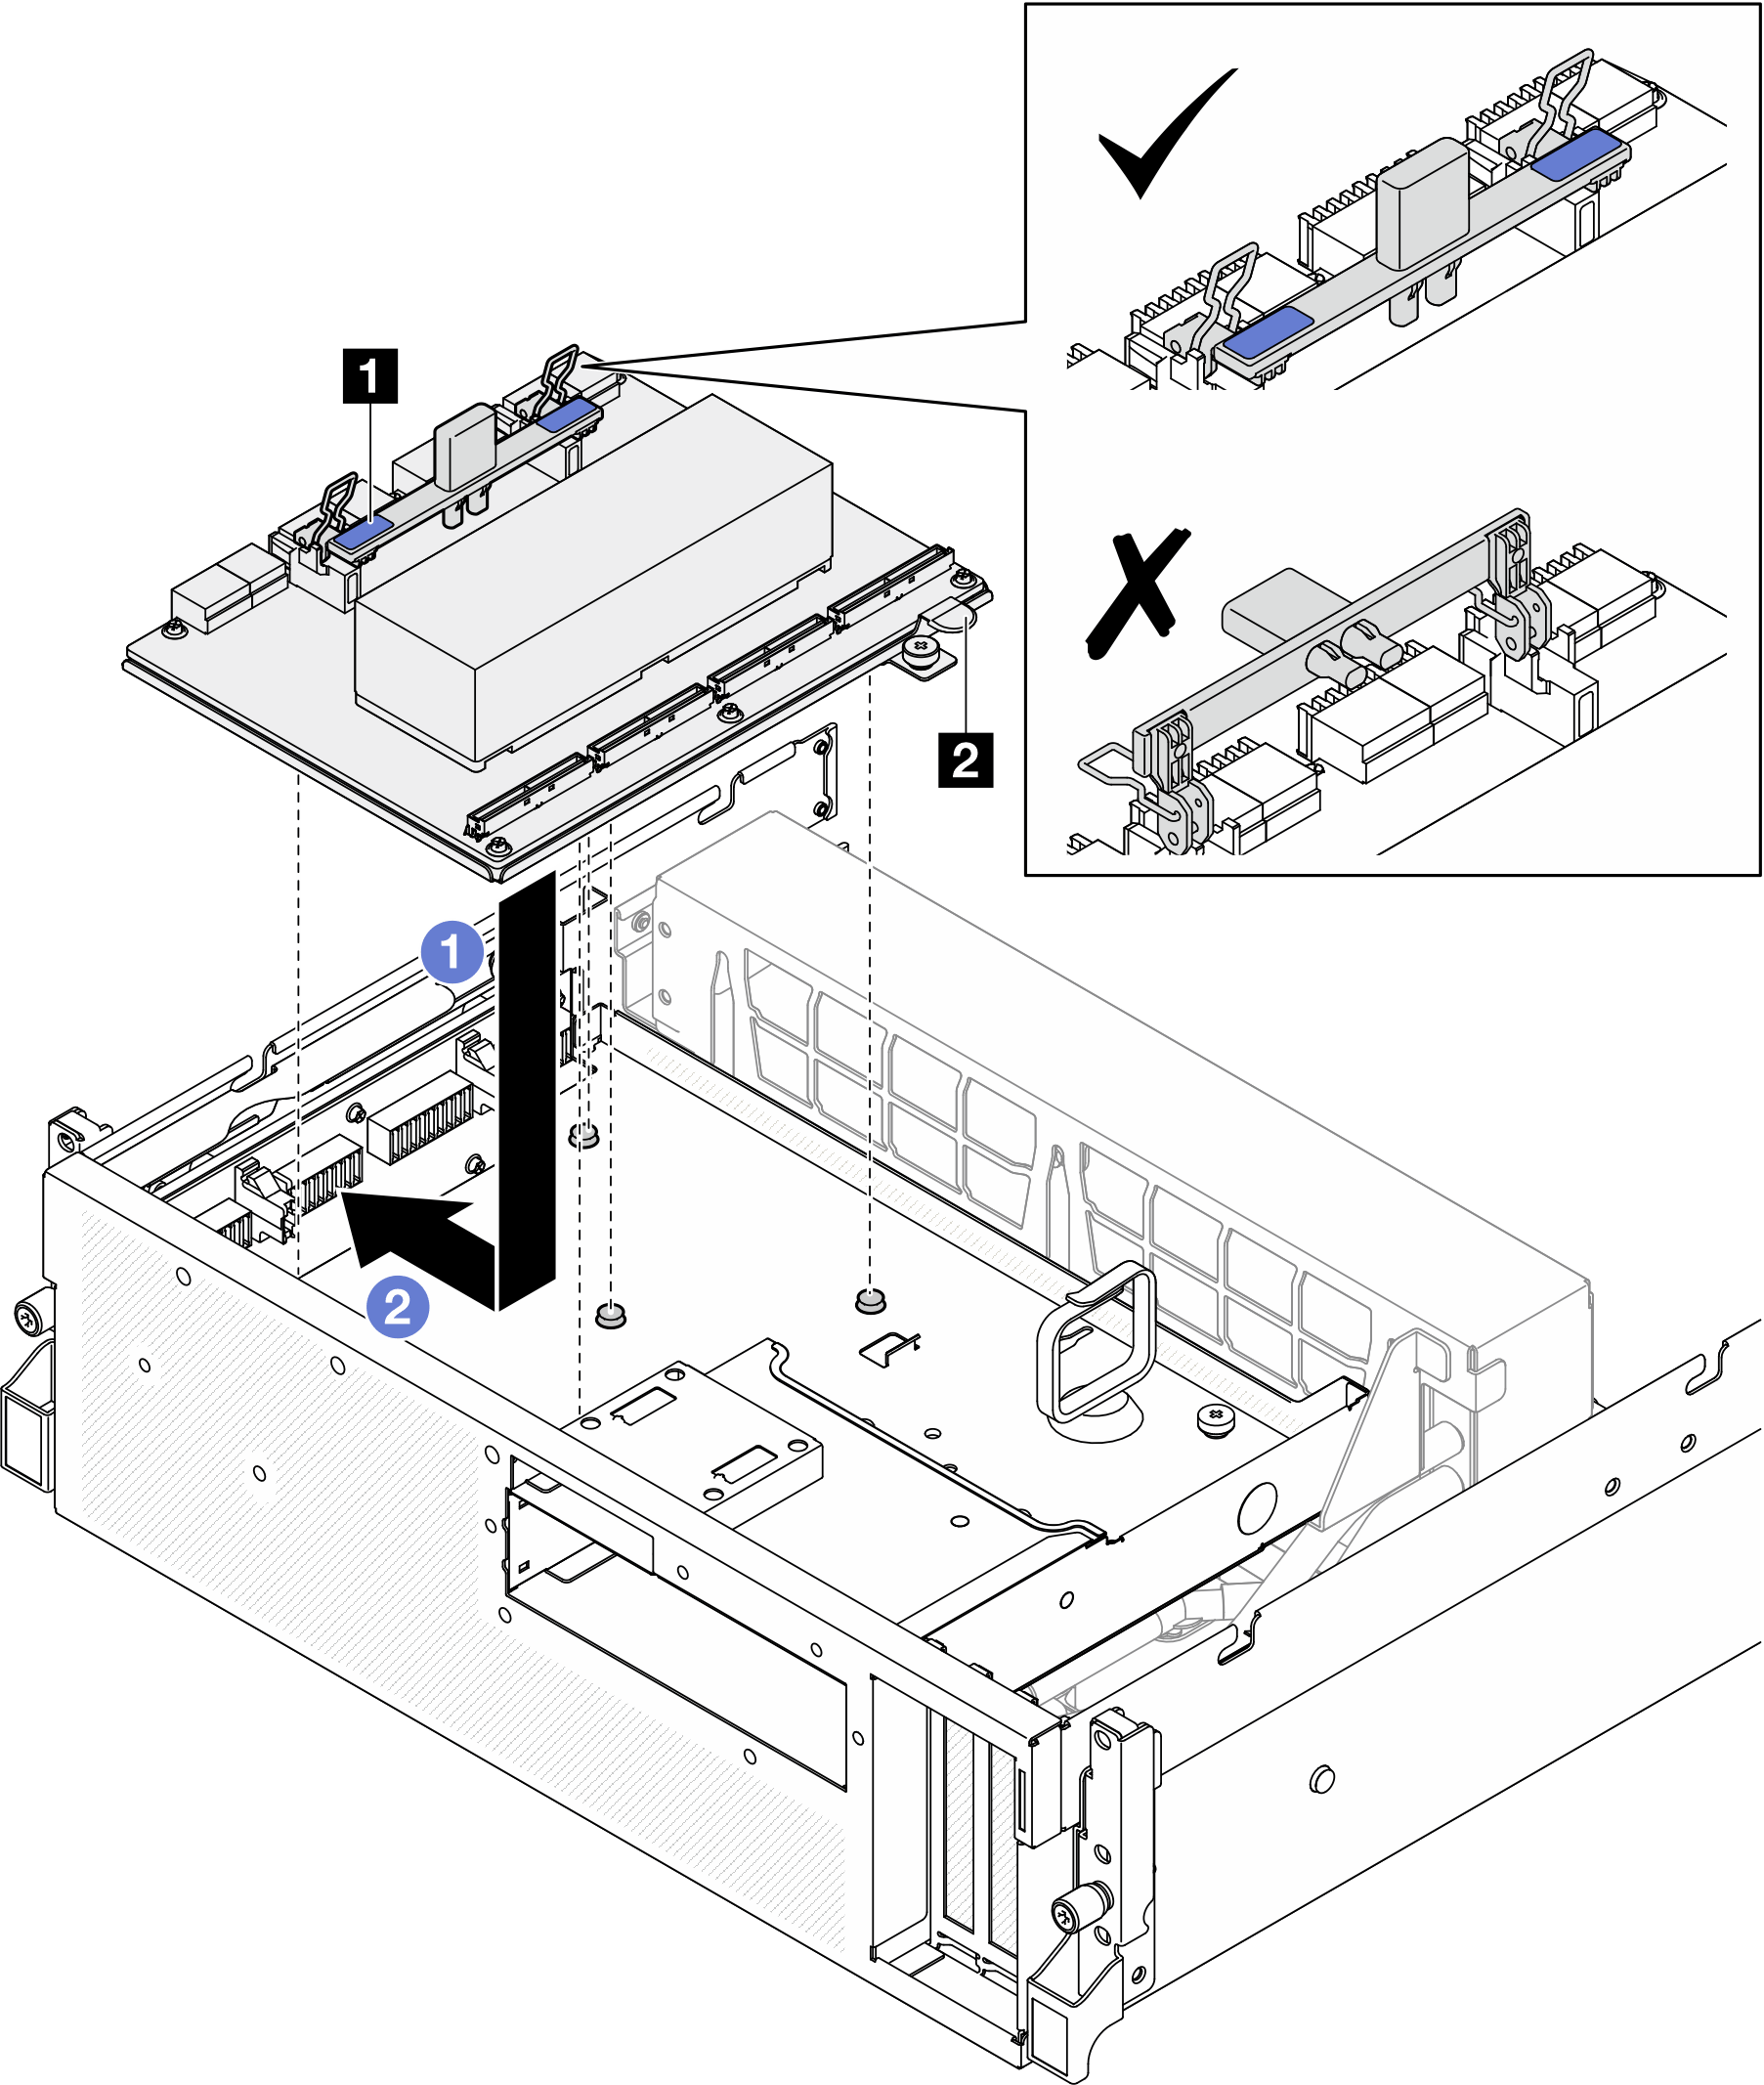
1 CX-7 carrier board handle 2 CX-7 carrier board tab 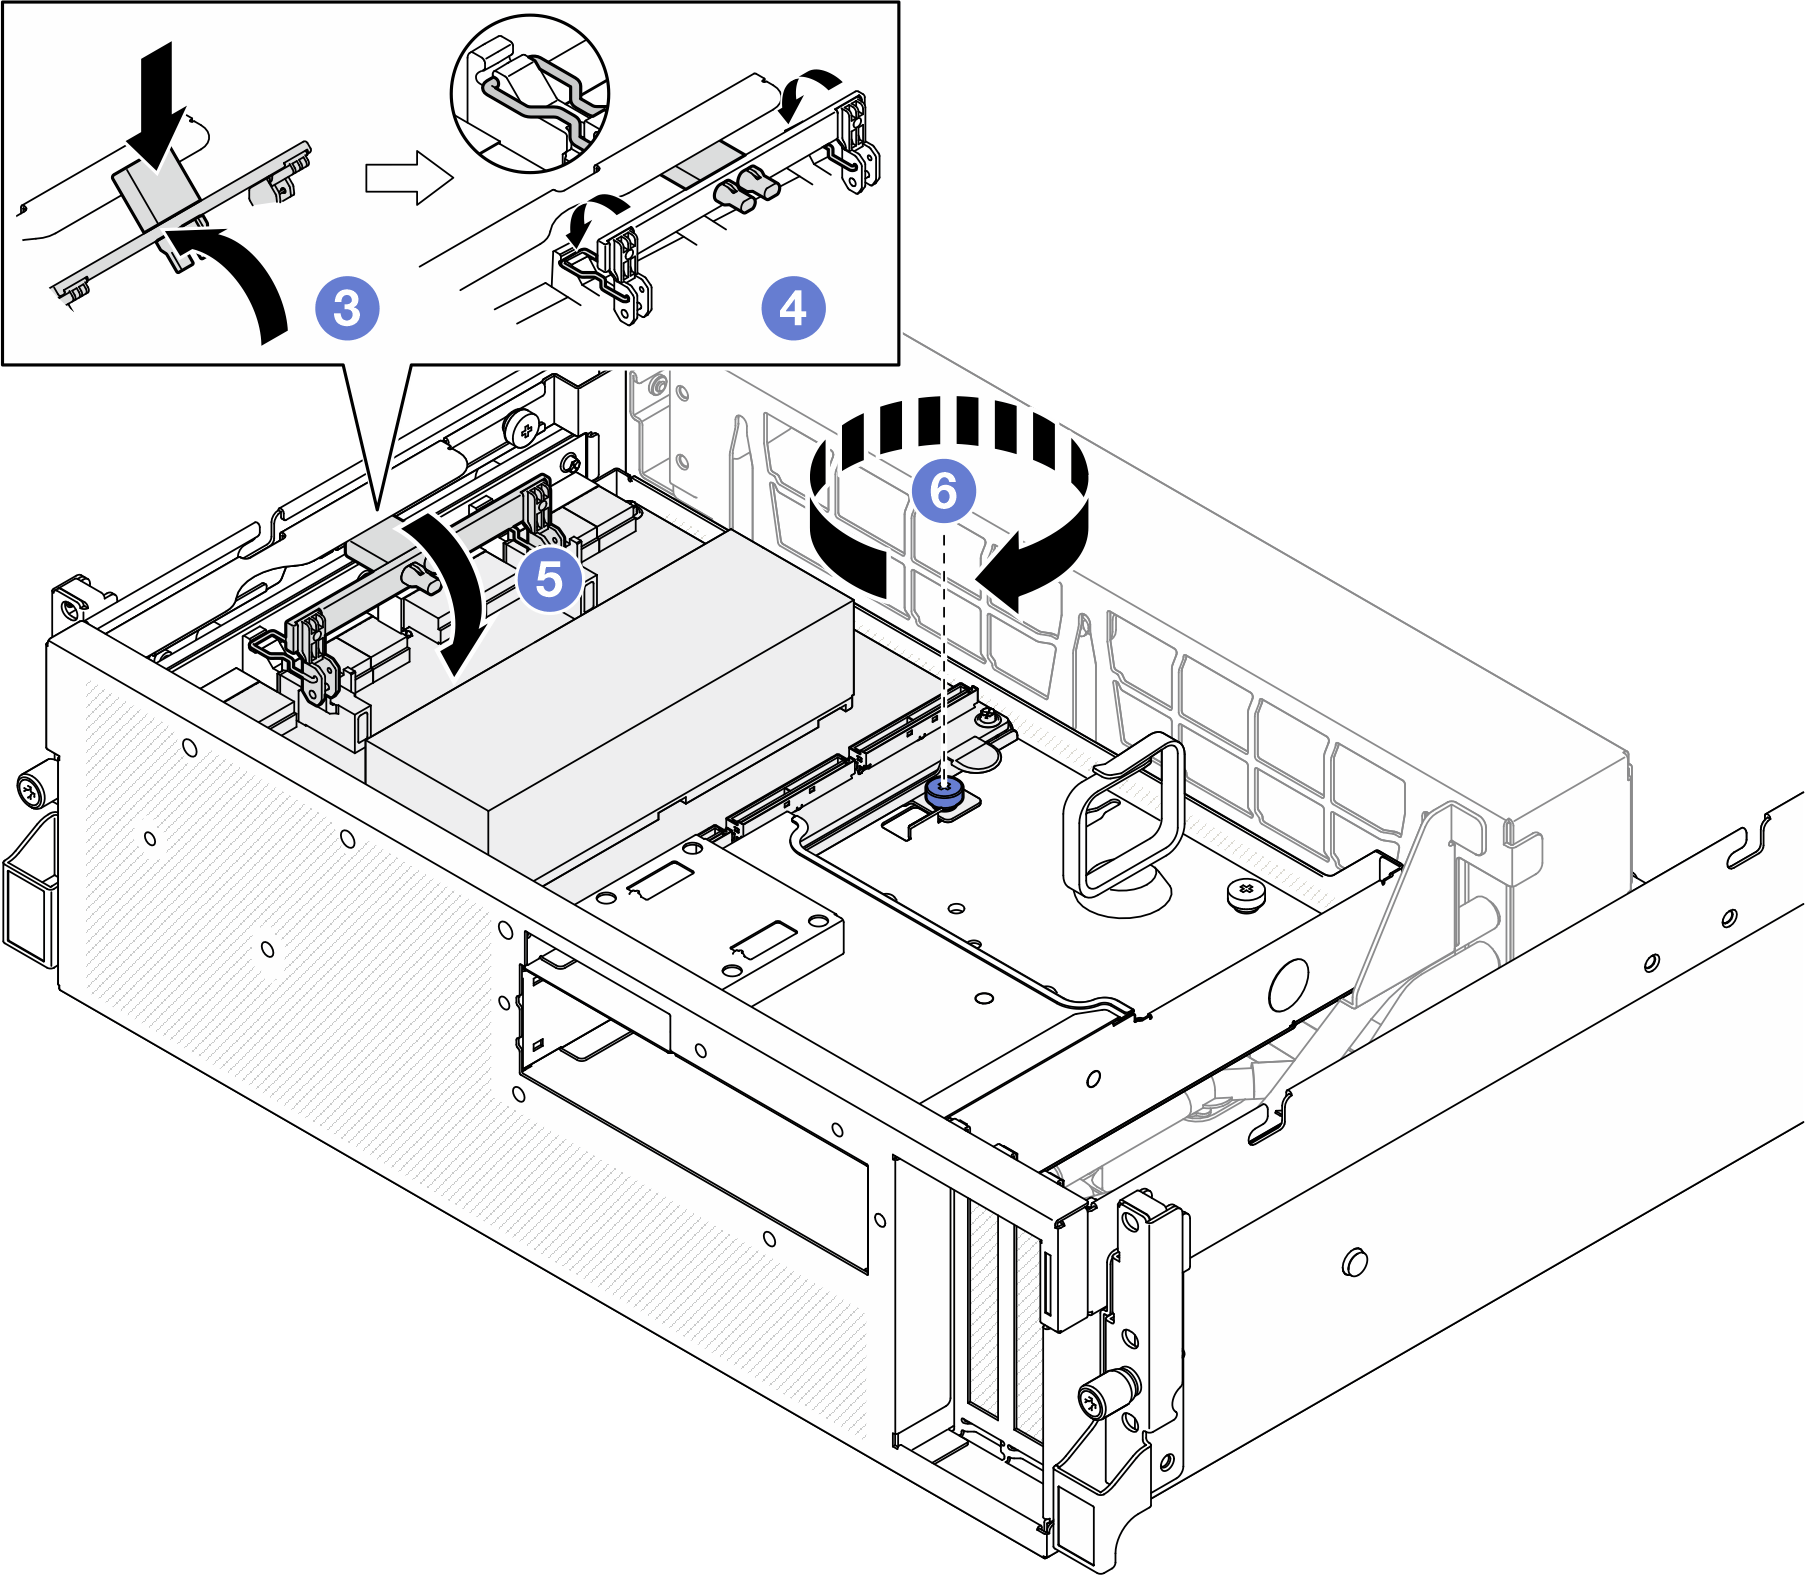
After you finish
- Reconnect the cables to the CX-7 carrier board and the CX-7 mezz board. See CX-7 carrier board cable routing and OSFP port card cable routing for more information.CAUTION
- Hold the cable connector at 45 degree angle when inserting it into the port.
- Have extremely precaution when reseating the connectors that have a 45 degree label on them as they are fragile and will get damage if not installed in the correct 45 degree angle.

- Complete the parts replacement. See Complete the parts replacement.
Demo video
Give documentation feedback