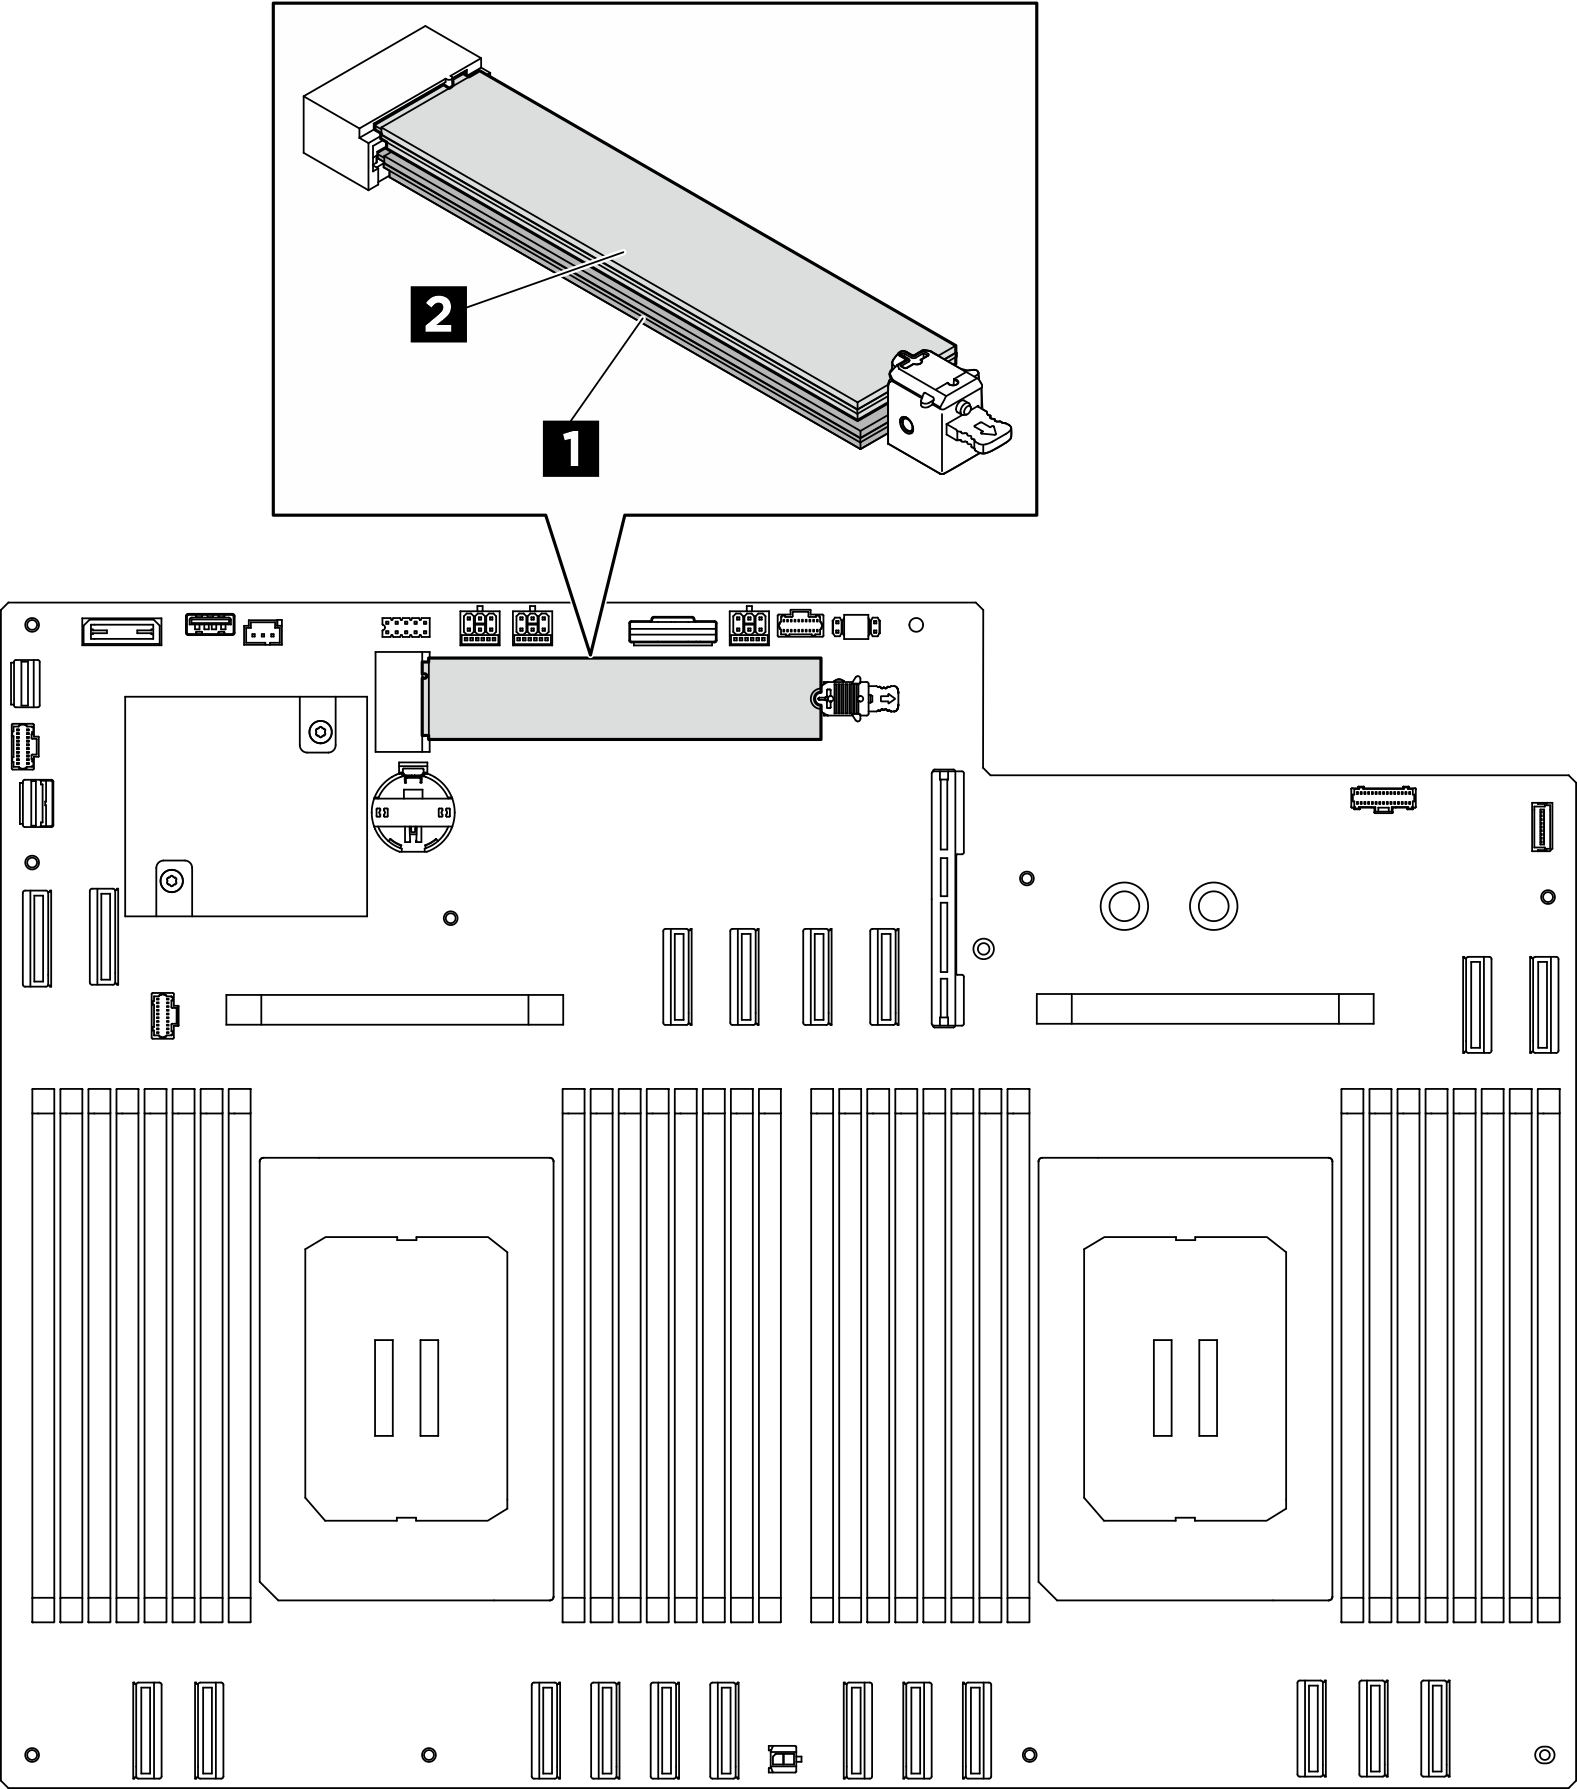
Install an M.2 drive
Follow instructions in this section to install an M.2 drive. The procedure must be executed by a trained technician.
About this task
Attention
- Read Installation Guidelines and Safety inspection checklist to ensure that you work safely.
- Touch the static-protective package that contains the component to any unpainted metal surface on the server; then, remove it from the package and place it on a static-protective surface.
Firmware and driver download: You might need to update the firmware or driver after replacing a component.
Go to Drivers and Software download website for ThinkSystem SR680a V3 to see the latest firmware and driver updates for your server.
Go to Update the firmware for more information on firmware updating tools.
Procedure
After you finish
- Reinstall the processor air baffle. See Install the processor air baffle.
- Reinstall the 2U compute shuttle. See Install the 2U compute shuttle.
- Complete the parts replacement. See Complete the parts replacement.
Give documentation feedback

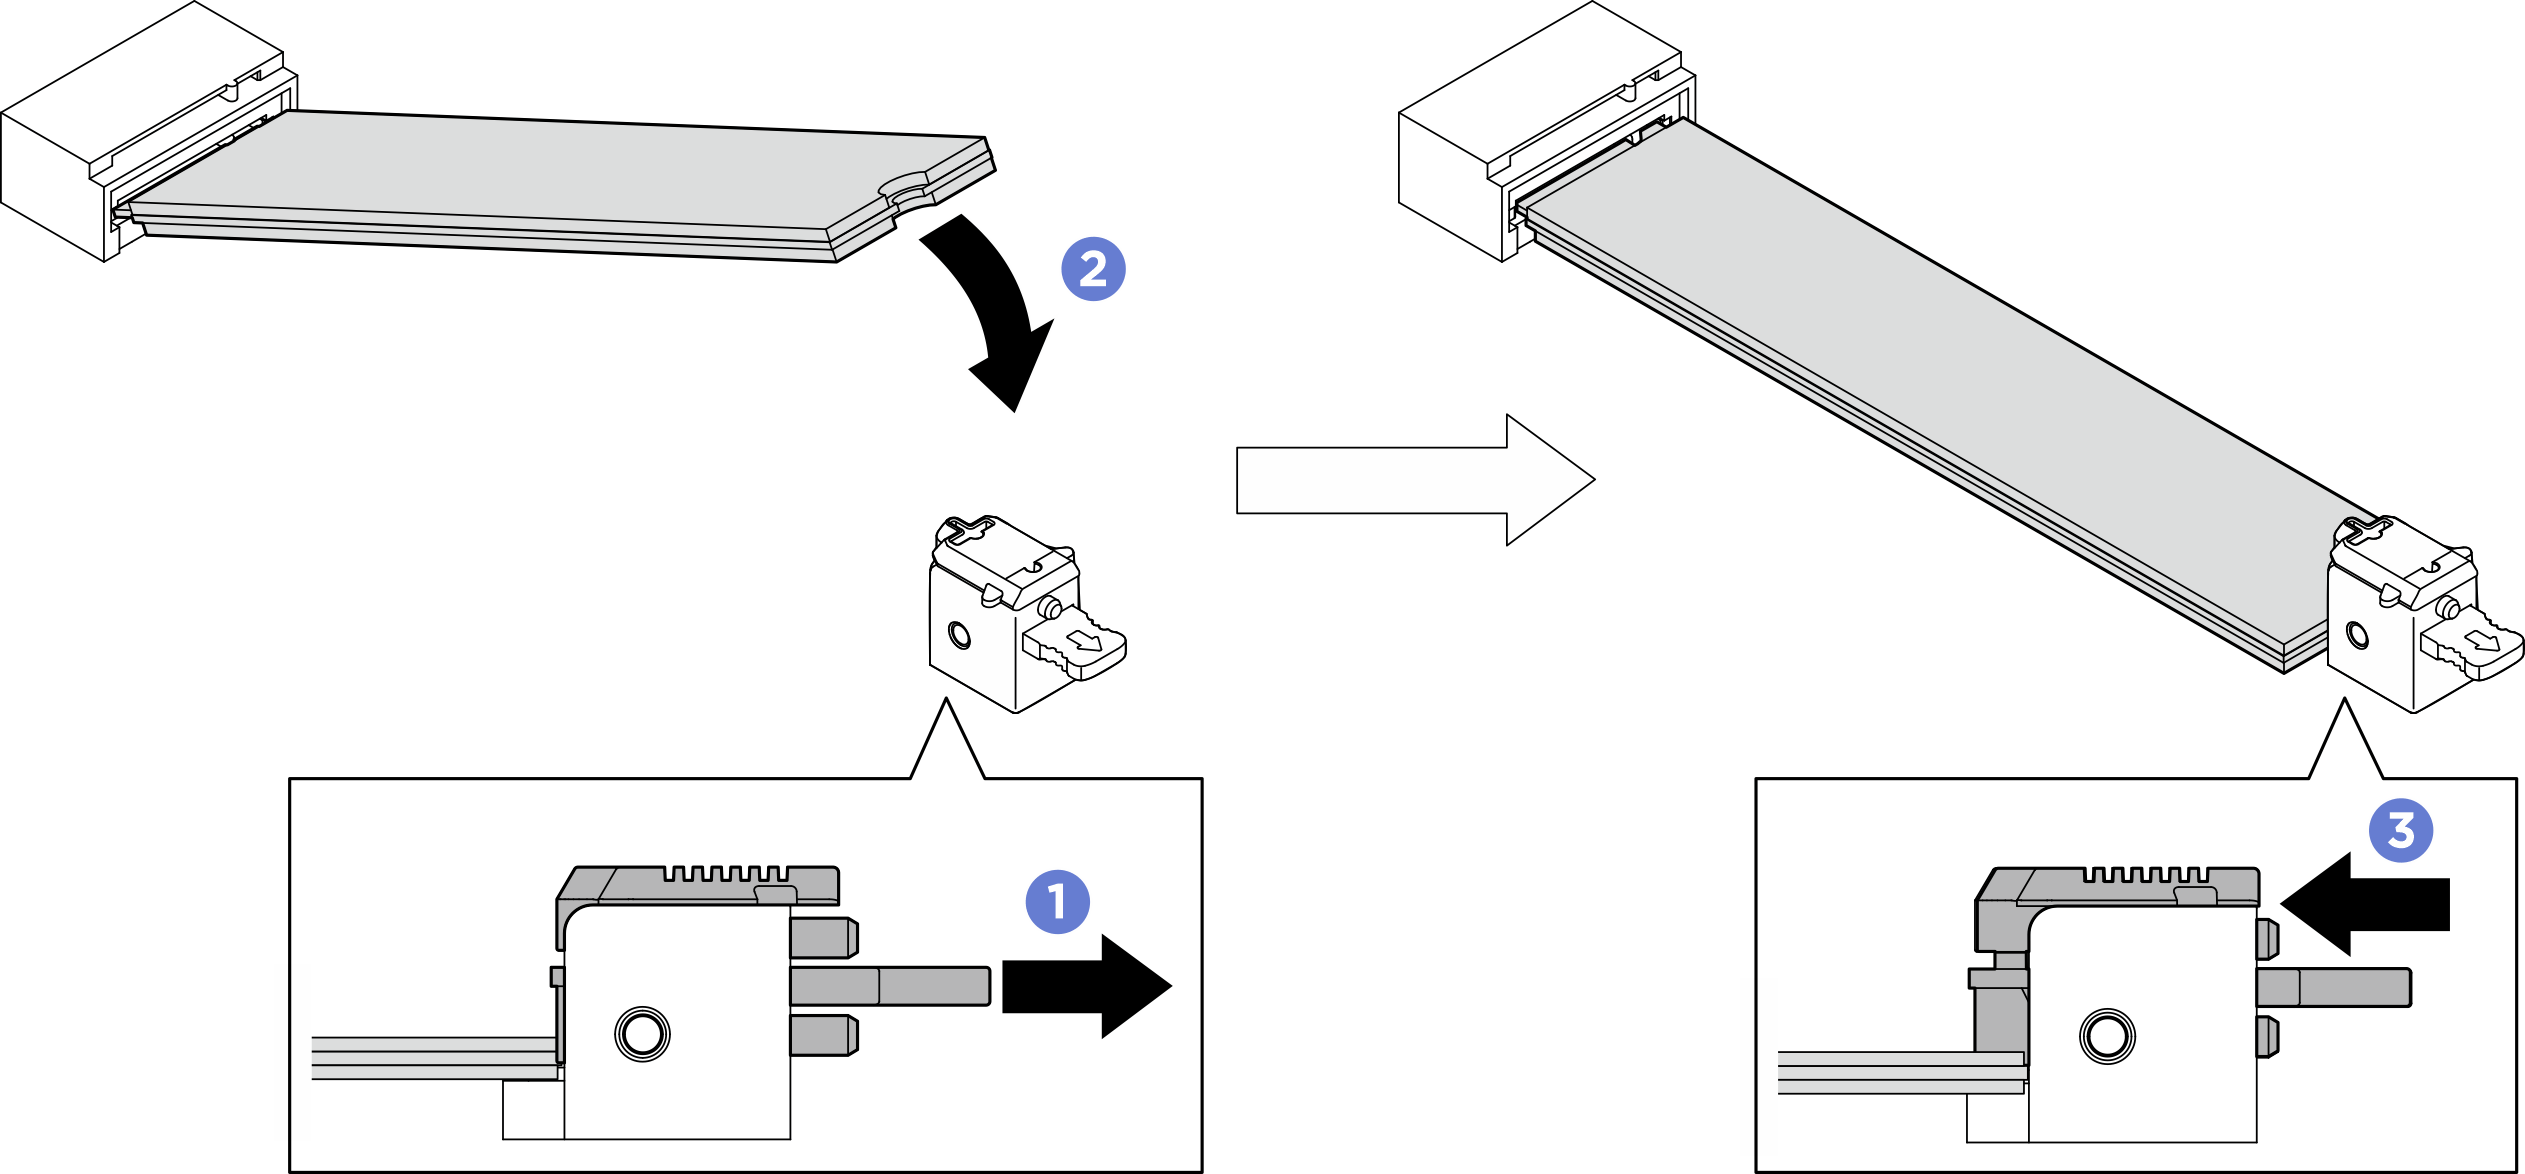
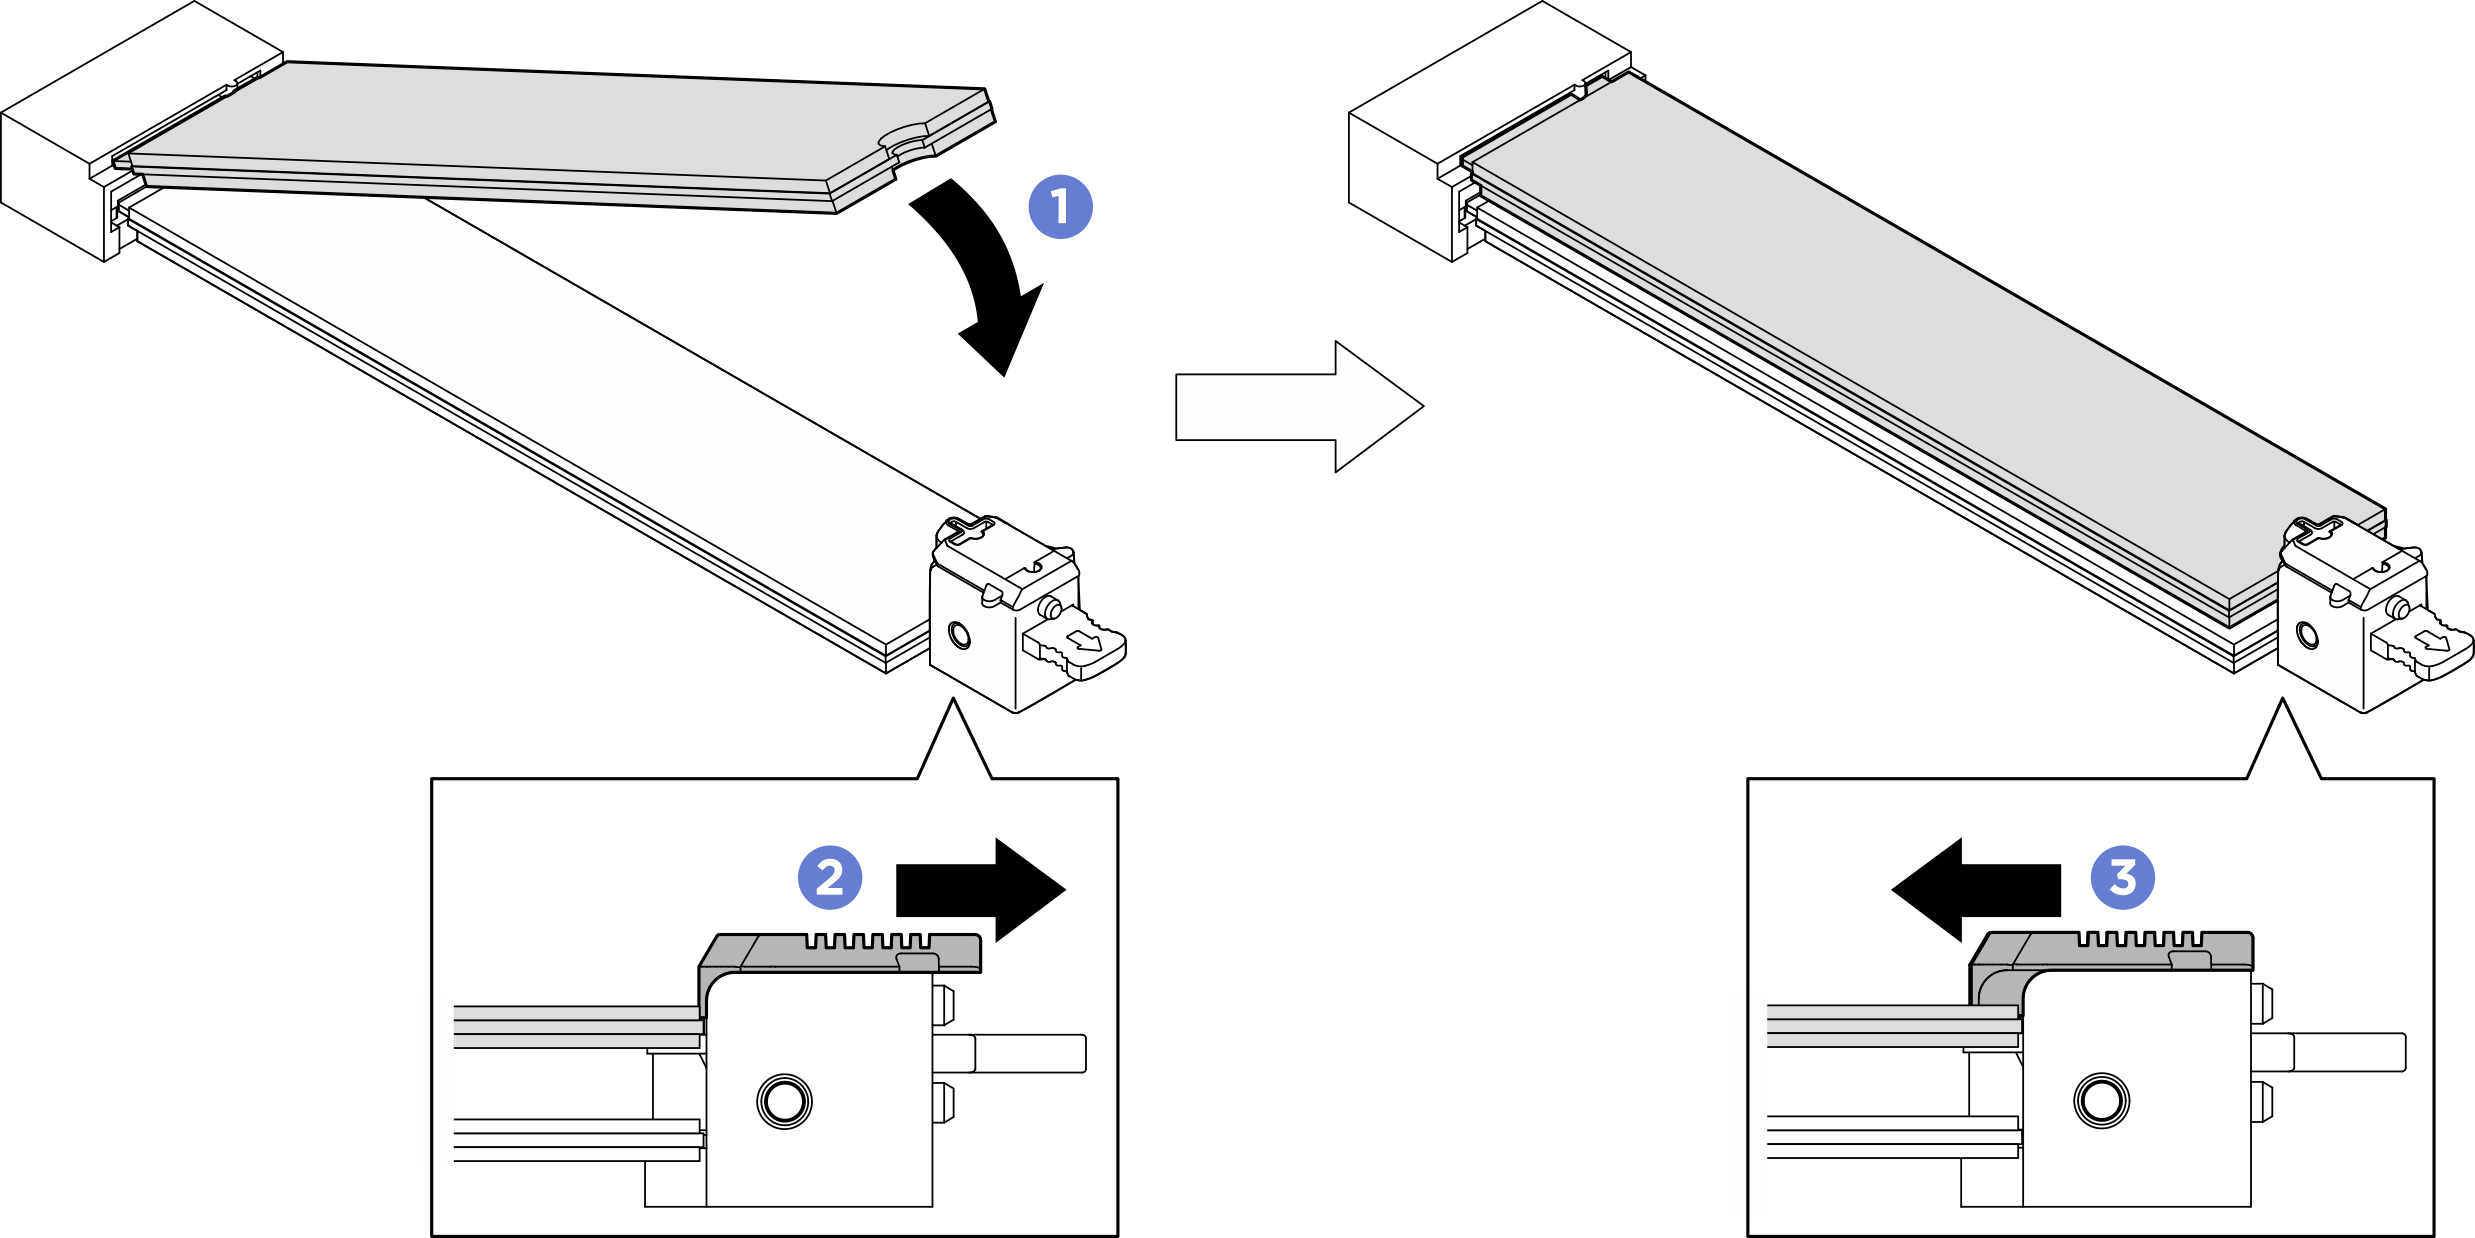
 Pull and hold the lower retainer as illustrated.
 Insert the M.2 drive into the lower M.2 slot at an angle of approximately 15 degrees.
 Pivot the other end of the M.2 drive down and slide the retainer toward the M.2 drive to secure it in place.
