Install an M.2 drive in the M.2 backplane
Use this procedure to install an M.2 drive in the M.2 backplane.
Before installing an M.2 drive in the M.2 backplane:
Read the safety information and installation guidelines (see Safety and Installation Guidelines).
Touch the static-protective package that contains the component to any unpainted metal surface on the server; then, remove it from the package and place it on a static-protective surface.
To install an M.2 drive in the M.2 backplane, complete the following steps:
- Locate the connector on each side of the M.2 backplane.Note
- Some M.2 backplanes support two M.2 drives. When two drives are installed, align and support both drives when sliding the retainer forward to secure the drives.
- Install the M.2 drive in slot 0 first.
- Make sure to install a 480 GB M.2 drive into the M.2 backplane that supports two M.2 drives.
Figure 1. M.2 drive slots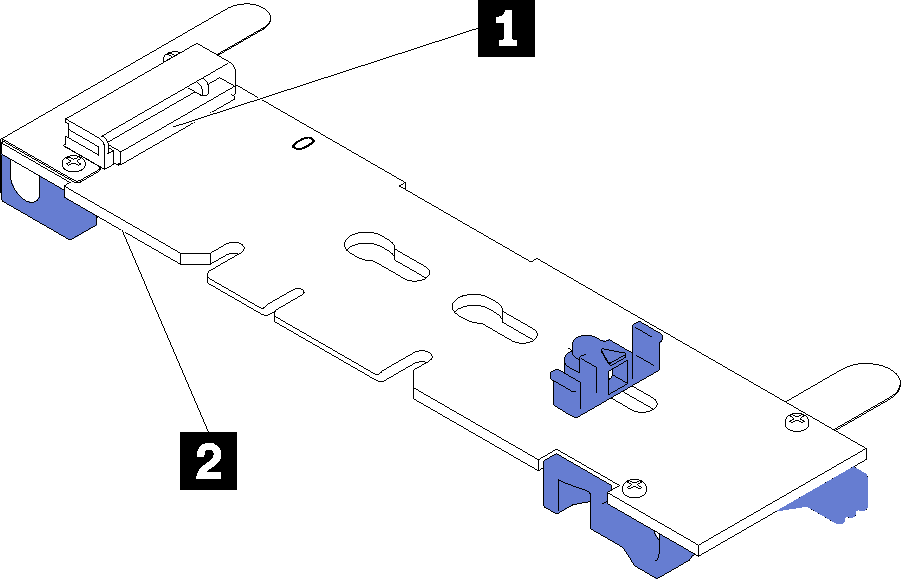
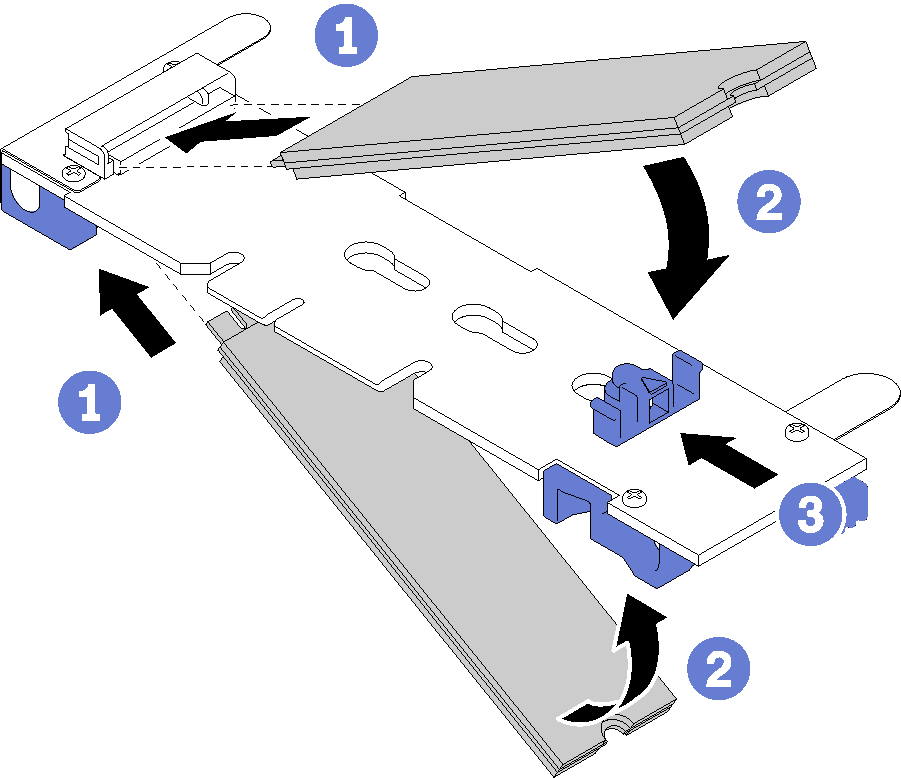
Table 1. M.2 drive slots 1 Slot 0 2 Slot 1 - Insert the M.2 drive at an angle (approximately 30 degrees) into the connector and rotate it until the notch catches on the lip of the retainer; then, slide the retainer forward (toward the connector) to secure the M.2 drive in the M.2 backplane.Figure 2. M.2 drive installation
 AttentionWhen sliding the retainer forward, make sure the two nubs on the retainer enter the small holes on the M.2 backplane. Once they enter the holes, you will hear a soft “click” sound.Figure 3. M.2 drive installation with the retainers in place
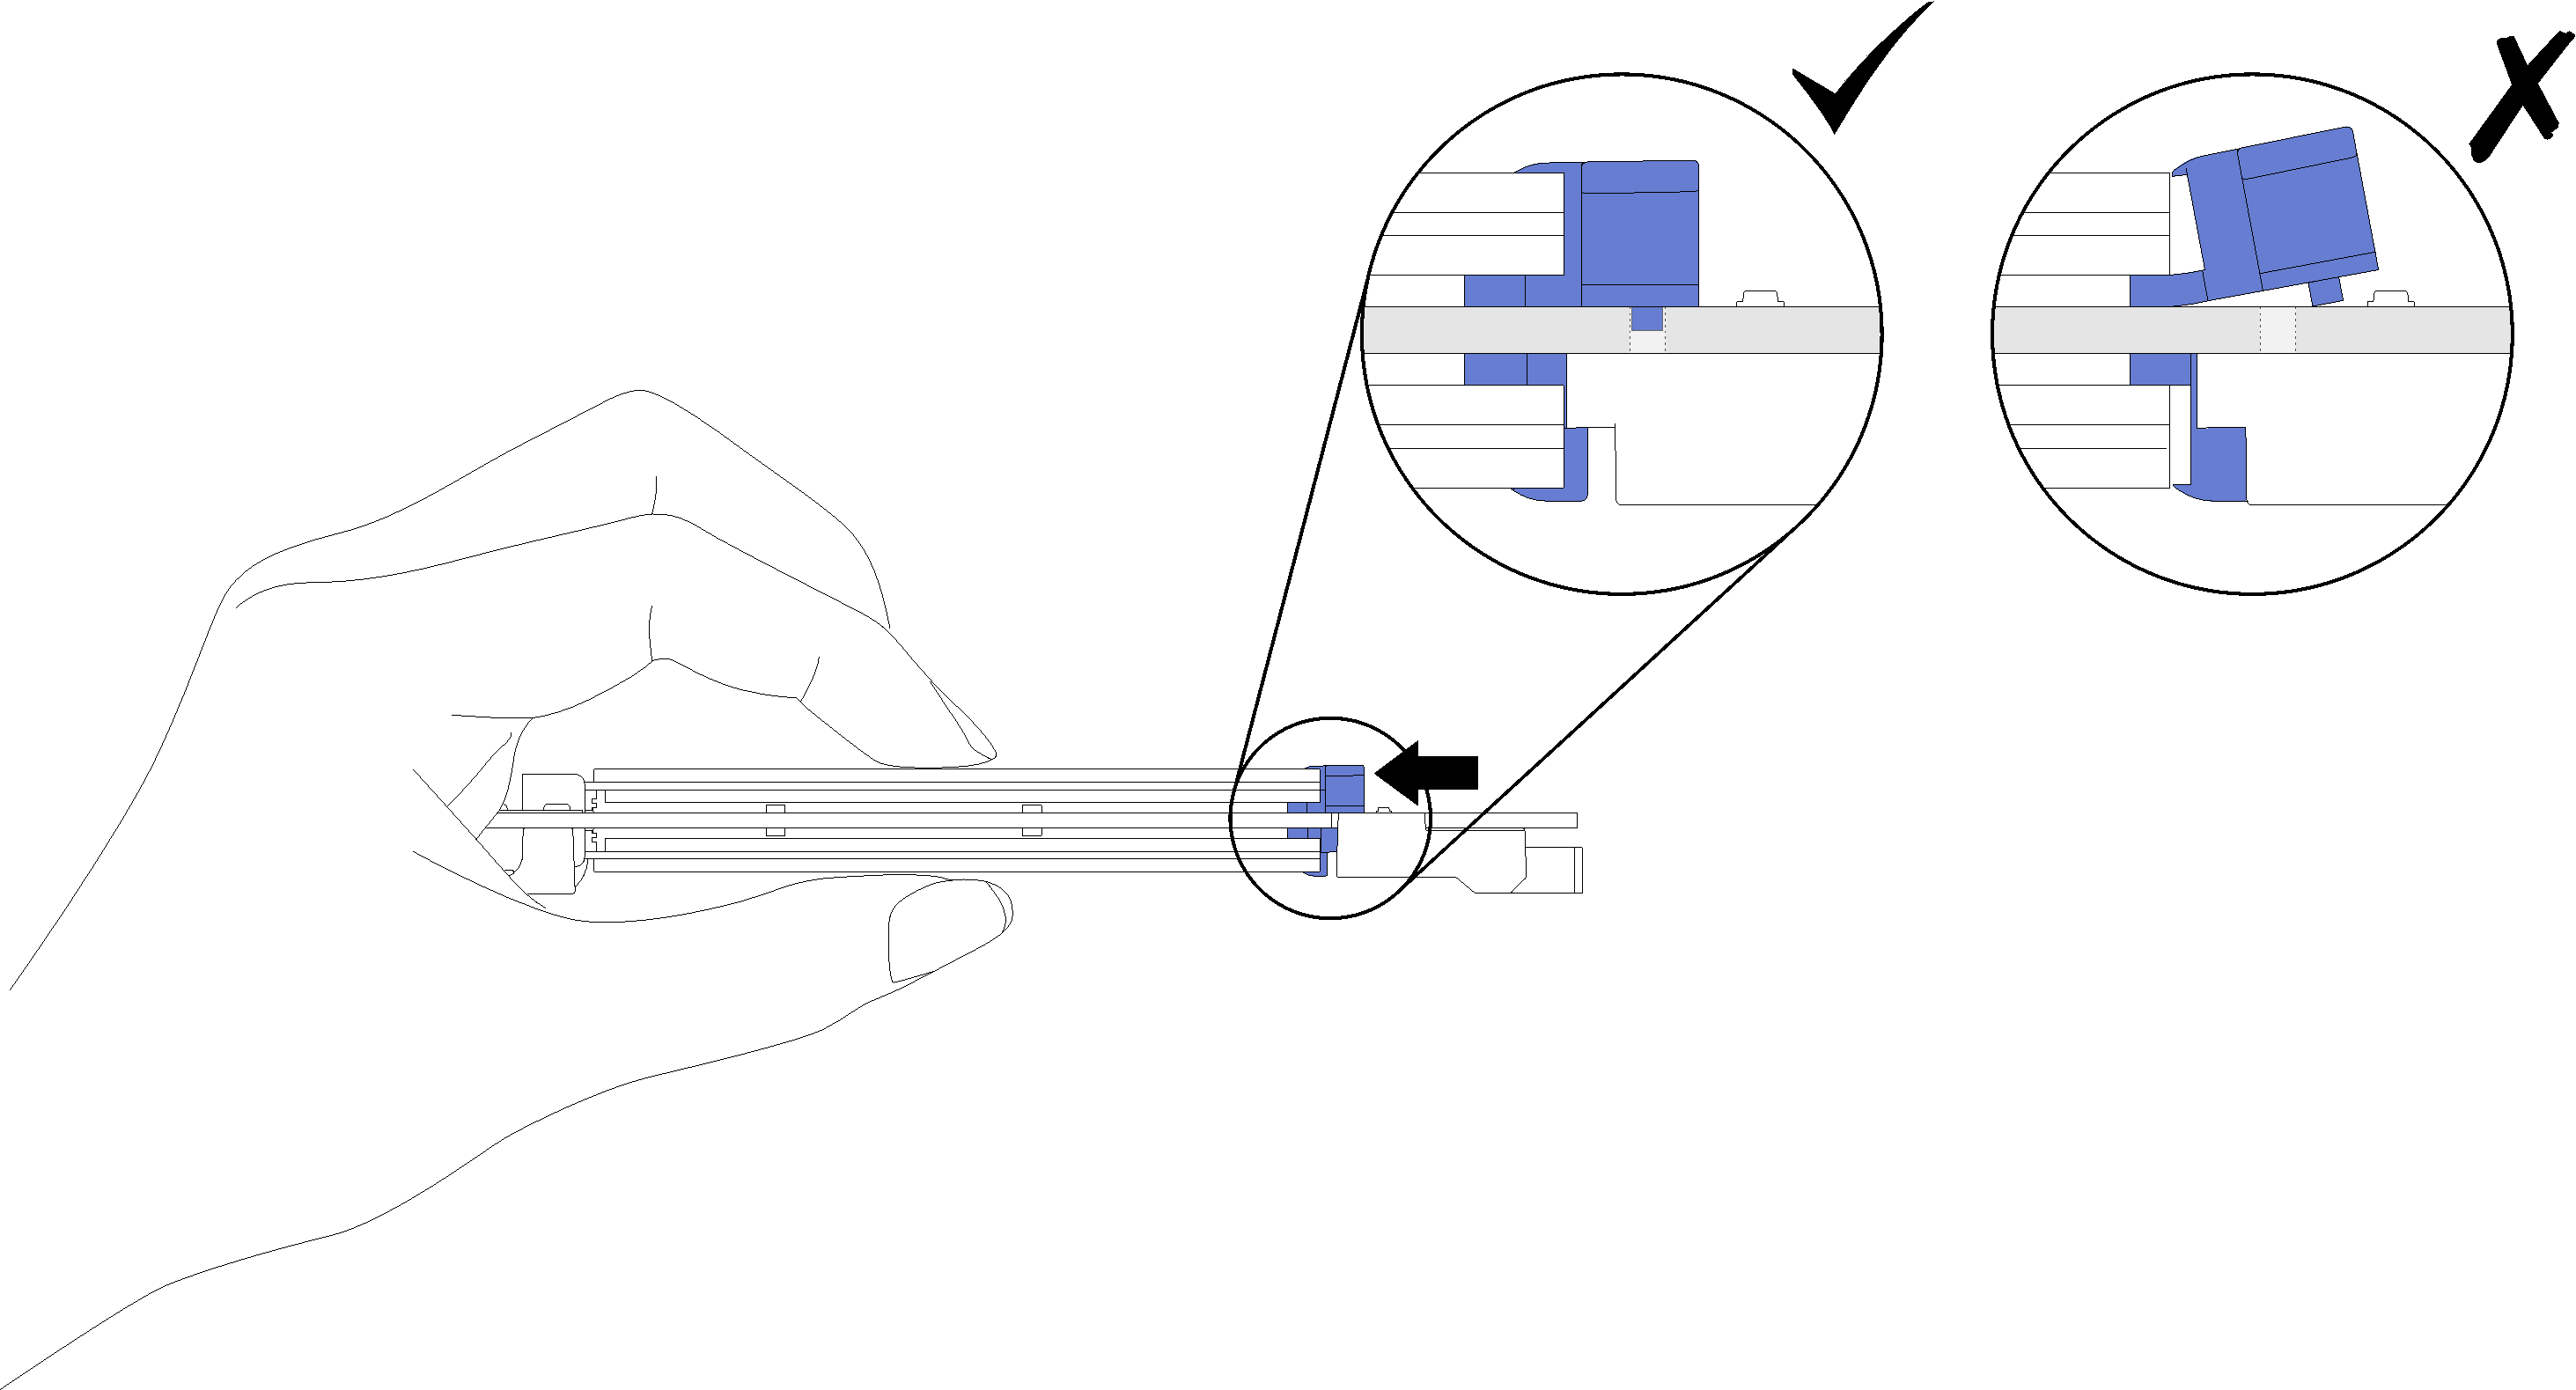
Give documentation feedback