Install the M.2 backplane
Use this procedure to install the M.2 backplane.
Before installing the M.2 backplane:
Read the safety information and installation guidelines (see Safety and Installation Guidelines).
Install an M.2 drive to every available connector on the M.2 backplane (see Install an M.2 drive in the M.2 backplane).
Touch the static-protective package that contains the component to any unpainted metal surface on the server; then, remove it from the package and place it on a static-protective surface.
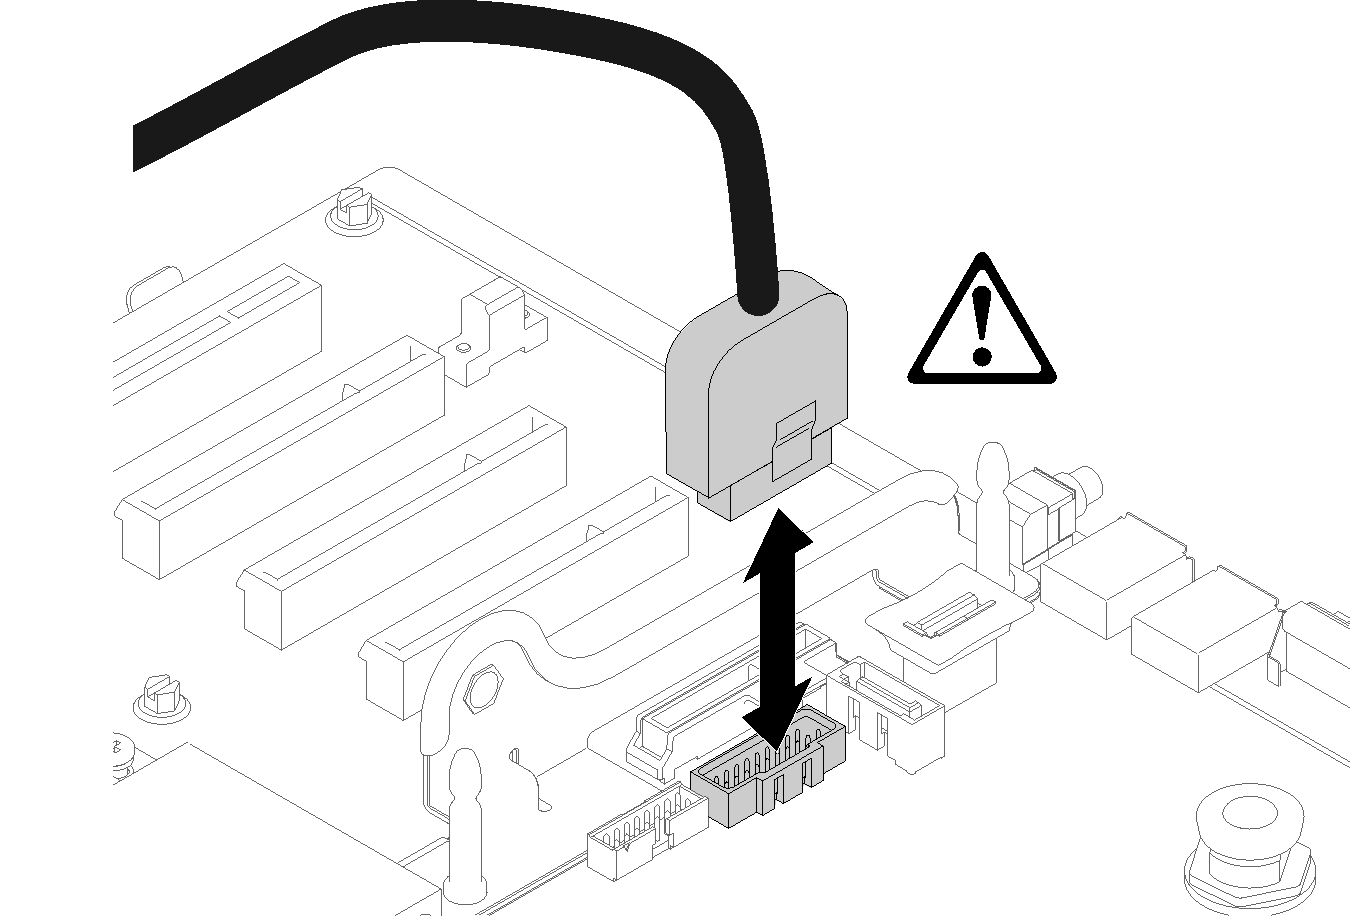
- Disconnect the USB 3.0 cable of operator panel tray assembly, and remove it vertically from the system board.Figure 1. Removing USB 3.0 connector vertically
To install the M.2 backplane, complete the following steps:
Note
Before installing the M.2 backplane, make sure an M.2 drive is installed to every available connector on the M.2 backplane.
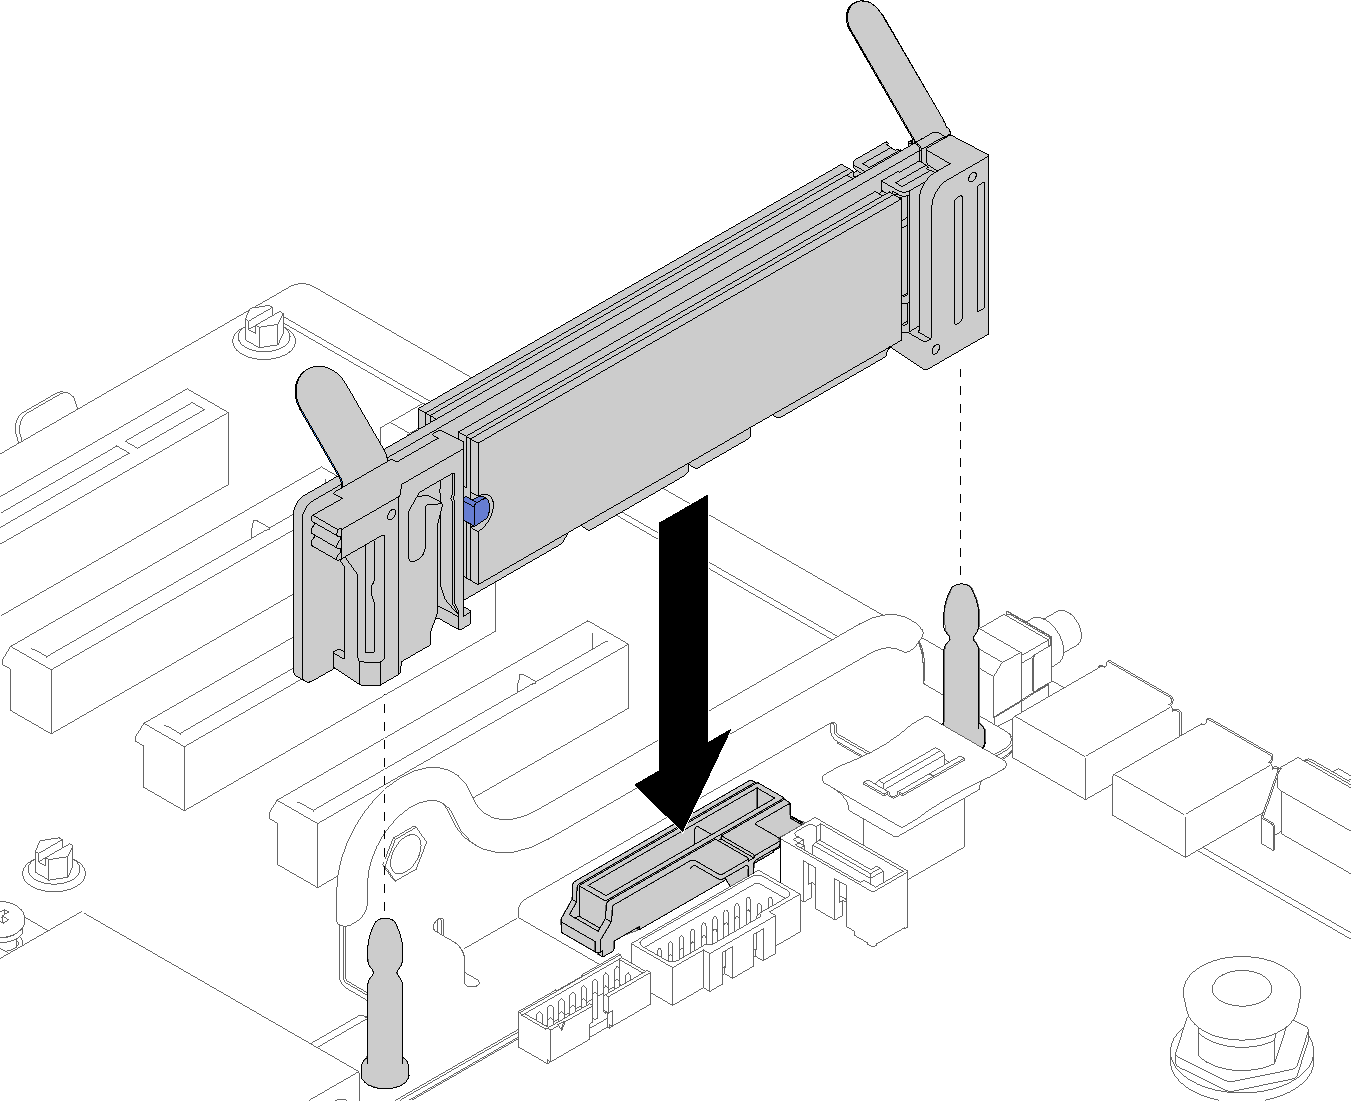
Align the openings located at the bottom of the blue plastic supports at each end of the M.2 backplane with the guide pin on the system board and T-head pins on the hard drive cage; then, insert the backplane in the system board connector. Press down on the M.2 backplane to fully seat it.
Figure 2. M.2 backplane installation
Give documentation feedback