Horizontal installation
- Lift the system and place it on a table. Two lifting options are available:

For two-person lift, remove the following components beforehand:
- All the power supply units
- All the storage drives
- Top cover
- (If applicable) All the expansion trays


Otherwise, lift the system with three people or a lifting device.
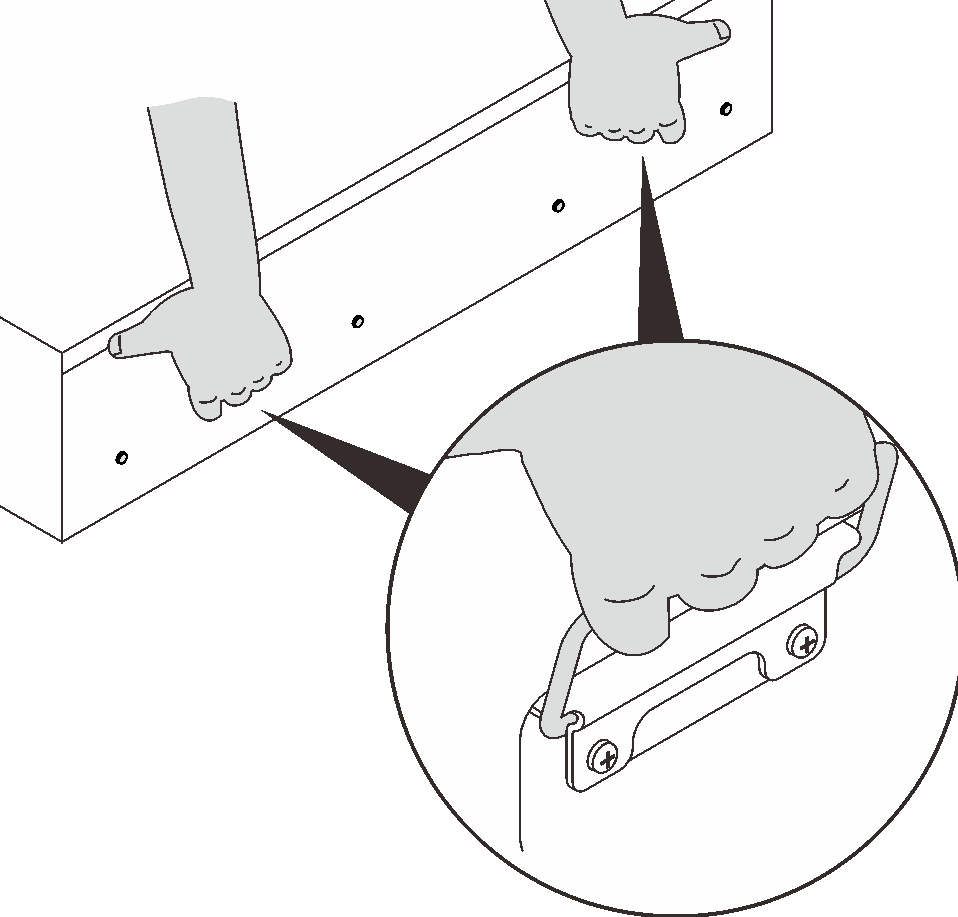 NoteWhen doing the lifting with people, make sure to lift the system by the handles.
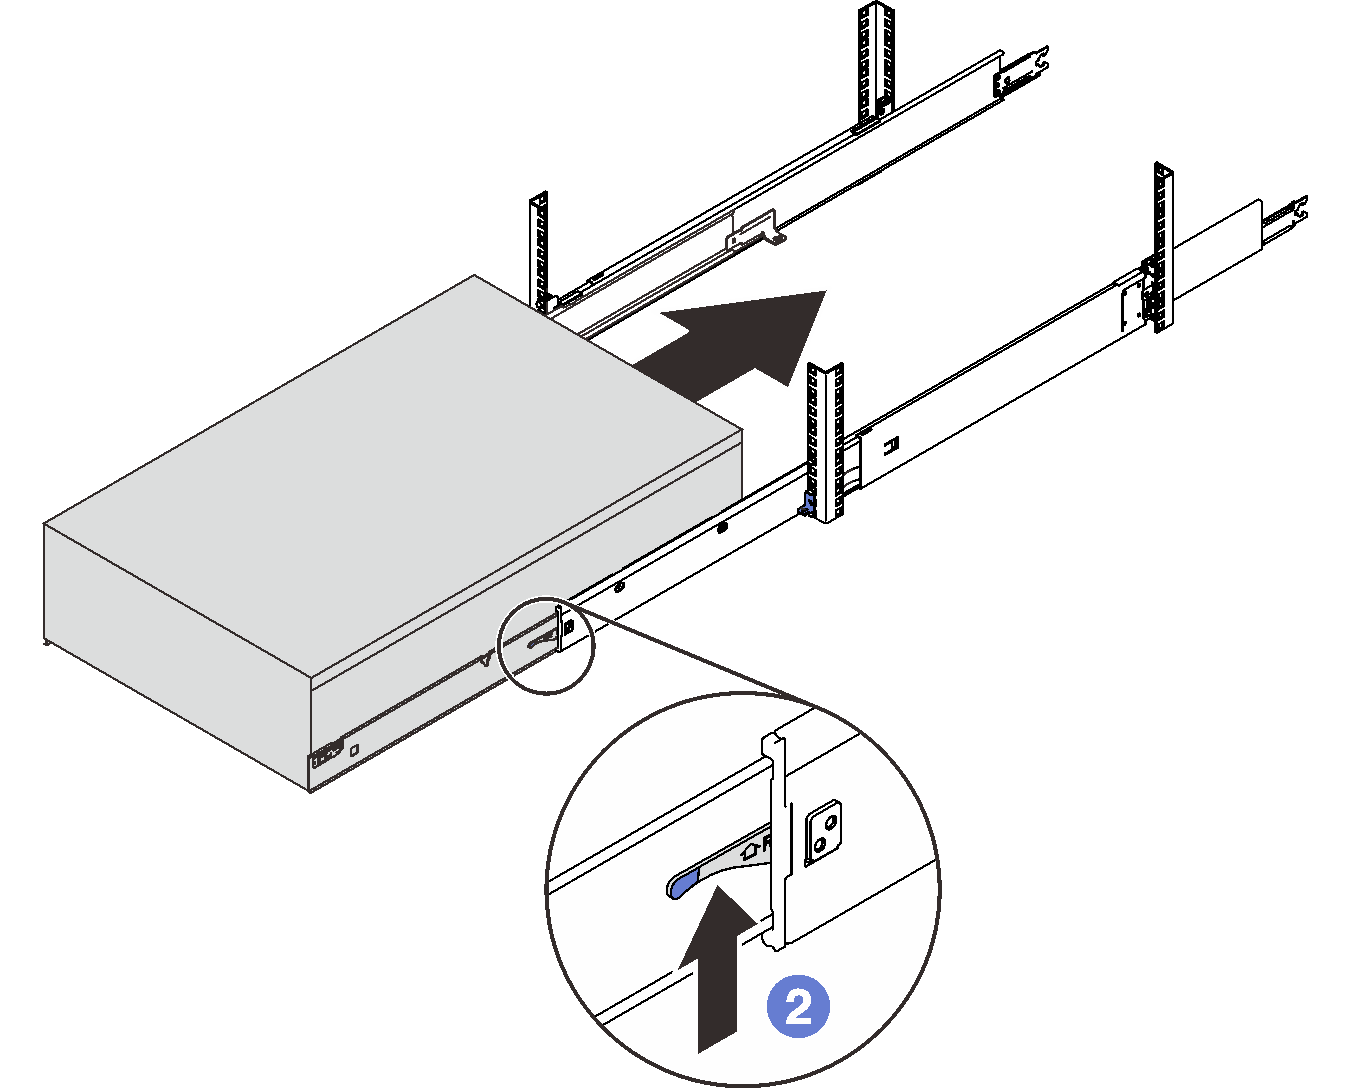
 - Remove the inner rails from the intermediate rails.
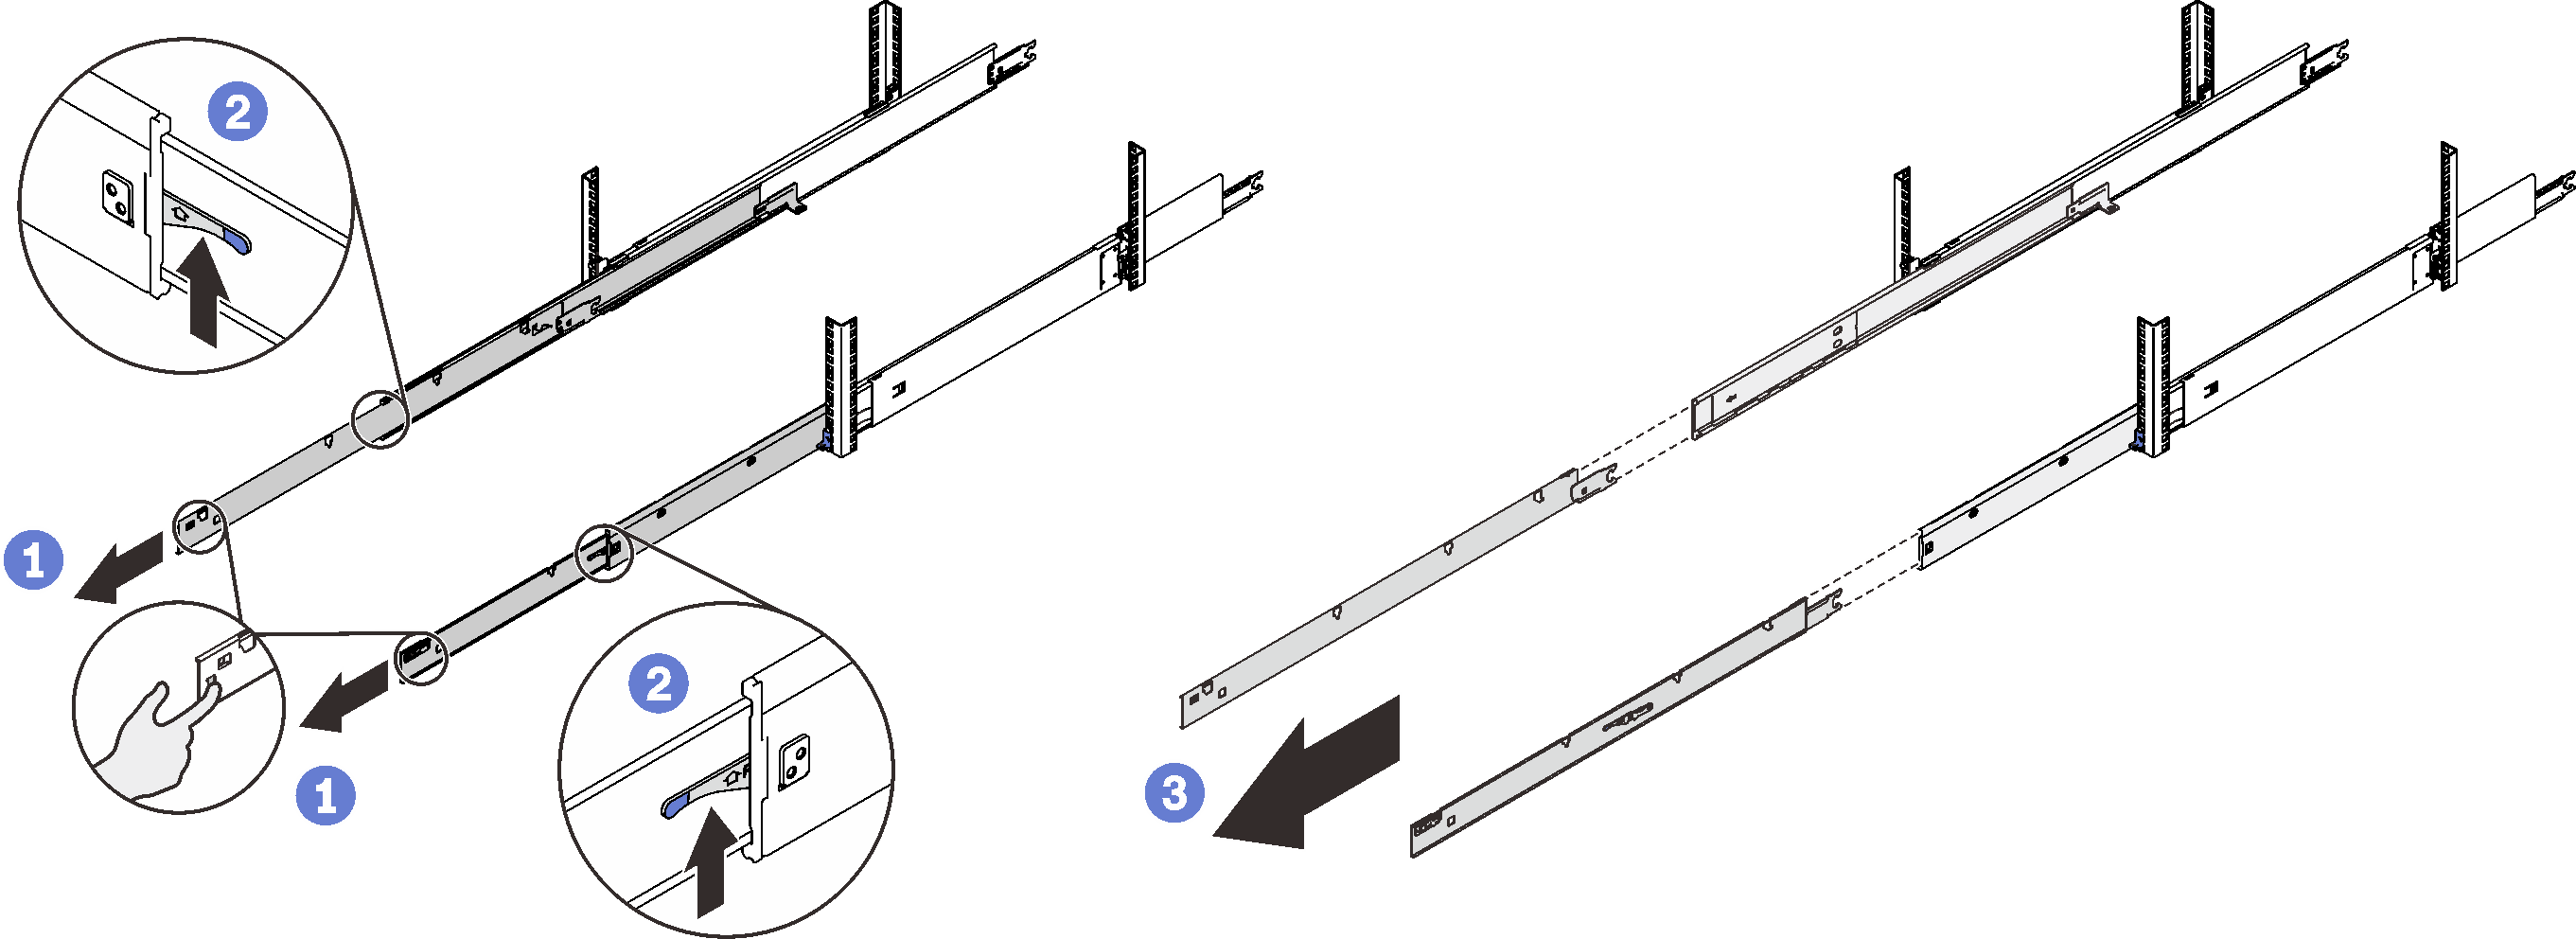
- ① Pull the inner rails all the way out until they stop.
- ② Pull the lock latches up to disengage the inner rails.
- ③ Remove the inner rails.
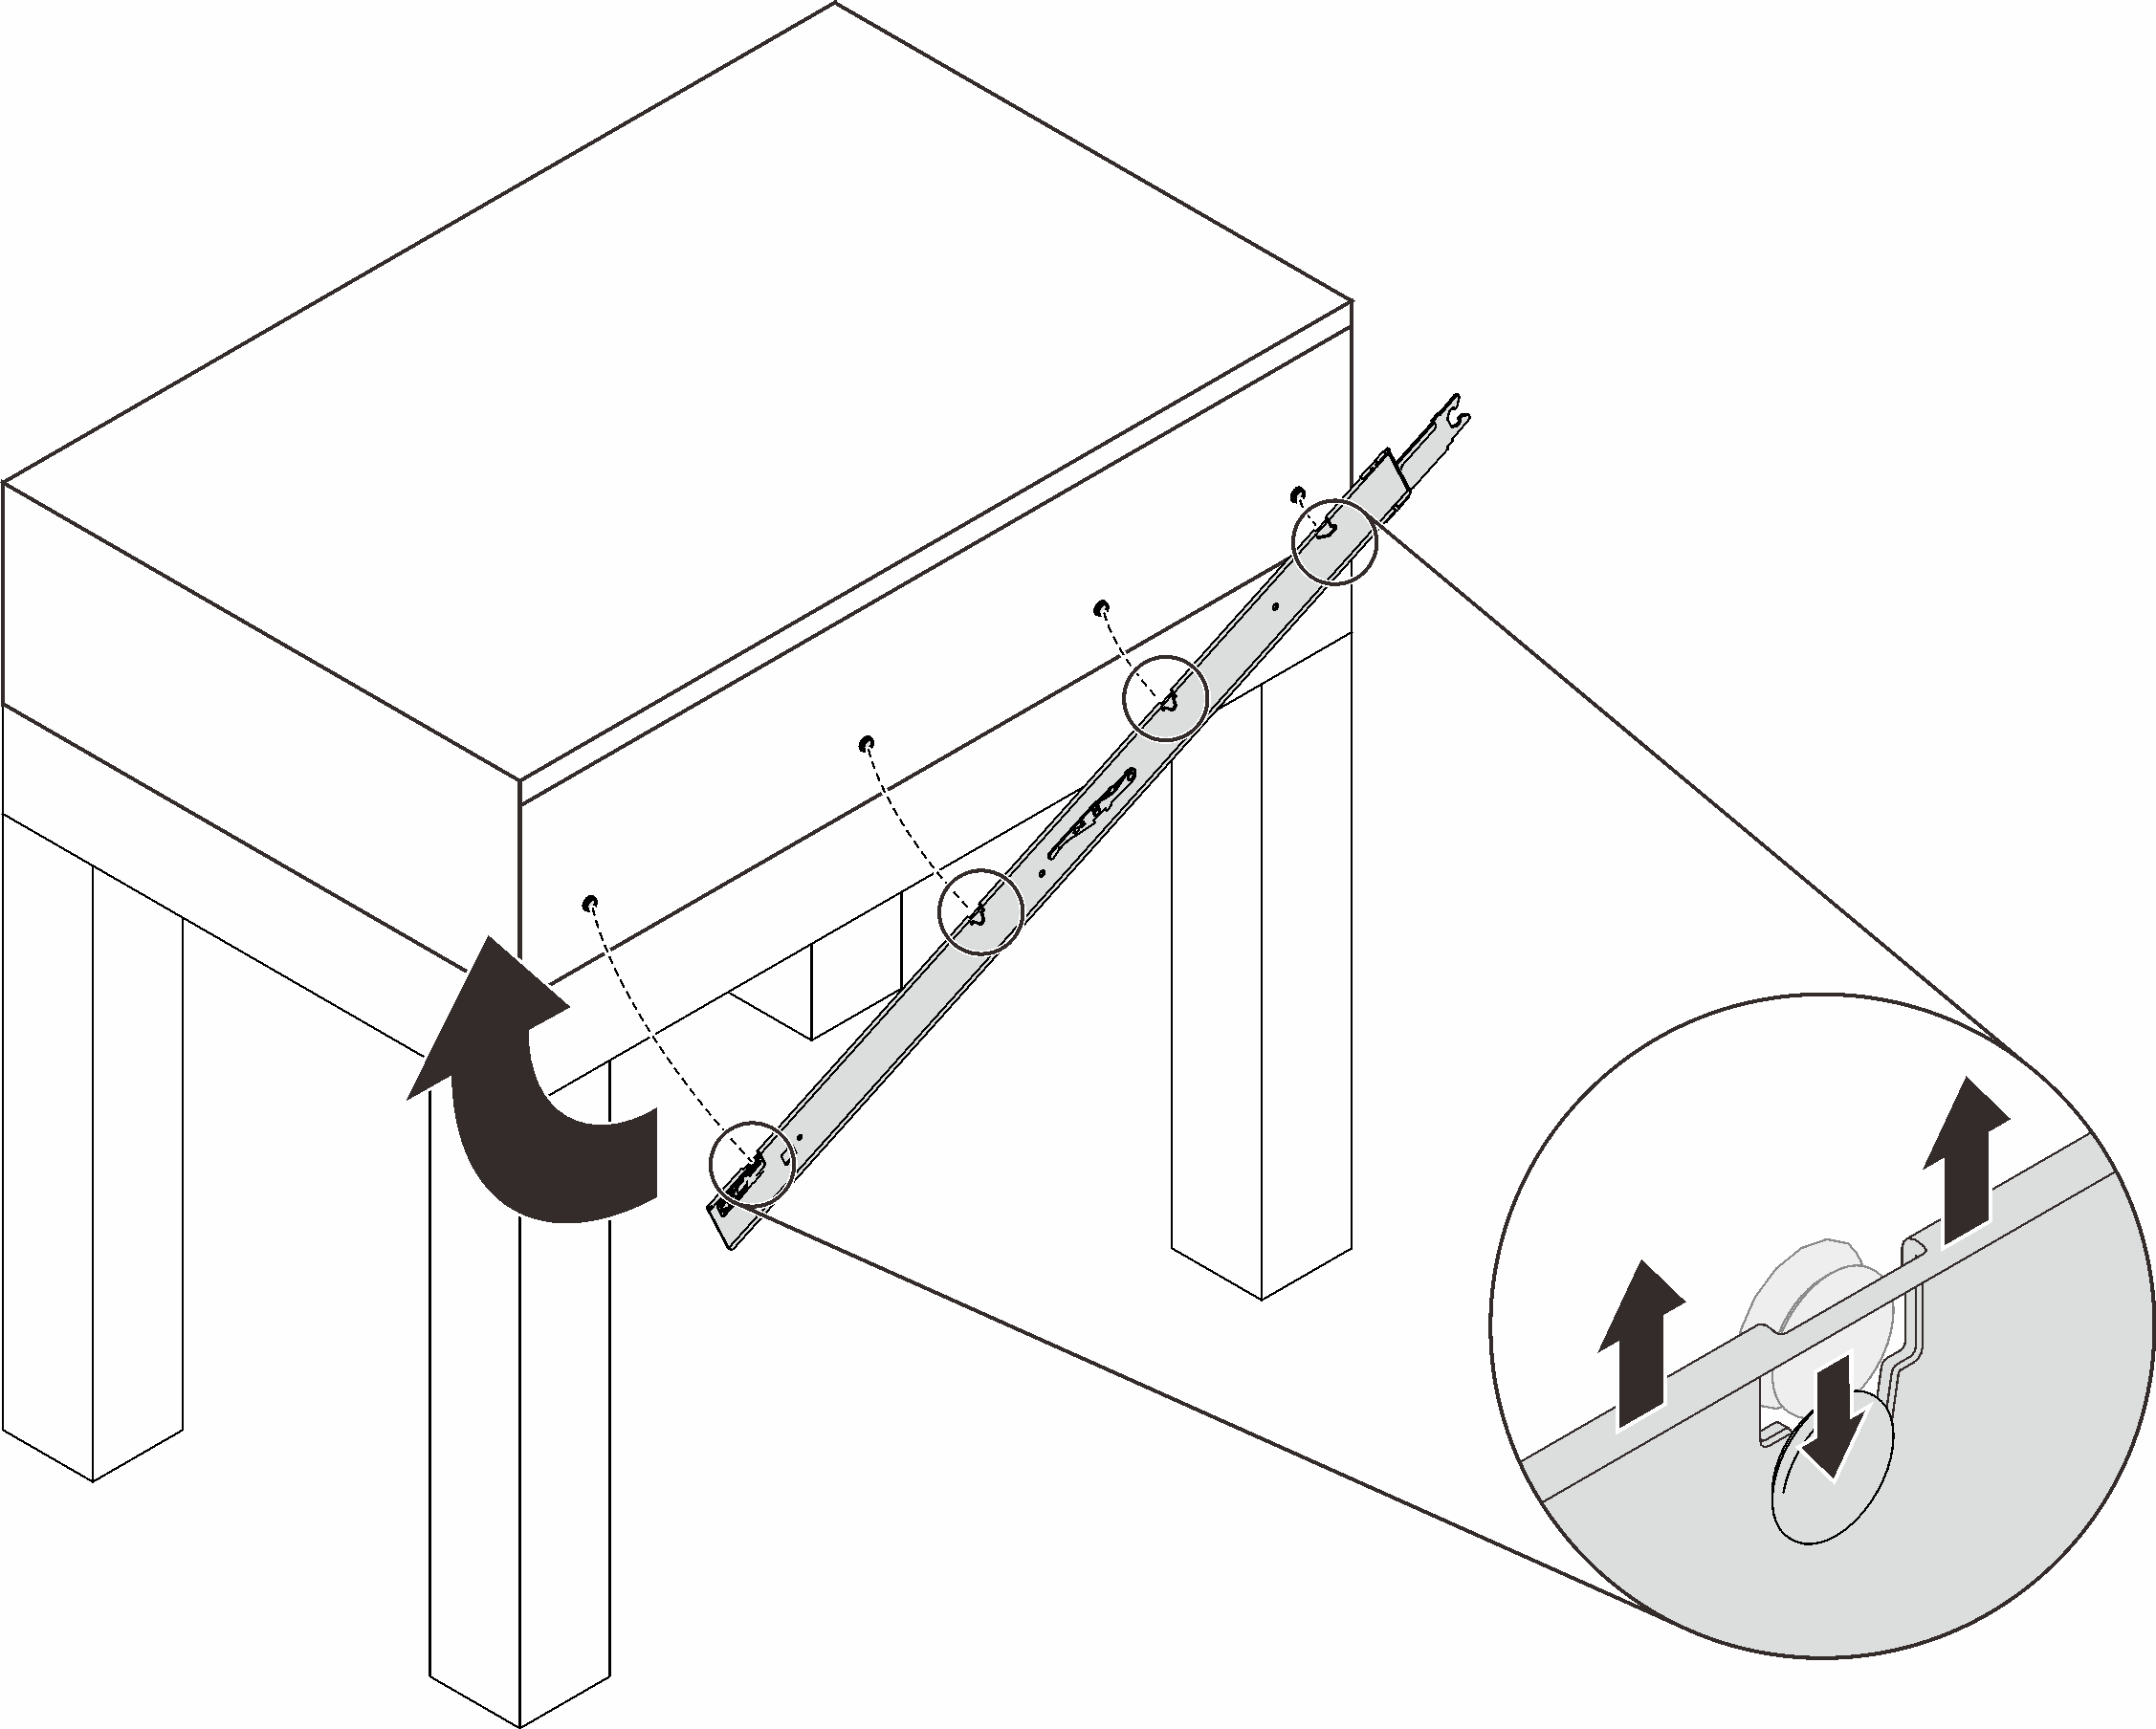
- Slip the rear nailhead into the corresponding slot on the inner rails; then, rotate the front end of the rail and make sure the other three nailheads go into the corresponding slots on the rail.NoteTo spare space for the rail, make sure the side of the system aligns with the edge of the table.
- Install the system to the rack.NoteIt is recommended to do this step with a lifting device that supports the system and allows precise alignment.
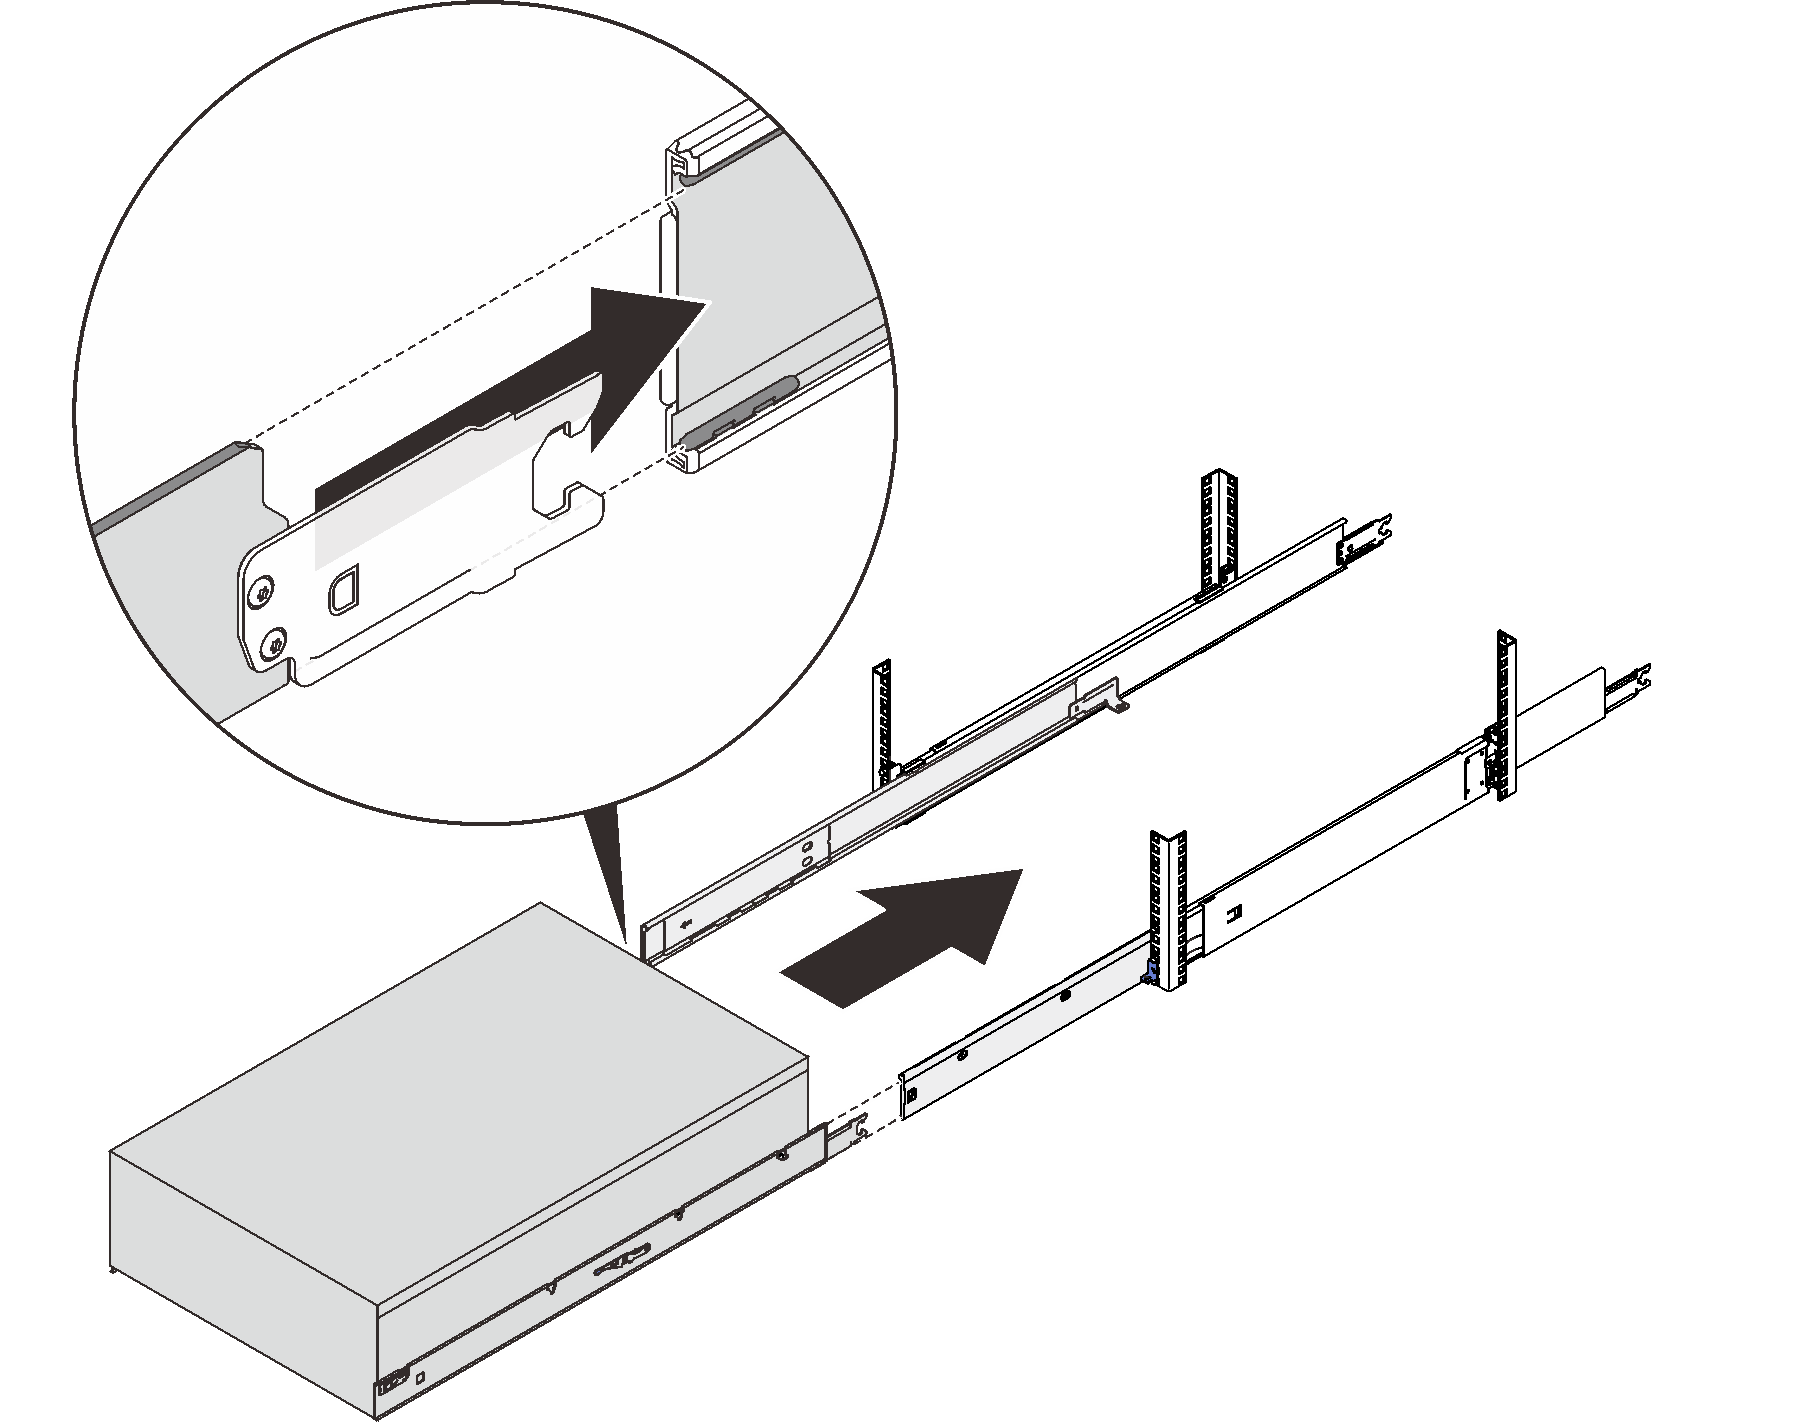
- ① Align the rear ends of the inner rails with the openings in the intermediate rails, and slowly push the system in toward the rack so the inner rails insert into the intermediate rails. Make sure the pairs of rails mate together correctly.
- ② Pull the lock latches up to unlock the rails, and slide the system all the way into the rack. Then, slide the system all the way out and all the way back in again to make sure the rails are working smoothly.
Give documentation feedback