Install the system board
Follow instructions in this section to install the system board.
About this task
- S002
 CAUTIONThe power-control button on the device and the power switch on the power supply do not turn off the electrical current supplied to the device. The device also might have more than one power cord. To remove all electrical current from the device, ensure that all power cords are disconnected from the power source.
 - S012
 CAUTIONHot surface nearby.
 - S017
 CAUTIONHazardous moving fan blades nearby. Keep fingers and other body parts away.
Read the Installation guidelines to ensure that you work safely.
Touch the static-protective package that contains the component to any unpainted metal surface on the server; then, remove it from the package and place it on a static-protective surface.
Procedure
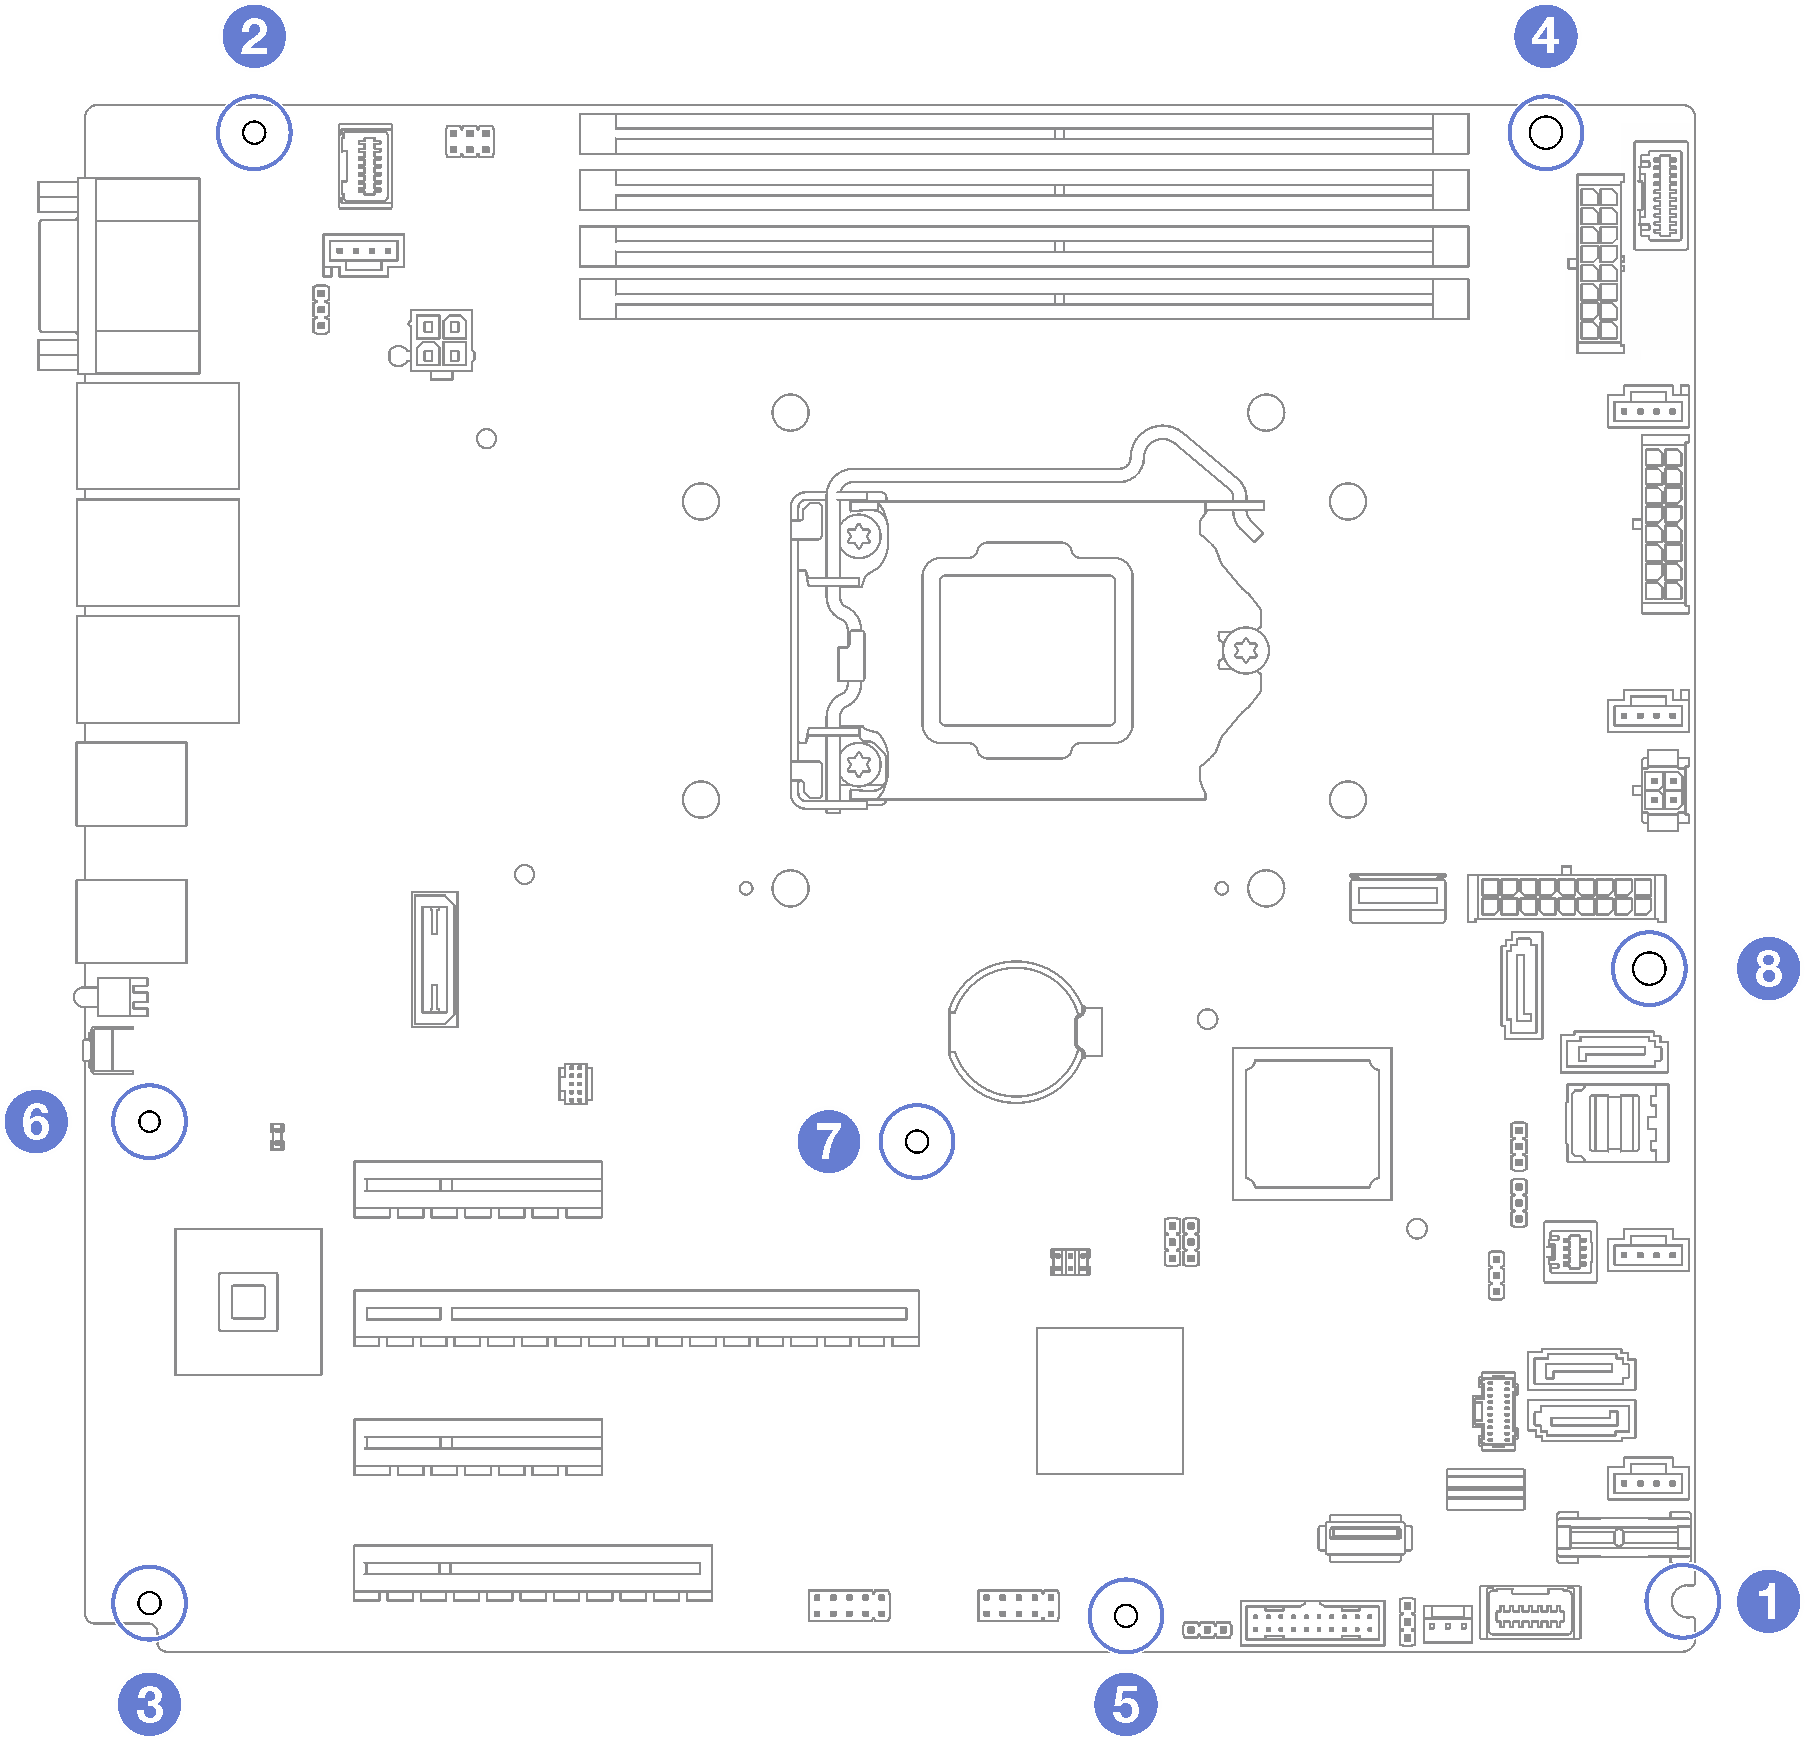
- Note the orientation of the new system board, and carefully place it into the chassis. Ensure that the serial port on the system board is inserted into the corresponding slot, and the eight screw holes on the system board are aligned with the corresponding mounting studs on the chassis.Figure 1. Installing the system board

- Secure the system board by tightening the eight screws in the sequence shown in the illustration.NoteFor reference, the torque required to fully tighten the screws is 0.5-0.6 newton-meters, 4.5-5.5 inch-pounds.Figure 2. Tightening the screws to secure the system board
After this task is completed
Install any components that you removed from the failing system board. See the related topics in Hardware replacement procedures.
Complete the parts replacement. See Complete the parts replacement.
Update the machine type and serial number with new vital product data (VPD). Use the Lenovo XClarity Provisioning Manager to update the machine type and serial number. See Update the machine type and serial number.
Enable TPM. See Enable TPM
Optionally, enable Secure Boot. See Enable UEFI Secure Boot.
Demo video