Disassemble the system board for recycle

Follow the instructions in this section to disassemble the system board before recycling.

About this task

Attention
  • Read Installation Guidelines and Safety inspection checklist to ensure that you work safely.
  • Power off the server and peripheral devices and disconnect the power cords and all external cables. See Power off the server.
  • Remove any locking device that secures the server, such as a Kensington lock or a padlock.
  • Place the server on its side with the cover up.

Procedure

  1. Remove the server cover. See Remove the server cover.
  2. Remove the front bezel. See Remove the front bezel.
  3. If applicable, remove the ODD+bay 2 drive cage assembly (see Remove an optical drive cage) or remove the bay 2+bay 3 drive cage assembly (see Remove the drive cage (bay 3)).
  4. Remove the cage bar. See step 3 in Remove the server cover.
  5. Remove all the system fans. See Remove the fan (front and rear).
  6. If applicable, remove the M.2 drive. See Remove an M.2 drive.
  7. If applicable, remove the PCIe adapters. See Remove a PCIe adapter.
  8. Remove the memory modules. See Remove a memory module.
  9. Remove the heat sink and fan module. See Remove the heat sink and fan module (trained technician only).
  10. Remove the processor. See Remove the processor (trained technician only).
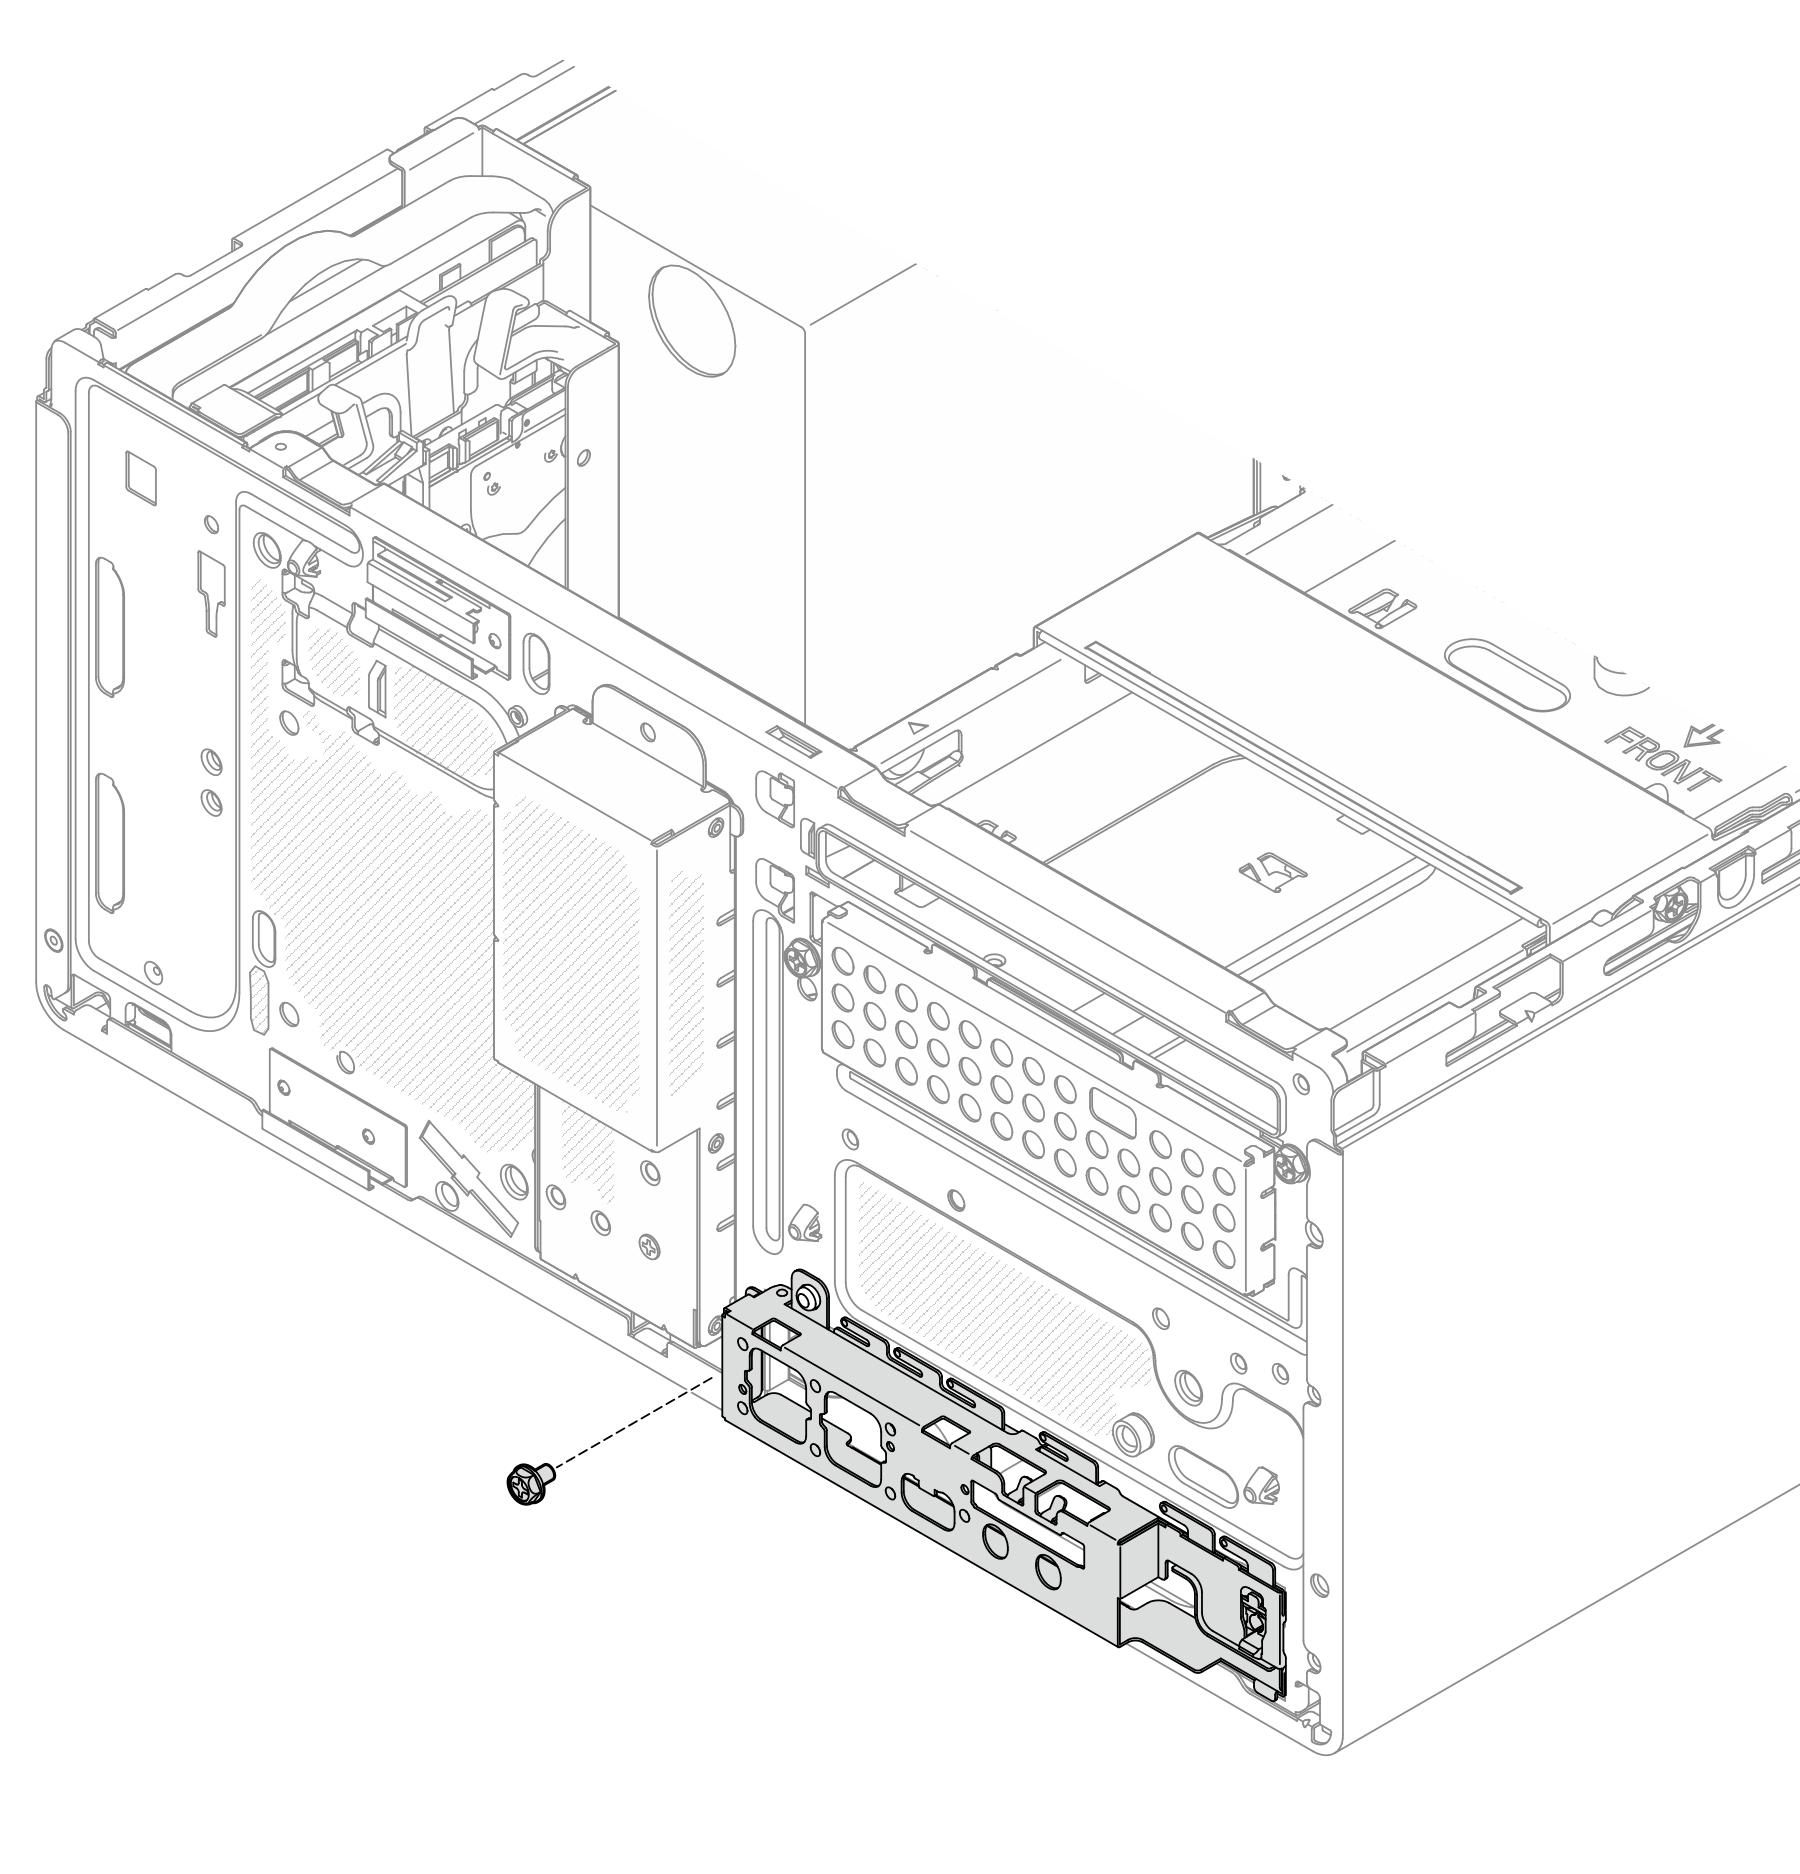
  11. Remove the screw that secures the front I/O bracket to the chassis.
    Figure 1. Removing the screw that secures the front I/O bracket
    Removing the screw the secures the front I/O bracket
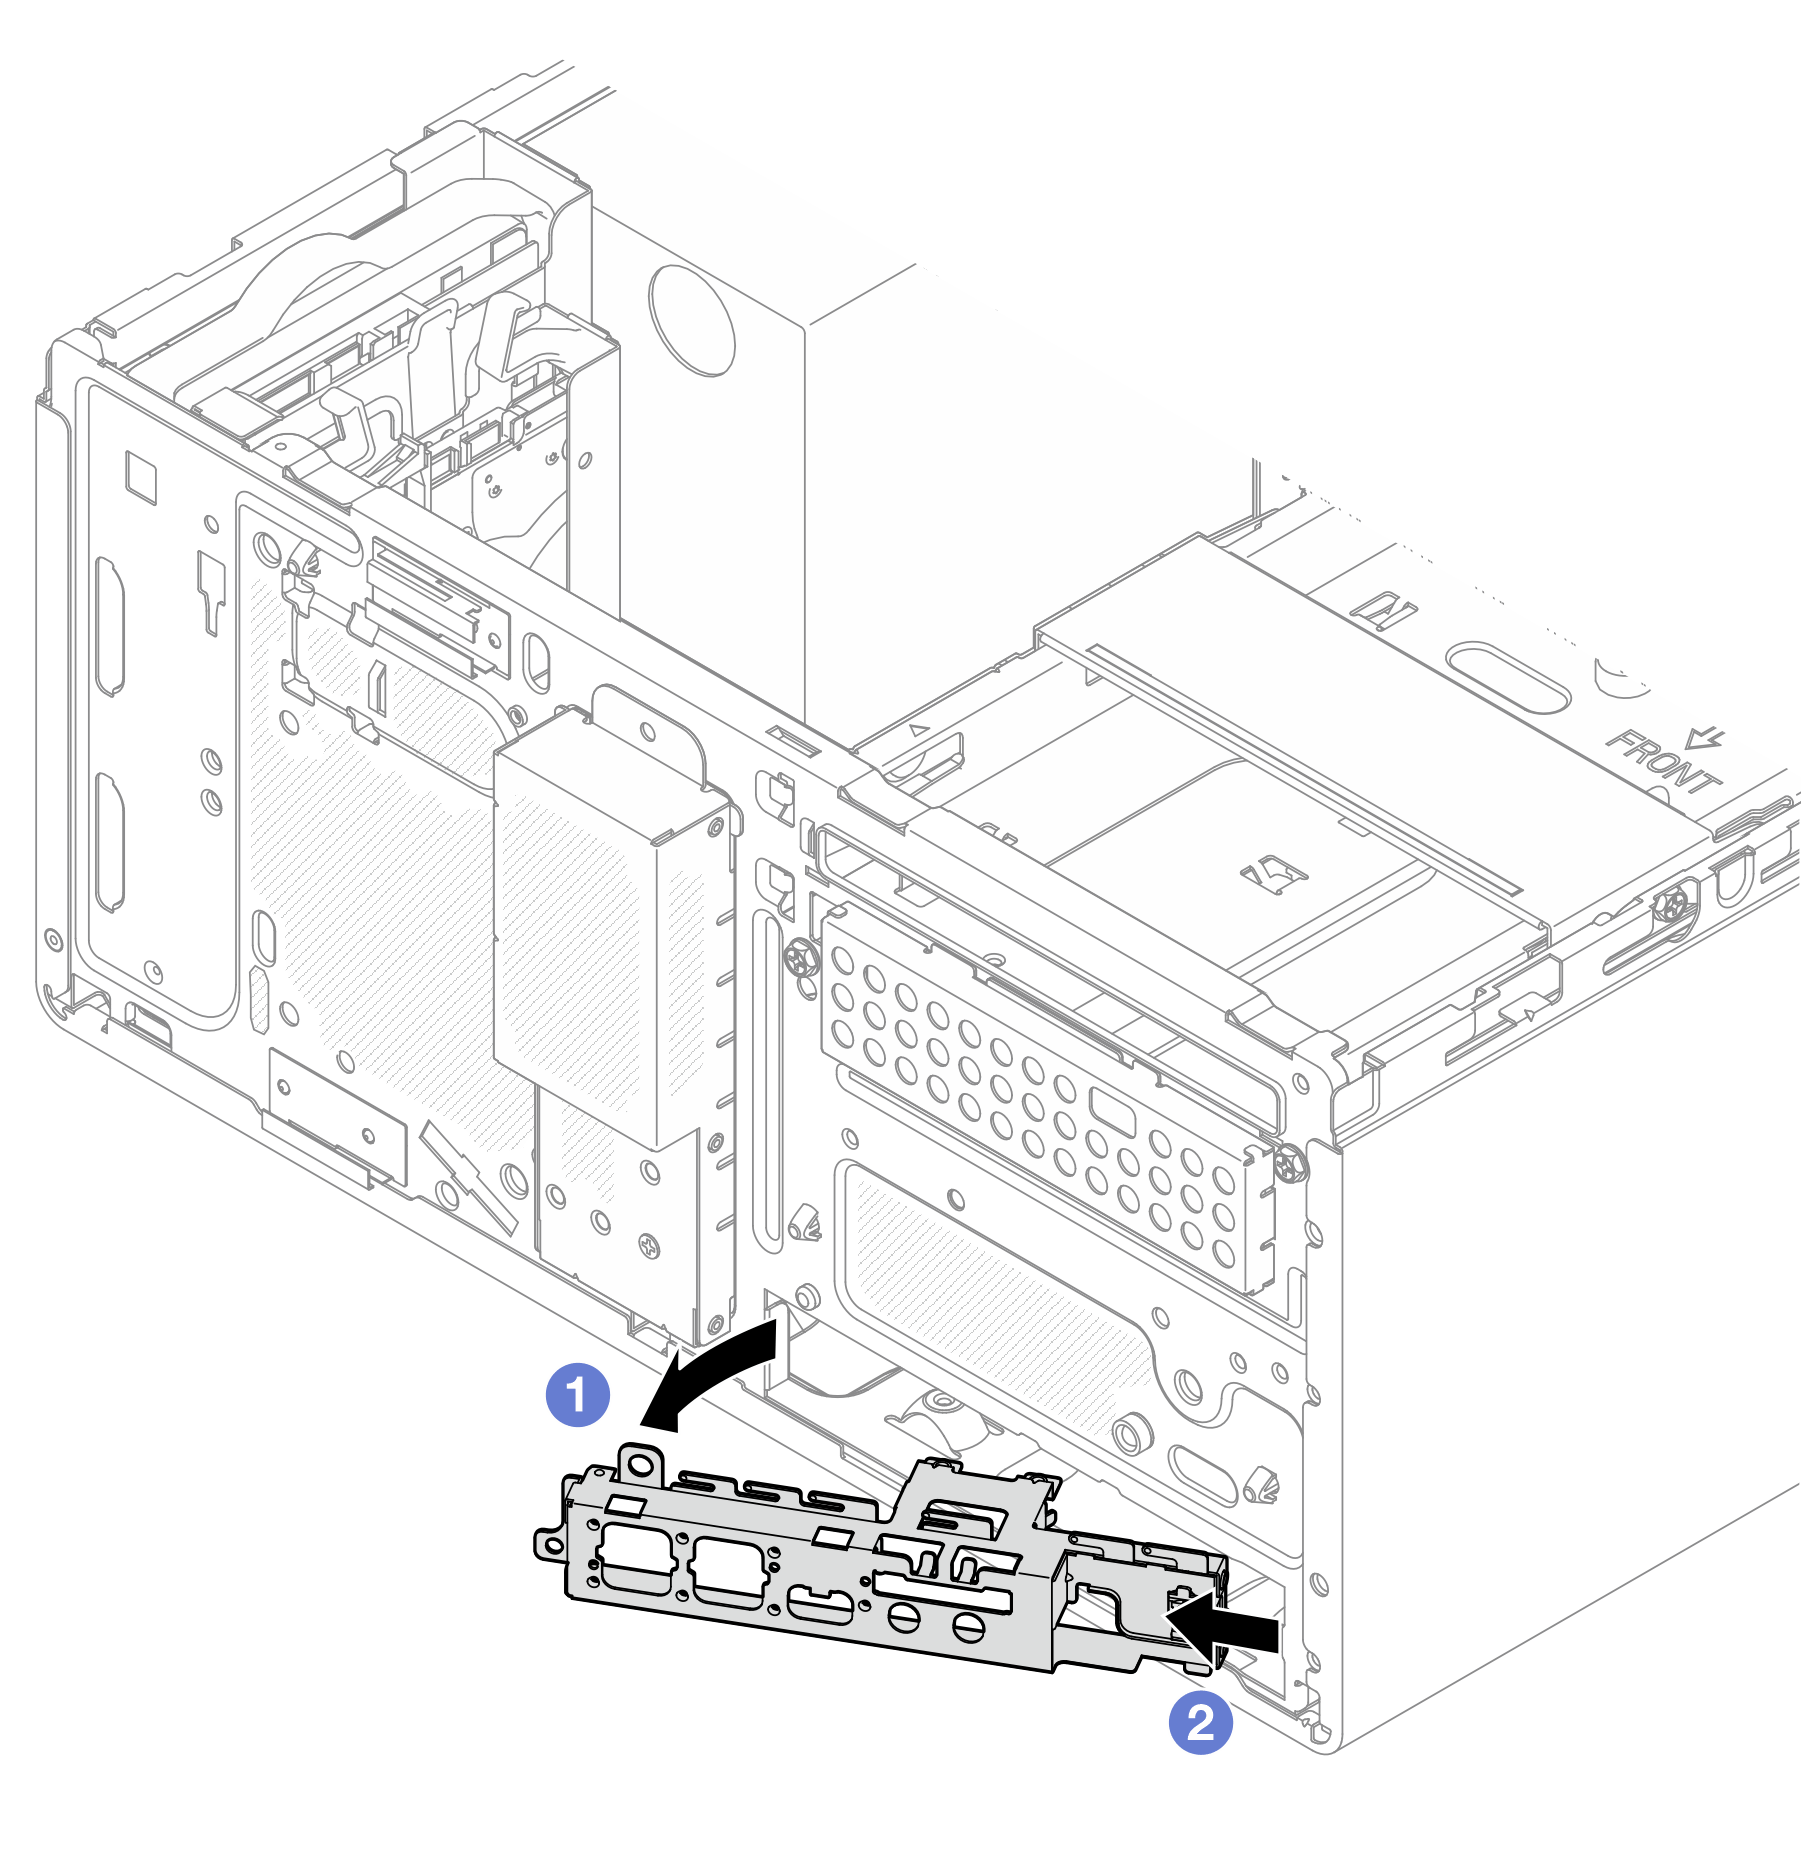
  12. Remove the front I/O bracket.
    1. Rotate the left end of the front I/O bracket away from the chassis.
    2. Remove the front I/O bracket from the chassis.
      Figure 2. Removing the front I/O bracket from the chassis
      Removing the front I/O bracket from the chassis
  13. Disconnect all the cables connected to the system board.
    Attention
    To avoid damaging the system board, make sure to follow the instructions in Internal cable routing when disconnecting cables from the system board.
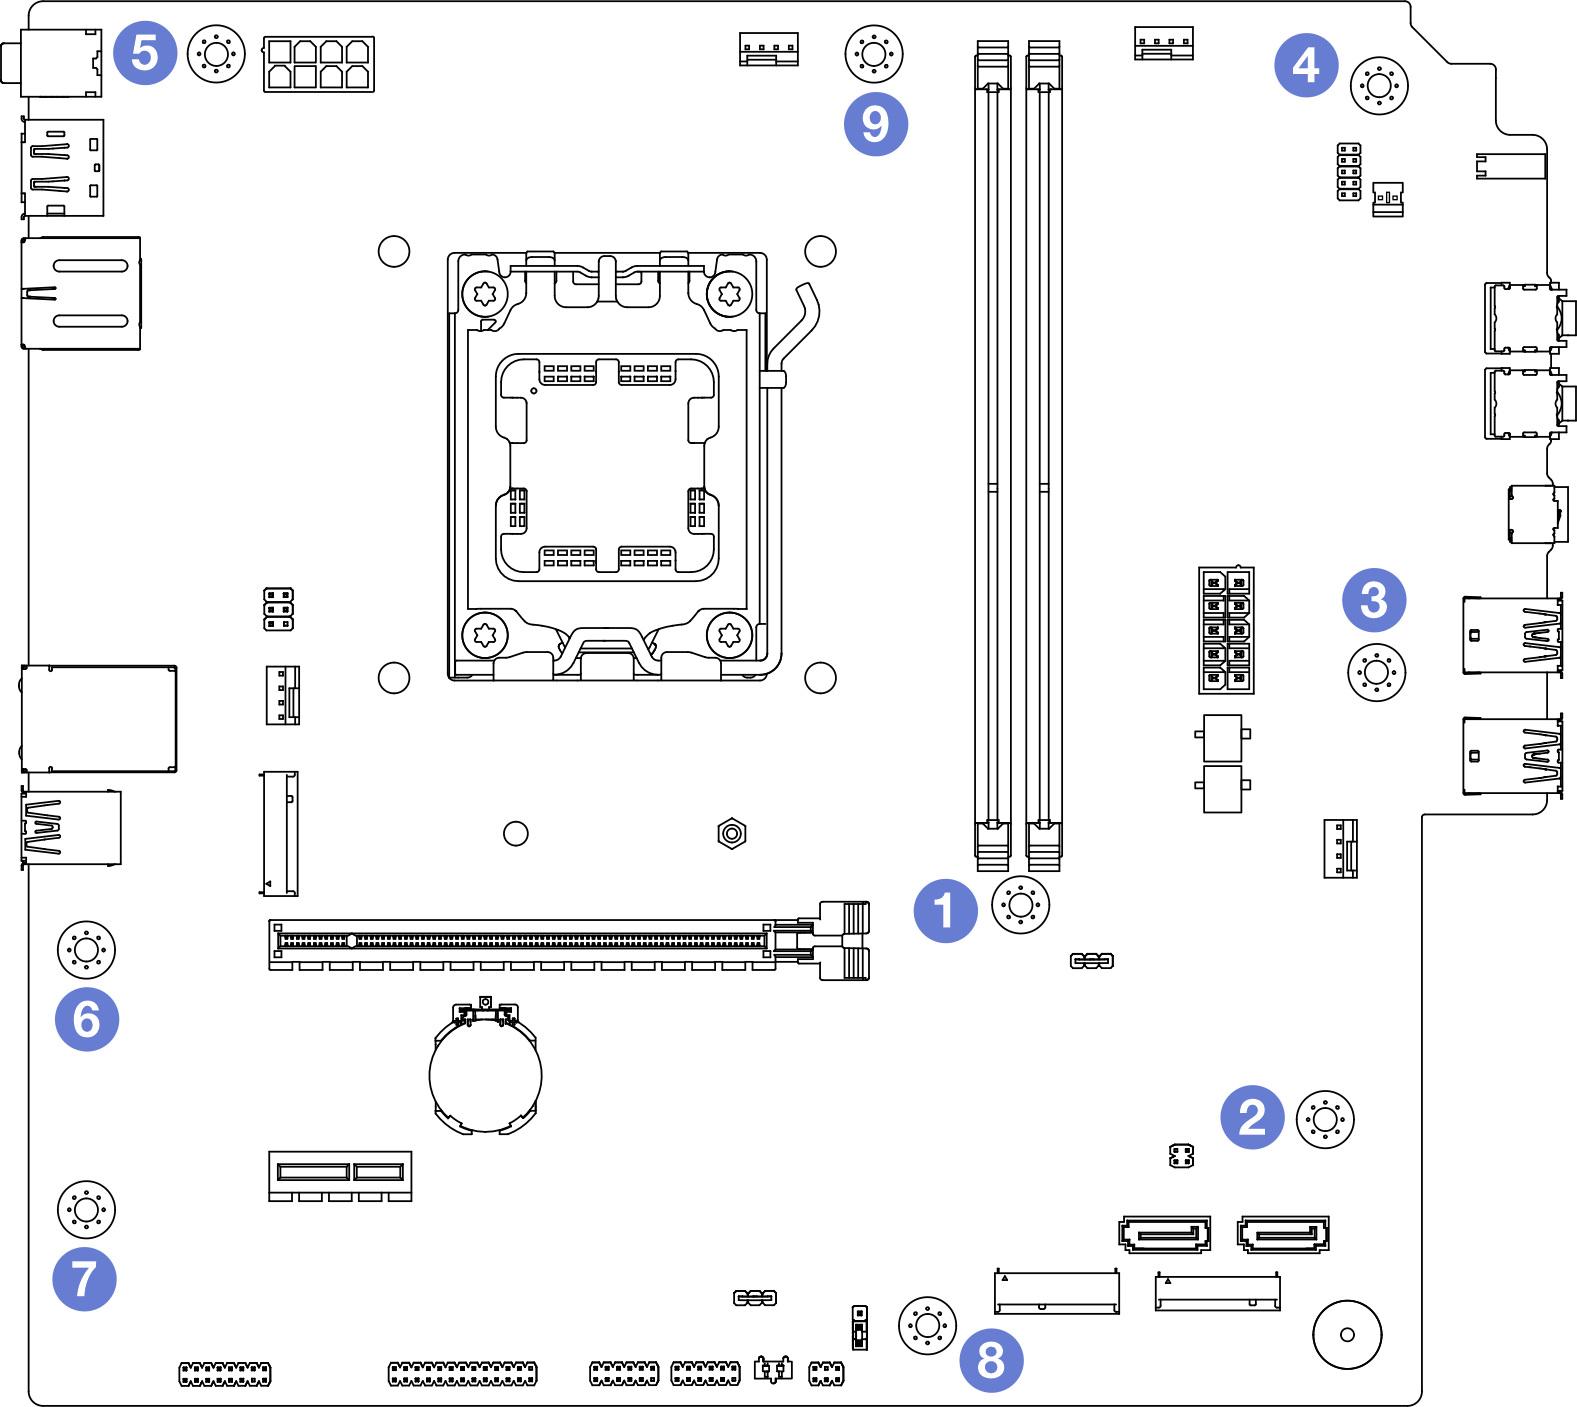
  14. Remove the nine screws that secure the system board in the sequence shown in the illustration below. Keep the screws for future use.
    Figure 3. System-board screws removal sequence
    System-board screws removal sequence
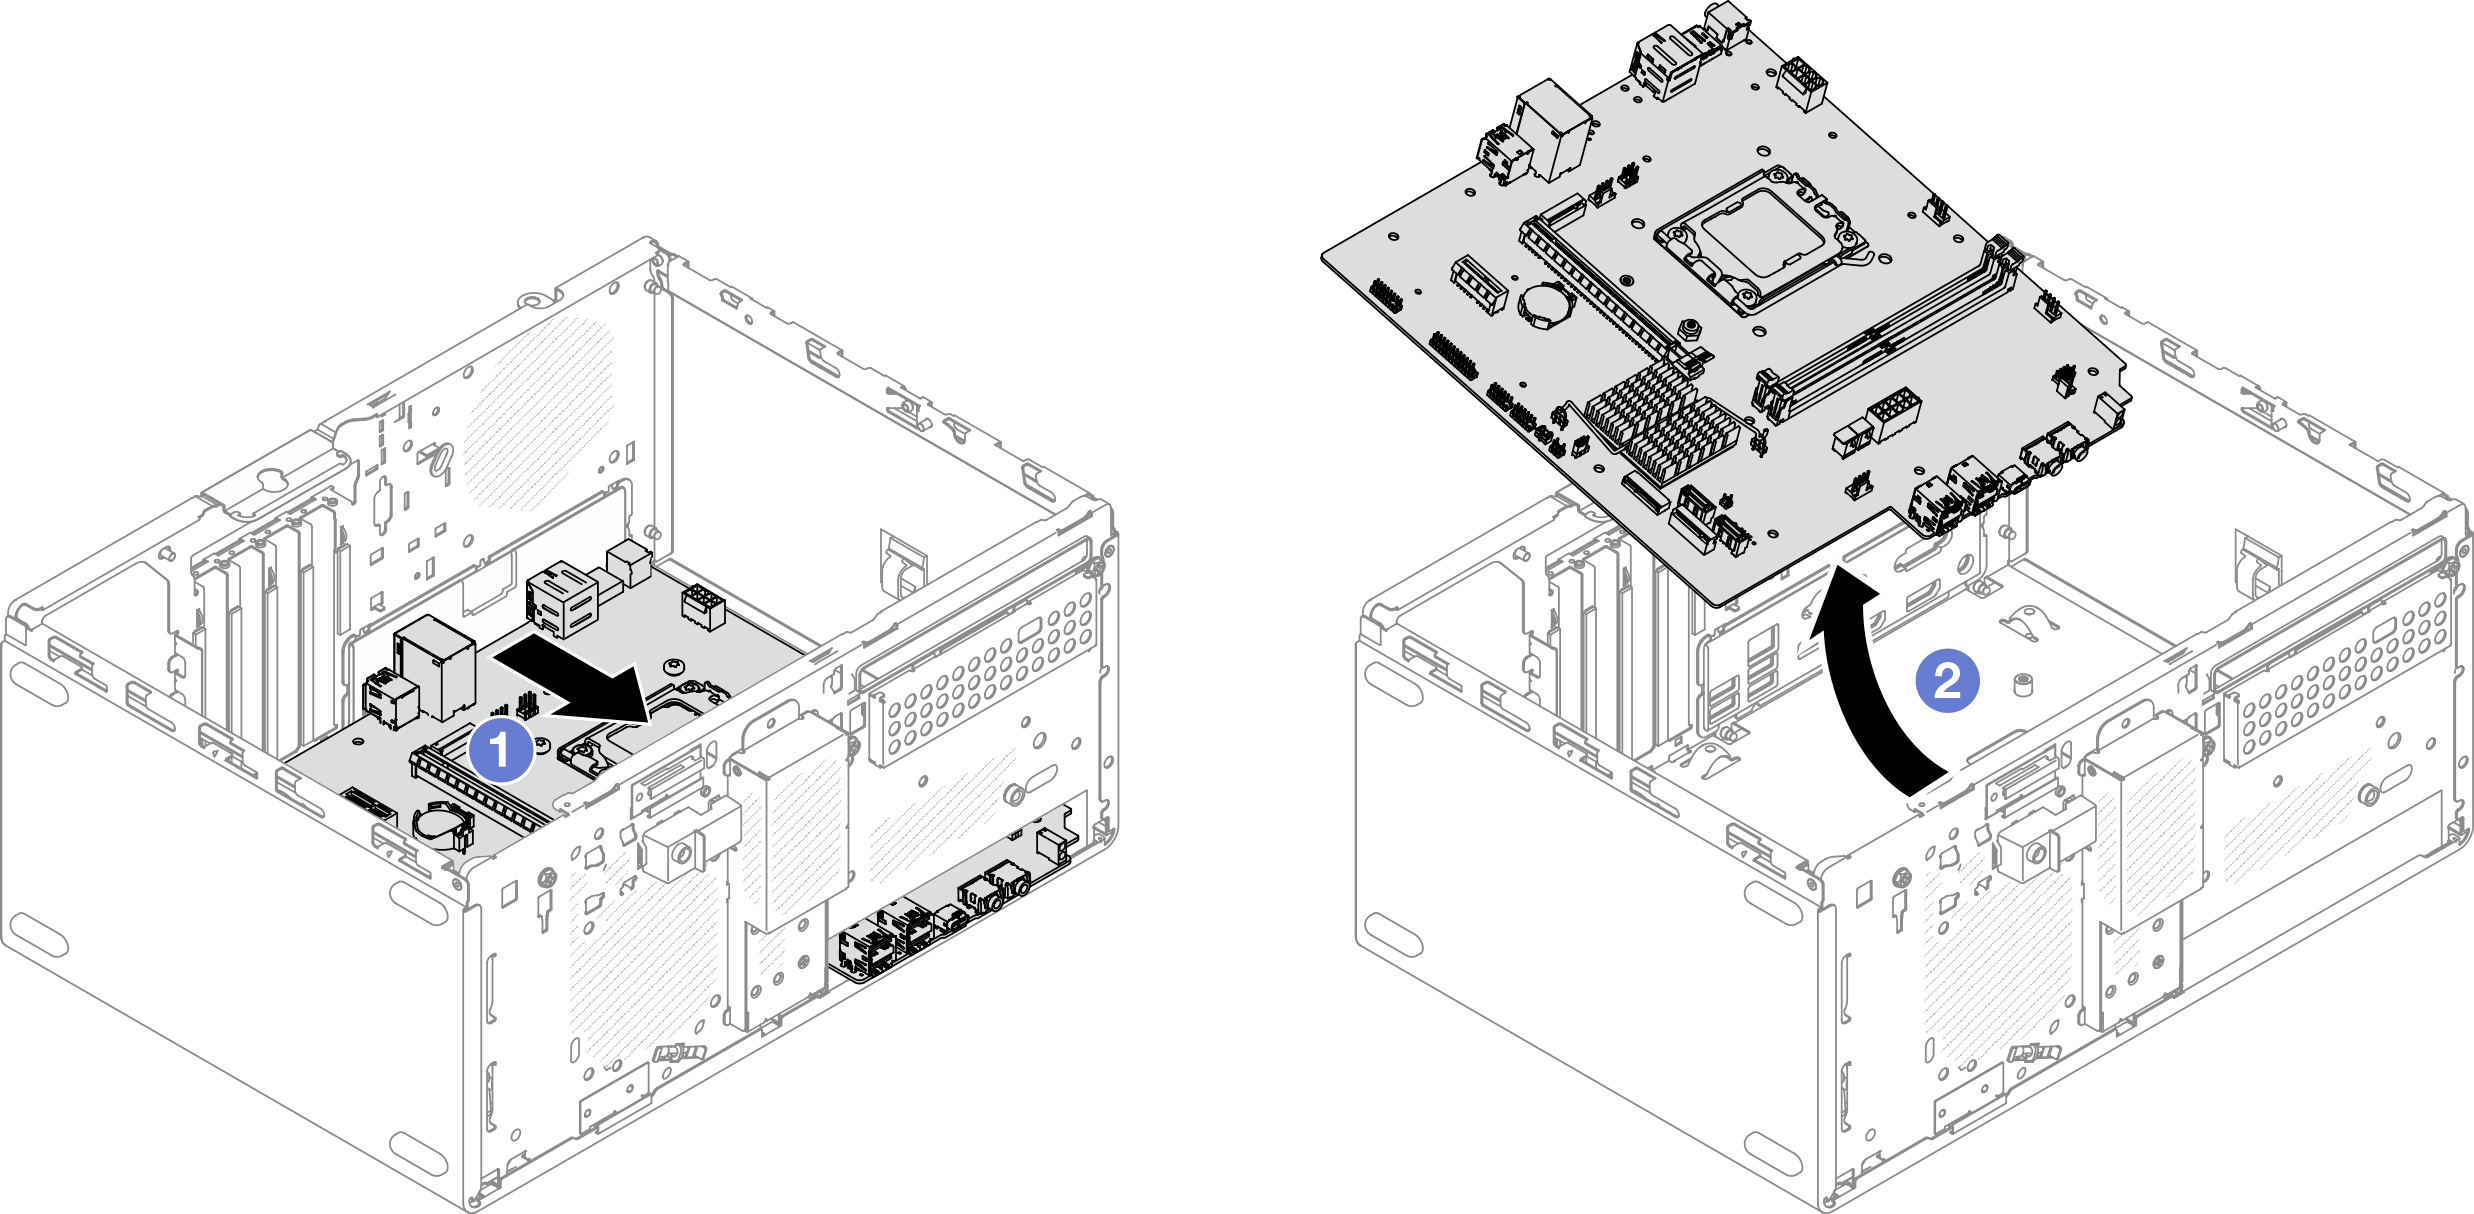
  15. Remove the system board from the chassis.
    1. Slide the system board toward the front of the server to release the serial port connector from the chassis.
    2. Gently grasp the system board by the edges; then, tilt the system board, and remove it from the chassis.
      Figure 4. Removing the system board from the chassis
      Removing the system board from the chassis
After you finish

After disassembling the server, recycle the unit in compliance with local regulations.