Remove an optical drive cage
Follow instructions in this section to remove the optical drive cage.
Read Installation Guidelines and Safety inspection checklist to ensure that you work safely.
Power off the server and peripheral devices and disconnect the power cords and all external cables. See Power off the server.
- If the server is in a rack, remove it from the rack. See Remove the server from rack.
Remove any locking device that secures the server, such as a Kensington lock or a padlock.
Place the server on its side with the cover up.
Procedure
- Make preparation for this task.
- If applicable, disconnect all the cables from the 3.5-inch drive assembly.
- Remove the optical drive cage from the chassis.
 Rotate the handle on the optical drive cage.
 Lift the optical drive cage out from the chassis.Figure 1. Removing the optical drive cage
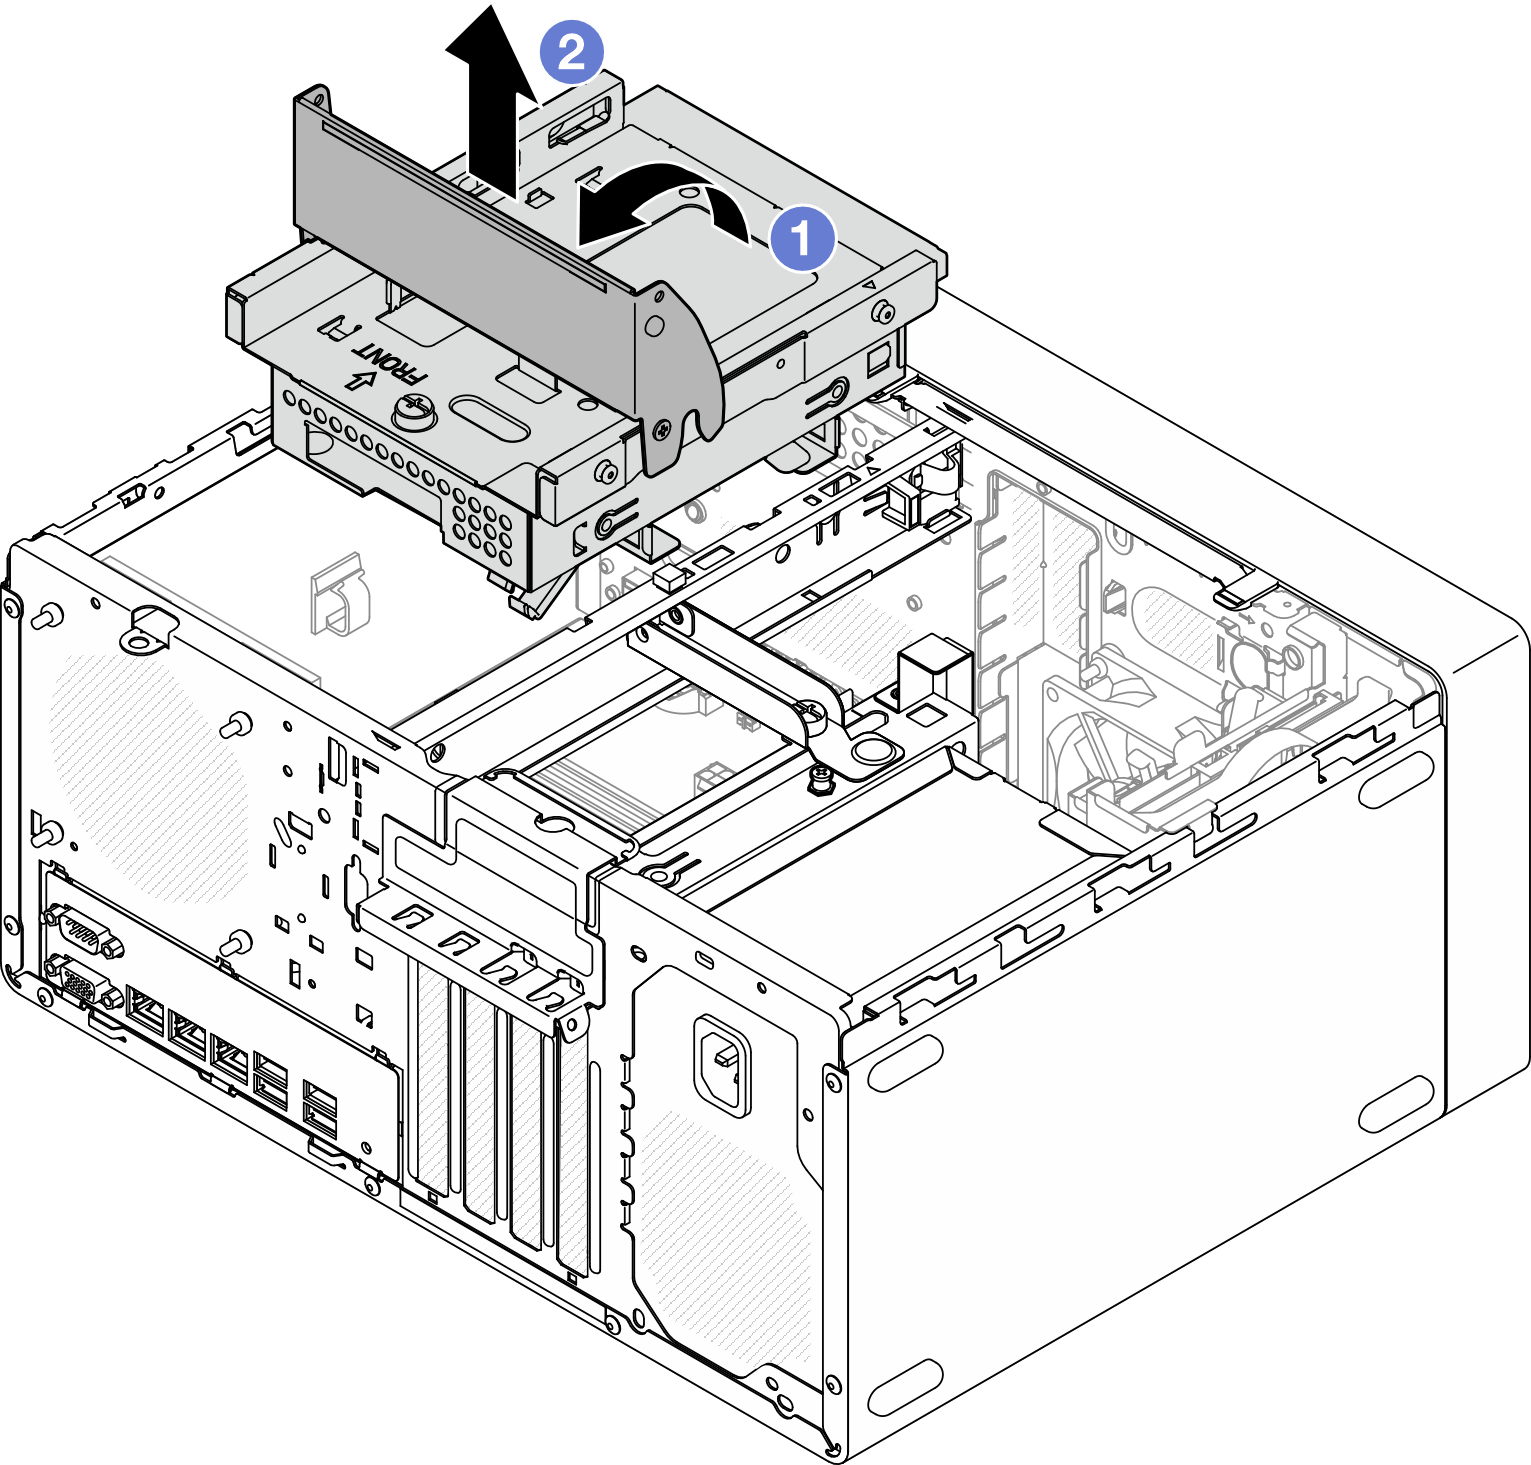
If applicable, replace the 3.5-inch drive cage or replace the 3.5-inch drive assembly. See Simple-swap drive and drive cage replacement (bay 2).
Install a replacement unit. See Install the optical drive cage.
If you are instructed to return the component or optional device, follow all packaging instructions, and use any packaging materials for shipping that are supplied to you.
Demo video