Install a hot-swap power supply
Use this information to install a hot-swap power supply.


To avoid possible danger, read and follow the following safety statement.
To avoid a shock hazard:
- Do not connect or disconnect any cables or perform installation, maintenance, or reconfiguration of this product during an electrical storm.
- Connect all power cords to a properly wired and grounded electrical outlet.
- Connect to properly wired outlets any equipment that will be attached to this product.
- When possible, use one hand only to connect or disconnect signal cables.
- Never turn on any equipment when there is evidence of fire, water, or structural damage.
- Disconnect the attached power cords, telecommunications systems, networks, and modems before you open the device covers, unless instructed otherwise in the installation and configuration procedures.
- Connect and disconnect cables as described in the following table when installing, moving, or opening covers on this product or attached devices.
| To Connect: | To Disconnect: |
|---|---|
|
|
Never remove the cover on a power supply or any part that has this label attached.
Hazardous voltage, current, and energy levels are present inside any component that has this label attached. There are no serviceable parts inside these components. If you suspect a problem with one of these parts, contact a service technician.
Before you install a hot-swap power supply:
Ensure that the devices you are installing are supported. For a list of supported optional devices for the solution, see http://www.lenovo.com/us/en/serverproven/.
Do not install two power supply units with different wattages. Related information is available from the following:
Read the label on the top cover for maximum wattage output of installed power supply units. Only replace the existing units with those having the same wattage as marked on the label.
Check the rear of the node to ensure that there is no length difference between the two installed units. A visible difference in length means that the two units have different wattages, and one of them must be replaced.
Procedure performed by: customer or field service
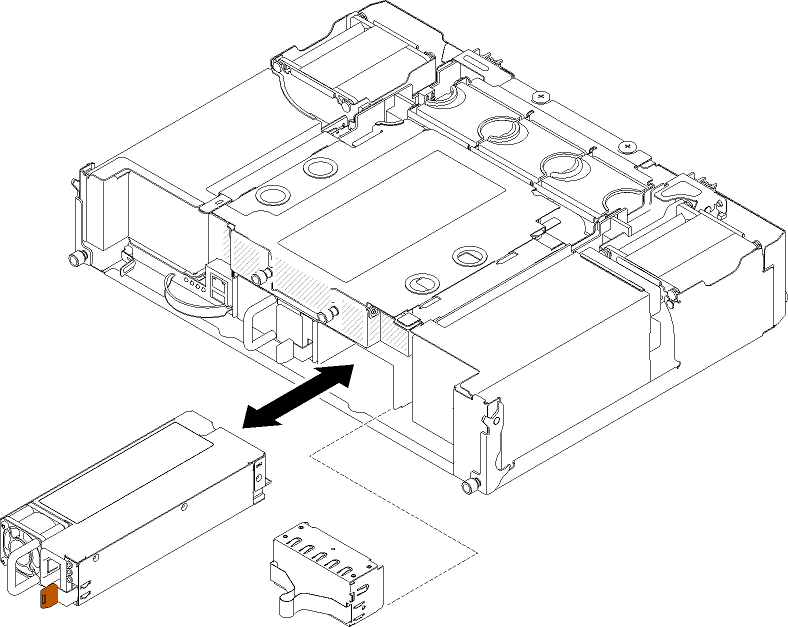
Complete the following steps to install a hot-swap power supply.
- Connect one end of the power cord for the new power supply into the AC connector on the back of the power supply. Then, connect the other end of the power cord into a properly grounded electrical outlet.Figure 1. Hot-swap power supply installation
 Note
NoteConnect the power cord to the power supply unit. Ensure that the cord is properly connected to the power supply.
After installing the hot-swap power supply:
Reconnect any cables that you removed.
If the node is turned off, turn it on and ensure that the power supply is replaced successfully:
The amber warning LED on node front panel is off.
The green indicator light on each power supply is illuminated.
If you are instructed to return the component or optional device, follow all packaging instructions, and use any packaging materials for shipping that are supplied to you.