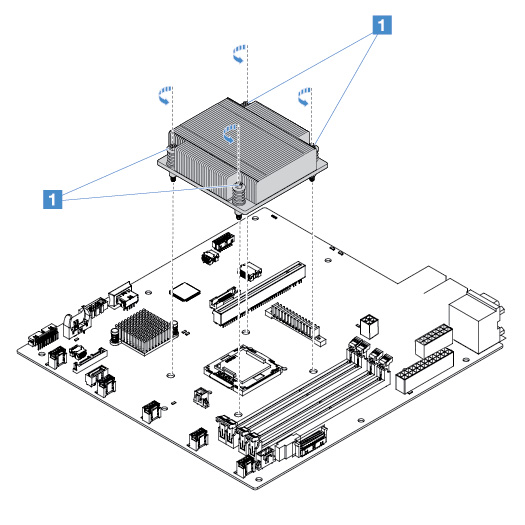
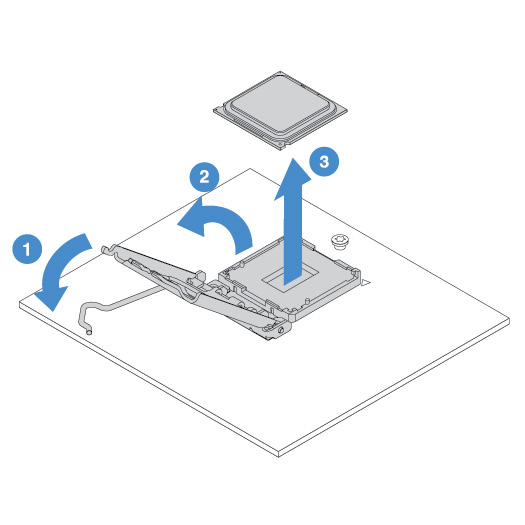
Removing the microprocessor and heat sink (Trained technician only)
The following notes describe the type of microprocessor that the server supports and other information that you must consider when you install or remove a microprocessor and heat sink:
- The server supports one Intel land grid array (LGA) 1151 dual-core or quad-core microprocessor. The type, speed, and L3 cache of the microprocessor depends on the server model.
- Read the documentation that comes with the microprocessor to determine whether you have to update the server firmware. To download the most current level of server firmware, go to the Lenovo Support Portal and https://datacentersupport.lenovo.com.
- The microprocessor uses an integrated voltage regulator on the system board.
Attention
- Do not allow the thermal grease on the microprocessor and heat sink to come in contact with anything. Contact with any surface can compromise the thermal grease and the microprocessor socket.
- Dropping the microprocessor during installation or removal can damage the contacts.
- Do not touch the microprocessor contacts; handle the microprocessor by the edges only. Contaminants on the microprocessor contacts, such as oil from your skin, can cause connection failures between the contacts and the socket.
- The pins on the sockets are fragile. Any damage to the pins might require replacing the system board.
Removing the heat sink from the microprocessor destroys the even distribution of the thermal grease, you must wipe off the thermal grease with the alcohol wipes and reapply clean thermal grease. See Thermal grease.
After you remove a new microprocessor or a new heat sink, you need to install a new one. See Installing the microprocessor and heat sink (Trained technician only).
To remove the microprocessor and heat sink, do the following:
Give documentation feedback

