Replacing a simple-swap SATA drive

Use this information to Replacing a simple-swap hard disk drive.

Note
You must turn off the server before installing simple-swap drives in the server.

To install a simple-swap SATA drive, complete the following steps:

  1. Read the safety information that begins in Safety and Installation guidelines.
  2. Touch the static-protective package that contains the new drive to any unpainted metal surface on the server; then, remove the drive from the package and place it on a static-protective surface.
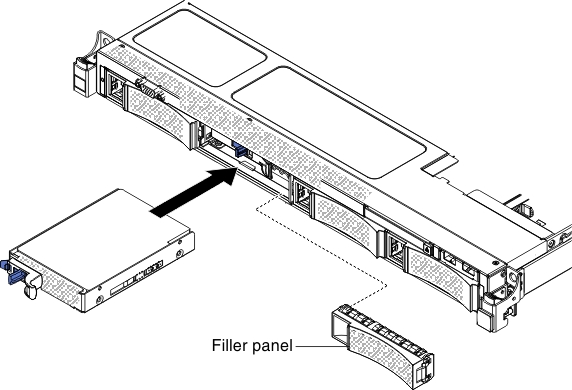
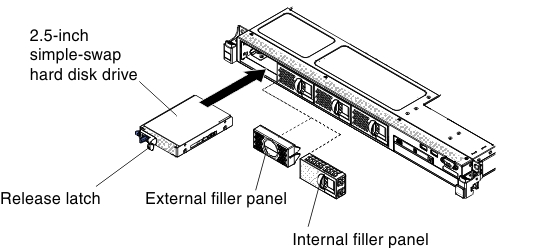
  3. Gently push the drive assembly into the drive bay until the drive clicks into place.
    Figure 1. 3.5-inch simple-swap hard disk drive installation
    3.5-inch simple-swap hard disk drive installation
    Figure 2. 2.5-inch simple-swap hard disk drive installation
    2.5-inch simple-swap hard disk drive installation
  4. Reinstall the filler panel that you removed
  5. Turn on the peripheral devices and the server.