Removing the dedicated slotless RAID controller
Use this information to remove the dedicated slotless RAID controller.
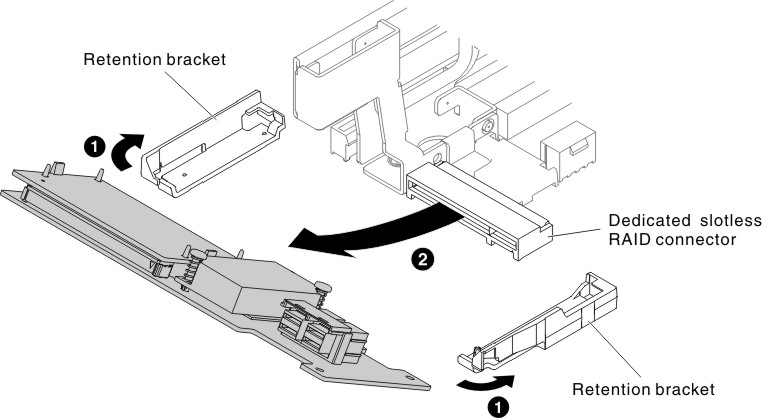
The dedicated slotless RAID controller can be installed in the dedicated connector on the system board (see System-board internal connectors for the location of the connectors).
To remove the dedicated slotless RAID controller, complete the following steps:
- 1 Press the retention tabs away from the controller; then, slightly lift up the rear of the controller, and 2 pull it out of the connector on the system board.Figure 1. Dedicated slotless RAID controller removal
Give documentation feedback