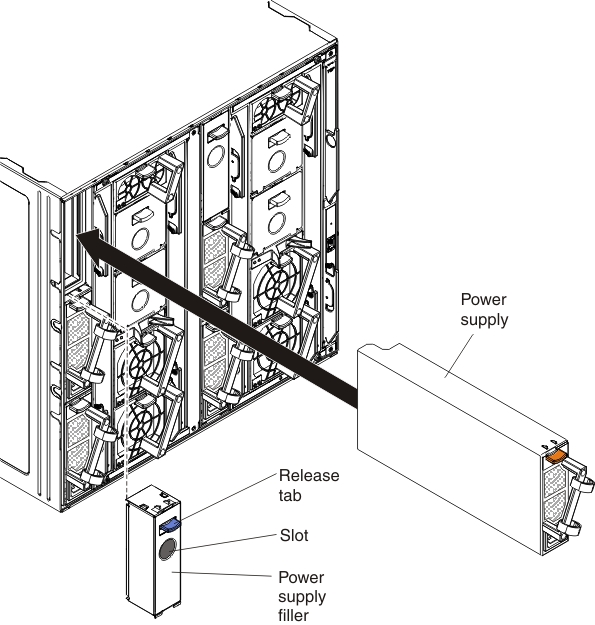
The Flex System Carrier-Grade chassis comes with at least two power supplies already installed in the rear of the chassis. You can install up to four additional power supplies in the chassis for a total of six power supplies.
The number of power supplies that you install is dependent on the chassis power load and selected chassis power policy.
To install a power supply, complete the following steps.

- If you are adding a power supply, remove the filler from the power-supply bay in which you want to install the power supply (press the release tab, grasp the filler by the slot, and pull it out of the bay).
- Grasp the power-supply handle and slide the power supply into the bay until it locks in place.
- If you are installing a -48 to -60 V dc power supply, connect the earth ground cable to the power supply.
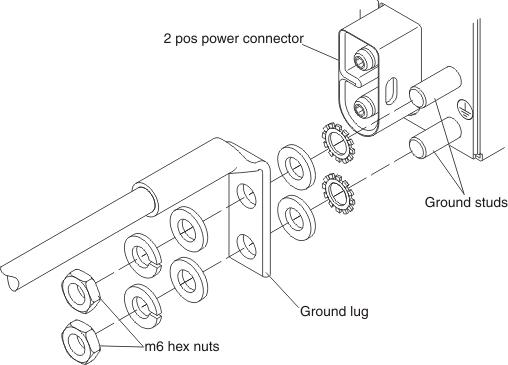
- Use a 10 mm nut driver to remove the hex nuts from the ground studs.
- Remove the lock washer and one of the flat washers from each ground stud.
- Push the ground lug onto the ground studs; then, place the flat washer, the lock washer, and the hex nut back on each ground stud.
- Use a 10 mm nut driver to tighten the hex nuts to 4.0 - 4.8 Newton-meters (35.4 - 42.5 inch-pounds).

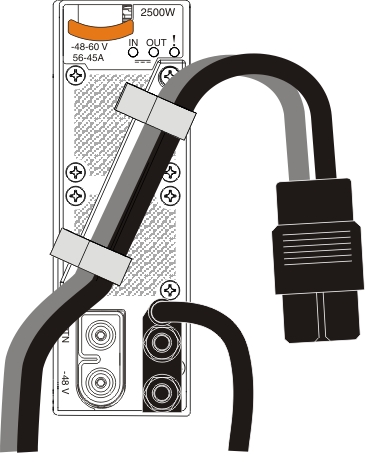
- Connect the power cord to the power supply:
- Loosen the strain-relief ties that are attached to the power-supply handle, but do not remove them.
- Align the power cord with the power-supply handle; then, secure the cord to the handle with the strain-relief ties.

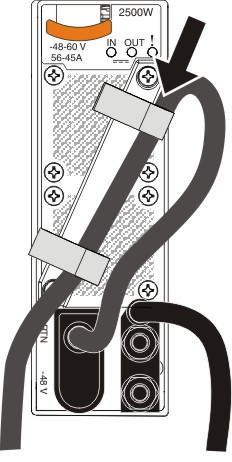
- Loop the power cord connector around and connect it to the power supply.

- Push the power cord back through the strain-relief ties to remove excess cable from the loop.


