Install the enclosure midplane
(Trained service technician only) Use this information to install the enclosure midplane.
About this task

Read Installation Guidelines and Safety inspection checklist to ensure that you work safely.
Go to Drivers and Software download website for ThinkSystem DW612S Enclosure to see the latest firmware and driver updates for your server.
Go to Update the firmware for more information on firmware updating tools.
Procedure
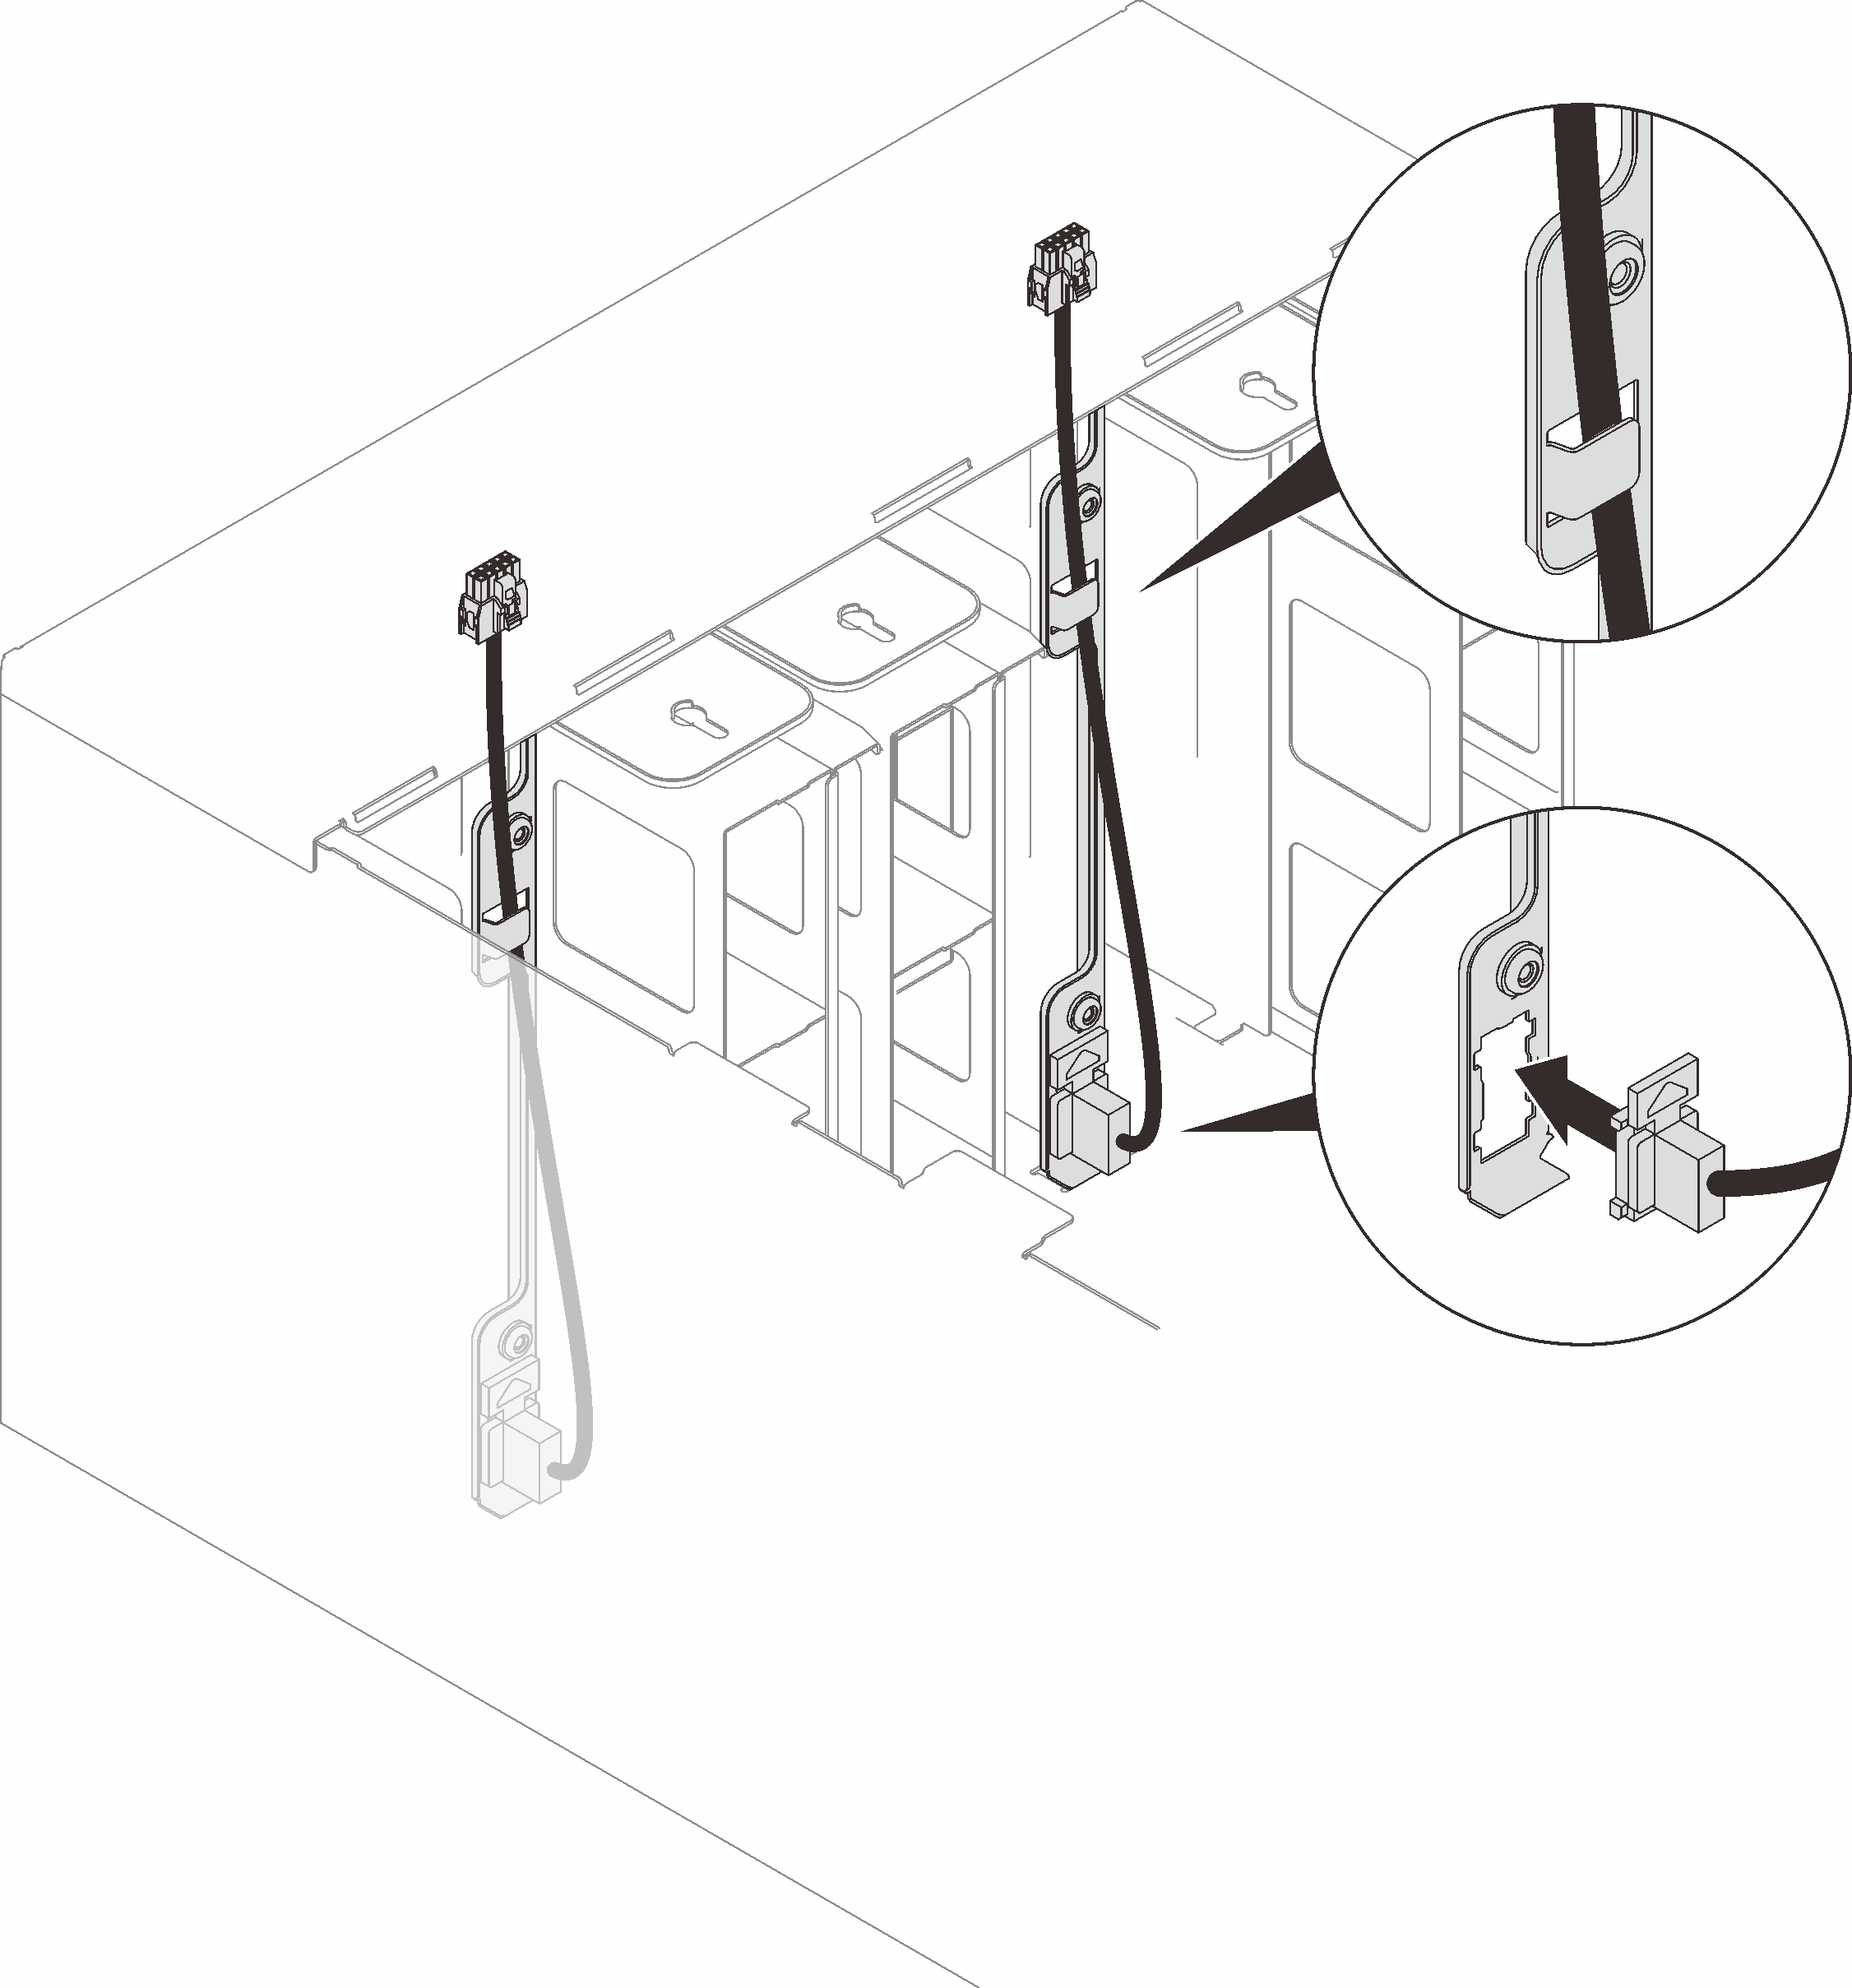
- Make sure the two drip sensor cables are secured to the enclosure and routed through the cable clips.Figure 1. Drip sensor cable installation
- Install the midplane.
 Carefully align the enclosure midplane with the guide pins in the enclosure; then, slide the midplane into the enclosure.AttentionDo not grasp the connectors on the enclosure midplane when you install it in the enclosure. Touching the connectors might damage the connector pins.
 Fasten three screws on the top of the midplane.
 Connect the drip sensor cables to the midplane.Figure 2. Enclosure midplane installation
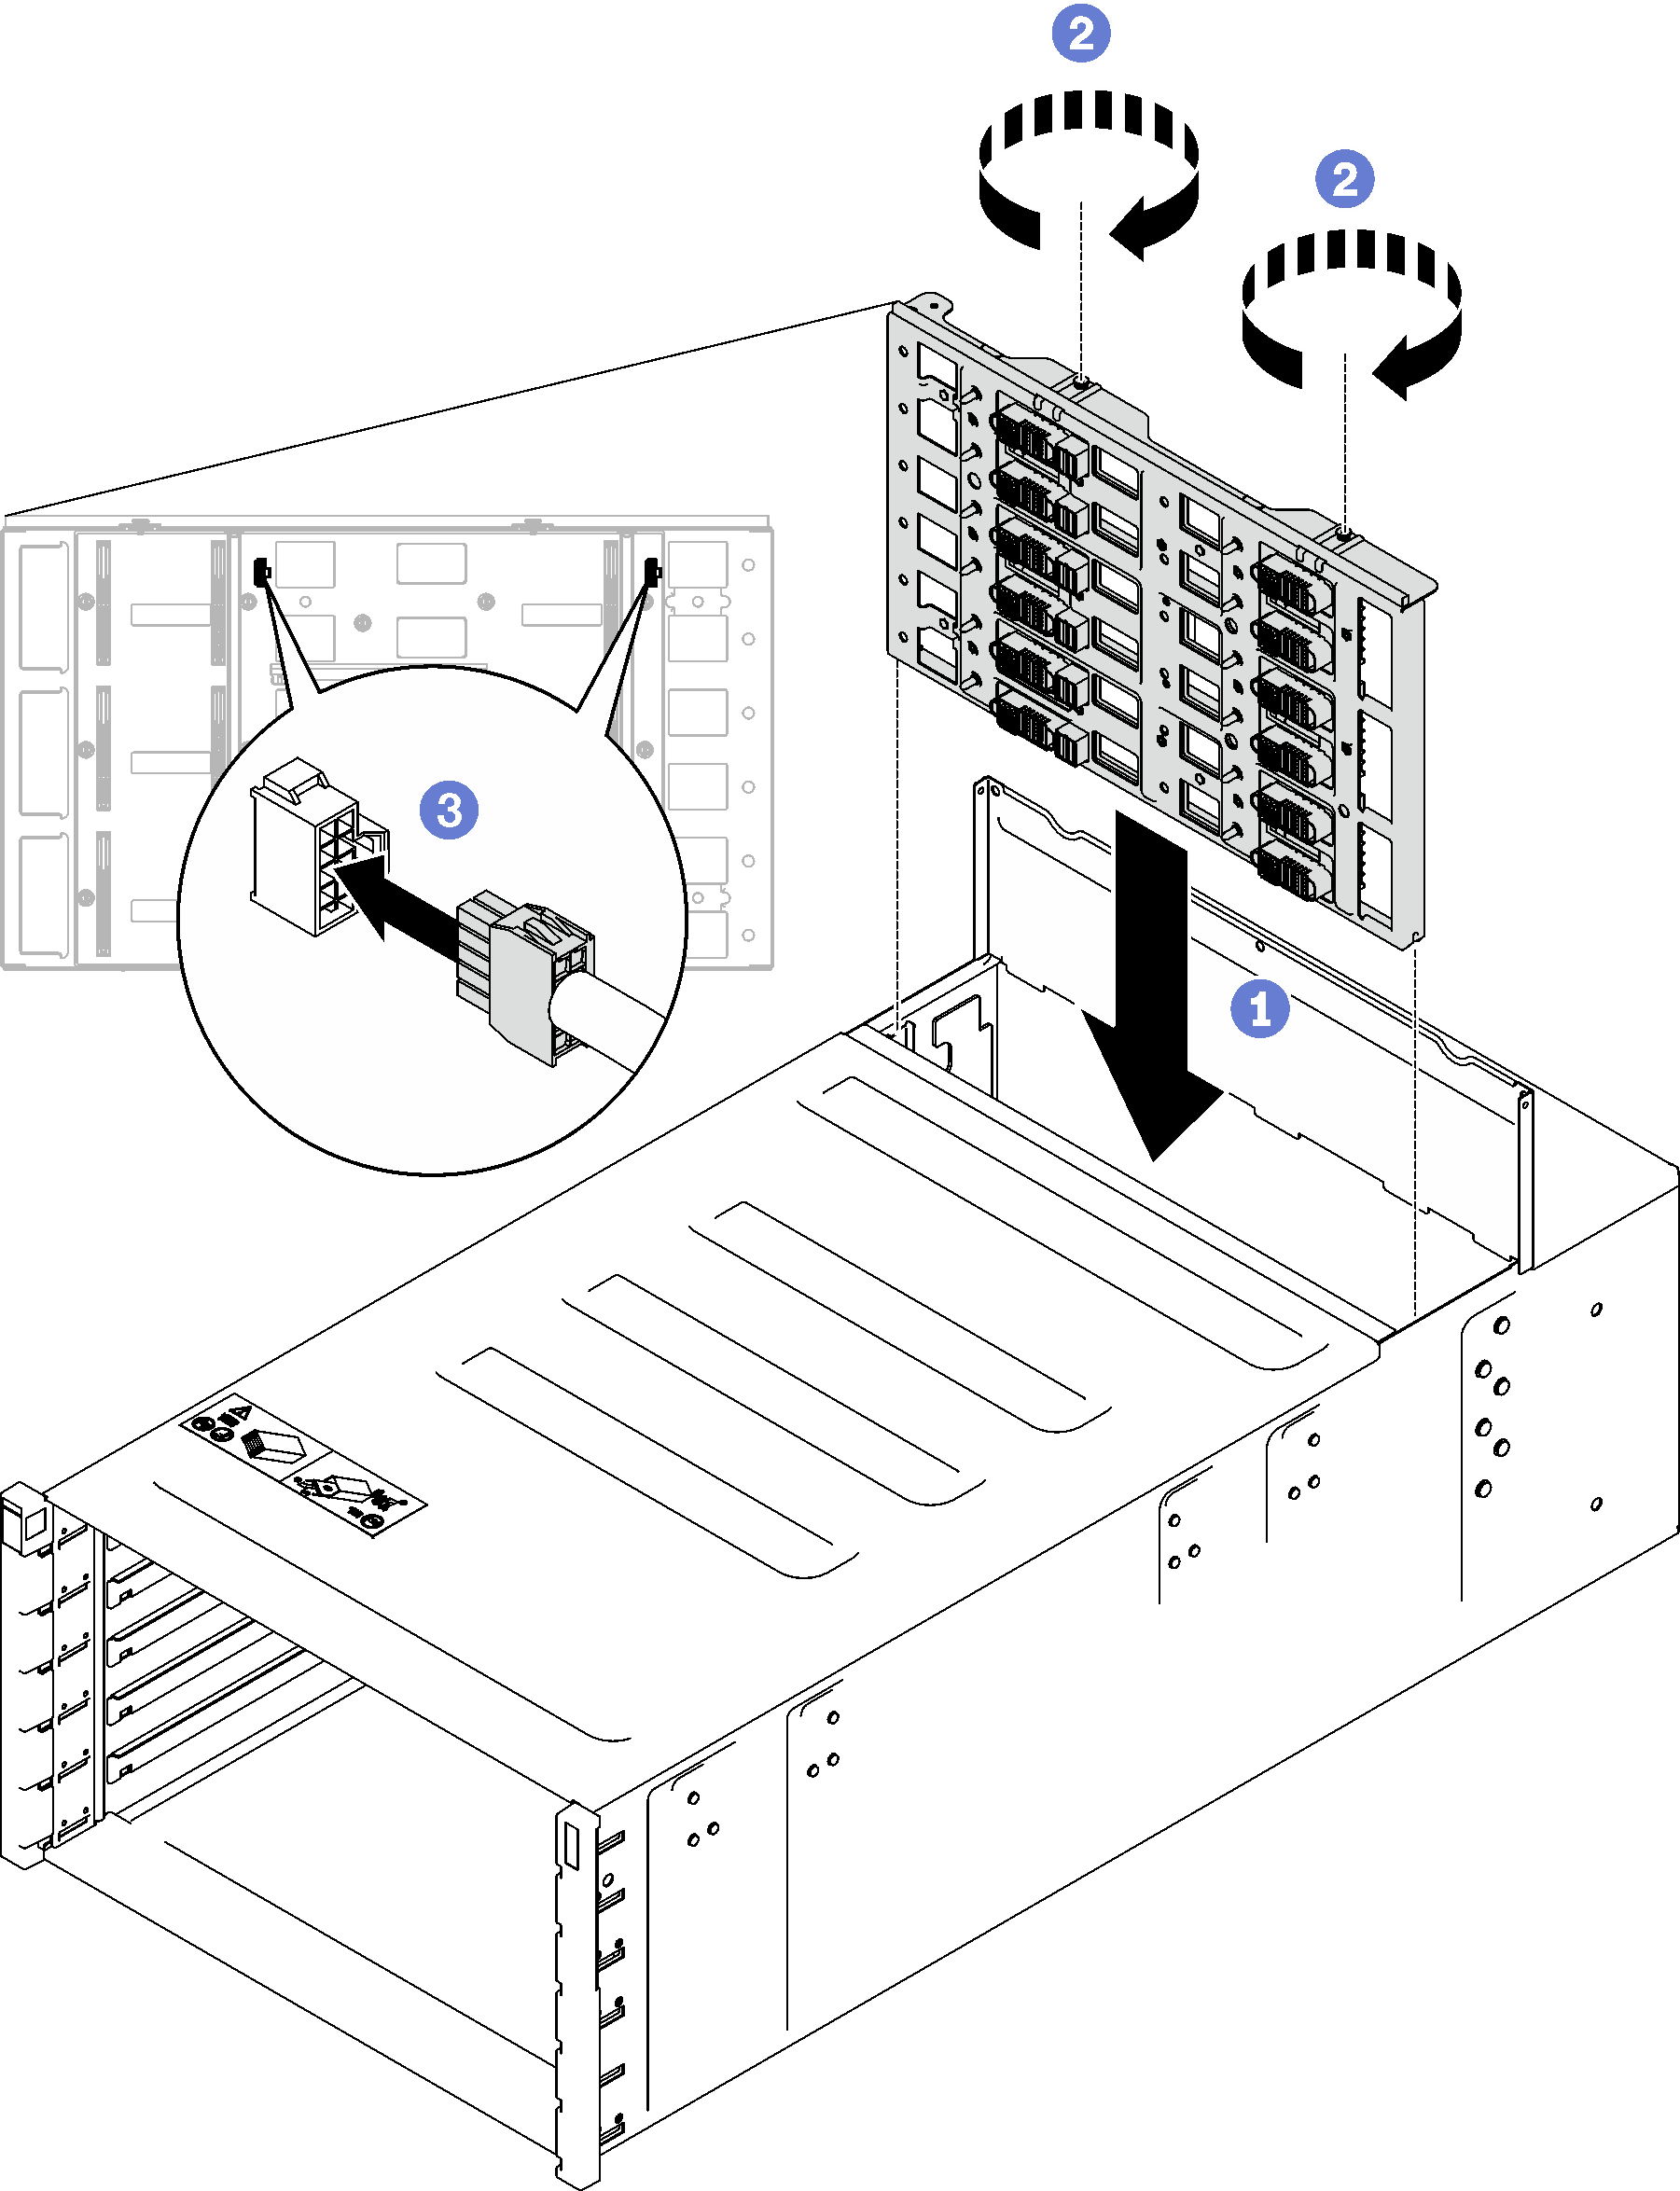
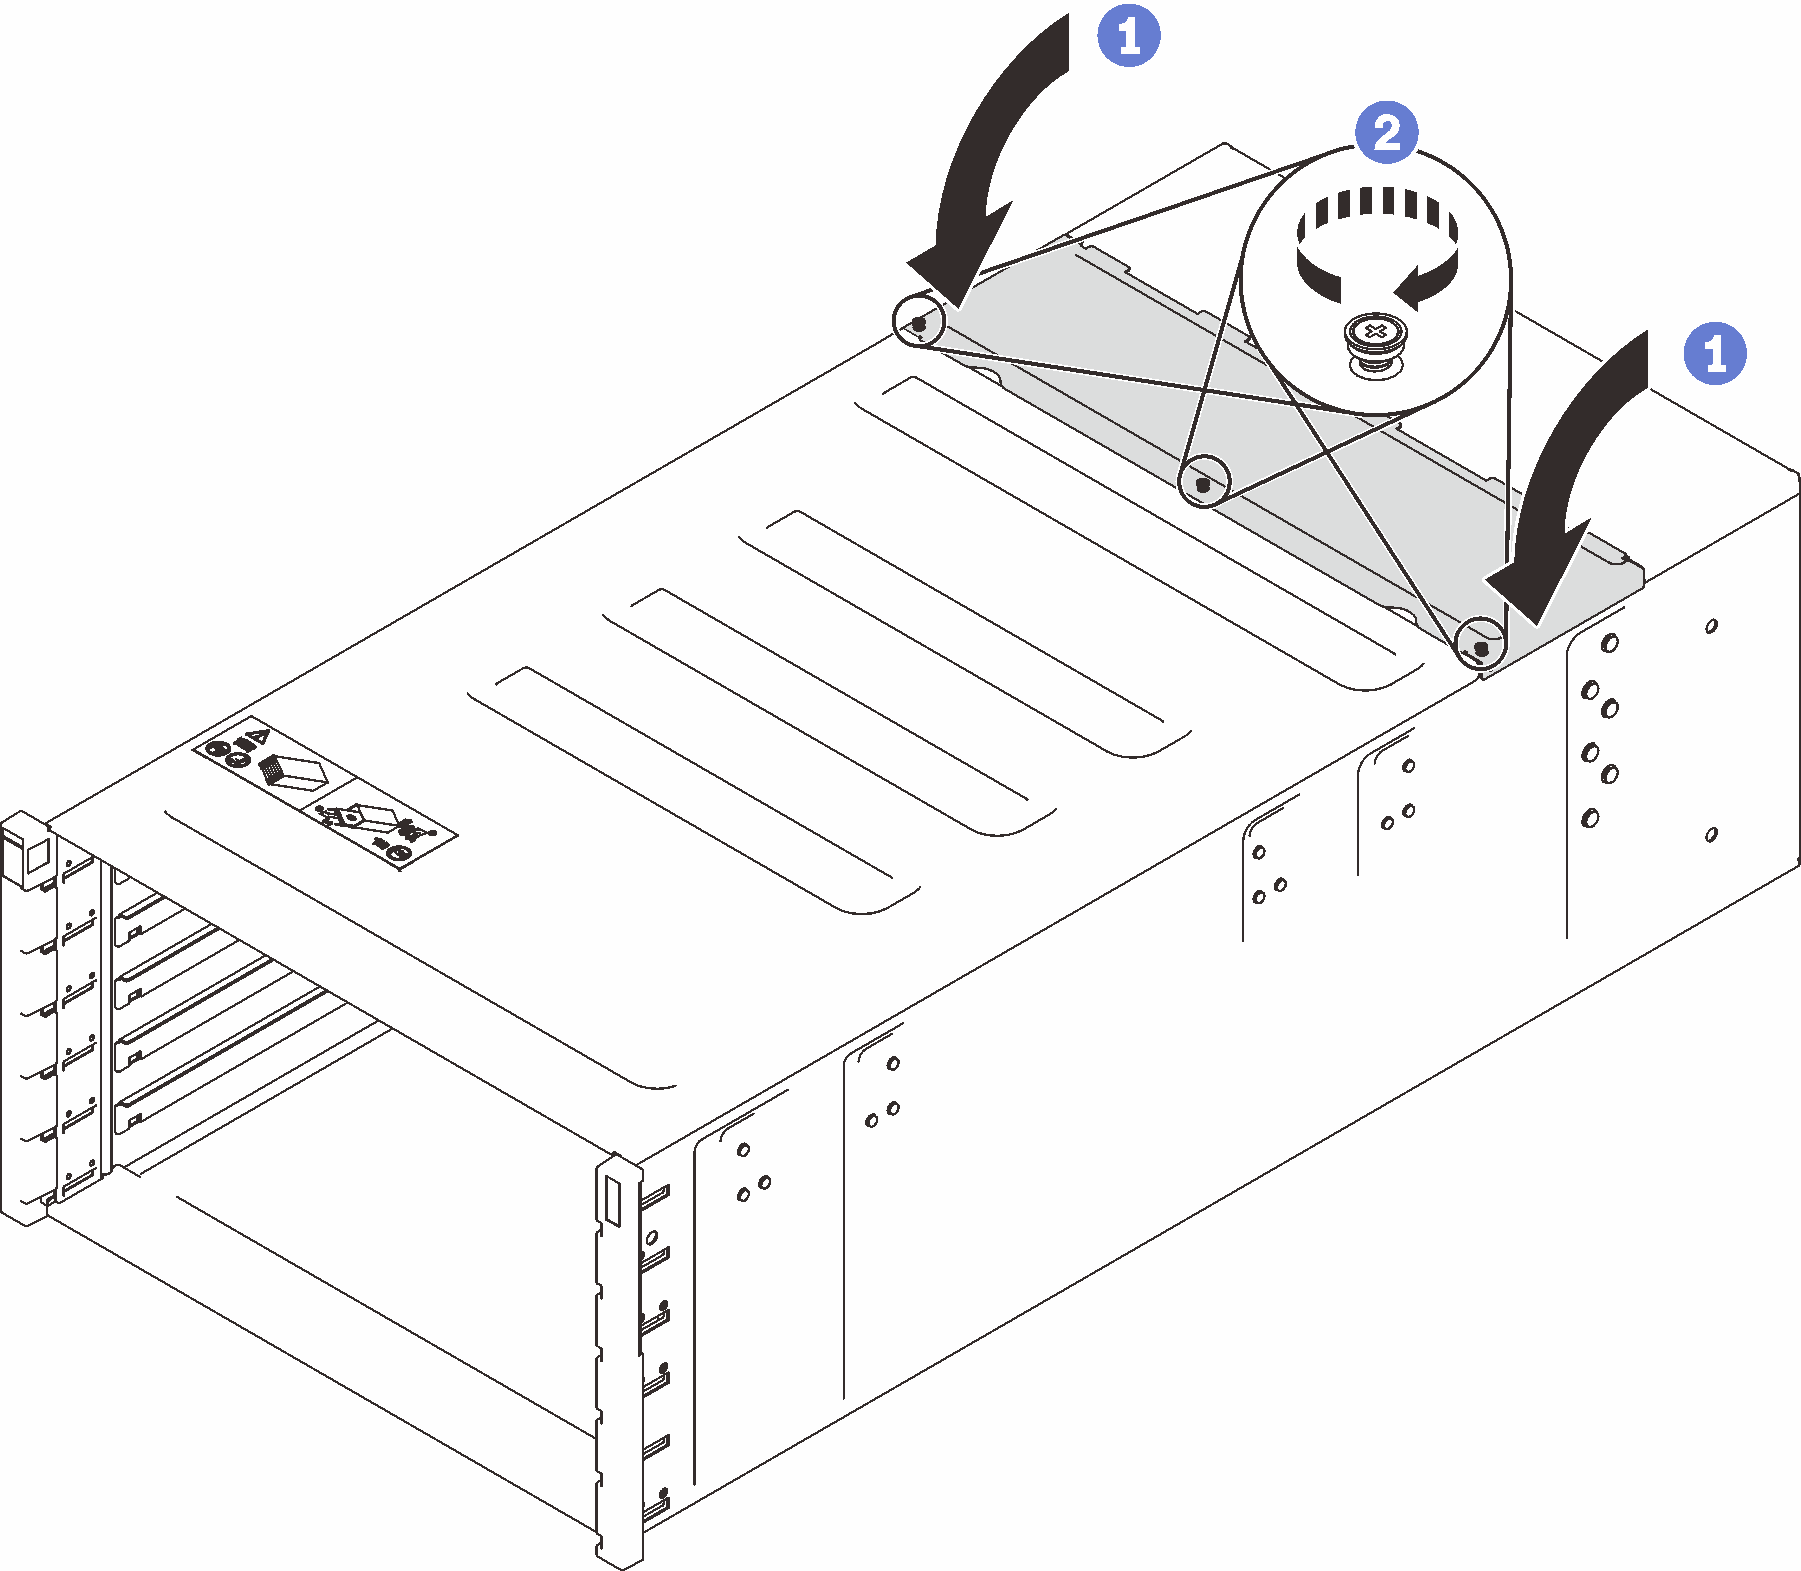
- Install the top cover.
- Insert the rear top cover tabs into the slot on the enclosure; then, rotate the top cover inwards.
- Tighten the captive screws on the top cover.Figure 3. Top cover inward rotation
After you finish
Install the enclosure into the rack. See Install the enclosure in the rack.
Install the manifold. See Install the manifold.
Install all power supplies. See Install a hot-swap power supply or Install a DWC PSU.
Install the SMM2 and SMM2 support bracket. See Install the SMM2.
Install the drip sensor assembly. See Install the drip sensor assembly.
Install the EMC shields. See Install an EMC shield.
Install all trays into the front of the enclosure. See Install a DWC tray in the enclosure.
- Install any other required components.
- Connect all required cables.
- Connect the enclosure to power.
- Write down new enclosure midplane serial number (for example: Y030UN34B063) and UUID (for example: 2E2B686CC6B311E2907C6EAE8B16A49E).
- Update the solution firmware to the latest level.
- Log in to the web interface.
- Go to System Information section, click on the Midplane VPD tab.
- Update the new enclosure midplane serial number and UUID onto the fan and power controller.
- Close the release handles on the tray in order to seat the nodes in the enclosure midplane connectors.
- Restart any nodes that you shut down. See the documentation that comes with the compute node for detailed instructions.
- The fan and power controller is powered-on automatically.
Demo video