REST API authentication and authorization
Before you can run automation scripts that contain Lenovo XClarity One REST APIs, you must set up an API key that is used for authentication and authorization.
To set up one or more API keys, click API keys on the context menu from the Settings view, and then click the Add icon (![]() ).
).
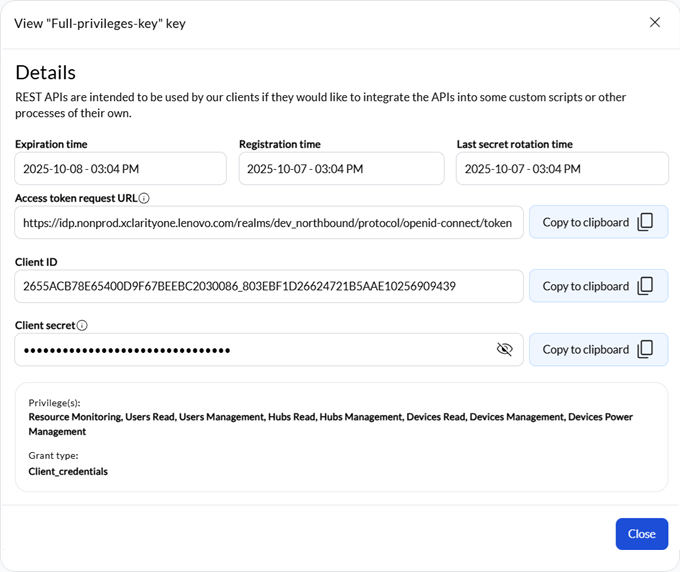
You can choose what privileges you want to give to the API key.
- Resources Monitoring . Allows scripts to monitor events, alerts, and jobs information.
- Users Read. Allows scripts to retrieve user information.
- Users Management. Allows scripts to invite new users, assign roles, and enable or disable users.
- Hubs Read. Allows scripts to retrieve hub information.
- Hubs Management. Allows scripts to add (connect), remove (disconnect), and enable or disable hubs.
- Devices Read. Allows scripts to retrieve device information.
- Devices Management. Allows scripts to discover, manage, and unmanage devices.
- Devices Power Management. Allows scripts to power on and off devices.
- Collections Read. Allows scripts to retrieve collection information.
- Collections Management. Allows scripts to create, modify, and delete collections.
- Service Tickets Read. Allows scripts to retrieve service-ticket information.
- Service Tickets Management. Allows scripts to create service tickets and update service-ticket status.
- Devices Life Cycle Management. Allows scripts to retrieve information about, create, assign, unassign, deploy, and delete device templates.
- Firmware Catalog Management. Allows scripts to retrieve information about firmware updates in the respiratory, download and import firmware metadata and firmware packages, import firmware repository packs, and delete firmware update payloads and packages.
- Data Forwarders Read. Allows scripts to retrieve data-forwarder information.
- Data Forwarders Management. Allows scripts to add, modify, and enable or disable data forwarders.
When you set up a new API key, the portal generates a unique client ID and client secret for that key. This secret expires after 6 months. When the key expires, the API key is disabled. The only way to re-enable (activate) the key is by regenerating the secret. From the API keys page, select the API key, and then click the Regenerate secret icon (![]() ). Each time that you regenerate the secret, you then need to update the secret in your custom scripts.
). Each time that you regenerate the secret, you then need to update the secret in your custom scripts.
Immediately after creating a new API client, ensure that you copy and record the client ID and client secret in a safe location. The secret is shown as plain text only when the API key is first created. In the Details view, only the last three characters of the secret is viewable for security purposes. If you lose the client secret, you can regenerate a new secret for the API client by clicking the Regenerate secret icon (
 ).
).If you disable an API key, client connections using that API key remain open until token expires.
If you disable an organization or perform an emergency shutdown, all API keys are automatically disabled, and open connections are immediately invalidated. Clients cannot authenticate, perform operations, or access resources. After the organization is reactivated, you can regenerate the secret to re-enable each API key.
Authentication
The access token expires after 5 minutes, regardless of activity.
Request body – application/x-www-form-urlencoded
- grant_type – string (required) Grant type. This is always client_credentials.
- client_id – string (required) Unique client ID that was generated for the API key
- client_secret – string (required) Unique client secret that was generated for the API key
grant_type=client_credentials
client_id=2655ACB78E65400D9F67BEEBC2030086_8270E1264DCB45BF91D4DDE443D53F90
client_secret=pGT0jQbBx9tfbm0hrQDj3oZVi9cg6l3L
Response body – application/json
200 (Success)
- access_token – string. JWT access token
- expires_in – string. Token expiration time, in seconds
- token_type – sring. Token type. This is always Bearer.
For example:{
"access_token": "",
"expires_in": "",
"token_type": "Bearer"
}400 (Failure - Invalid data) and 401 (Failure - Unauthorized)
- status – string. Request status
- code – string. Message code
- text – string. Message text (translated)
- description – string. Additional information to clarify the reason for the message (translated)
- userAction – string. User actions that can be taken to recover from the error (translated)
- recoveryURL – string. Link to more information or recovery actions, if available