Backing up switch-configuration data
You can back up configuration data for a Flex System or RackSwitch switch. When backing up a switch, the configuration data is imported into Lenovo XClarity Administrator from the target switch as a switch-configuration file.
Procedure
To back up configuration data for a managed switch, complete the following steps.
For a single switch:
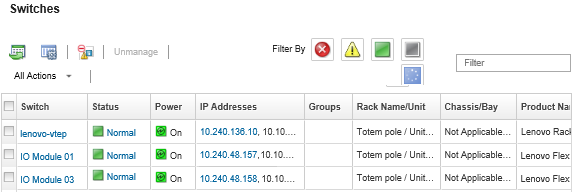
From the XClarity Administrator menu bar, click . The Switches page is displayed with a tabular view of all switches that are installed in managed chassis.
You can sort the table columns to make it easier to find the switches that you want to manage. In addition, enter text (such as a name or IP address) in the Filter field to further filter the switches that are displayed.

Click the switch in the Switches column. The Summary page is displayed, showing the properties and a list of components that are installed in that switch.
Click Configuration to view the configuration files for the switch.
Click Back up configuration data icon (
 ) to back up the switch configuration.
(Optional) Specify a name for the switch-configuration file.
For CNOS devices, the file name can contain alphanumeric characters and the following special characters: underscore (_), hyphen (-) and period (.). For ENOS switches, the file name can contain alphanumeric characters and any special characters.
If a file name is not specified, the following default name is used:
<switch_name>_<IP_address>_<timestamp>.cfg.
(Optional) Add a comment that describes the backup.
Click Back up to back up with switch-configuration data immediately or click Schedule to schedule this backup to run at a later time.
If you chose to schedule a backup, you can select Overwrite to back up the switch-configuration data into the same file at each job run, overwriting its contents. If you choose not to overwrite file, the file names of subsequent backups are appended with a unique number (for example, MyBackup_33.cfg).
NoteWhen scheduling a backup, you cannot choose dynamic file names or comments for each scheduled job.
For multiple switches:
From the XClarity Administrator menu bar, click . The Switches page is displayed with a tabular view of all switches that are installed in managed chassis.
Select one or more switches.
Click .
(Optional) Specify a name for the switch-configuration file.
For CNOS devices, the file name can contain alphanumeric characters and the following special characters: underscore (_), hyphen (-) and period (.). For ENOS switches, the file name can contain alphanumeric characters and any special characters.
If a file name is not specified, the following default name is used:
<switch_name>_<IP_address>_<timestamp>.cfg.
(Optional) Add a comment that describes the backup.
Click Back up to back up with switch-configuration data immediately or click Schedule to schedule this backup to run at a later time.
If you chose to schedule a backup, you can select Overwrite to back up the switch-configuration data into the same file at each job run, overwriting its contents. If you choose not to overwrite file, the file names of subsequent backups are appended with a unique number (for example, MyBackup_33.cfg).
NoteWhen scheduling a backup, you cannot choose dynamic file names or comments for each scheduled job.
After you finish
When the backup process is complete, the switch-configuration file is added to the Configuration Files tab on the switch details page.
Restore the switch configuration by selecting the switch-configuration file and clicking the Restore configuration data icon (
 ).
).Delete switch configuration files from XClarity Administrator by clicking the Delete icon (
 ).
).Export switch-configuration files to your local system by selecting the files and clicking the Export configuration file icon (
 ).
).Import switch-configuration files to XClarity Administrator by clicking the Import configuration file icon (
 ).
).