Remove the PIOR left/right
Use this information to remove the PIOR left/right from the shuttle.
Before you remove a PIOR:
- Read the following section(s) to ensure that you work safely.
Power off all the compute nodes and peripheral devices (see Power off the compute node).
Disengage all the compute nodes from the enclosure.
Disconnect the power cords and all external cables from the rear of the enclosure.
If the cable management arm is installed, remove it (see Remove the cable management arm).
Remove the shuttle from the enclosure (see Remove the shuttle).
Remove the EIOM card from the shuttle (see Remove the EIOMe).
- Remove all the adapters that are installed (see Remove a low-profile PCIe x8 adapter or Remove a low-profile PCIe x16 adapter).
Complete the following steps to remove the PIOR.
Remove the PIOR right
Note
This PIOR is on the right when the shuttle is viewed from the front.
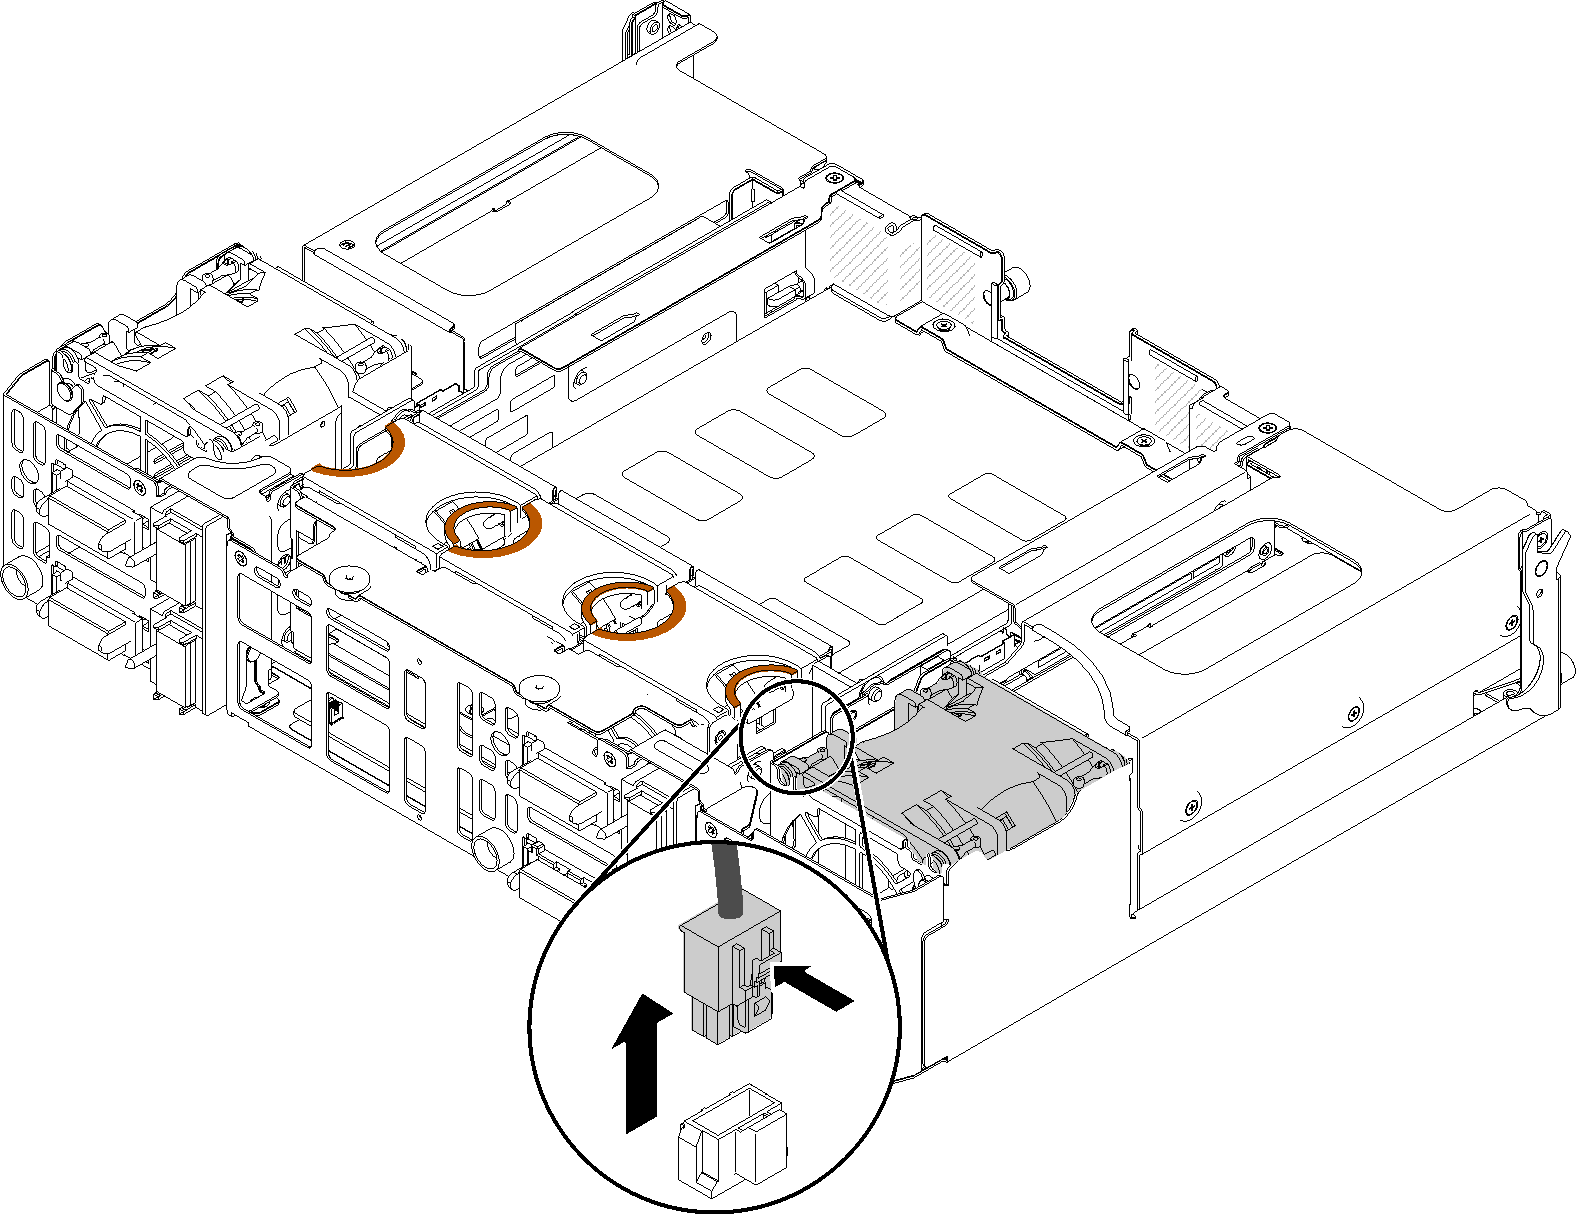
- Disconnect the fan cable from the PIOR right.Figure 1. Fan cable disconnection from the PIOR right
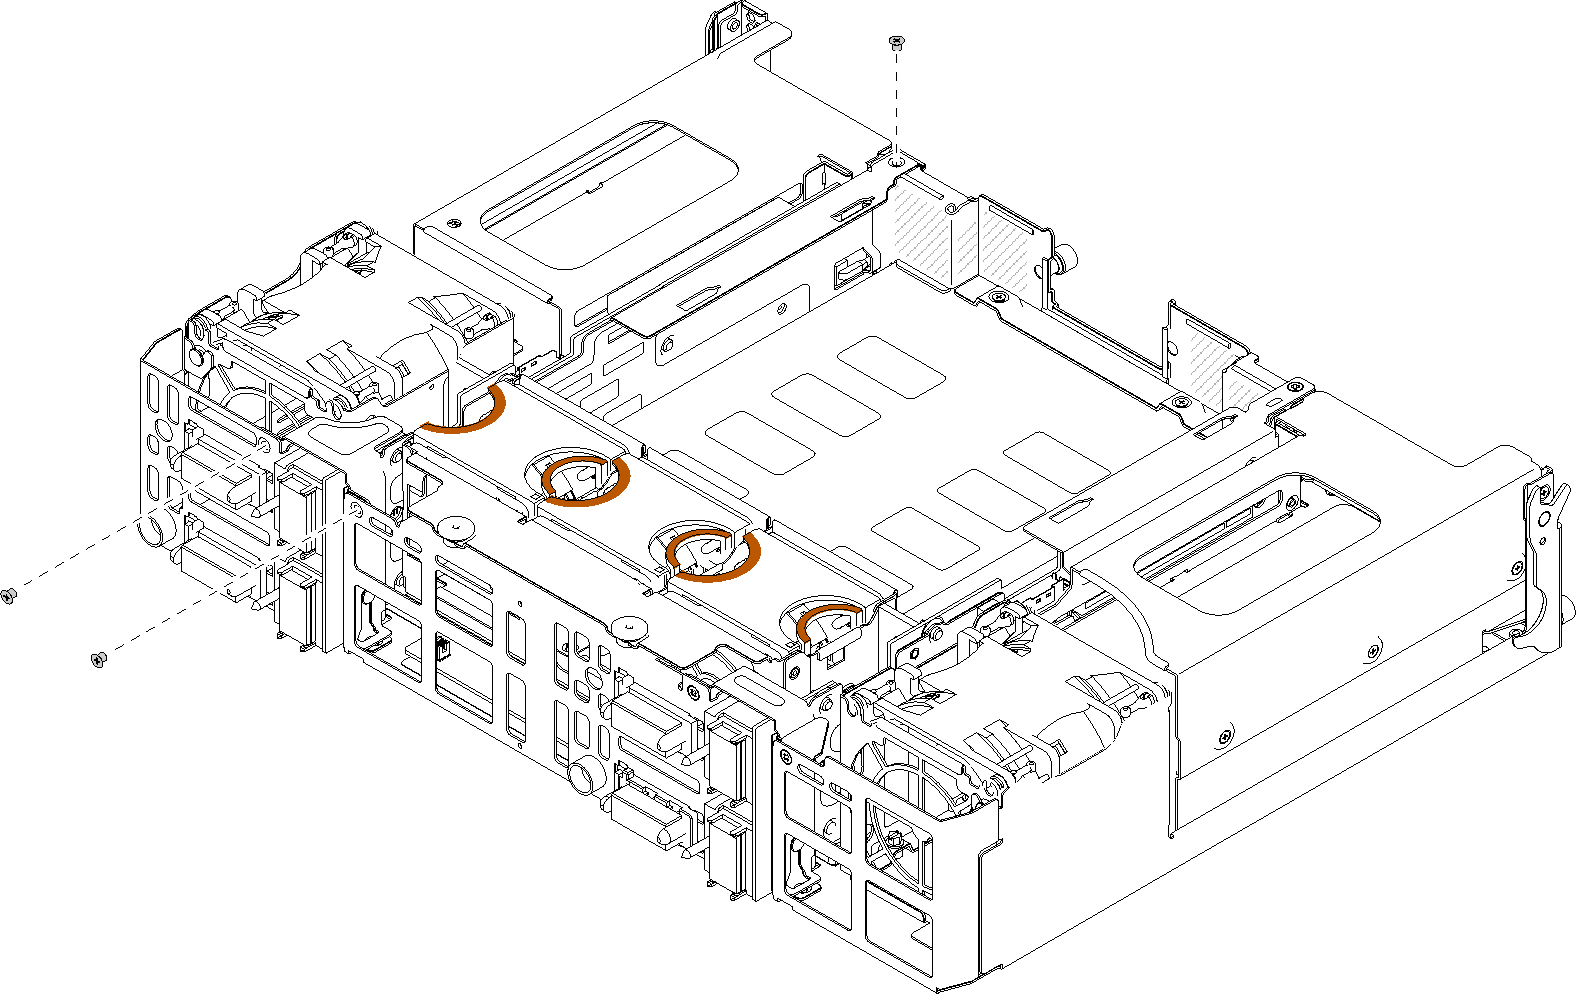
- Remove the three screws that secure the PIOR right to the shuttle.Figure 2. Screw removal

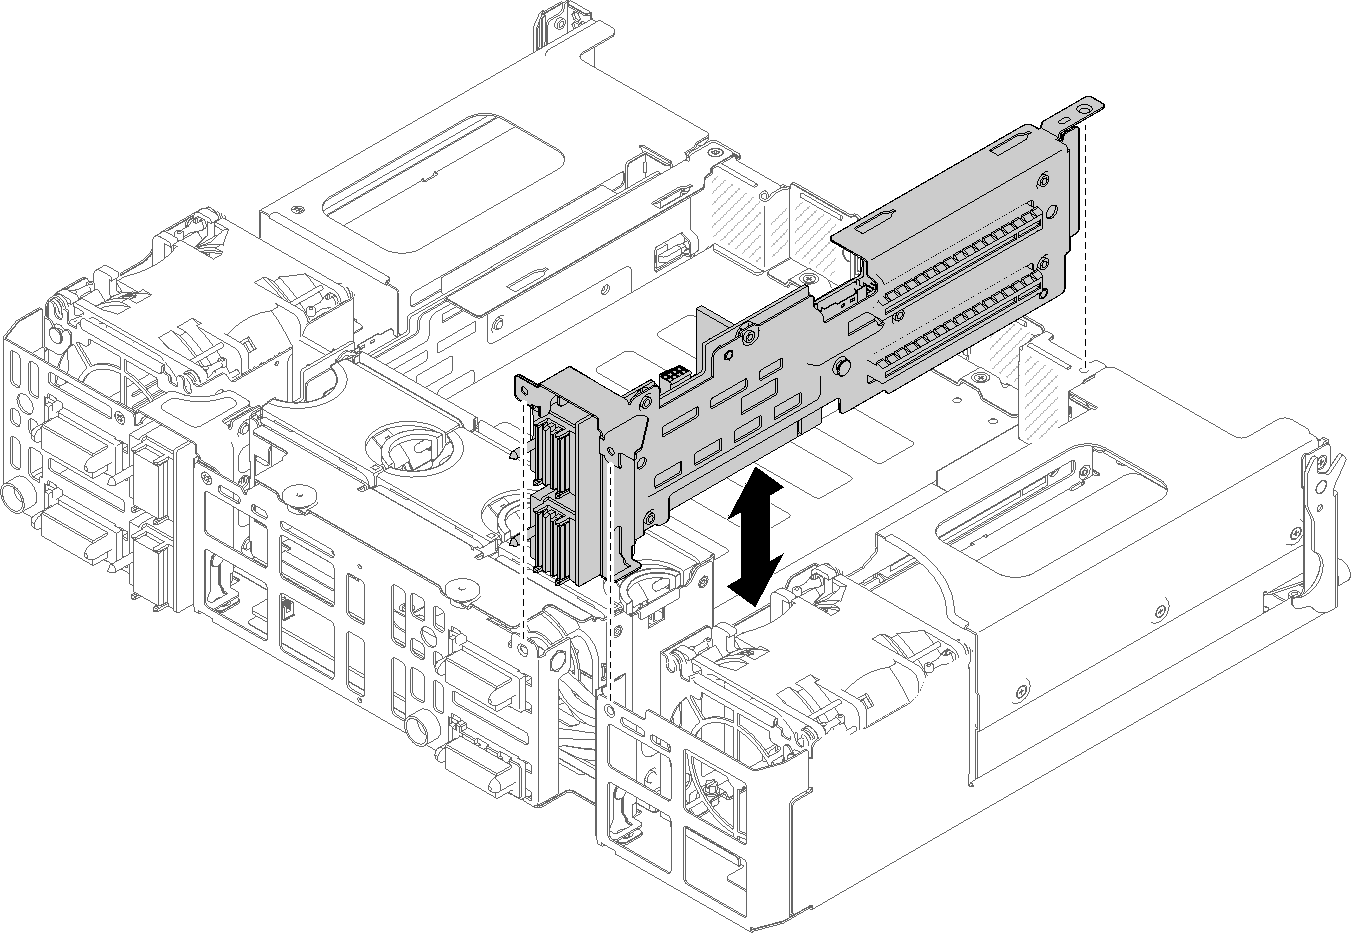
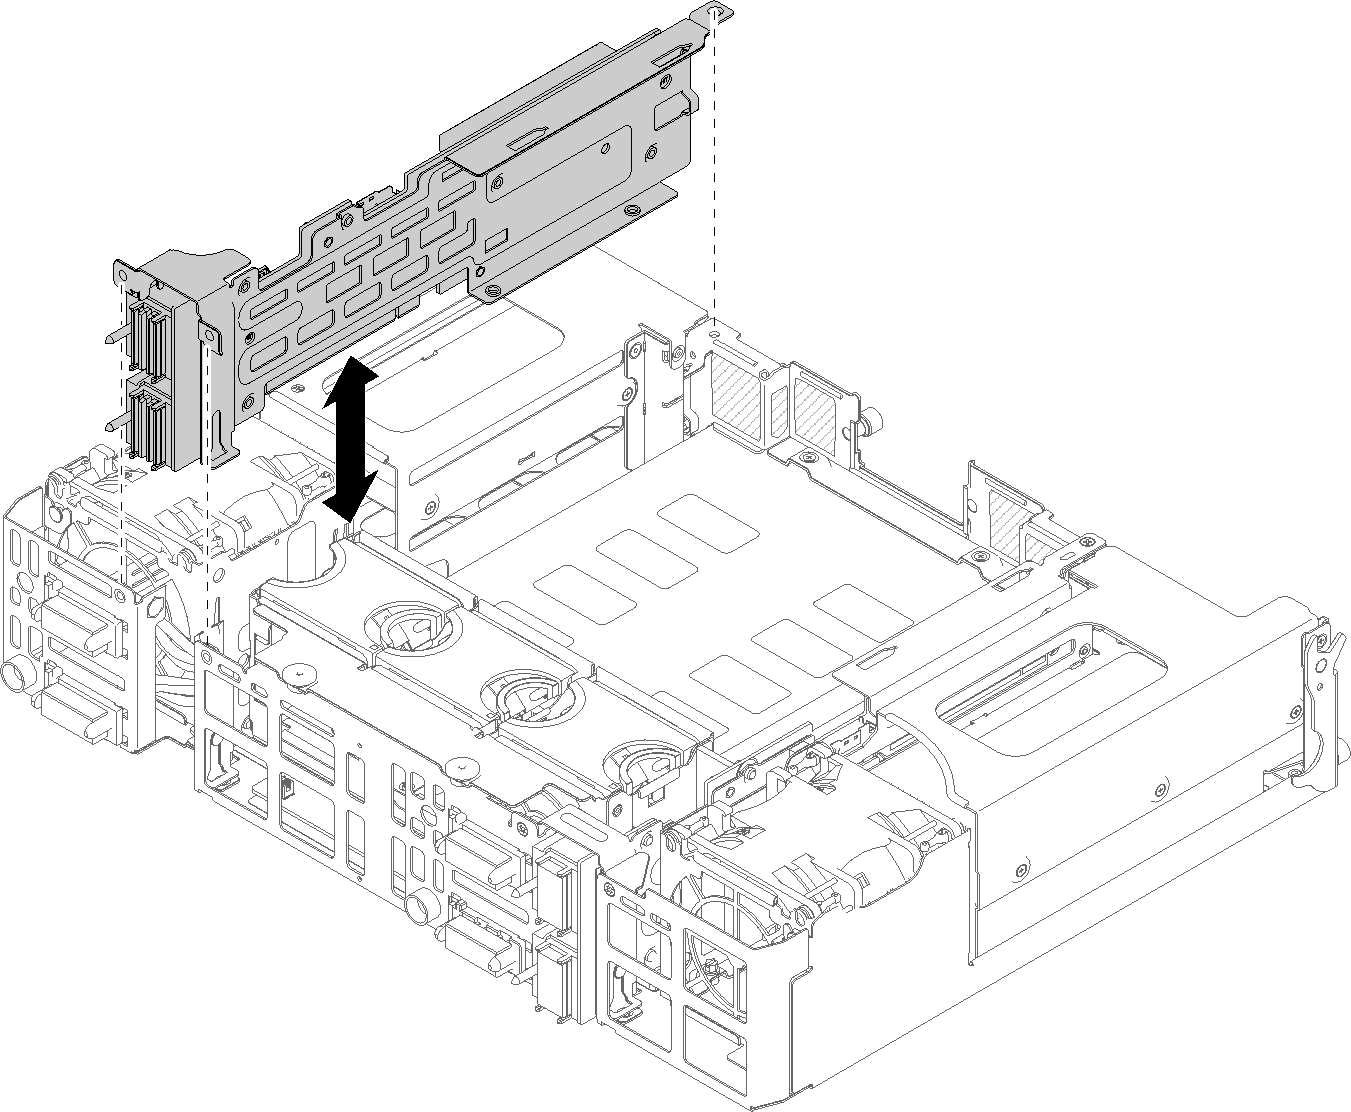
- Lift the PIOR right and remove it from the shuttle.Figure 3. PIOR right removal
Remove the PIOR left
Note
This PIOR is on the left when the shuttle is viewed from the front.
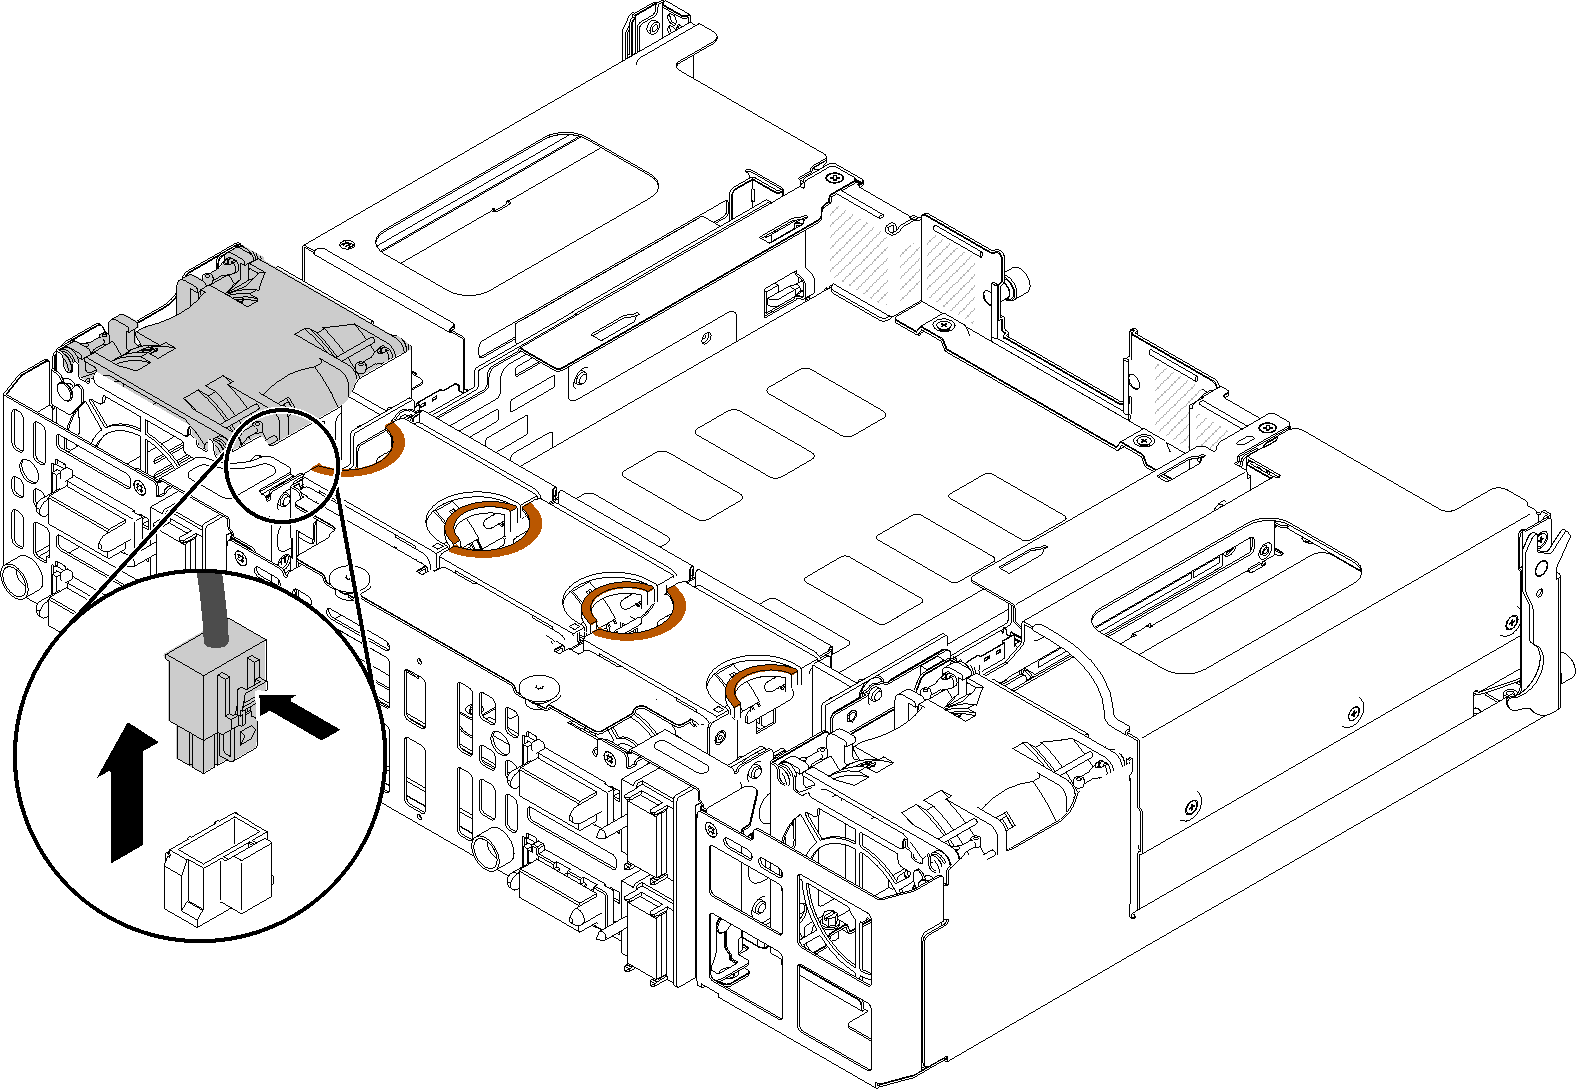
- Disconnect the fan cable from the PIOR left.Figure 4. Fan cable disconnection from the PIOR left
- Remove the three screws that secure the PIOR left to the shuttle.Figure 5. Screw removal
- Lift the PIOR left and remove it from the shuttle.Figure 6. PIOR left removal
After removing the PIOR:
If you are instructed to return the component or optional device, follow all packaging instructions, and use any packaging materials for shipping that are supplied to you.
Give documentation feedback