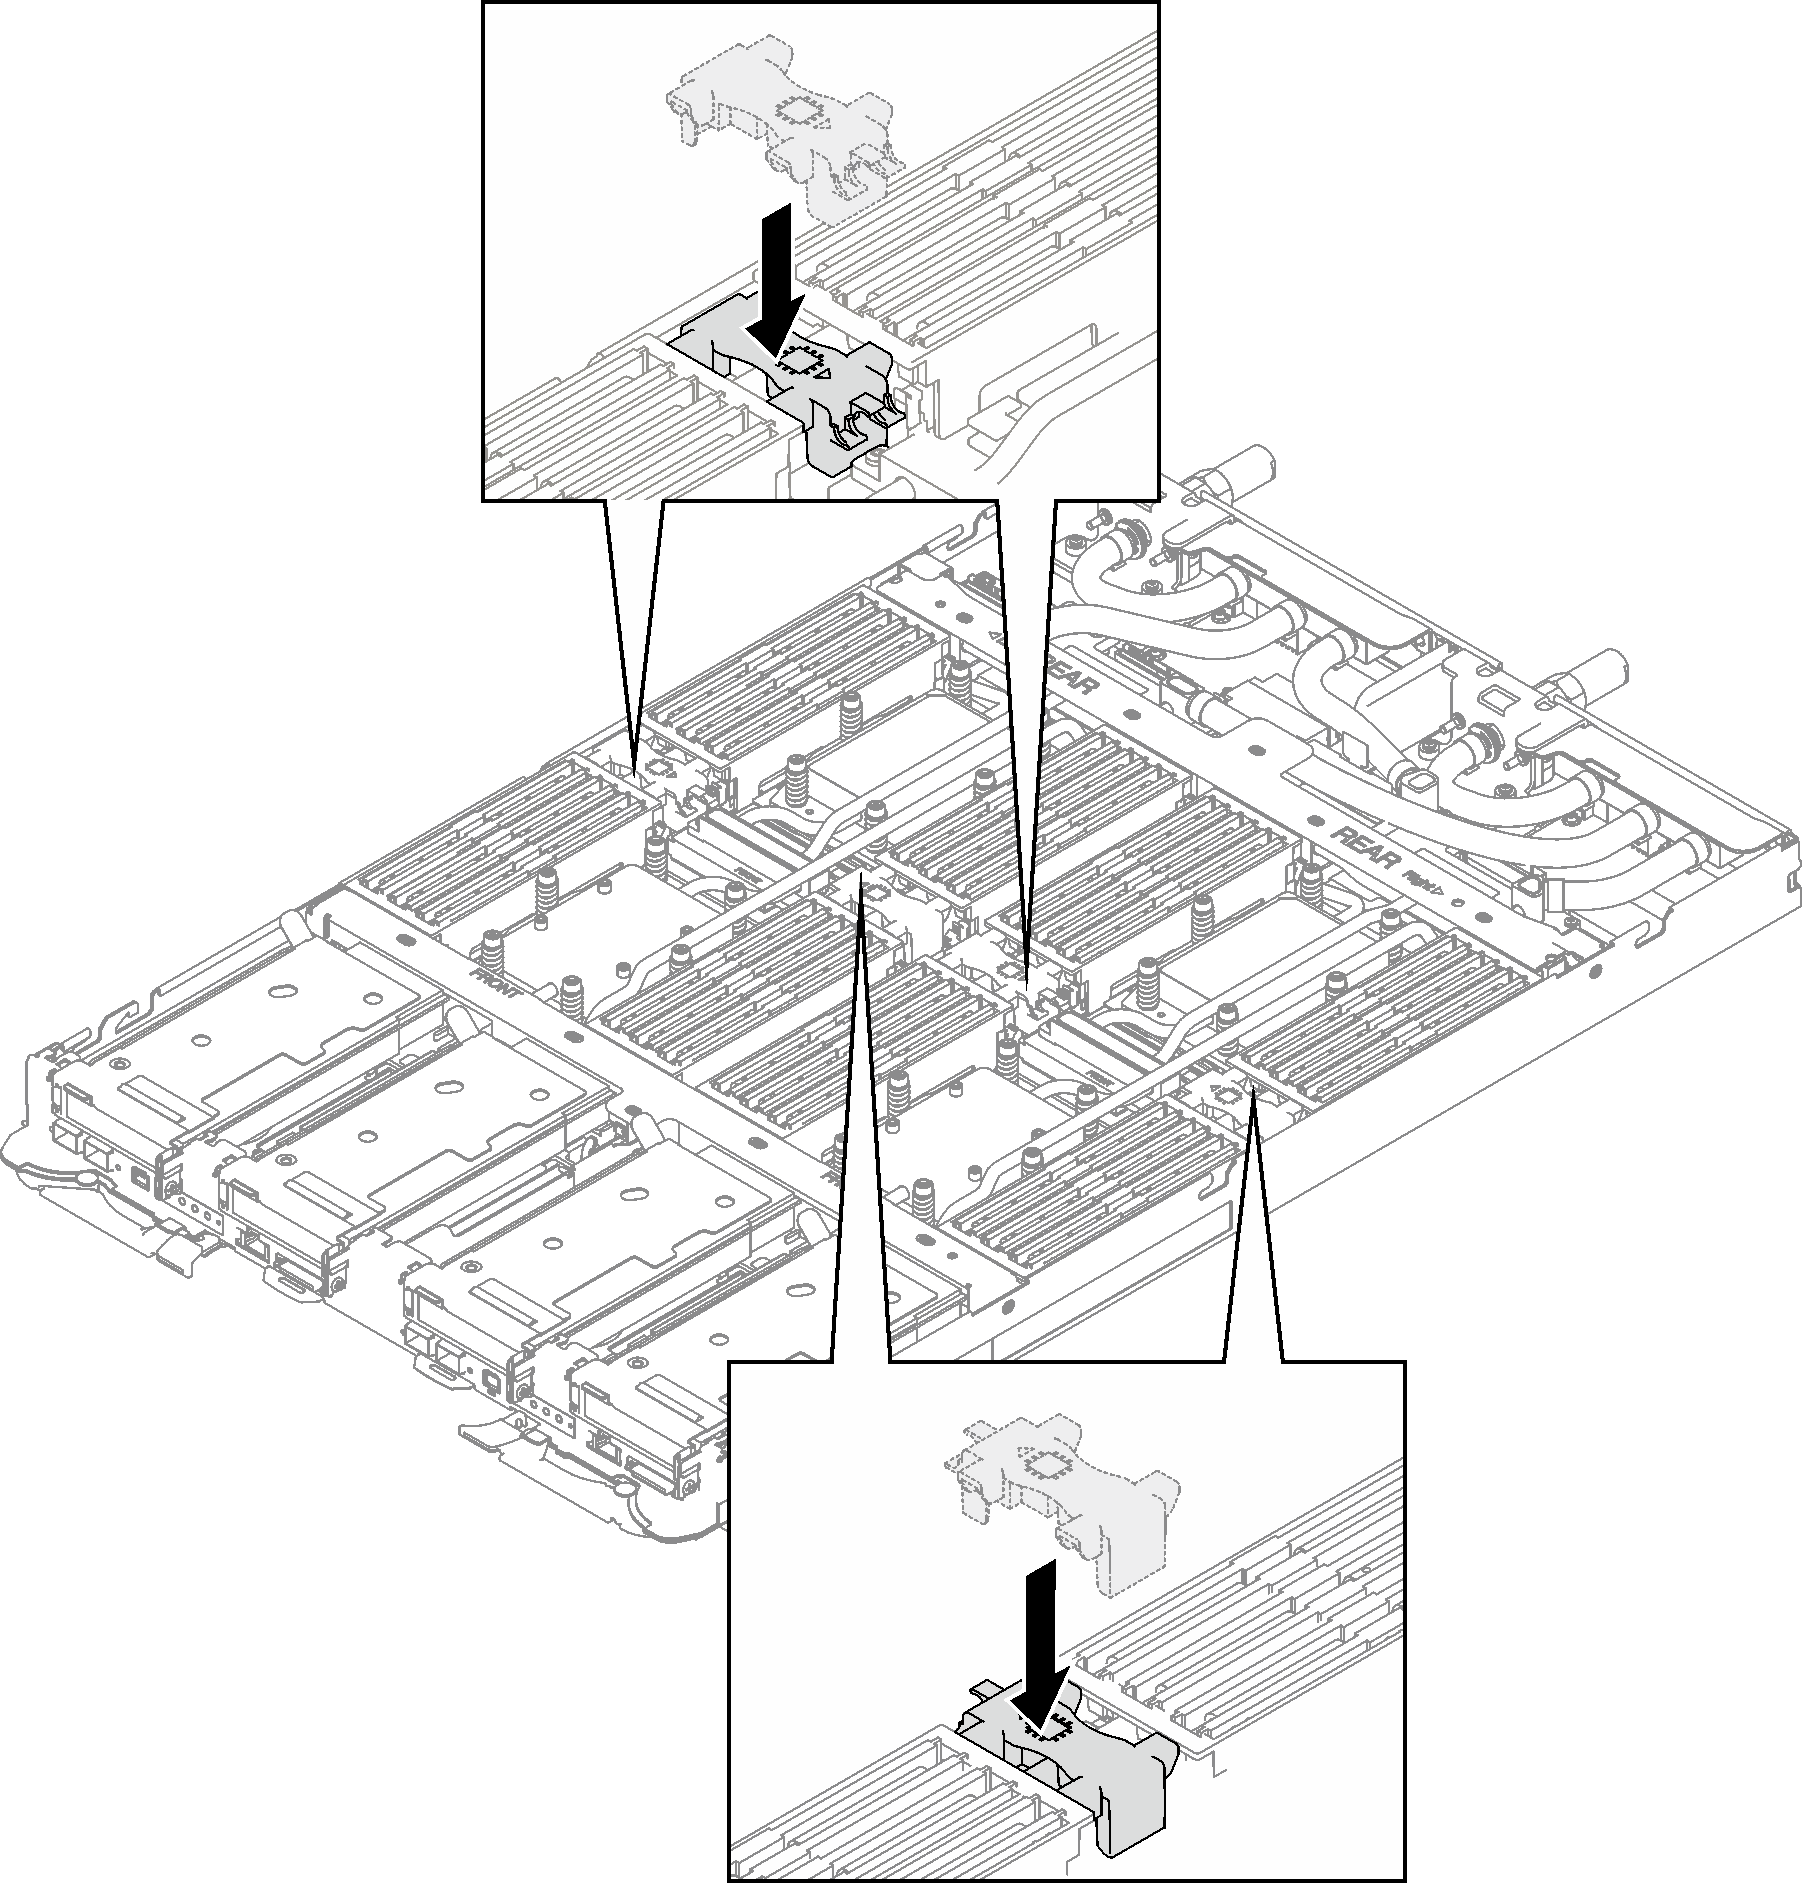
Install a DIMM comb
Use this information to install a DIMM comb.
About this task
Attention
Read Installation Guidelines and Safety inspection checklist to ensure that you work safely.
Note
The following illustration might differ slightly from your hardware, but the installation method is the same.
Procedure
- Align the DIMM comb with the slots and insert it into the node.Figure 1. DIMM comb installation
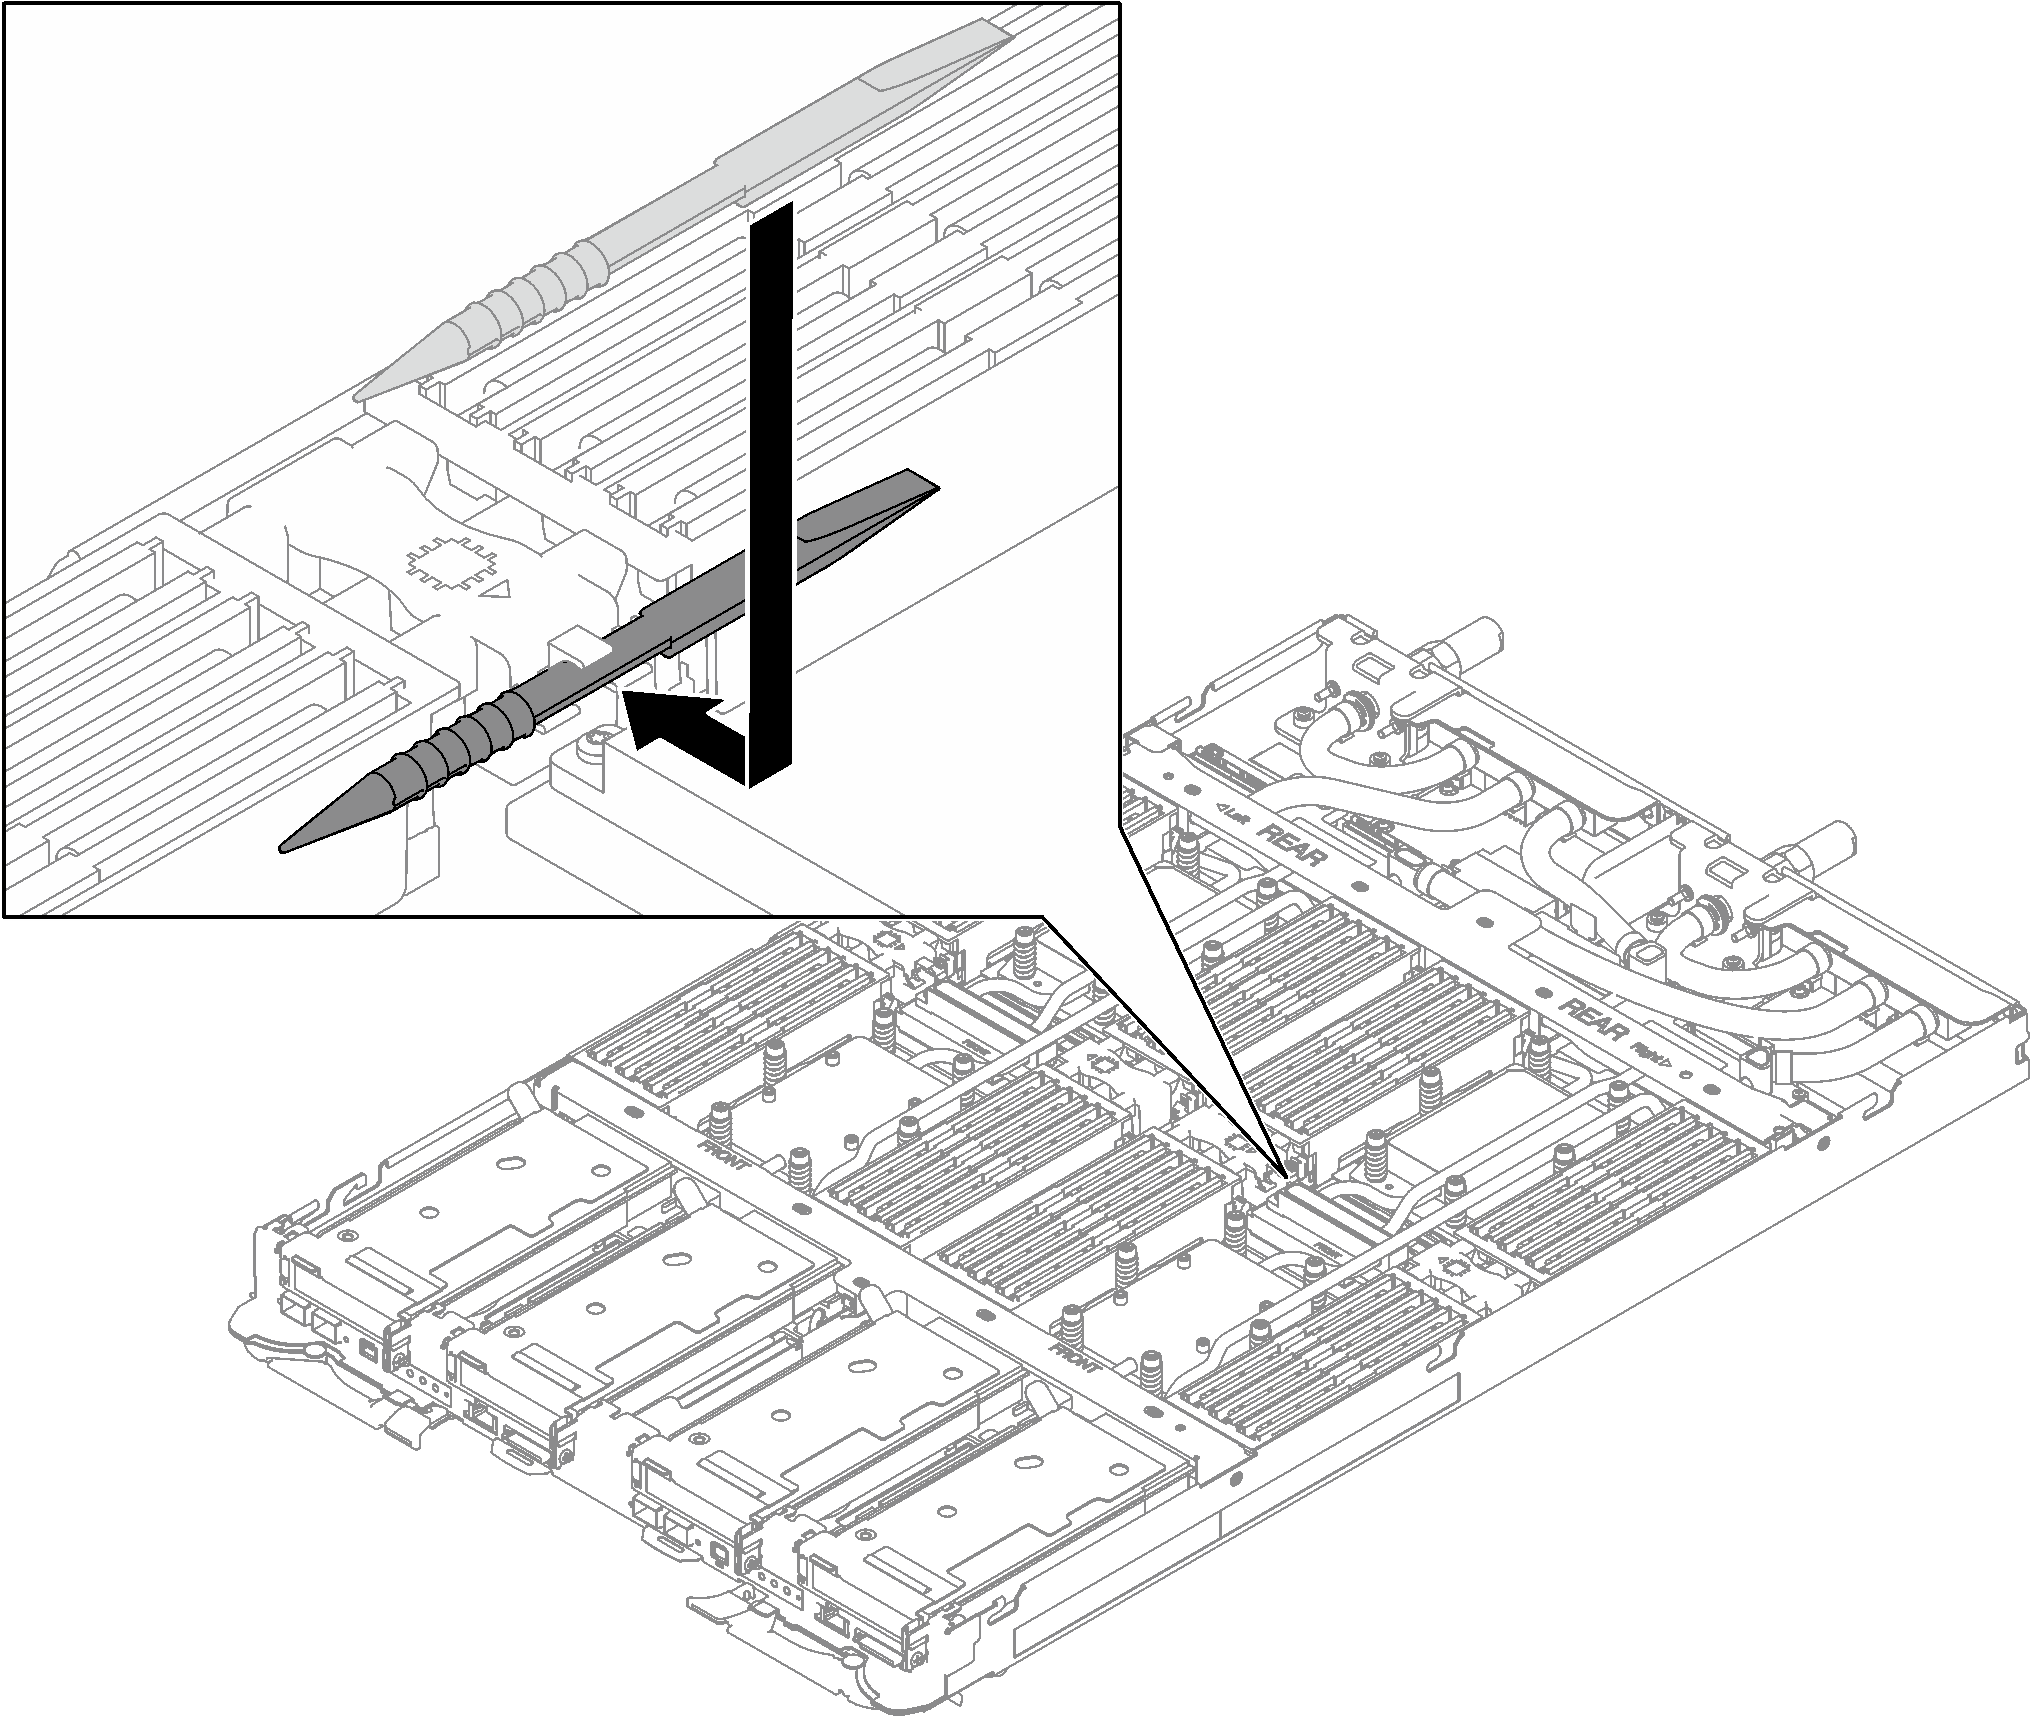
- Install the memory module tool to the DIMM comb on the left side of the node.Figure 2. Memory module tool installation
After you finish
Install the tray cover. See Install the tray cover.
Install the tray into the enclosure. See Install a DWC tray in the enclosure.
- Connect all required external cables to the solution.NoteUse extra force to connect QSFP cables to the solution.
Check the power LED on each node to make sure it changes from fast blink to slow blink to indicate all nodes are ready to be powered on.
Demo video
Give documentation feedback