Complete the parts replacement
Go through the checklist to complete parts replacement
Make sure that all components have been reassembled correctly and that no tools or loose screws are left inside your server.
Properly route and secure the cables in the server. Refer to the cable connecting and routing information for each component.
- Reinstall the air baffles. See Air baffle and air flow sensor board replacement.Note
For proper cooling and airflow, reinstall the air baffle before powering on the server. Operating the server with the air baffle removed might damage server components.
Reinstall the top cover. See Install the top cover.
Reinstall the bottom cover. See Install the bottom cover.
If necessary, reinstall the node to the enclosure or mount. See Configuration guide.
Reconnect the power cords and any cables that you removed.
Install the I/O fillers when the connectors are not used. The connectors could be damaged without proper protection of the fillers. See Front I/O fillers and Rear I/O filler.
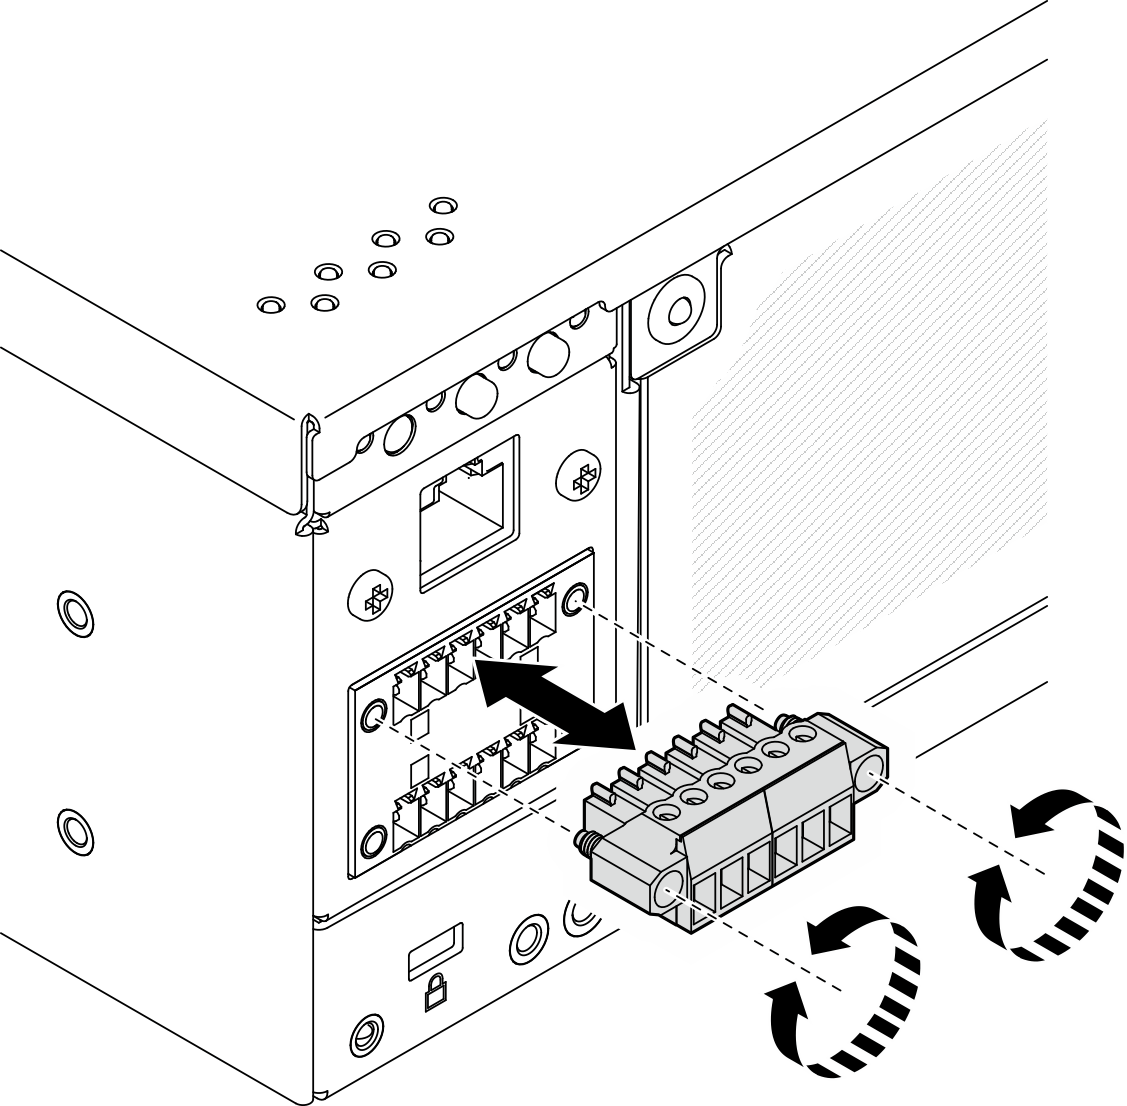
If applicable, install the header when the power connector is not used. The connector could be damaged without proper protection.
- Locate the power connector. See Rear view.
- Insert the header to the power connector which is not used.
- Fasten two captive screws to secure the header.Figure 1. Installing the header
If the security LED of the server is blinking, activate or unlock the system. See Activate or unlock the system.
Power on the server and any peripheral devices. See Power on the server.
Update the server configuration.
Download and install the latest device drivers: Lenovo Data Center Support.
Update the system firmware. See Update the firmware.
Update the UEFI configuration. See UEFI manual for ThinkSystem server.
Reconfigure the disk arrays if you have installed or removed a hot-swap drive or a RAID adapter. See Lenovo XClarity Provisioning Manager portal page for the LXPM documentation compatible with your server.