Install the processor heat sink
Follow instructions in this section to install the processor heat sink. This procedure must be executed by a trained technician.


About this task
Read Installation Guidelines and Safety inspection checklist to ensure that you work safely.
Power off the server and peripheral devices and disconnect the power cords and all external cables. See Power off the server.
Prevent exposure to static electricity, which might lead to system halt and loss of data, by keeping static-sensitive components in their static-protective packages until installation, and handling these devices with an electrostatic-discharge wrist strap or other grounding system.
Do not allow the thermal grease on the processor or heat sink to come in contact with anything. Contact with any surface can compromise the thermal grease, rendering it ineffective. Thermal grease can damage components, such as the electrical connectors in the processor socket.
Procedure
- Make preparation for this task.
- Apply the thermal grease on the top of the processor with syringe by forming four uniformly spaced dots, while each dot consists of about 0.1 ml of thermal grease.Figure 1. Proper shape of the thermal grease
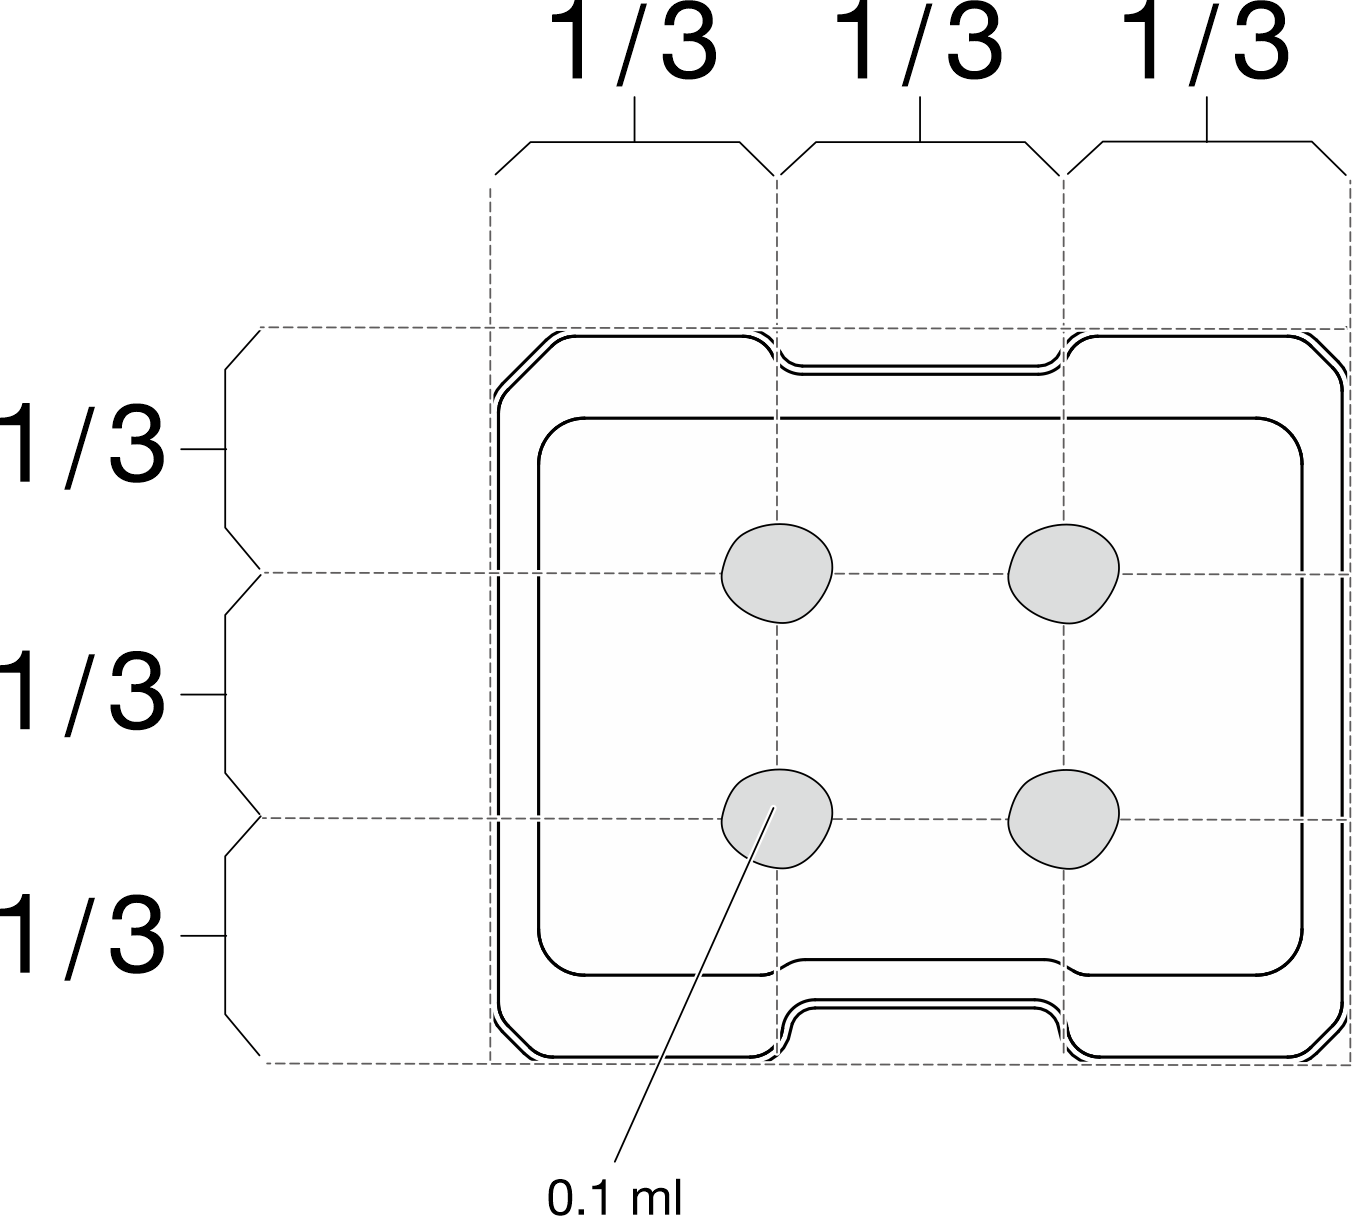
- Apply the thermal grease on the top of the processor with syringe by forming four uniformly spaced dots, while each dot consists of about 0.1 ml of thermal grease.
- Install the processor heat sink.
 Align the heat sink with the guide pins on the system board; then, lower the heat sink down until it is firmly seated.
 Fully tighten the four captive screws in the installation sequence shown on the heat-sink label. Tighten the screws until they stop; then, visually inspect to make sure that there is no gap between the screw shoulder beneath the heat sink and the system board. (For reference, the torque required for the captive screws to fully tighten is 1.4-1.6 newton-meters, 12-14 inch-pounds.)
Figure 2. Installing the processor heat sink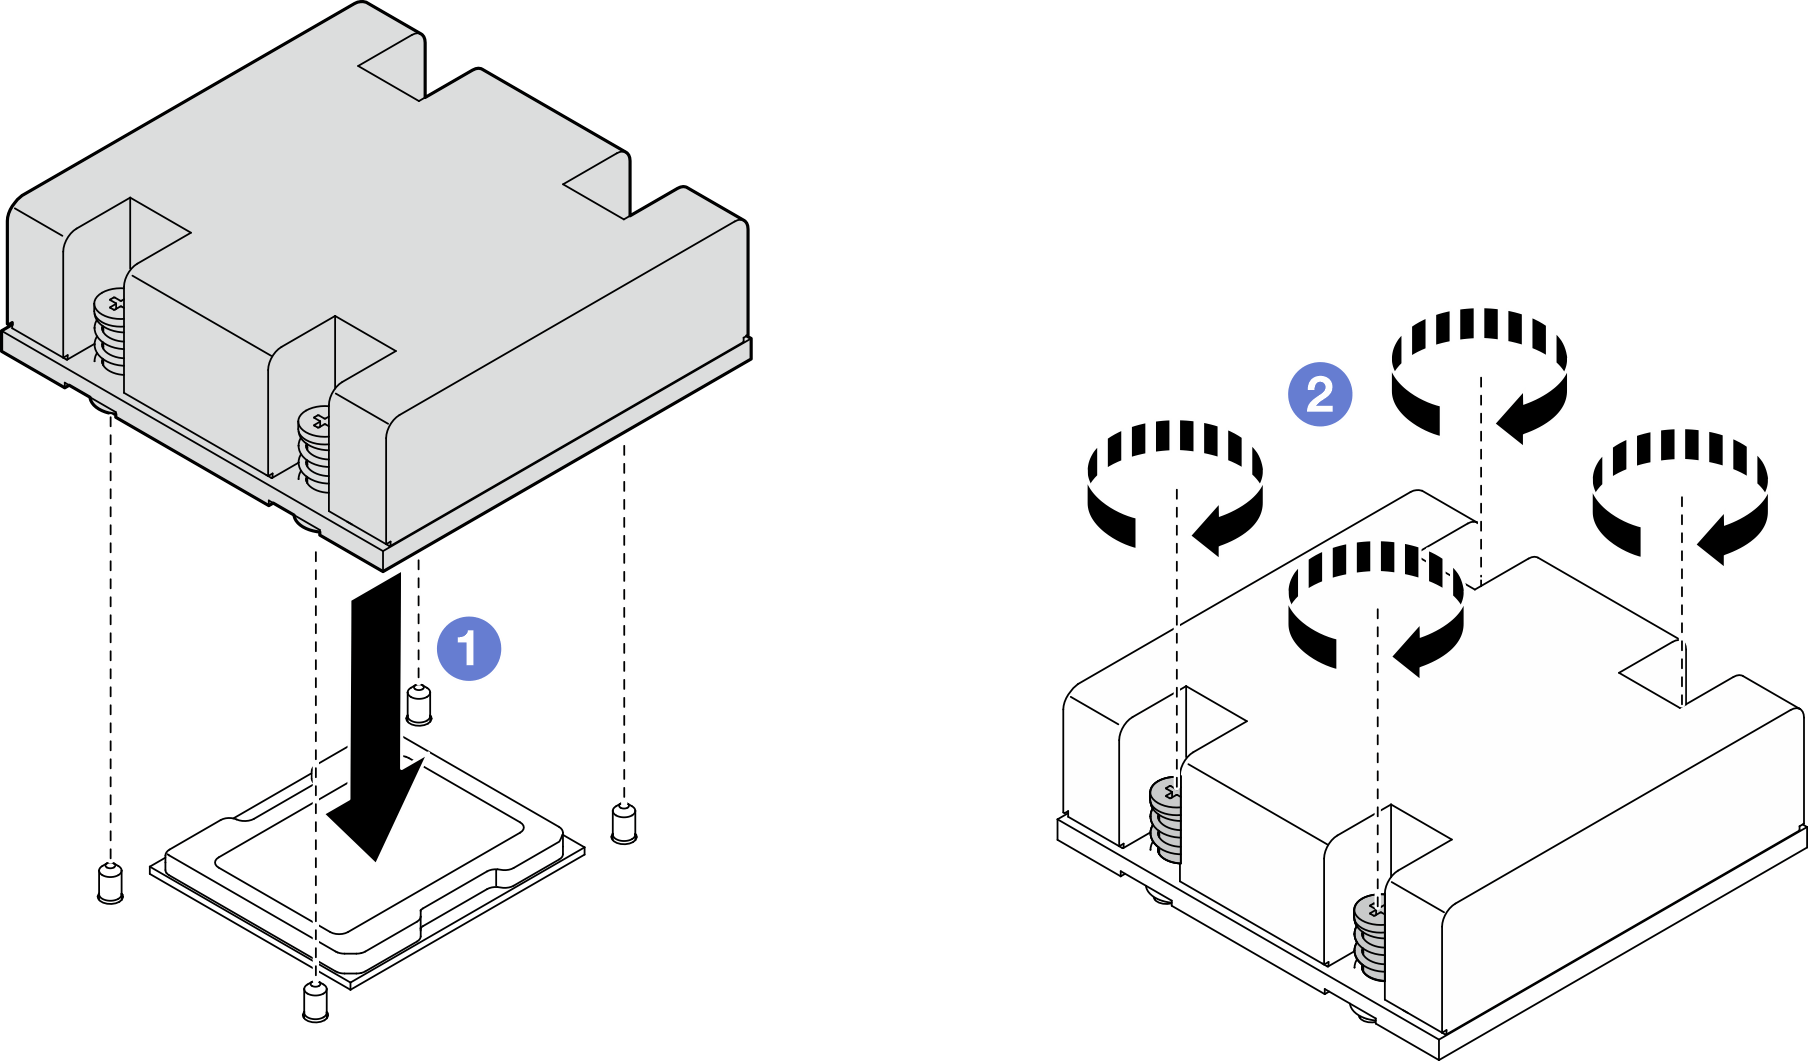
After this task is completed
Complete the parts replacement. See Complete the parts replacement.
Demo Video