Install the OCP Ethernet adapter
See this topic to learn how to install the OCP Ethernet adapter.
About this task
Note
Before adding a new OCP Ethernet adapter to the server, make sure the present Riser 1 adapter configuration is x16 or x16/x8, so that PCIe 4 and 5 slots on the system board are available for the OCP cable.
Procedure
- If the OCP cable has not been installed, complete the following steps:
- If necessary, remove the screw that secures the OCP filler; then, remove the filler.Figure 1. Removing the OCP filler
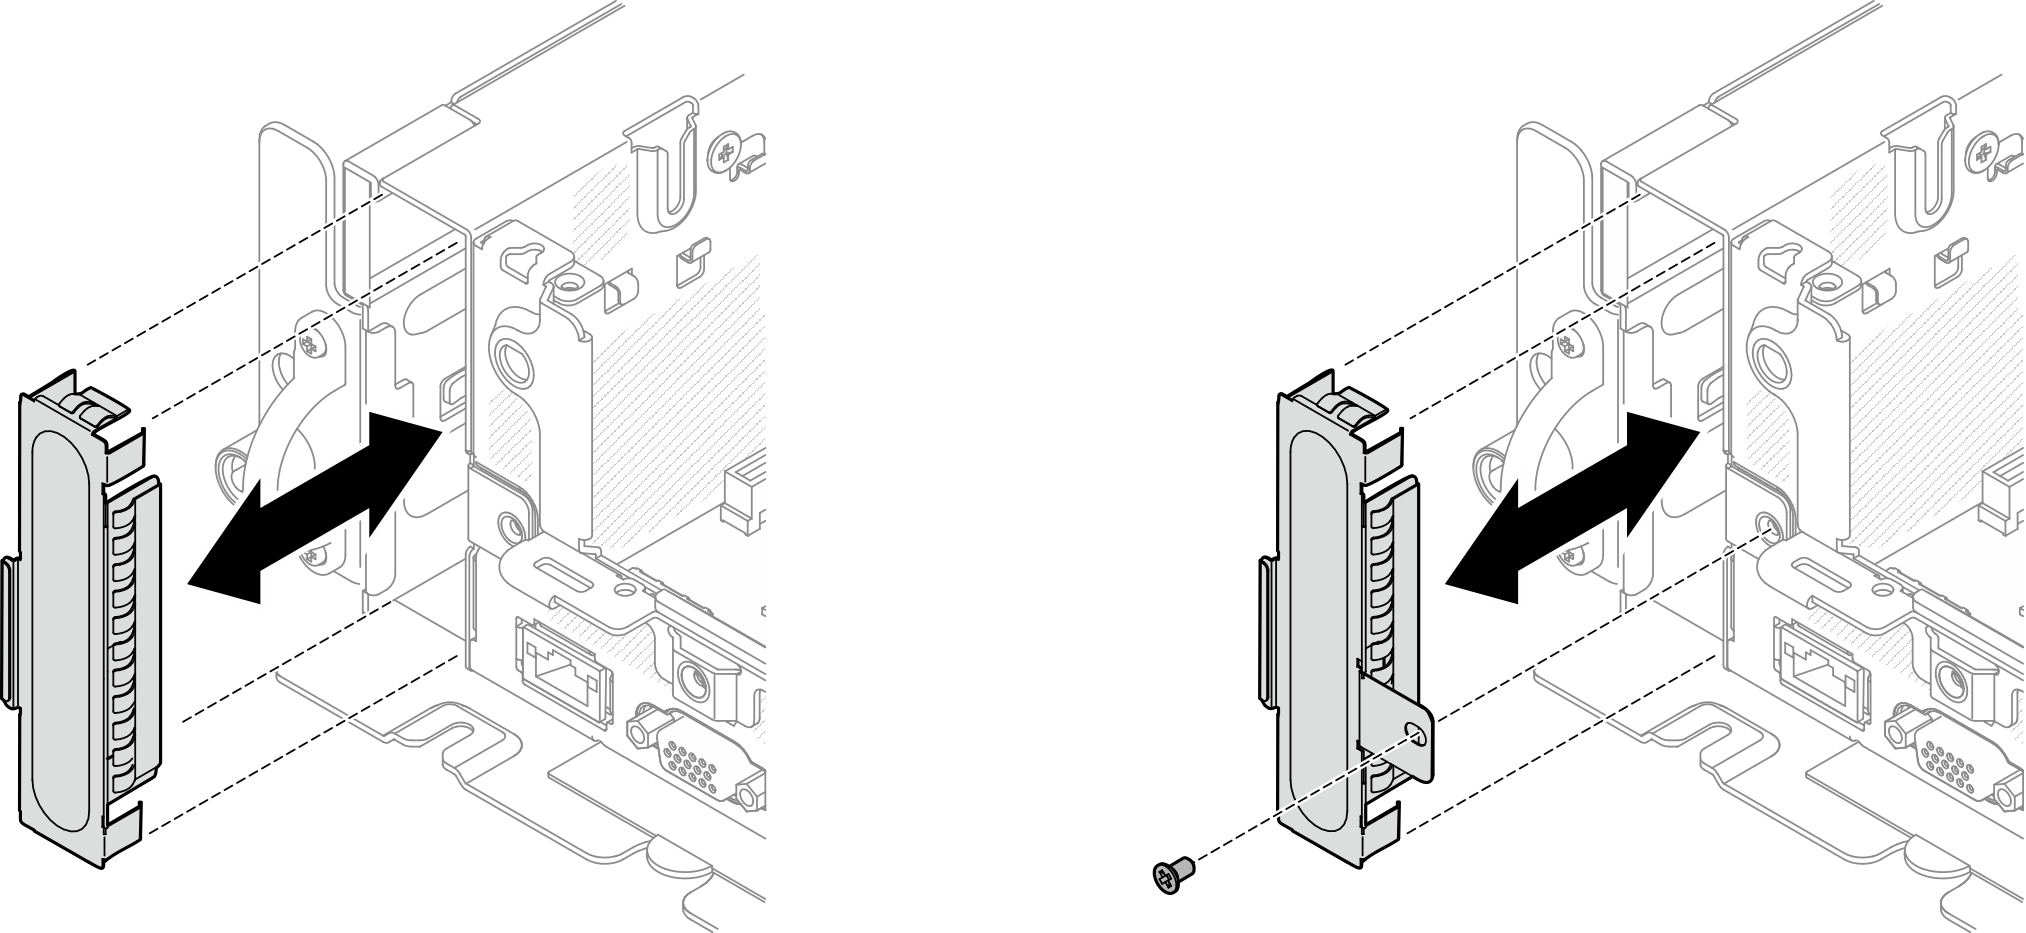 NoteThere are two types of OCP filler. The one is secured with a screw, while the other is not.
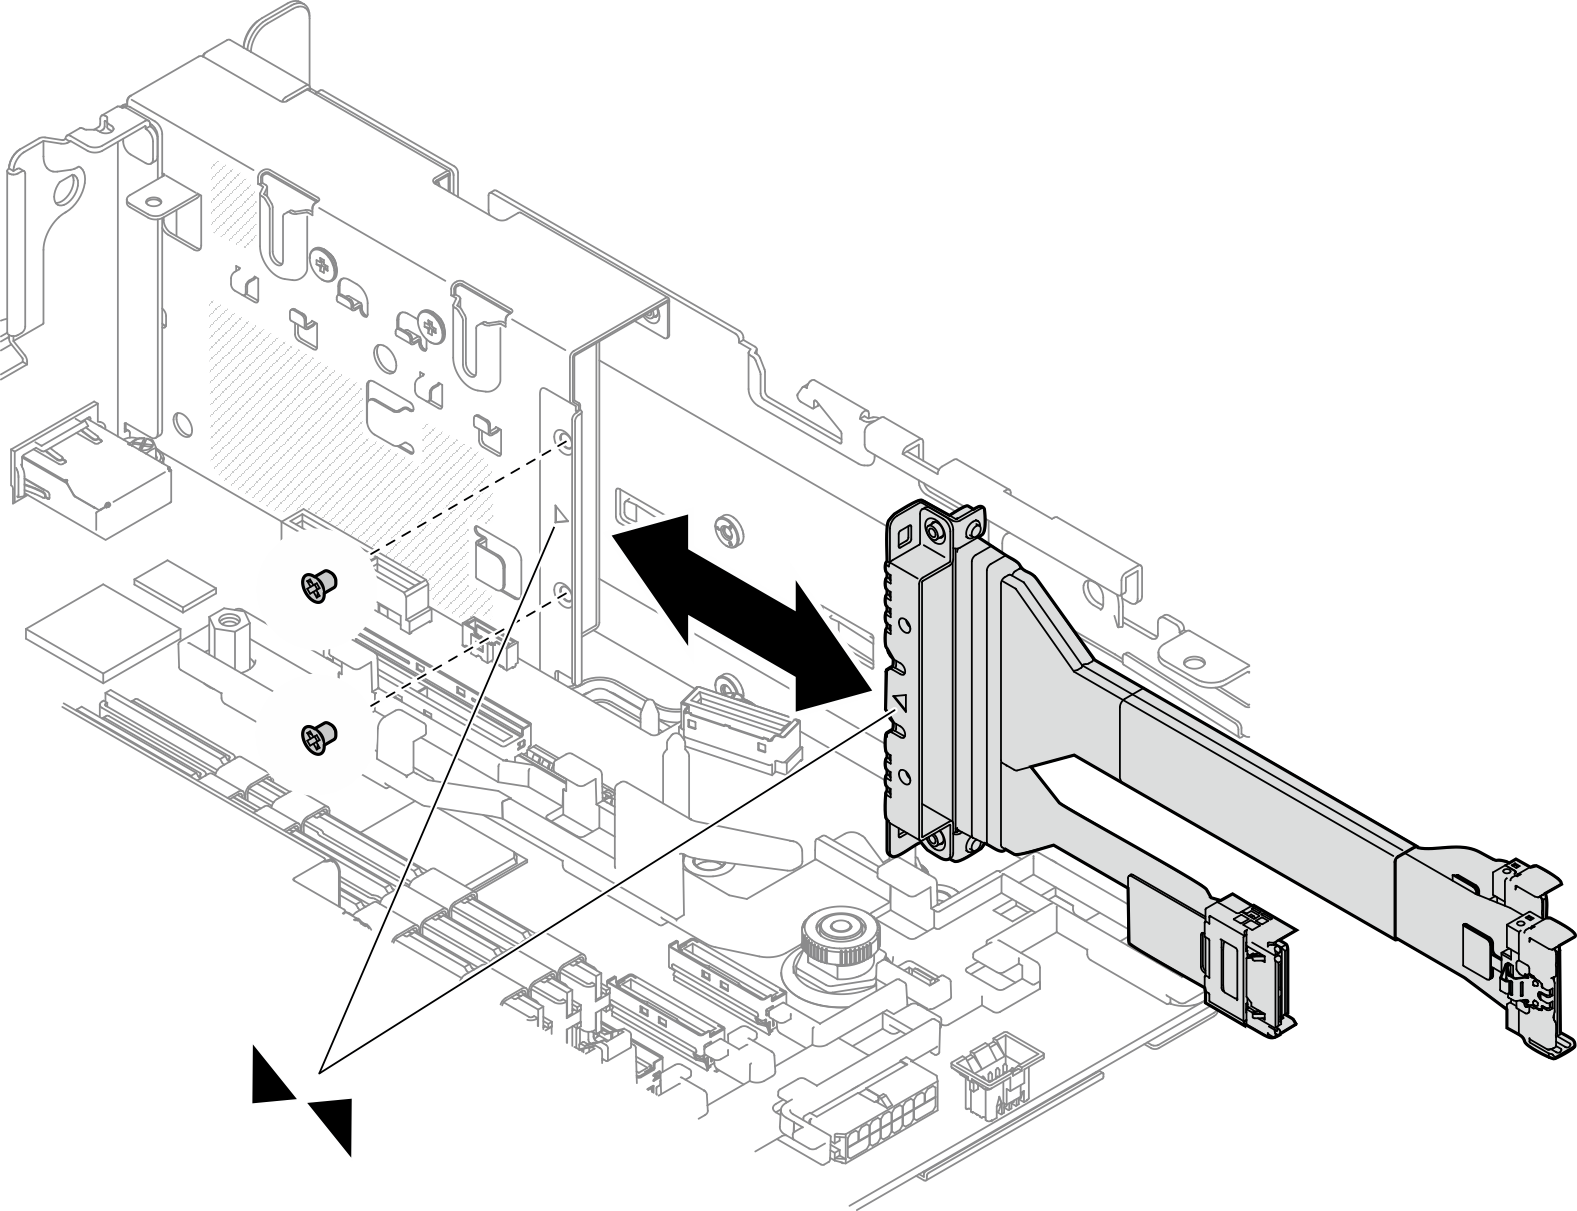
 - Align the pointed ends of two triangles on the OCP cable and OCP cage, and secure the cable with two screws.Figure 2. Installing the OCP cable
- Connect the OCP cable to the system board. Make sure to contain the cable with the clip as illustrated.Figure 3. Cable routing for the OCP 3.0 Ethernet adapter
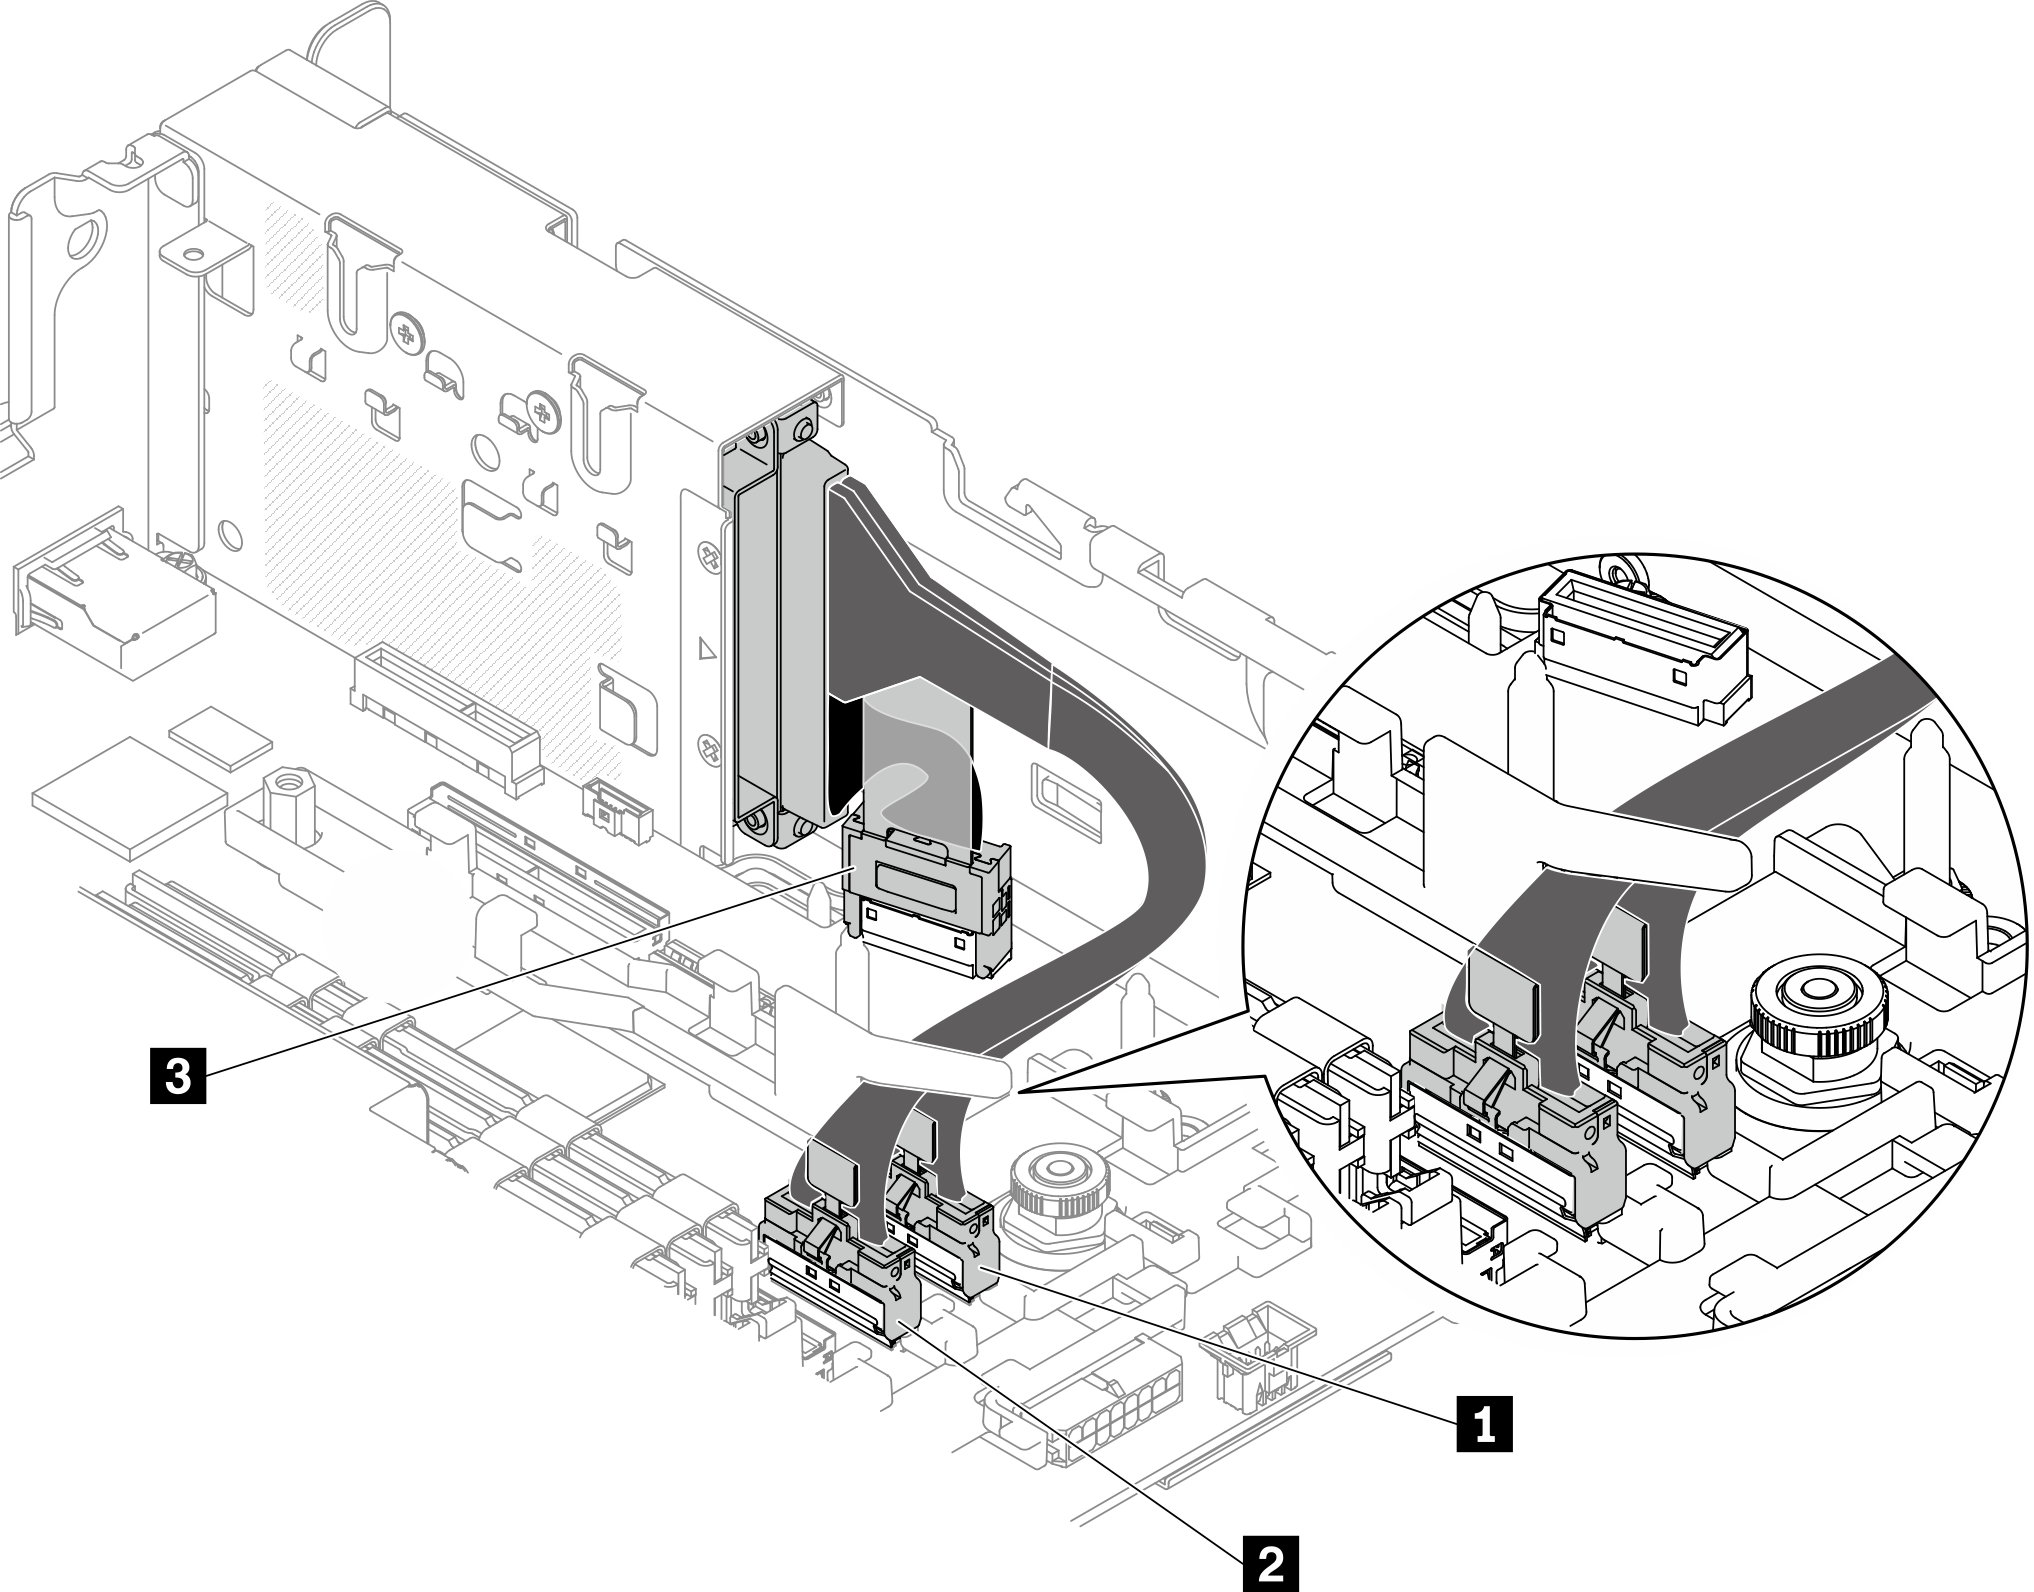
Table 1. Cable routing for the OCP 3.0 adapter From To 1 OCP 3.0 Ethernet adapter PCIe connector 4 2 PCIe connector 5 3 OCP connector
- If necessary, remove the screw that secures the OCP filler; then, remove the filler.
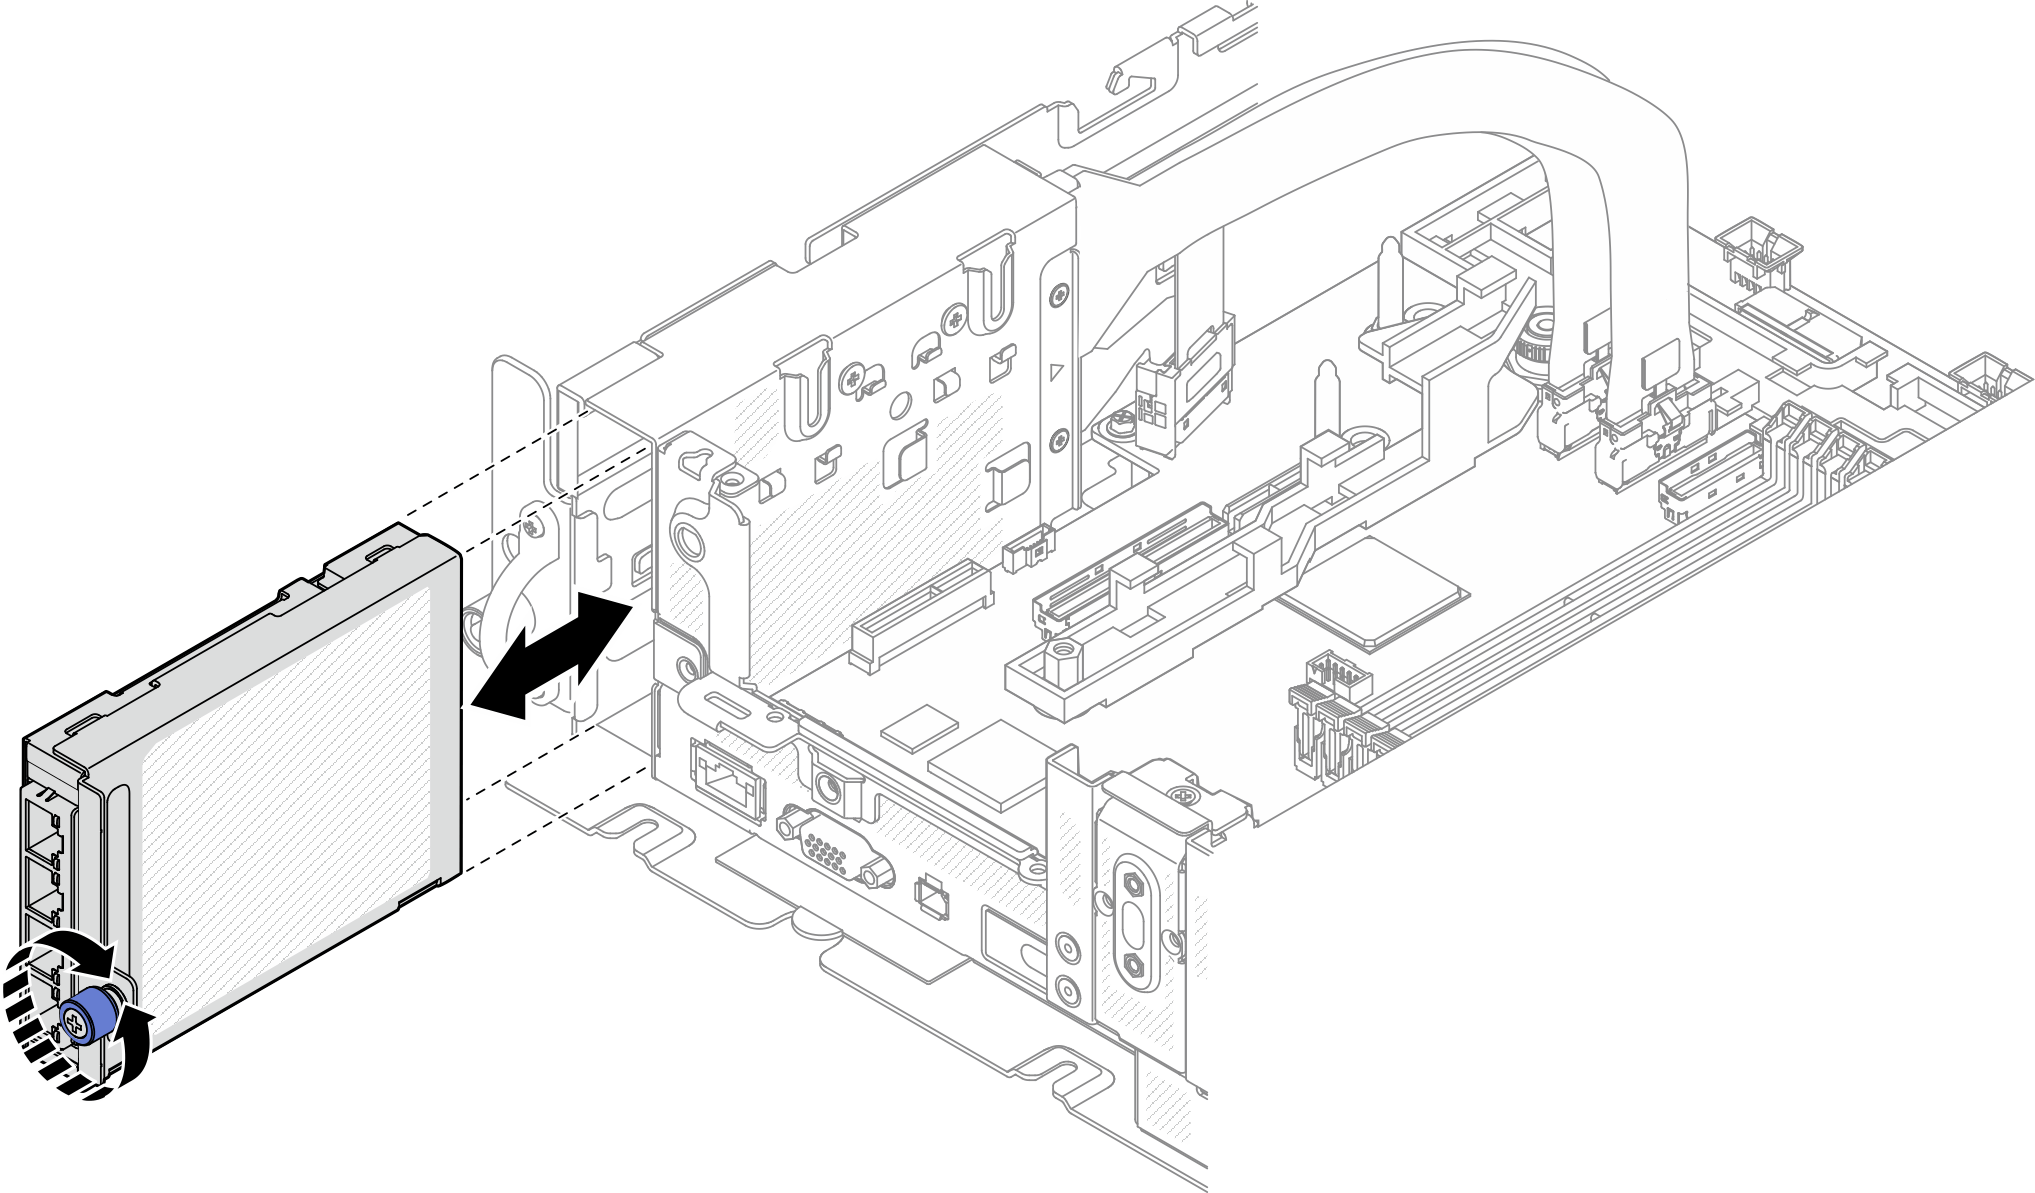
- Slide the OCP Ethernet adapter into the chassis, and tighten the captive screw to secure the adapter.Figure 4. Installing the OCP Ethernet adapter
After this task is completed
Proceed to complete the parts replacement (see Complete the parts replacement).
Give documentation feedback