Remove the M.2 boot adapter and drives
See this topic to learn how to remove the M.2 boot adapter and drives.
About this task
Attention
Go over Installation Guidelines to ensure that you work with safety.
Turn off the server and peripheral devices and disconnect the power cords and all external cables (see Power off the server).
If the server is installed in a rack, slide the server out on its rack slide rails to gain access to the top cover, or remove the server from the rack.
Procedure
Note
Depending on the configuration, the M.2 boot adapter and backplane might look slightly different from the illustration in this section.
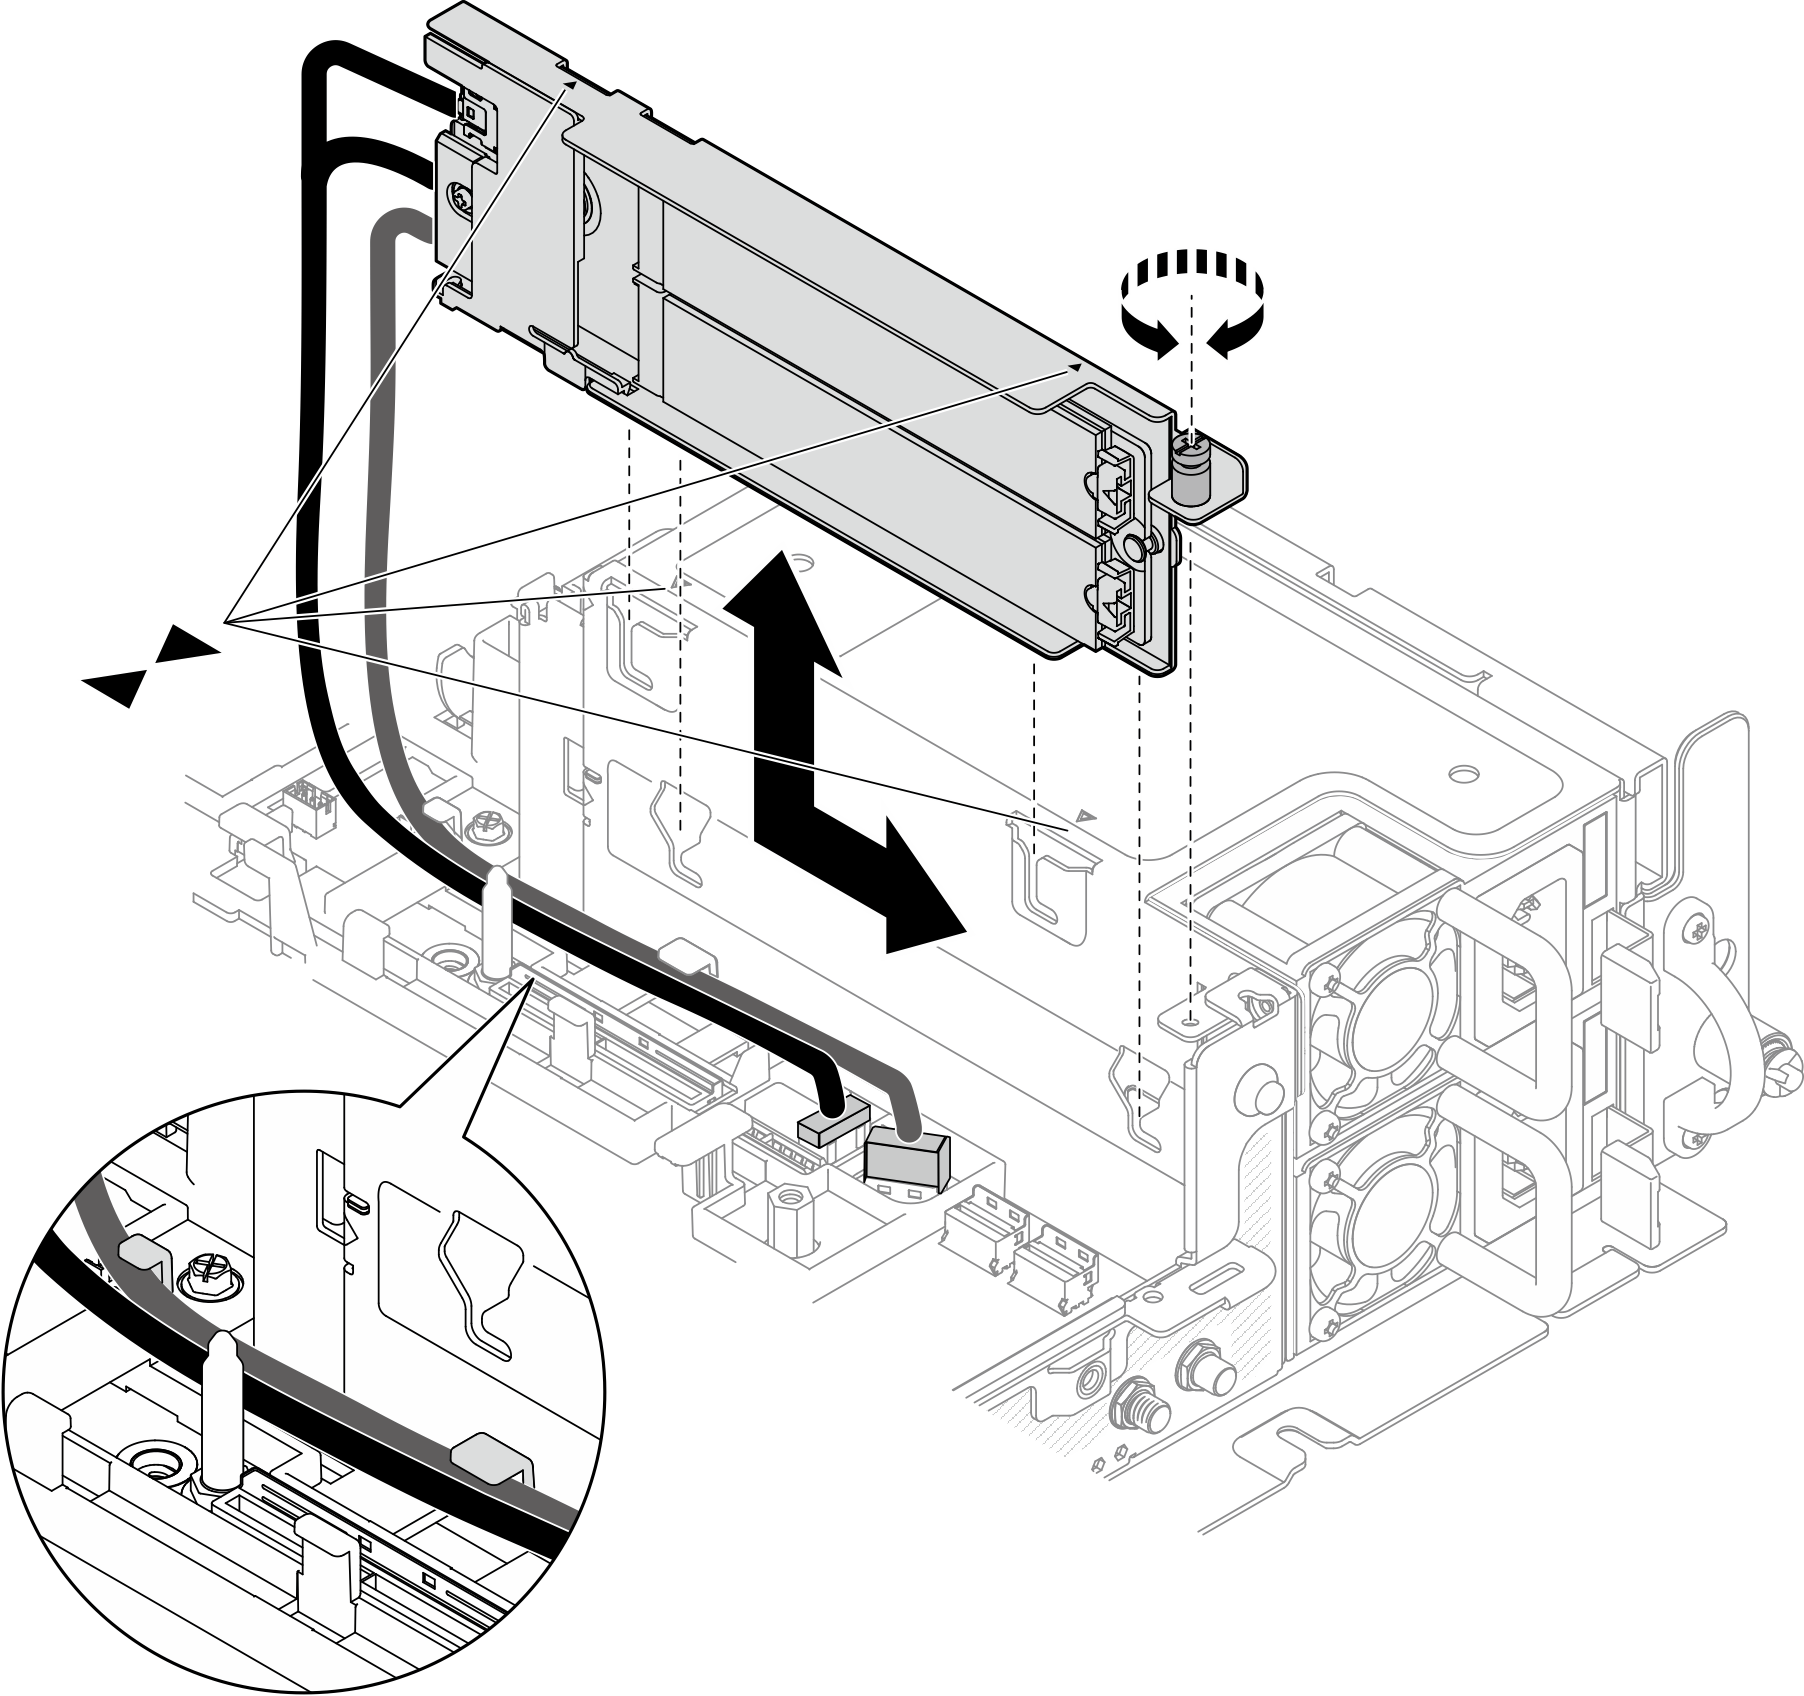
- Loosen the captive screw, and push the M.2 boot adapter slightly forward to detach it from the system board. Then, lift the M.2 boot adapter.Figure 1. Removing the M.2 boot adapter
- Remove the M.2 drives from the backplane.Figure 2. Removing the M.2 drives
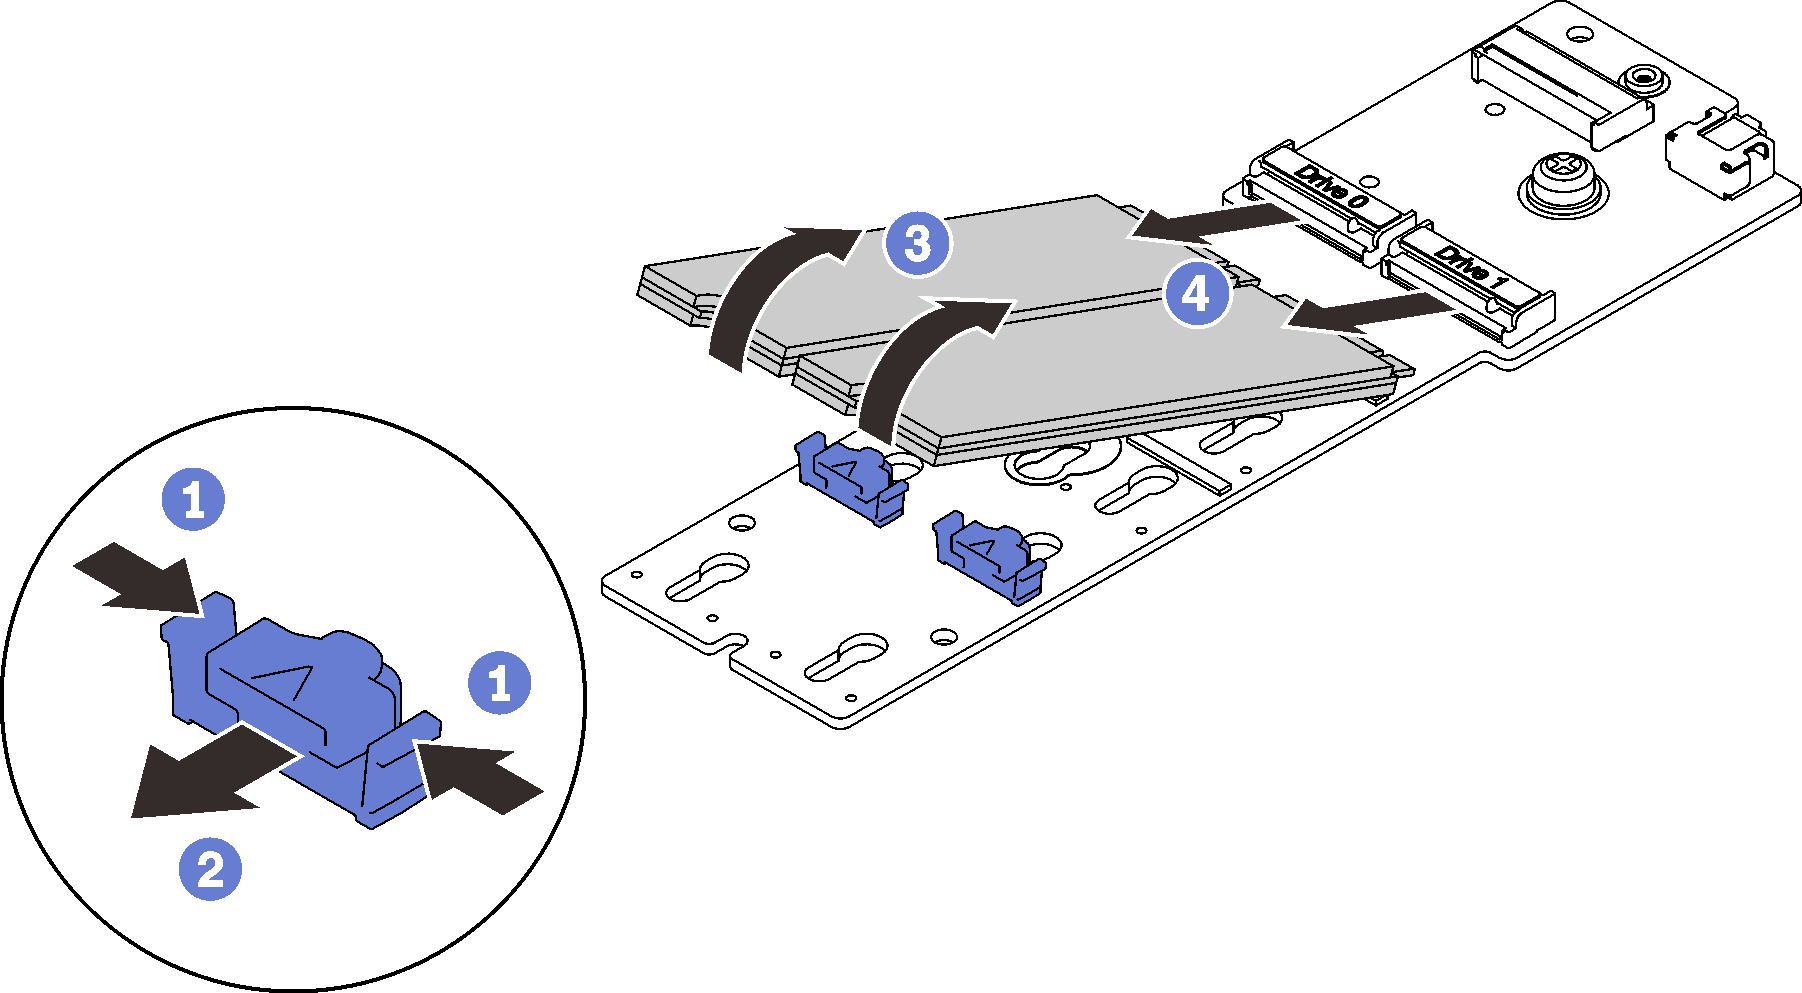
 Pinch and hold on the retainer clip.
 Slightly push the retainer clip left to disengage the M.2 drives.
 Pivot the rear side of the M.2 drives away from the backplane.
 Remove the M.2 drives.
- If necessary, remove the M.2 backplane.
- Disconnect the M.2 cable.SATA/NVMe 2-Bay backplaneFigure 3. Disconnecting the M.2 cable
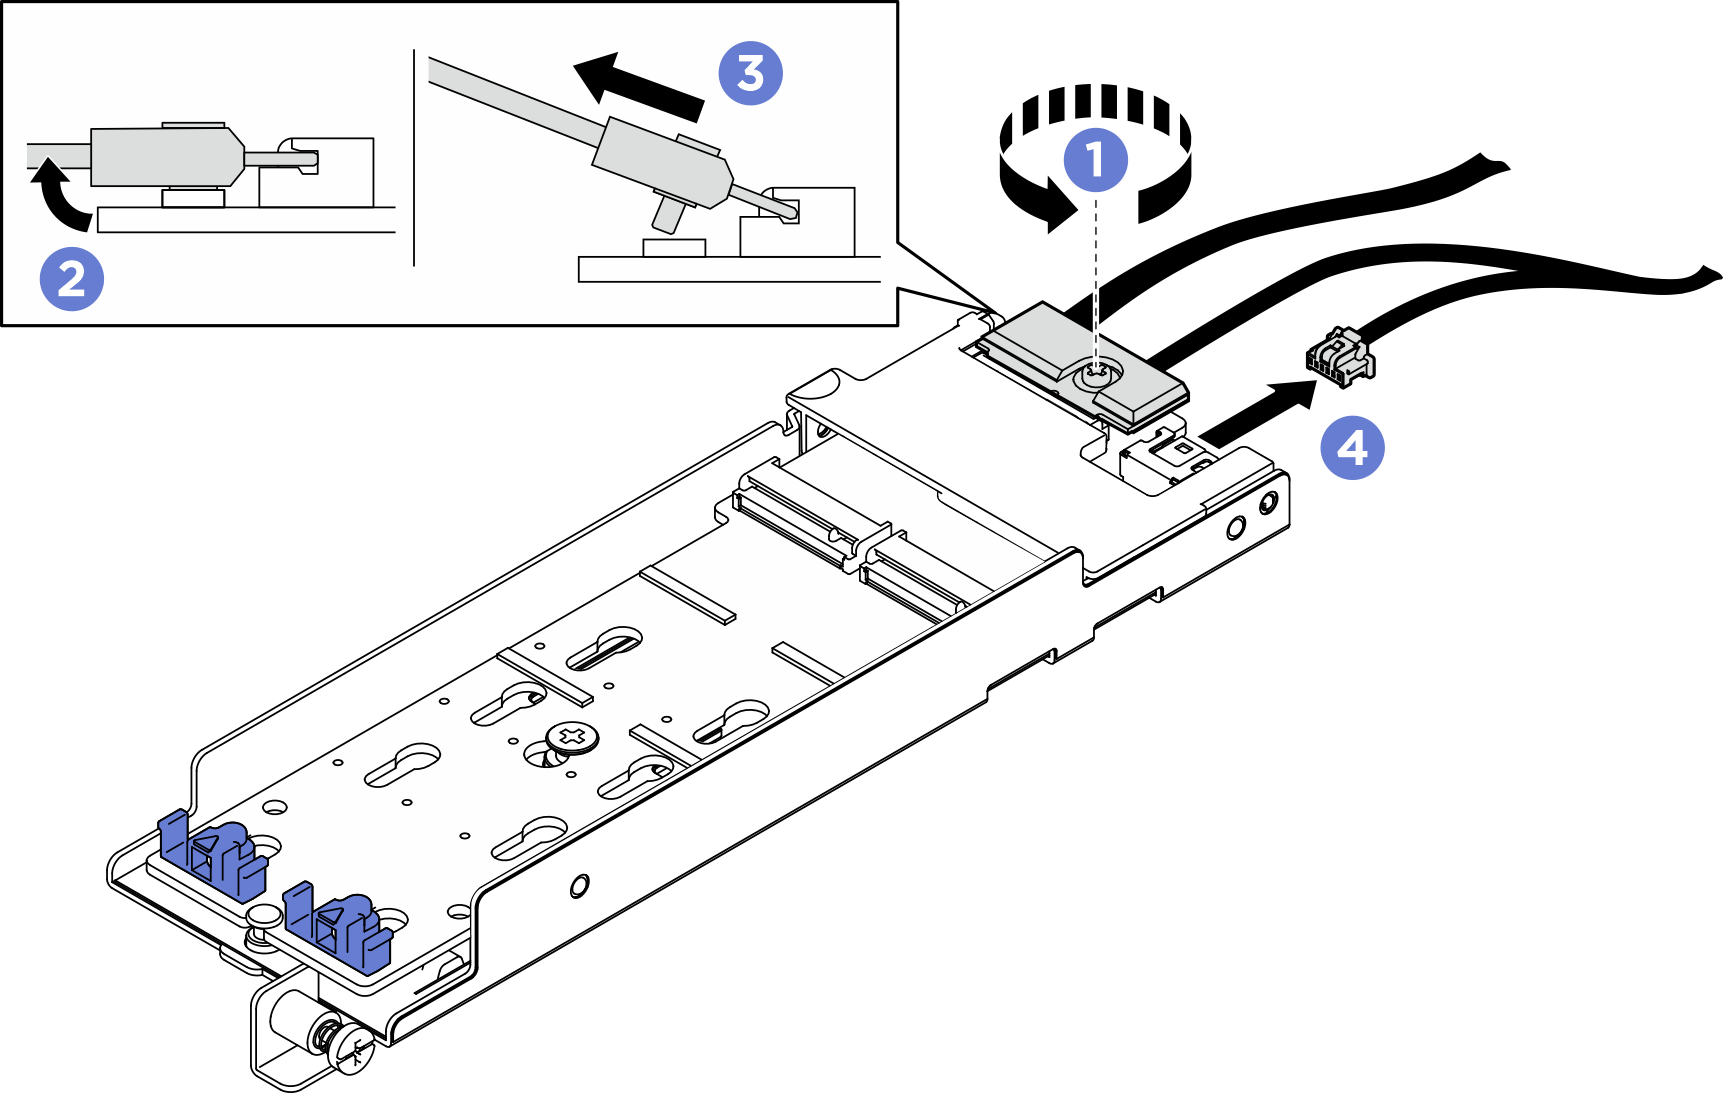
- Loosen the screw on the signal cable.
- Tilt the connector.
- Remove the connector.
- Remove the power cable.
B540i-2i SATA/NVMe backplaneFigure 4. Disconnecting the M.2 cable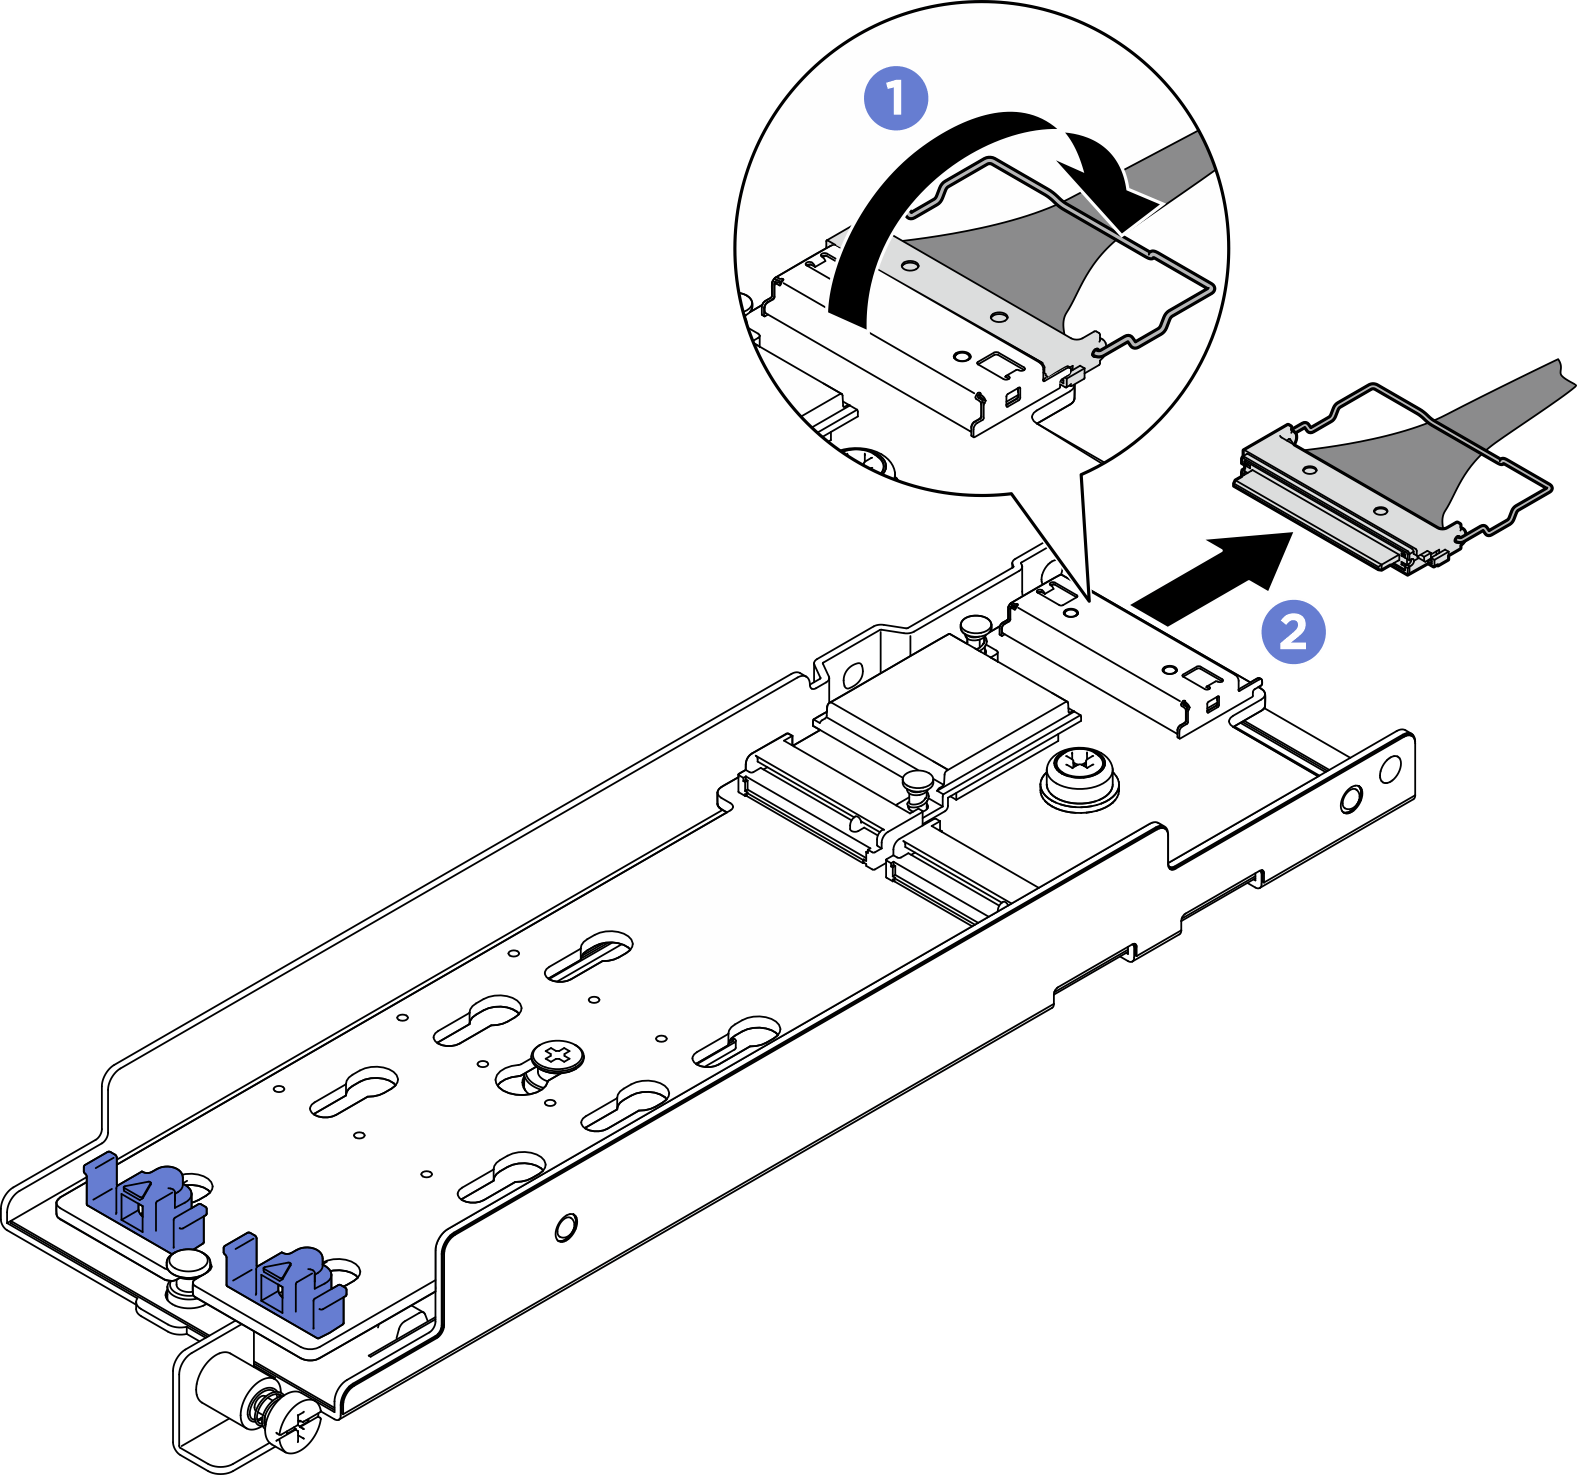
- Unhook the wire bail on the cable from the connector..
- Disconnect the cable from the M.2 backplane.
- Disconnect the M.2 cable.
After this task is completed
- Install replacement units of M.2 drives (see Install the M.2 drives and boot adapter).
If you are instructed to return the component or optional device, follow all packaging instructions, and use any packaging materials for shipping that are supplied to you.
Give documentation feedback